How to Create Shortcuts on the Windows 10 Desktop
 Once again, we welcome everyone to our website and today we will talk about how to create a shortcut on the desktop in Windows 10. A shortcut is, in fact, a bookmark that allows you to open any directory, or run any file. As a result, we save a lot of time when the procedure for moving to a certain point in the OS file system turns into one click. So let's get down to business without delay.
drag and drop
There are several options with which you can implement drag and drop. Let's consider them in more detail.
From explorer
The easiest way to create a shortcut to any file or directory is to use the so-called Drag and Drop method. Its essence lies in the fact that we hold down an object with the right mouse button and, without releasing it, drag the file to a certain place in the explorer. This can be, for example, the Windows 10 desktop. As a result, a context menu opens in which we can select the item to create a new shortcut. Now, when this object is launched, the file from which we created it will open.
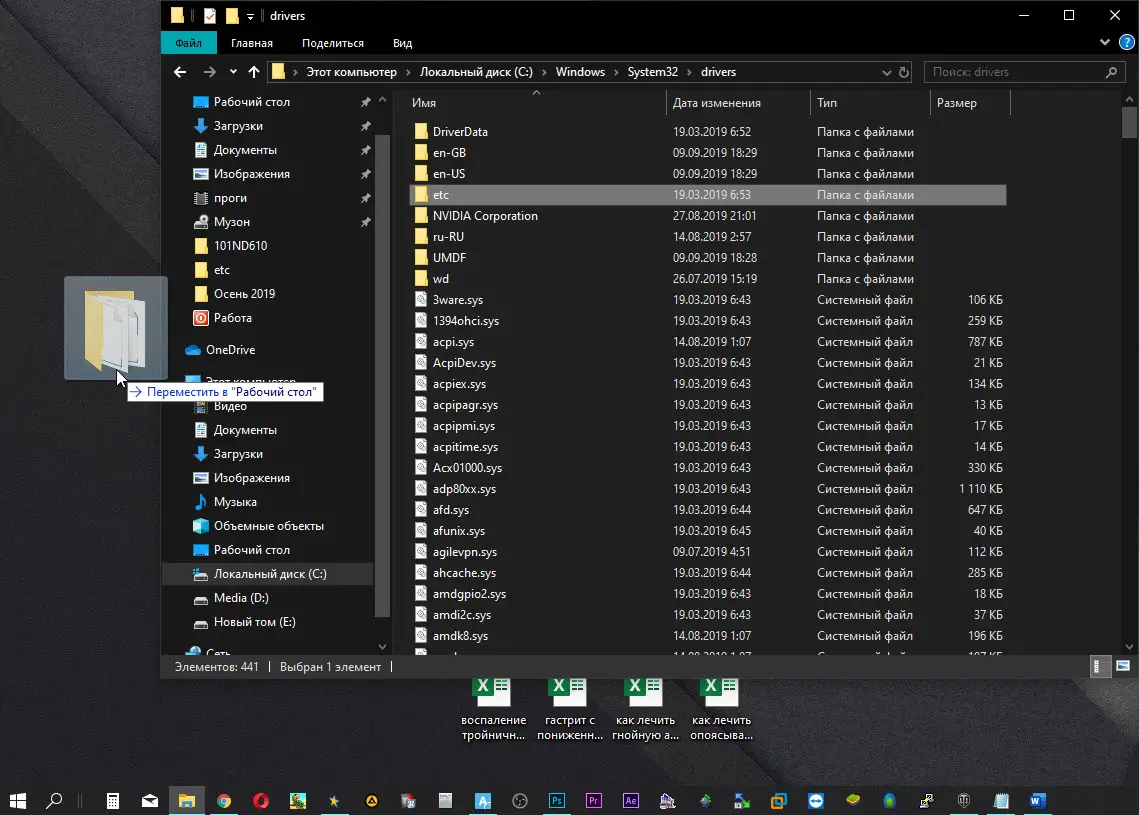
We are moving on to another option.
From the start menu
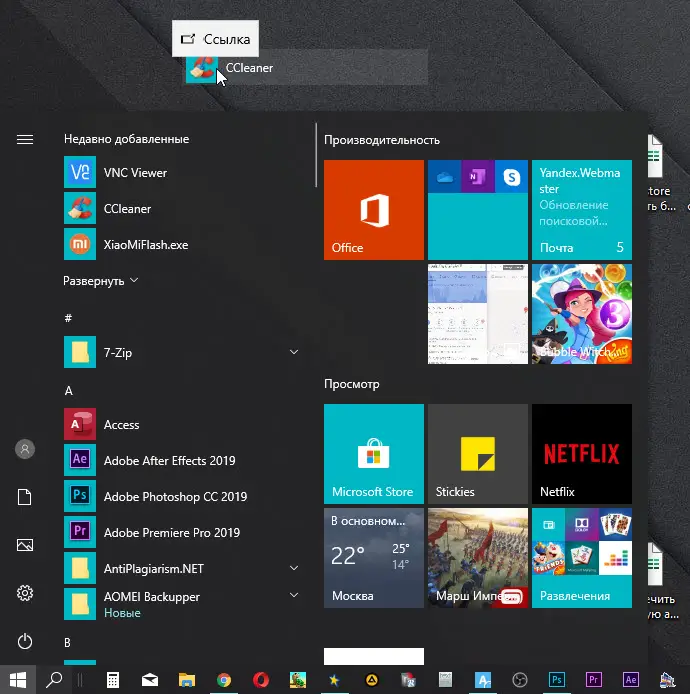
You can drag a program shortcut not only from Windows Explorer, which is a file manager, but also from the Start menu. To do this, in the same way as in the previous case, we hold down a certain name with the left mouse button and drag it, in this case, to the desktop. However, you can do the same to any other location in the file system.
Expert opinion
Basil
Project manager, comment moderation expert.
Also Read: How to Disable Airplane Mode in Windows 10
Ask a Question It should be noted that not always we can create a shortcut by moving the name of an application. Often, depending on the type of object, the operation is not available.
Create a shortcut via the context menu
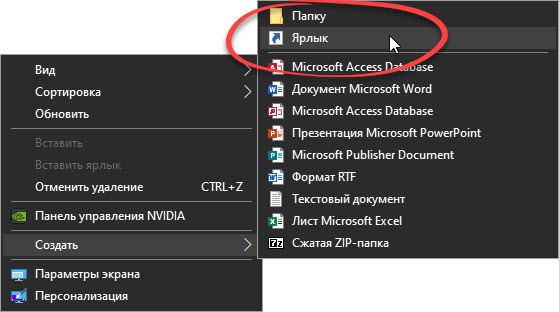
We can also create a shortcut using the Windows 10 context menu. To do this, we right-click the mouse in the location of the file system where we want to create a shortcut. Next, from the context menu, select the item marked in the screenshot.
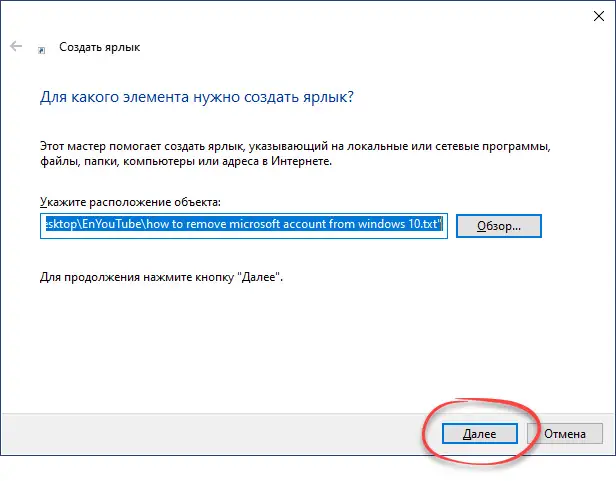
After that, we will need to specify the location of the target object by clicking the button labeled "Browse". As a result, Windows Explorer starts, in which we will have to select the desired file. After that, click on the “Next” button that appears.
Then we simply call our shortcut something, and finish creating it. As a result, an object will appear on the desktop, by running it, we will open the target file or open some directory.
"Submit" item in explorer
There is another option that allows you to create a shortcut on the desktop. We simply find the object or folder to which we make a link, right-click on it and select the item that we marked in the screenshot from the context menu.
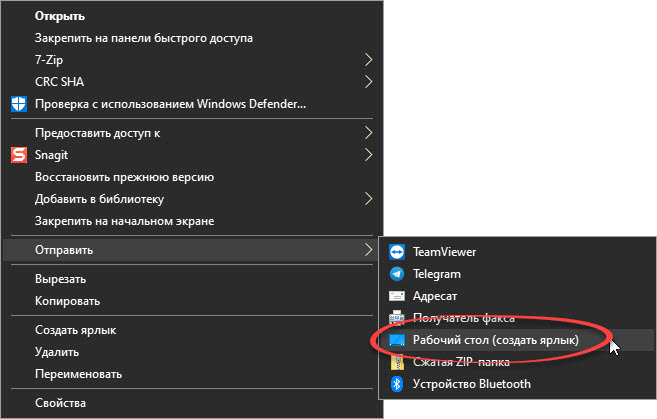
After that, the shortcut of the selected object will automatically appear on the Windows 10 desktop.
Shortcut setting
Now that we've covered all three ways to create a shortcut, let's talk a little about how it looks. For example, if we make a shortcut to a folder, it looks unattractive. To fix this, again, right-click on the shortcut from the context menu and select the properties item. In the shortcut tab, click on the "Change Icon" button. As a result, another small window will open, from which we can select an icon, in the form of which the shortcut itself will begin to be displayed.
Also Read: How to Update Video Card Drivers in Windows 10
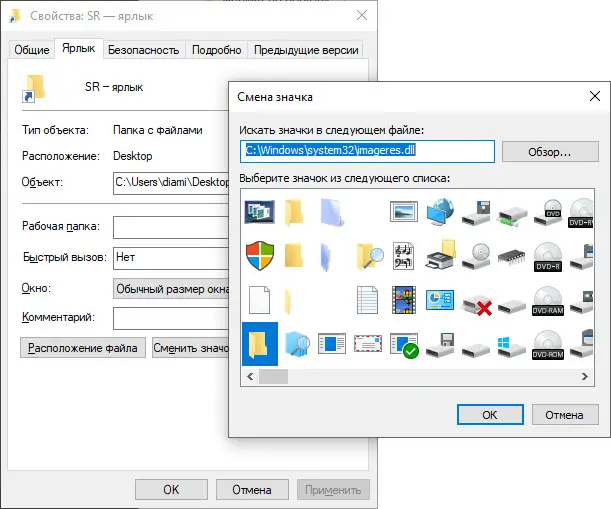
Confirm the changes made by clicking the OK button twice. After that, the appearance of the shortcut will change according to the icon we have chosen.
Video instruction
In order to consolidate the acquired knowledge, we recommend that you familiarize yourself with the contents of the training video on the topic.
Summing up
Now you understand perfectly how to create a shortcut on the Windows 10 desktop. Moreover, you can implement the task in various ways. We believe that we have provided all the necessary information related to the issue under consideration. Therefore, we consider our step-by-step instructions complete. If along the way you have any questions, ask us and you will quickly get a comprehensive answer. To do this, we have attached a feedback form a little lower.