How to enable Windows 10 update: simple instructions
 The Windows 10 operating system has a special service that monitors the latest updates, downloads and installs them. All files are downloaded from official Microsoft servers. Initially, this service is enabled (after OS installation). If you accidentally disabled it or it suddenly stopped working, then you need to restart it manually. Let's figure out how to enable updates on Windows 10. The article describes all the main methods that are available to an ordinary computer user, even with a minimal knowledge base.
Existing methods
You can enable automatic updating of the operating system using the built-in OS features or using third-party programs. The methods presented in the article for starting auto-update are suitable for PCs and laptops on Windows 10 x32 bit / x64 bit Professional edition. For the basic version, some of the methods will not be available, because the Registry and Group Policy Editor is not available in it.
How to run update through "Options"
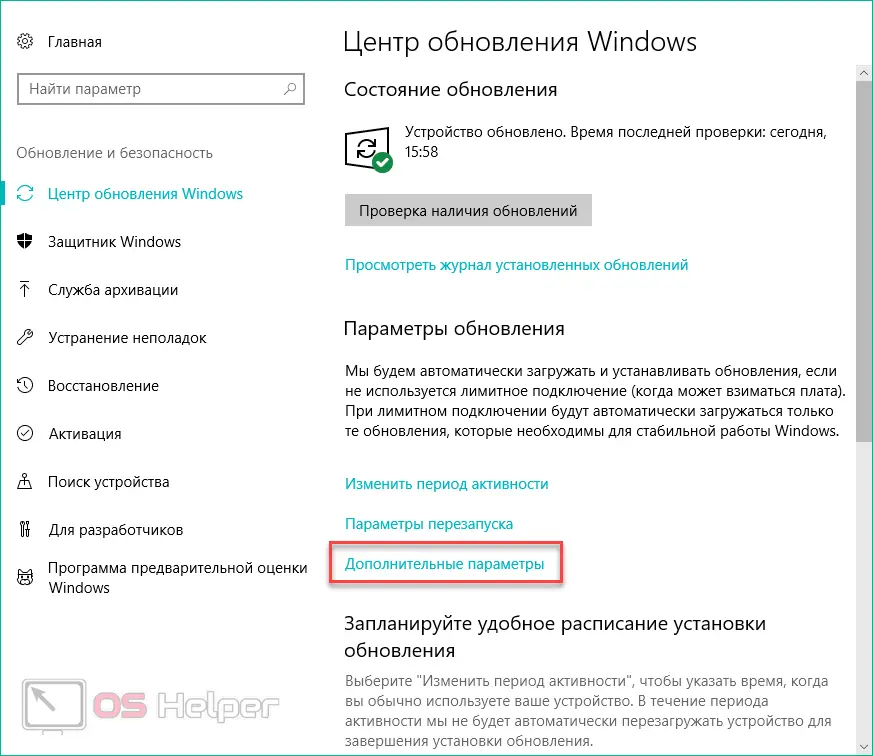
Let's start with the easiest and fastest way. You can start the service manually using advanced system settings. To do this, you need to do the following:
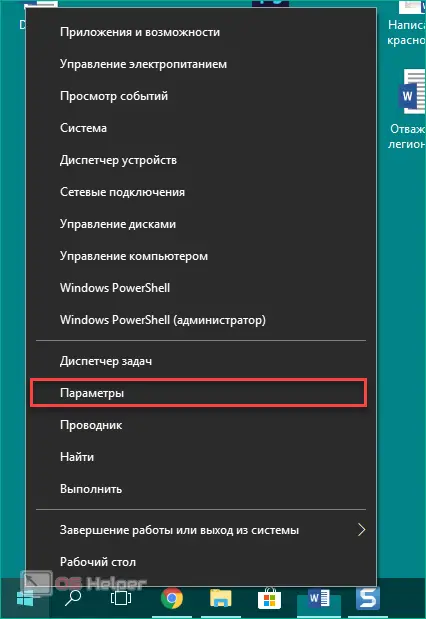
- Right-click on the "Start" icon on the taskbar to open an additional menu.
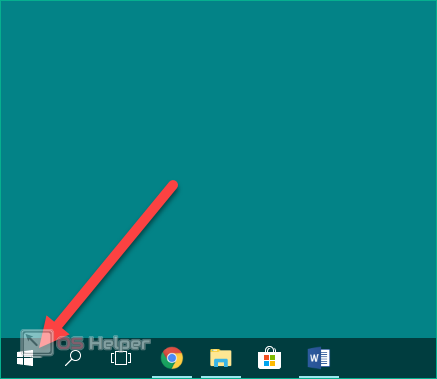
- Select the line "Options" in the list. You can also access this window through the search bar.
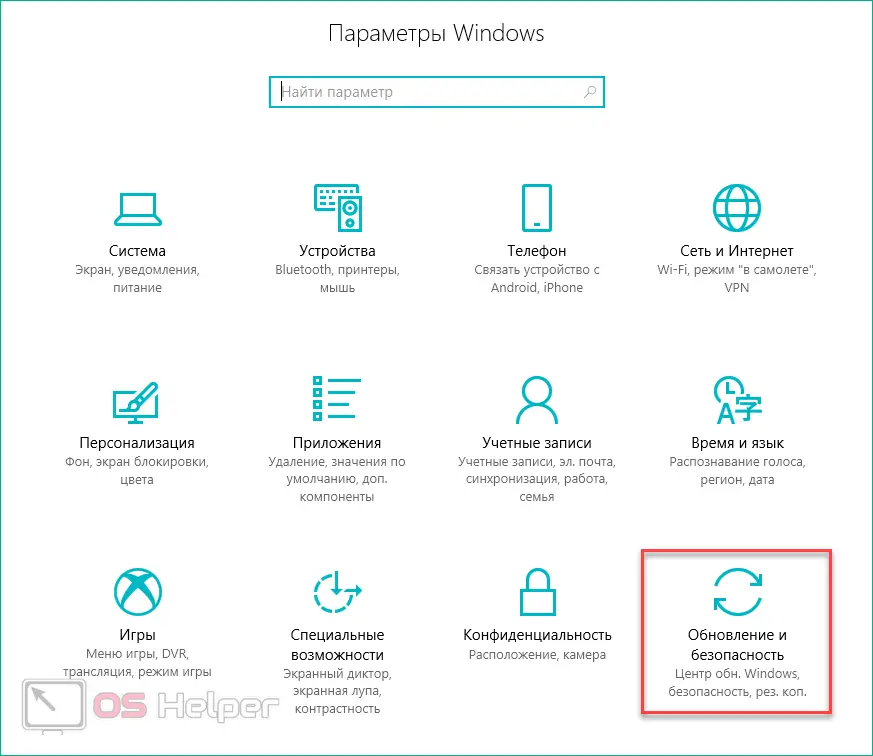
- Open the Update & Security section.
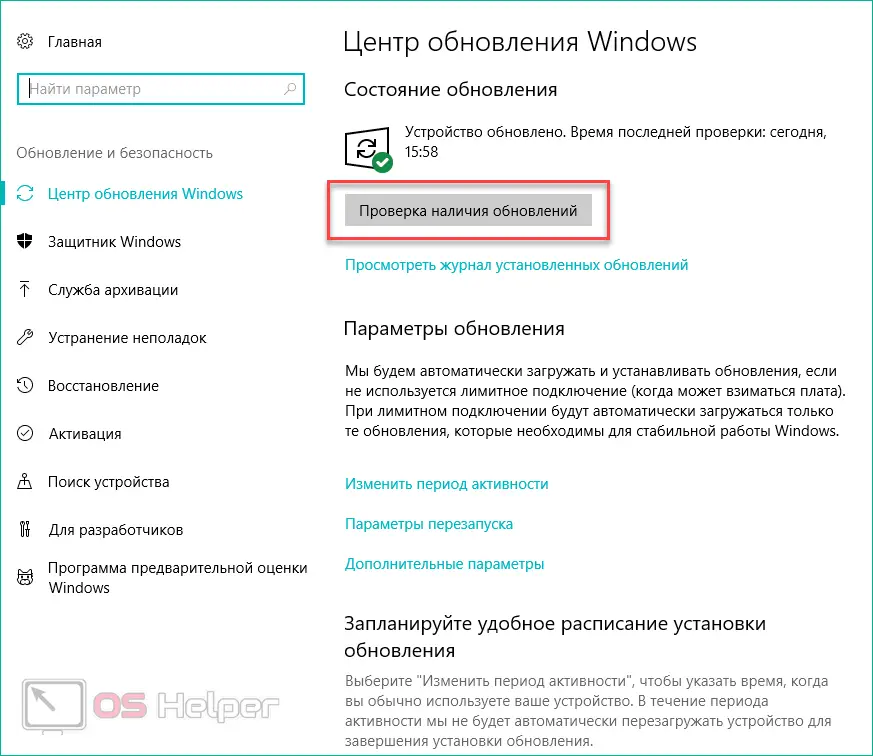
- In the "Windows Update" tab, click on the "Check for Updates" button. This action will allow you to run a manual check for the latest patches and system files that can be downloaded and installed. If none were found, then you will see the message shown in the screenshot.
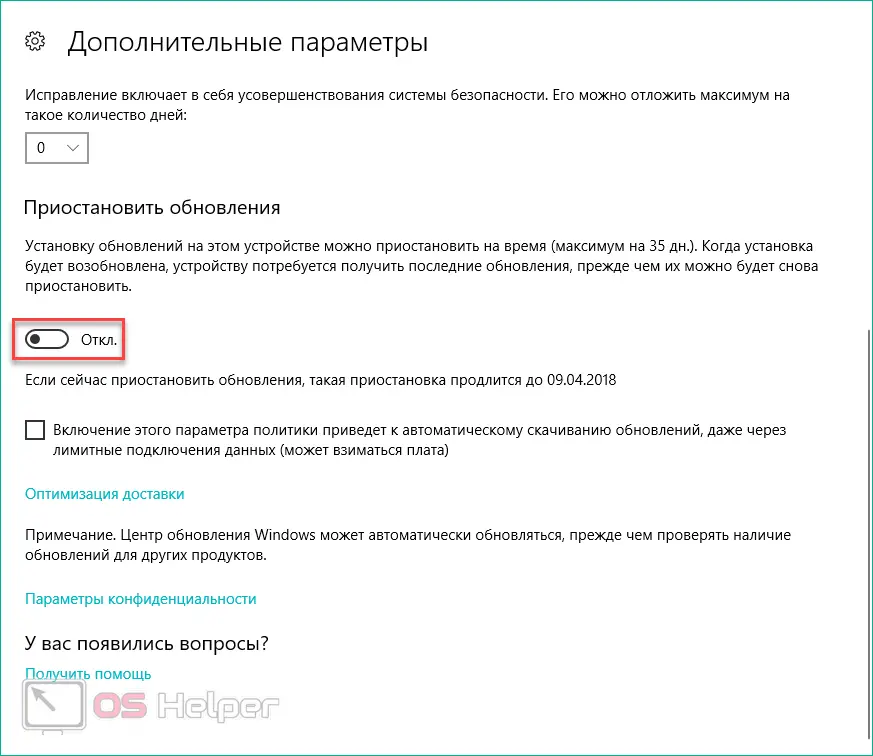
- Now click on "Advanced Options".
- Find "Pause updates" and toggle the setting to "Off".
See also: Where is the AppData folder in Windows 10
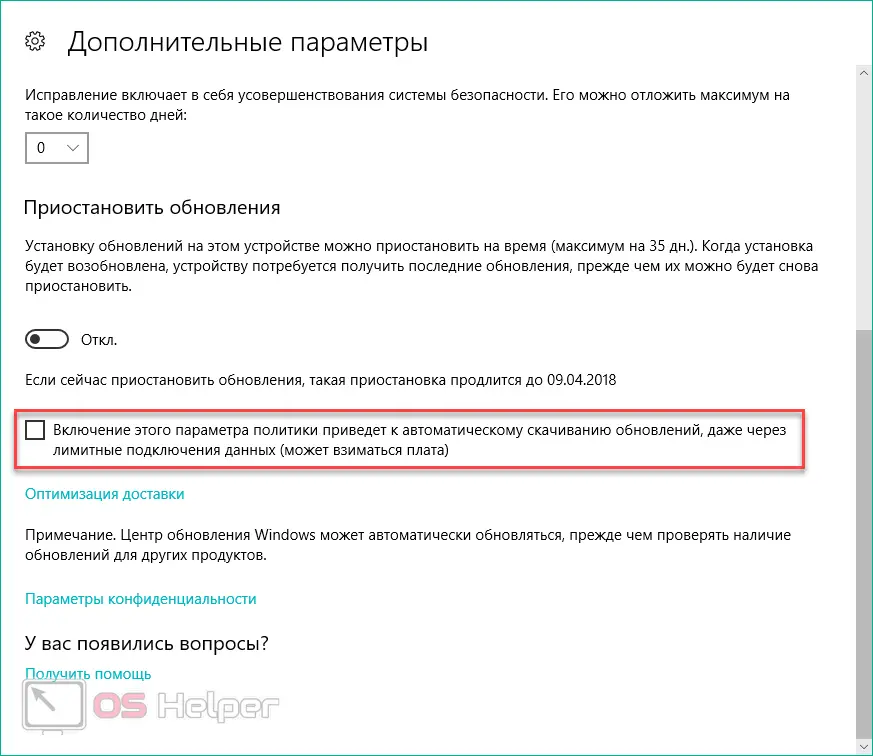
- If you want to update while the mobile Internet is connected, the operating system will not let you do this without enabling a special parameter. To do this, check the box next to the item marked in the screenshot. This will allow you to install update even with a limited network connection.
This option allows you to restore the functionality of automatic OS updates in the event that your PC does not have problems with the registry or local group policy. If the check for available components only starts manually, and automatic scanning does not work, then proceed to the next step.
Services
Let's consider the second method of starting the AC using the "Services" window. To do this, use the provided instructions:
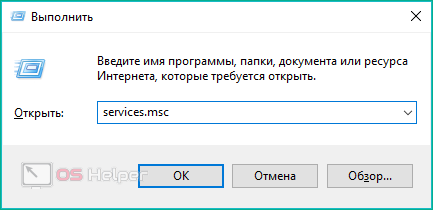
- In the "Run" window ([knopka]Win[/knopka]+[knopka]R[/knopka]), enter the command "services.msc".
- In the list of services, find the marked line and double-click on it with LMB.
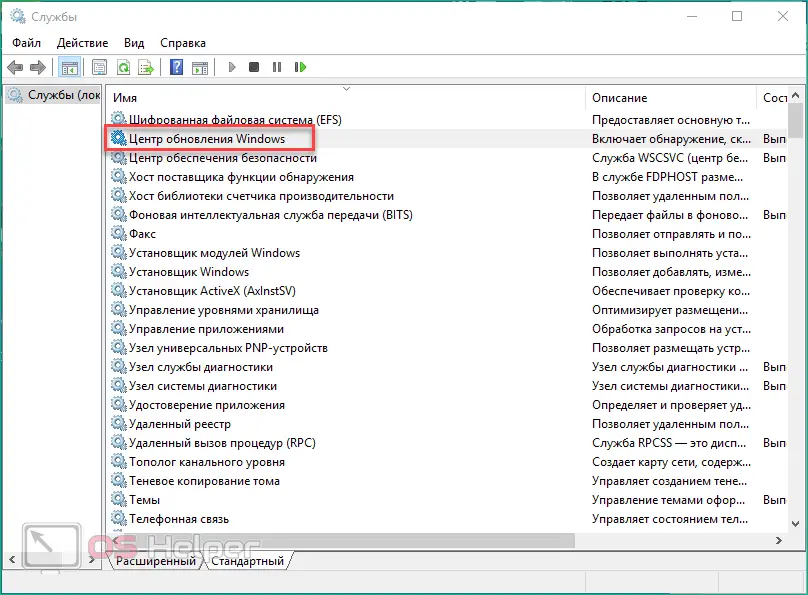
- In the properties, set the startup type to "Automatic" and close the window by clicking on "OK".
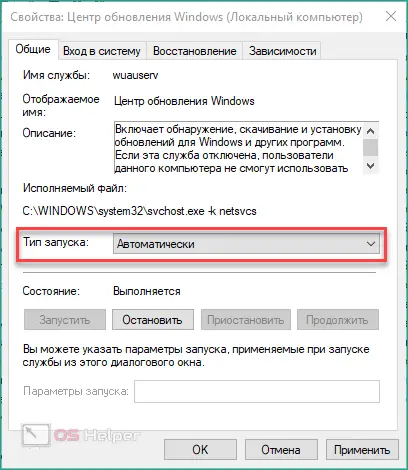
Now restart your PC. Checking and downloading the necessary files will start automatically. You can cancel, select individual components and drivers, or postpone the procedure depending on the selected settings in the Group Policy Editor.
Group Policy
The third way is to enable the AC through editing the group policy settings. To do this, you need to run a special application:
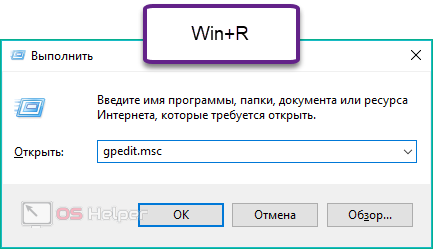
- Launch the Run utility using the combination [knopka]Win[/knopka] + [knopka]R[/knopka] and enter the command "gpedit.msc".
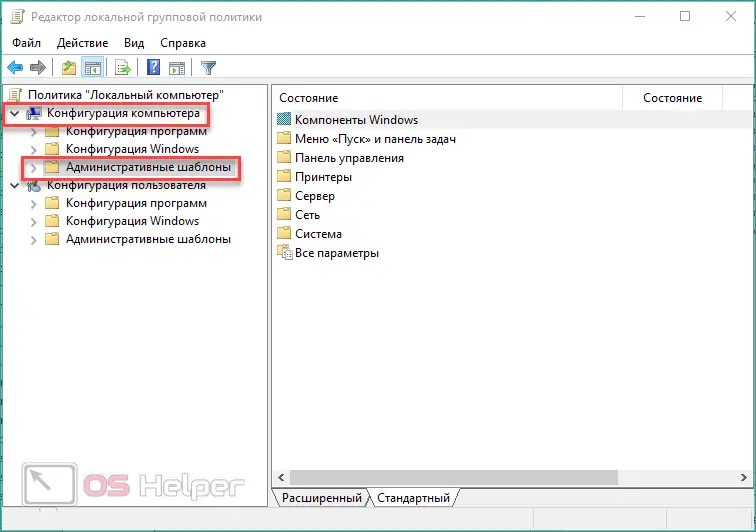
- In the window that opens, you need to find the marked directory. It's under Computer Configuration.
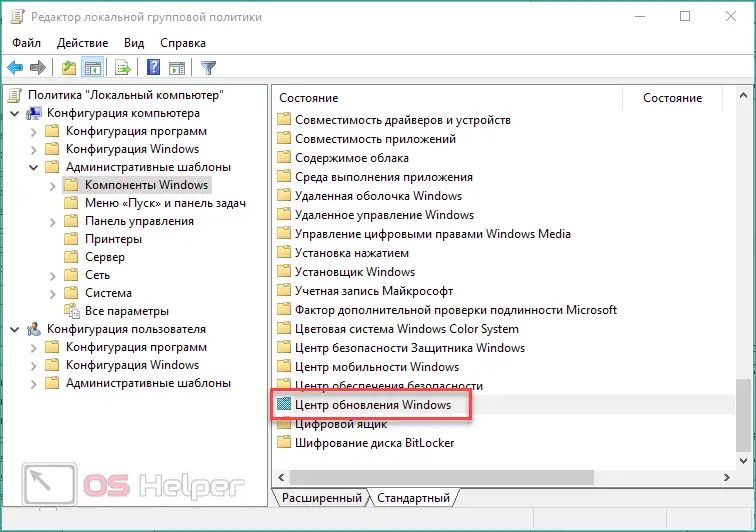
- Next, go to Administrative Templates and open Windows Components. This is where the required folder is located. Open it.
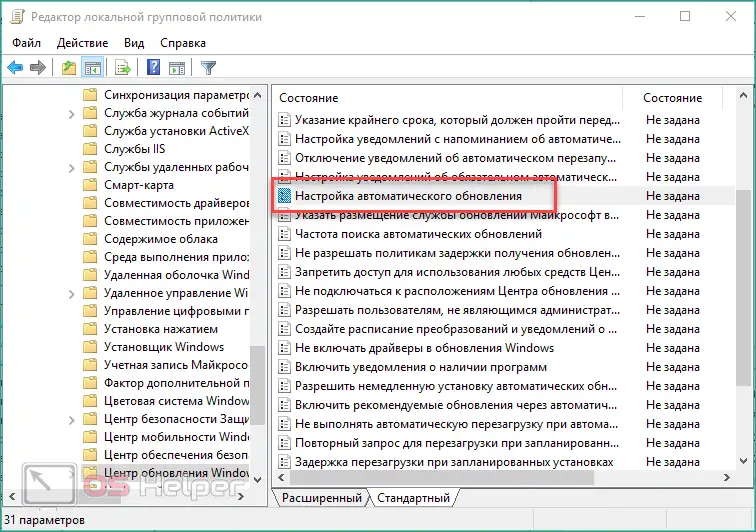
- Find the option "Setting automatic updates" and double-click on it.
In the window that opens, you must set the "Enabled" option.
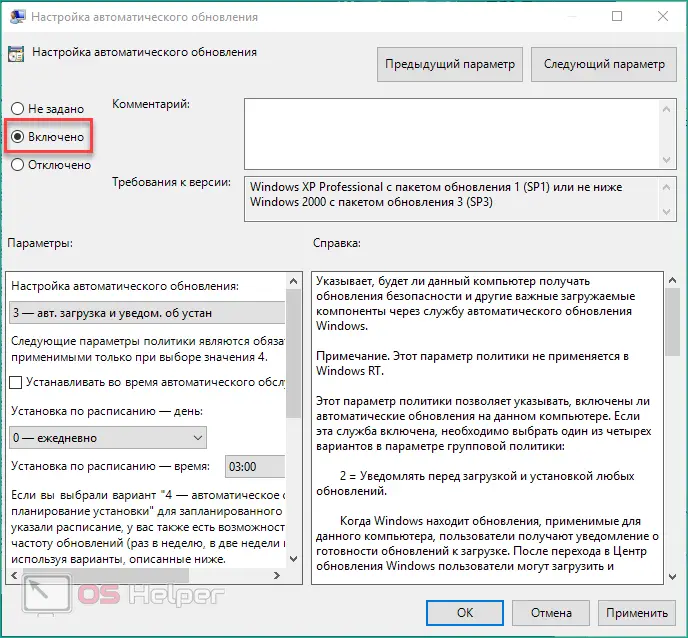
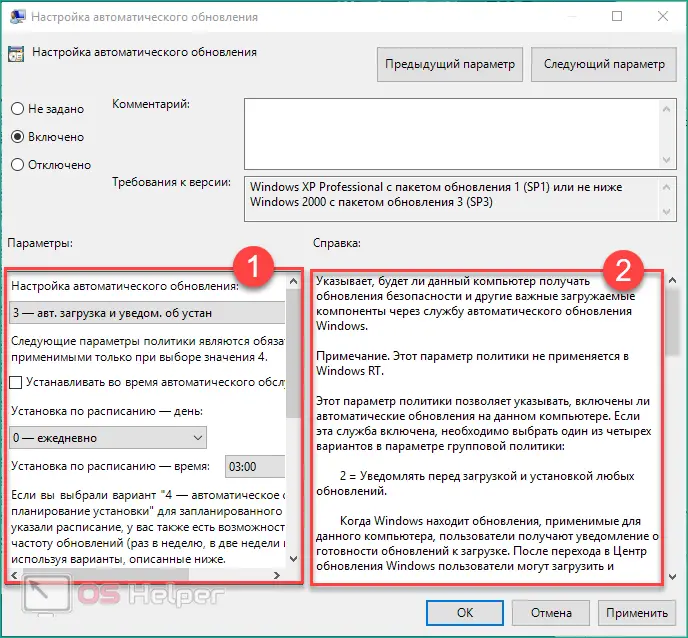
- In the marked block, you need to configure the schedule (1). Select the appropriate item depending on when the update should be downloaded and installed. To save the changes, click on the "OK" button. On the right side is a detailed description of each parameter (2).
See also: How to find the control panel in Windows 10
Now the Windows 10 AC should start up on its own every time you turn on the computer. The files will be downloaded and installed according to the set schedule, so you will not see any initiative from the PC. If this method did not help start the update or it was disabled by the administrator, then you need to check the settings through the registry. Let's figure out how to do it.
Setting up the registry
Microsoft has a special utility for editing the registry, which is built into the functionality of Windows by default. Let's use it:
- Open the Run application again and type "regedit".

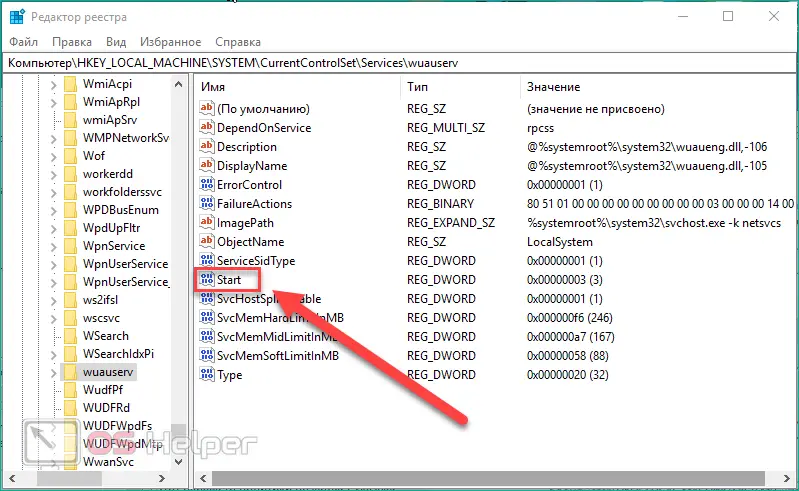
- In the editor that opens, you need to open the "wuauserv" directory. It is located in the "HKLM\System\CurrentControlSet\Services" branch.
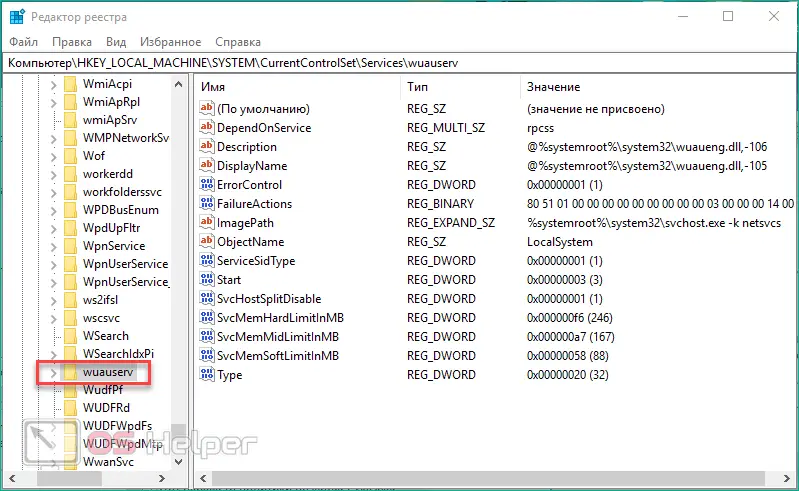
- Find the option called "Start" and double-click on it to view the options.
- Set the value to "1". To save, close the window with the OK button.
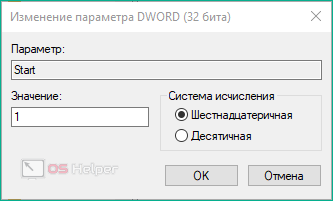
Now you need to restart the computer and check if it was possible to restore the work of the central heating center in this way. Let's look at the last method to start the service.
Launch via command line
To manage the update service through the command line, you must do the following:
- Through the Windows search or the Run application ([knopka]Win[/knopka]+ [knopka]R[/knopka]) and the "cmd" command, run the utility with administrator rights.
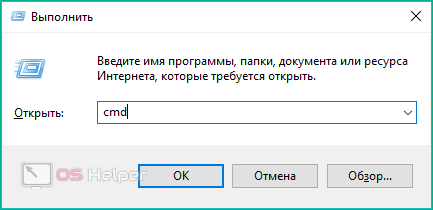
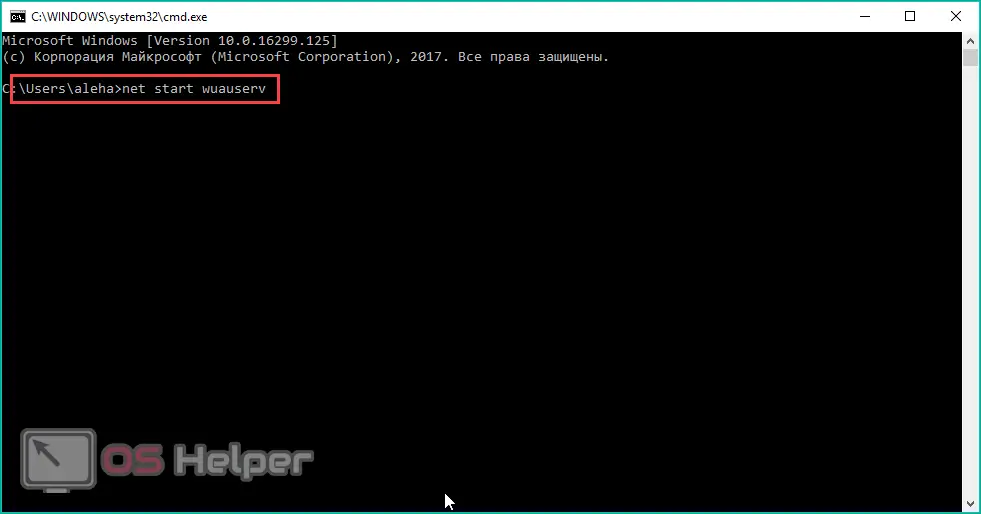
- Enter the command "net start wuauserv" to start the update service.
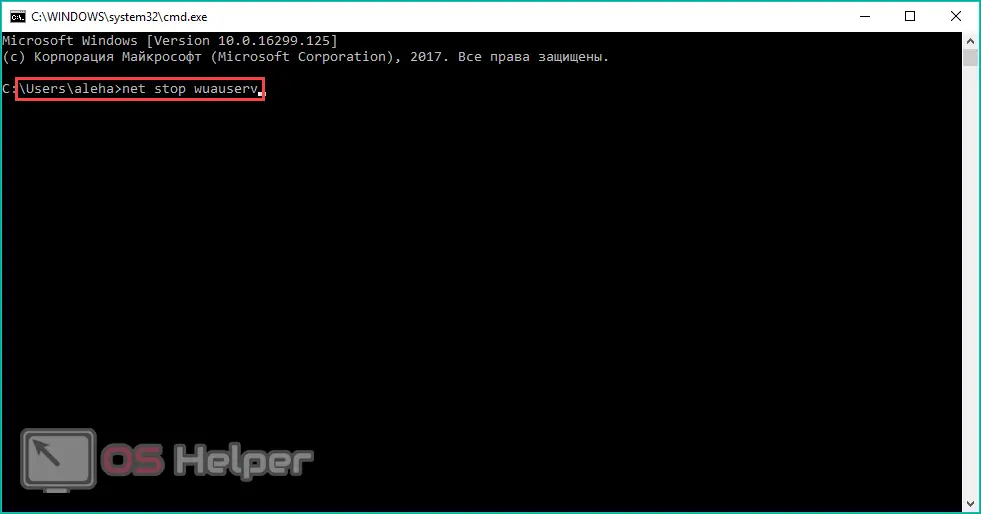
- To disable the CH, enter the line "net stop wuauserv".
It is enough to configure the activation of the central heating unit once via the command line. After that, the service will open automatically every time you turn on the computer.
Additional programs
If you do not want to perform all the steps described manually, then use one of the convenient utilities.
The first program is Show or hide updates from Microsoft. A proprietary application allows you to fix problems with the Windows Central Office service in a couple of clicks. To do this, do the following:
- You need to go to: https://support.microsoft.com/en-us/help/3073930/how-to-temporarily-prevent-a-driver-update-from-reinstalling-in-window and click on the marked button.
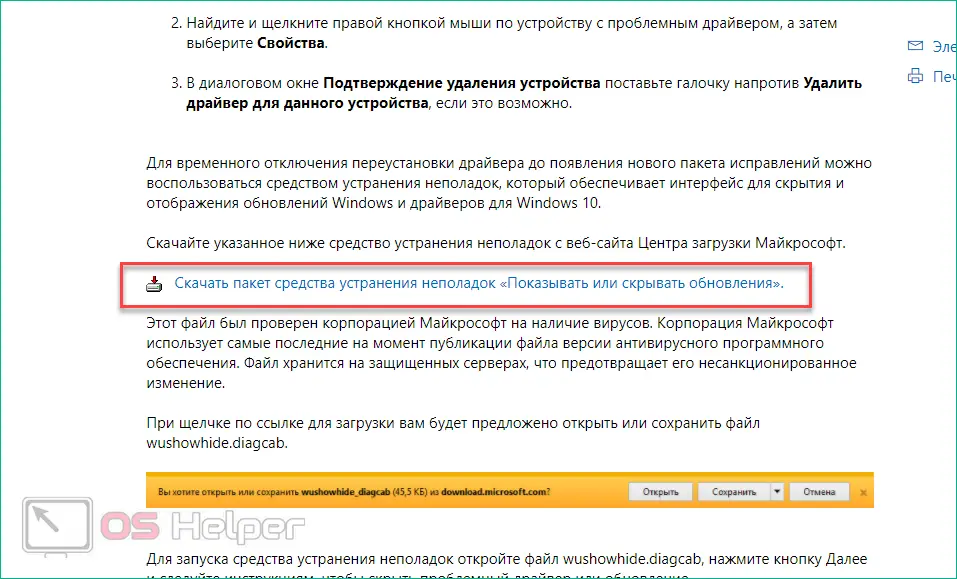
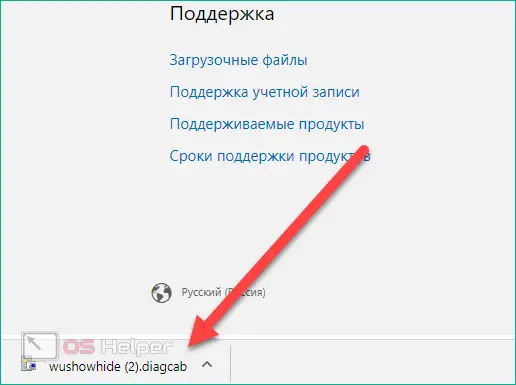
- The wushowhide.diagcab file will download to your computer. Run it.
Also Read: How to Format a Hard Drive in Windows 10
- On the first screen, click Next.

- After scanning, click on "Show hidden updates".

- Click "Next" again.
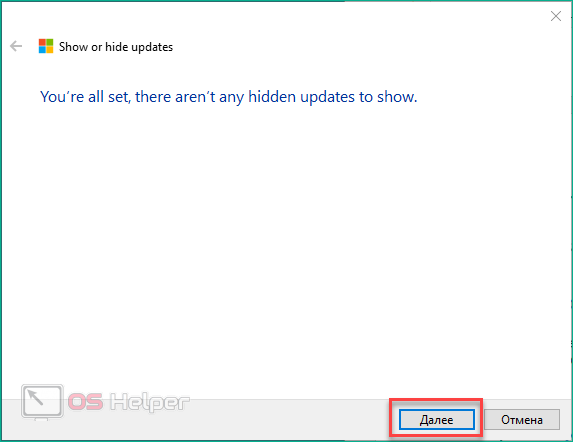
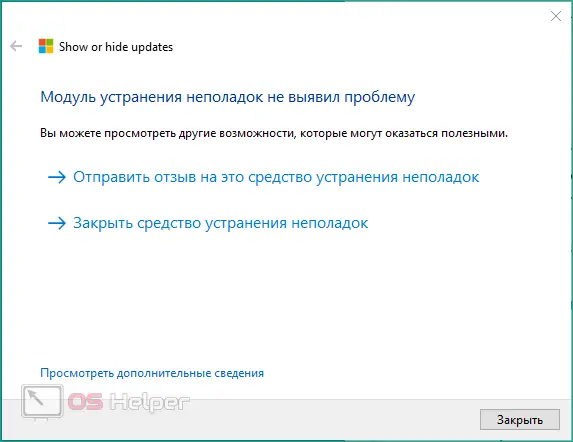
- If all installed files are correct and there are no errors, you will see a corresponding message.
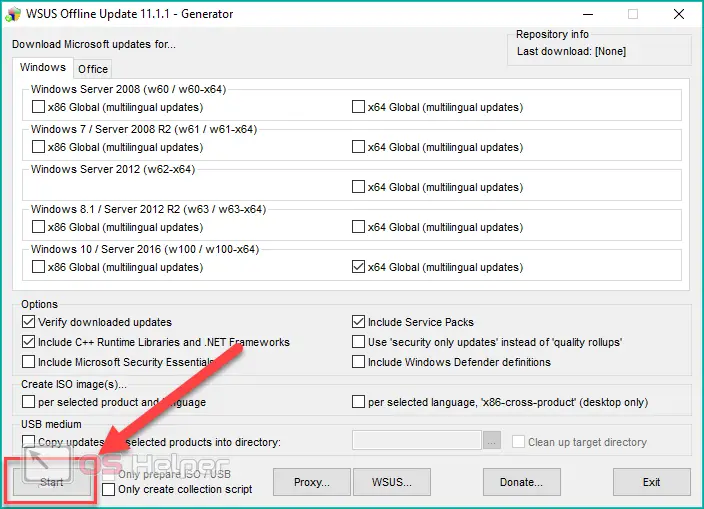
The second program is WSUS Offline Update. It is used to manage updates. The utility allows you to select individual components, postpone the installation of a particular driver, etc. You can download it on the official website http://download.wsusoffline.net. To work with the application, follow the instructions:
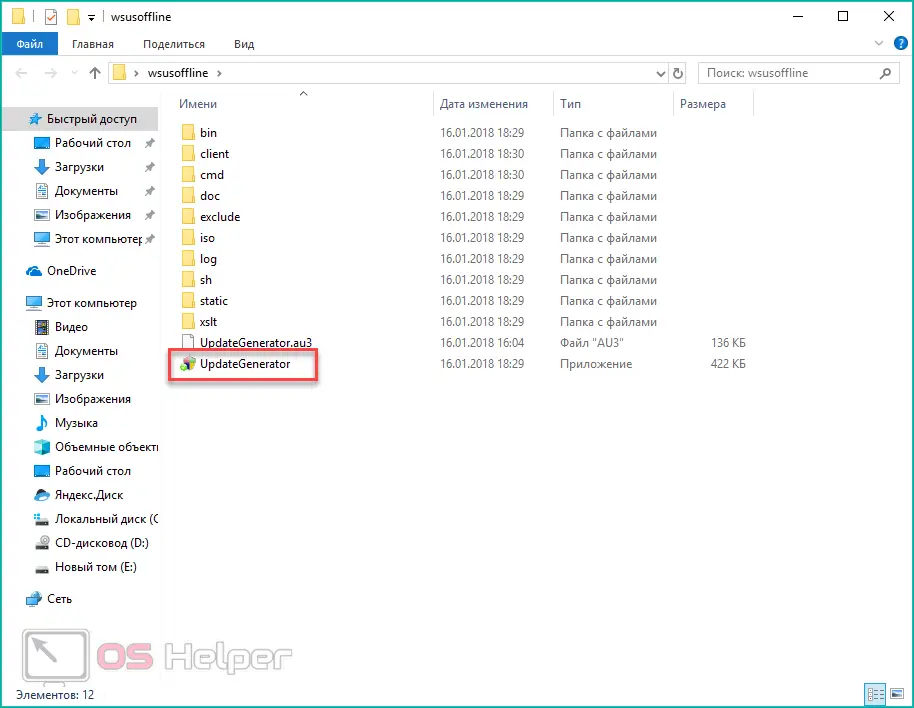
- After downloading, run the UpdateGenerator file (program installation is not required).
- In the "Download" tab, select your version of Windows 10.
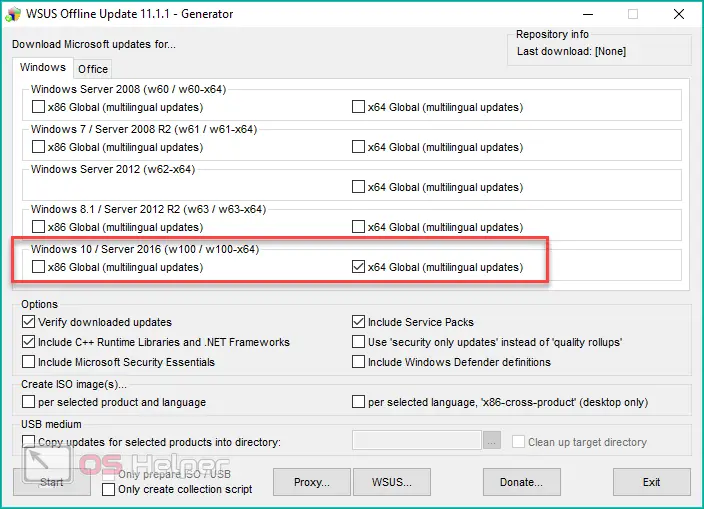
- To update the OS, click on the "Start" button.
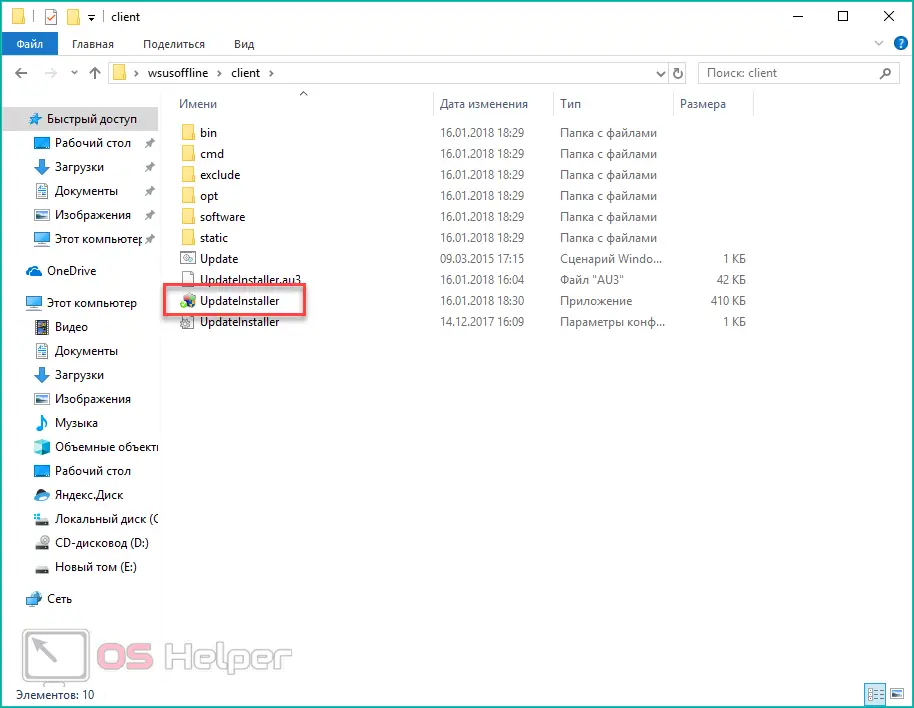
- After downloading all the files, close this window. Next, go to the client folder and run UpdateInstaller.
- In the window you will see all available components. You can manually select what you want to install. Click "Start" to start the installation.
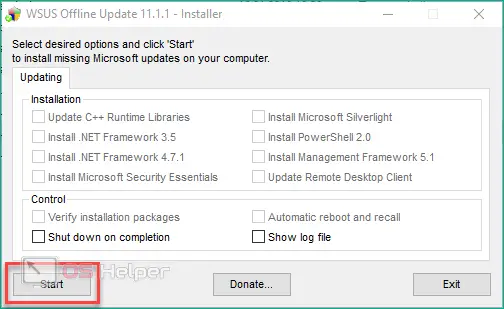
With WSUS Offline Update, no system files or patches can go missing or install incorrectly. Use this utility if the standard Windows AC does not turn on, hangs on an endless check for available updates, etc.
Conclusion
Now you know how to start Windows 10 Update using various methods. Thanks to this instruction, your computer will be constantly updated to the latest versions of the operating system.
Video
If you have difficulty with any of the methods, be sure to watch the attached video with a step-by-step description of all the steps from the article.