How to uninstall Windows 10 updates
 The Windows 10 EULA provides for the user's consent to automatically install updates. It is completely impossible to refuse them, and in general they are aimed at keeping the system up to date and protected. However, the difference in PC hardware and software configurations may lead to failures on some of them. In this case, the user must know how to roll back Windows 10 updates to the desired state and be able to do it.
Remove updates
Consider how to remove Windows 10 updates using the tools provided for this case in the operating system itself.
Update Center
First, let's look at the easiest way.
- Open Windows Settings using the keyboard shortcut [knopka]Win[/knopka]+[knopka]I[/knopka].

- The point of interest to us is indicated in the screenshot by a frame.
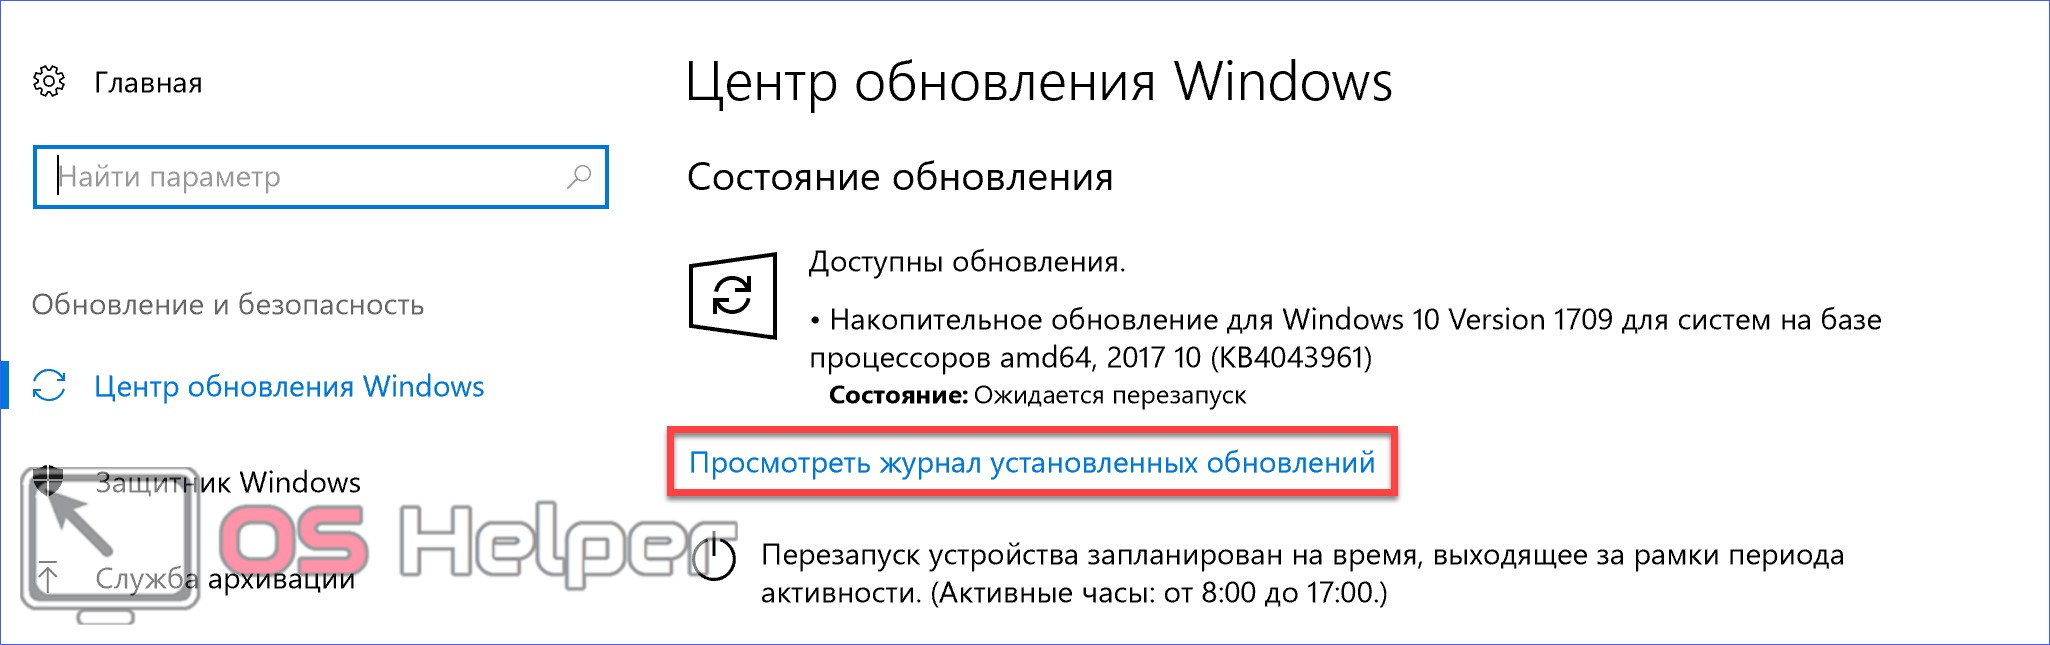
- To view the list of installed fixes, open the following menu.
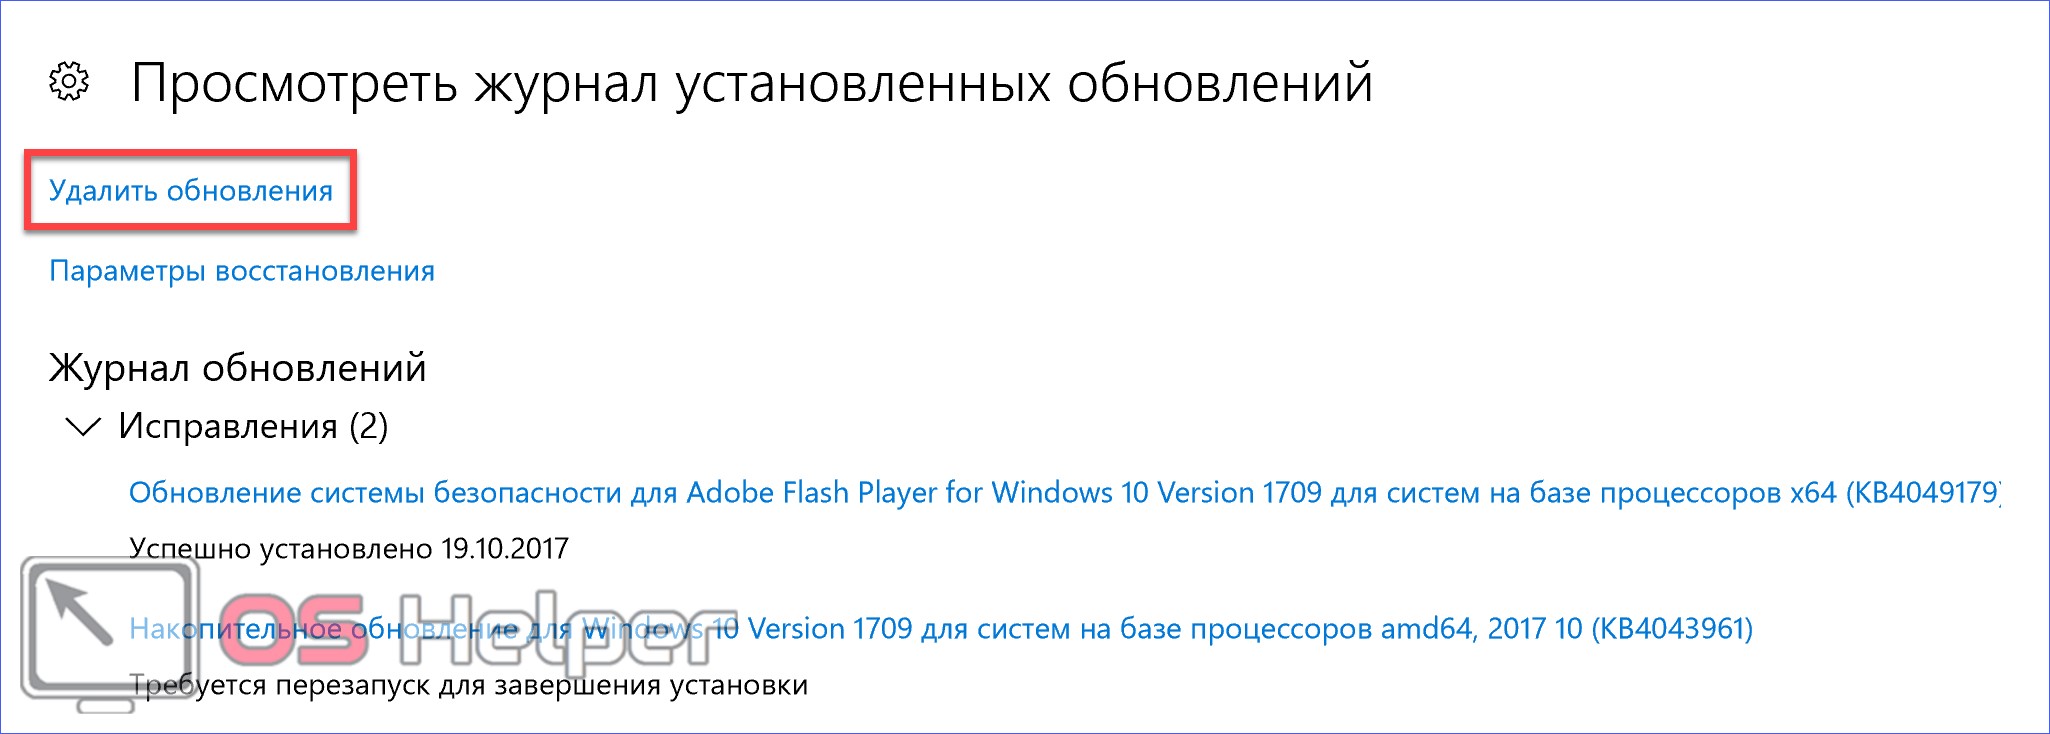
- This page is view only. To clear the log, you will need to go to the old interface, to one of the sections of the classic control panel. A direct link to it is indicated by a frame.
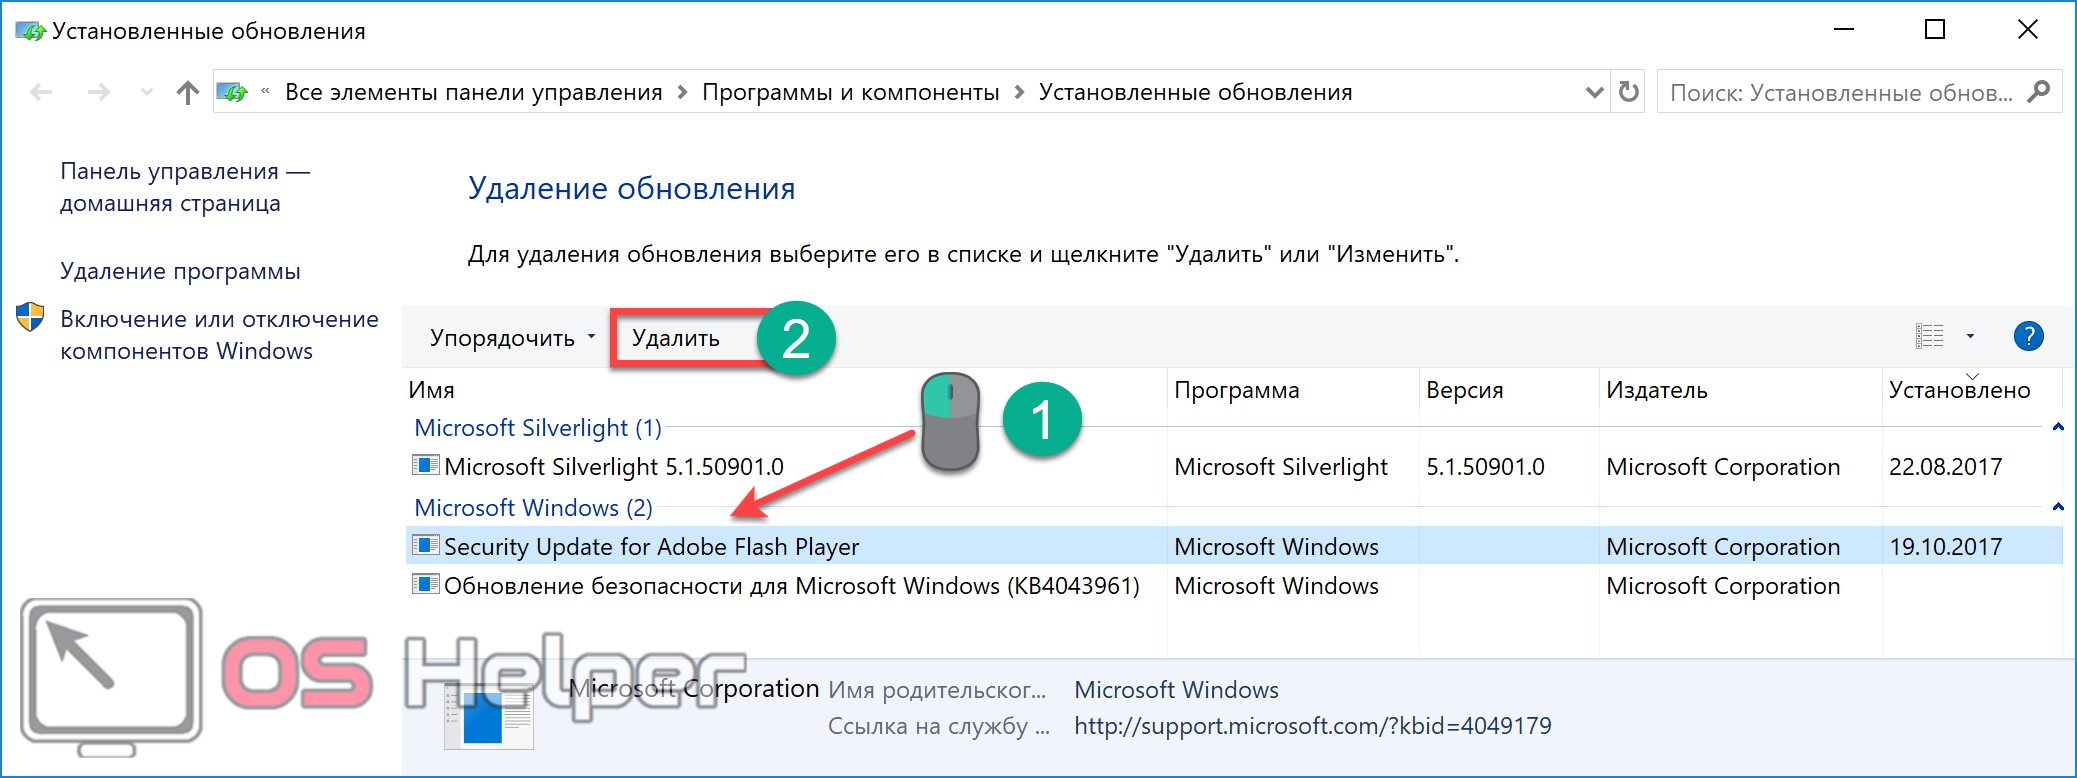
- Here we have detailed information about all Microsoft products that have received the update. To remove, for example, Adobe Flash, select it in the general window. An additional button will appear on the top line. Click it and get rid of unnecessary or problematic fixes.

For security reasons, Windows will ask you to confirm the action. After receiving consent, the system will perform the necessary operation.
PowerShell or command line
You can also remove update files from the command line. In a normally working OS, this method may not be needed, but in case of failures it will come in handy.
- Press [knopka]Win[/knopka]+ [knopka]X[/knopka]" to open the context menu of the Start button .
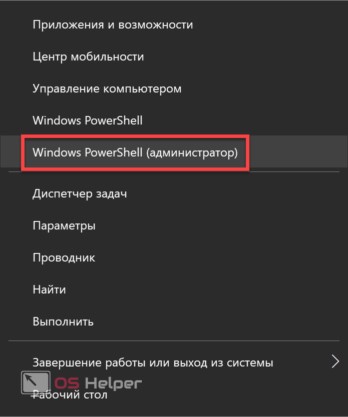
- We will need to run the PC command line shell in administrator mode. Microsoft is promoting PowerShell to the masses, but it can also be the old "cmd.exe" - whichever is more convenient for you.
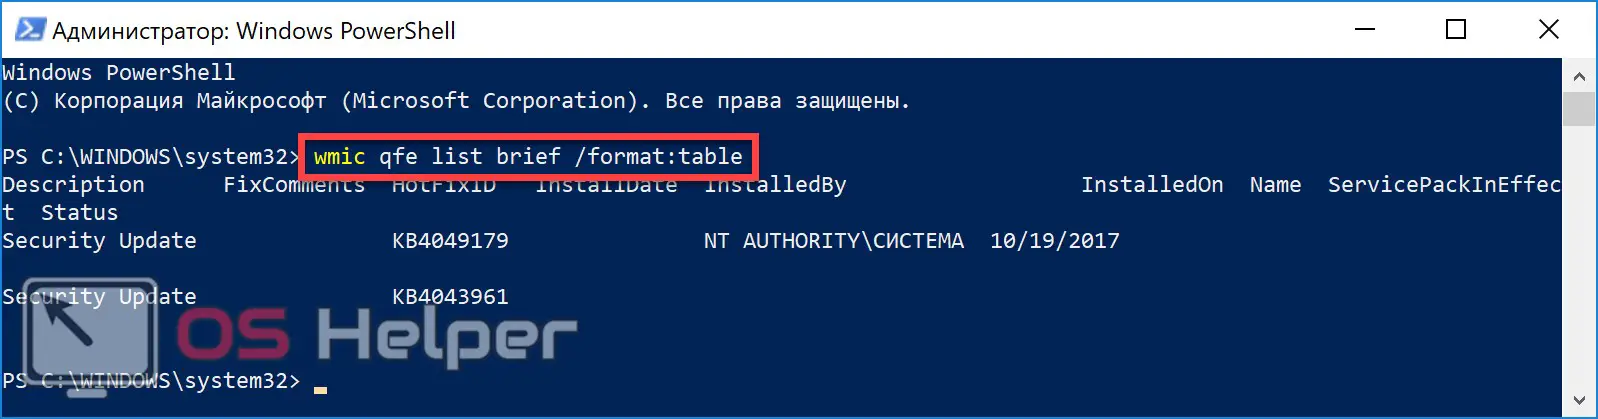
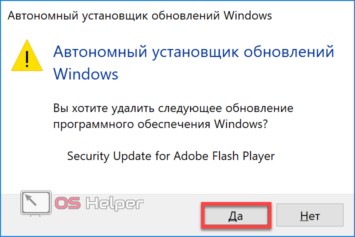
- We enter the command: “wmic qfe list brief / format: table” and see the result of its execution. The list contains, among other things, downloaded but not installed updates. The latter can be distinguished by the absence of an installation date. The update is removed by the " wusa / uninstall" operator .

- An offline installer window will appear asking you to confirm the operation.
The peculiarity of this method is that the user must know the number of the update, the installation of which he wants to cancel .
Rolling back changes
An automatically updated Windows driver or a patch installed can cause the peripheral device to work incorrectly, and in the worst case, crash the OS. Experienced users will immediately remember the recovery menu, which allows you to roll back the system to a stable state.
Read also: How to uninstall DirectX on Windows 10
When this mechanism first appeared in Windows, Microsoft was not scolded only by the lazy. Complaints flowed about the empty space being lost as a result of his work. As a result, according to the persistent "wishes of the workers", this function was turned off. Therefore, just remembering its existence is not enough. To protect yourself from the troubles associated with unsuccessful updates, you must first enable it.
Enable System Restore
Users who have upgraded from earlier versions of OS Windows can be relatively calm. If System Restore was previously enabled, it should work. However, it doesn't hurt to check. With each update, Microsoft "digs" the system control panel deeper and deeper, believing that only "advanced" users will need it, and they will figure it out themselves.
- In order not to bother searching, we call the Run menu with the combination [knopka]Win[/knopka] + [knopka]R[/knopka].
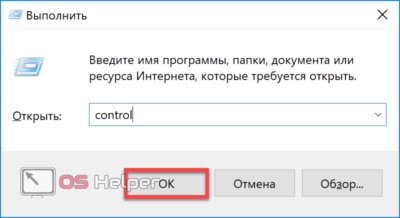
- In the input field, type " control" without quotes and click on "OK" .
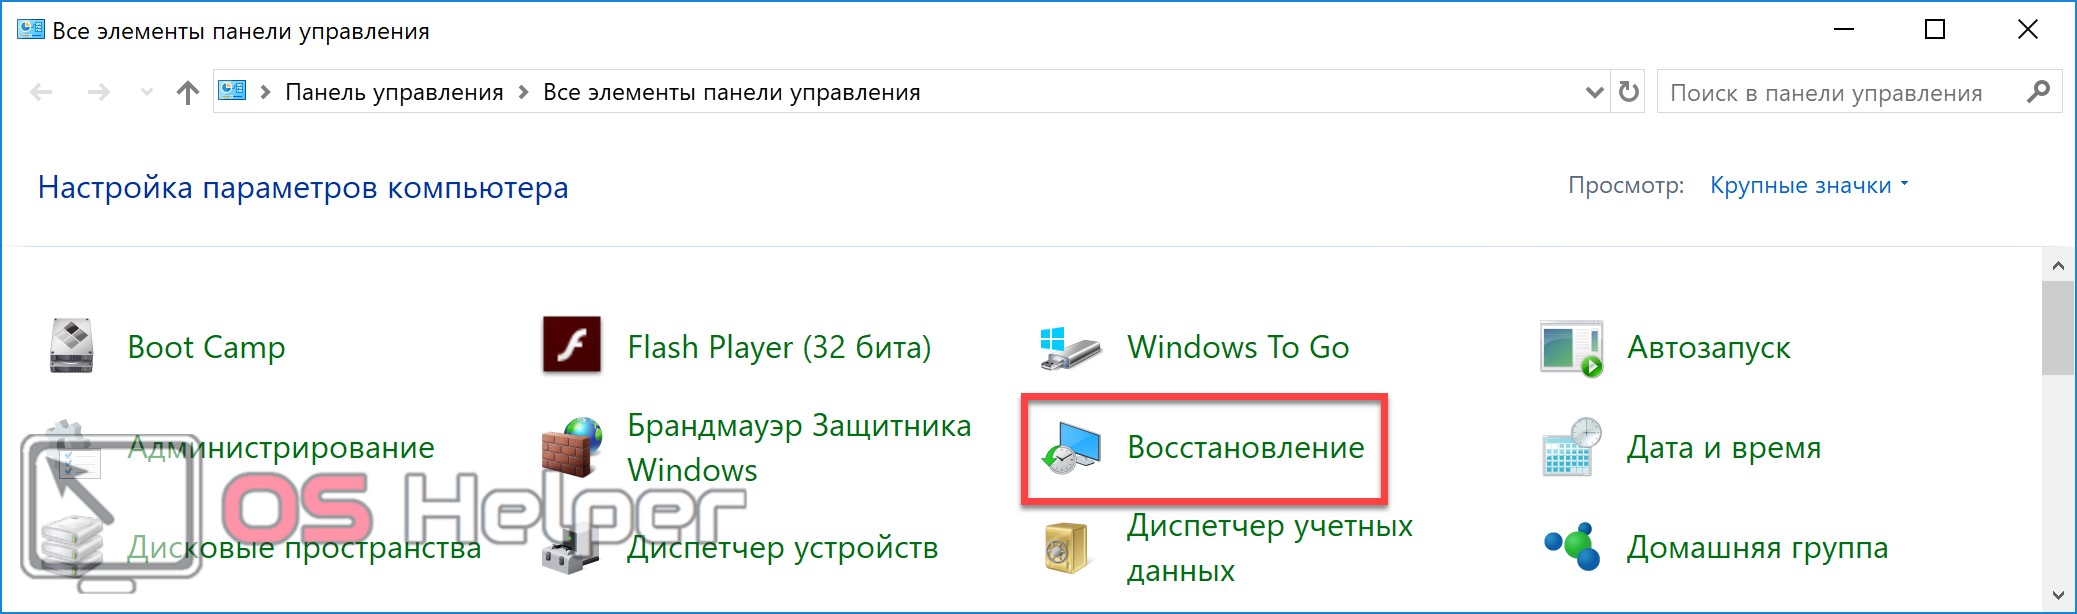
- Select the item marked in the screenshot.
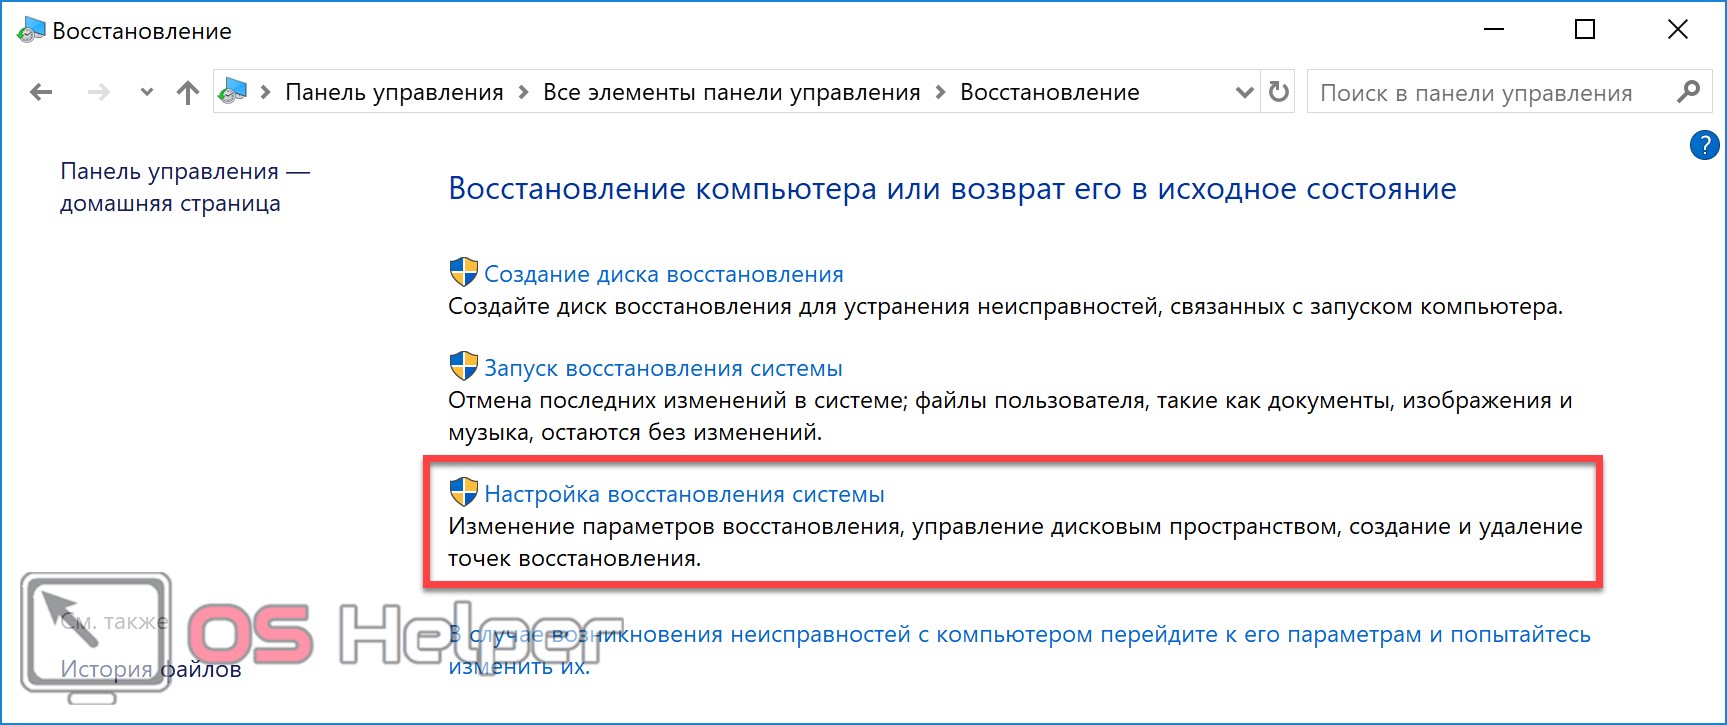
- Open the third line in the menu to get directly to the settings. The desired tab will open immediately.

- We make sure that the recovery is disabled and press the highlighted button.
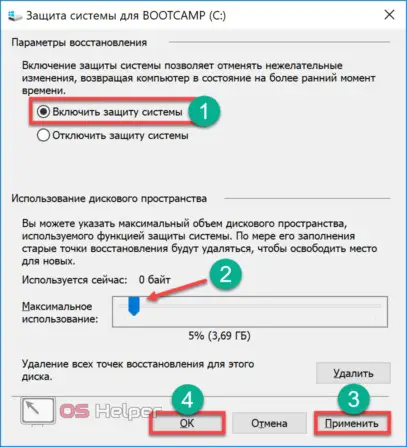
- We perform the specified sequence of actions:
- turn on protection;
- using the slider that has become active, we set the percentage that we will select for creating restore points. Five percent will be enough - when the allocated space is filled, old entries will be deleted automatically.
In order not to be surprised later, be sure to click "Apply" . The system will accept your choice as an unconditional command and limit the size of the recovery folder. Otherwise, the OS will set the default parameters, allocating 10 percent to itself. If the hard drive is small, this is quite a significant loss.
By following these settings, you can return your computer to its last stable state even after a major crash.
Restoring a stable state
To return to a checkpoint, do this:
- Open the recovery menu again from the control panel.
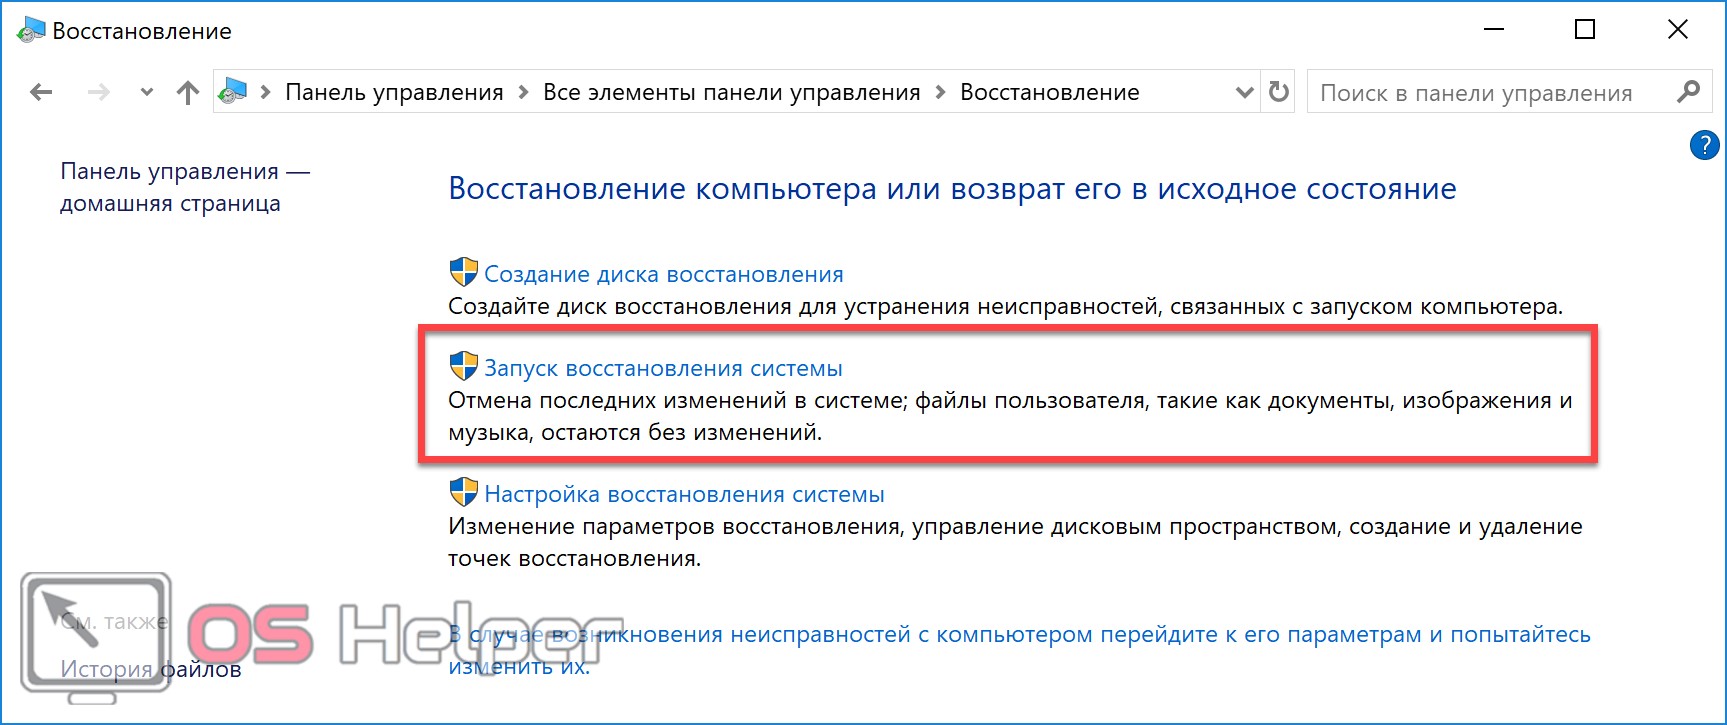
- We choose the second item.
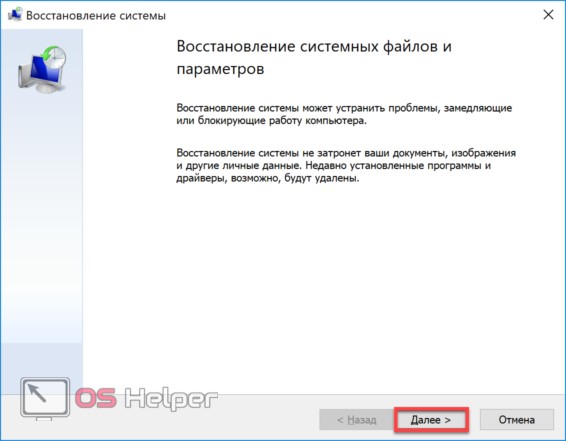
- We agree with the loss of part of the data and continue.
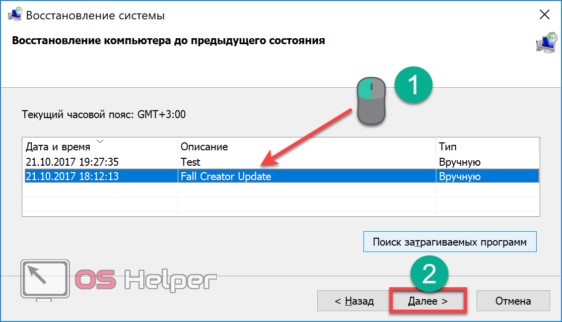
- We select the desired point at which the system worked optimally, or the last one automatically created before the system failure.
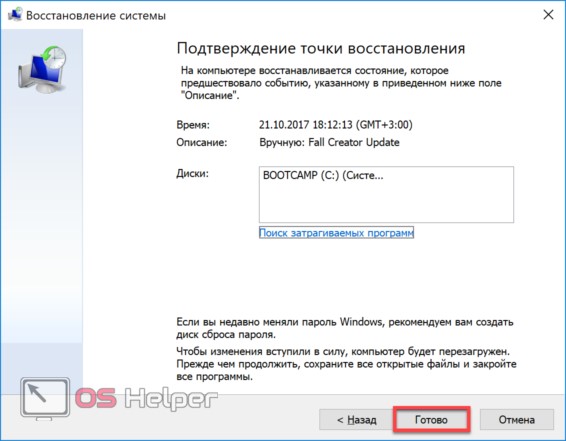
- We make sure that the system is going to return us to the desired state.

- We confirm our actions and wait for the results.
Recovery in Safe Mode
Damage resulting from a failed update can affect more than just the operation of peripheral devices. If Windows refuses to boot, all the described recovery operations will have to be performed in safe mode. Users with a laptop or all-in-one from a reputable manufacturer may not need to take any special action. Just for this case, many vendors build software protection into their products. When the OS cannot boot in normal mode several times in a row, the next boot automatically goes into Safe Mode. On a regular PC, there is no such function and you will have to do everything yourself.
See also: How to create a D drive on a PC or laptop with the Windows 10 operating system
Fast loading made the keyboard shortcuts that could be used at the time of system startup almost useless.
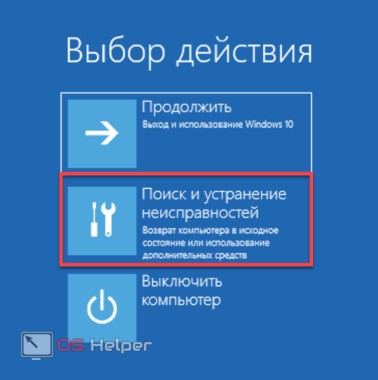
- Without wasting time, we take the media with the distribution kit - it can be a DVD or a flash drive. By changing the BIOS boot priority to the desired device, we start from them.
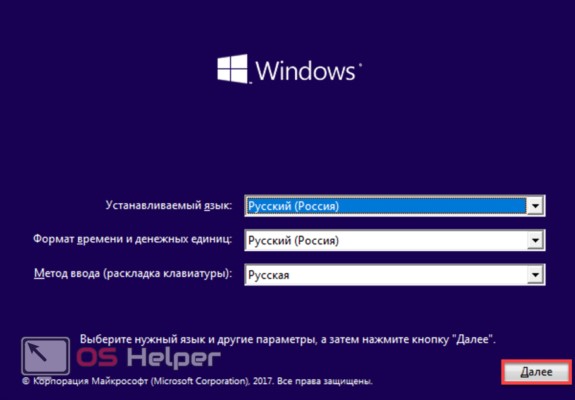
- In this window, we do not change anything and click "Next" .
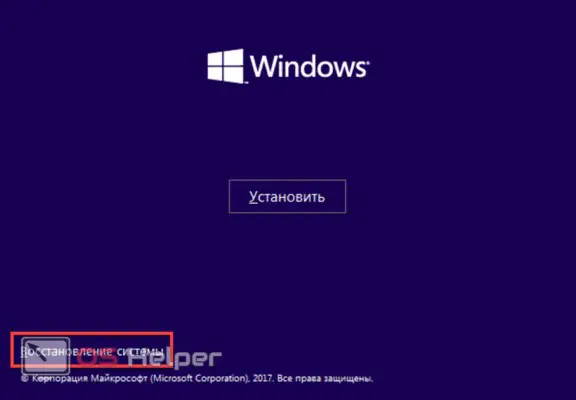
- Select the recovery mode in the lower left corner.
- A window with three options will appear. We use the average.
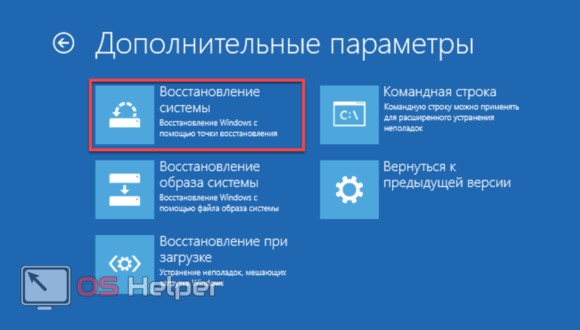
- In the advanced options, select restore again.
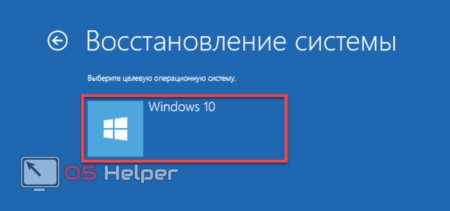
- If several versions of Windows are installed on the PC at the same time, select the one to be restored.
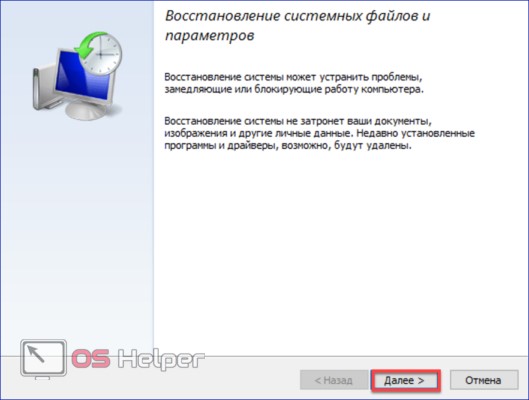
After all the operations, we get into the familiar recovery menu and act as described above.
Prohibit installation of updates
Windows, after a successful download, will still download the problematic update back and try to install it. To remove automatic updates and not to get into a situation that required a system rollback, you need to use a special application.
Microsoft developed it after a rather sensational scandal, when a cyclically downloaded fix did not allow the use of a second monitor. The fact is that, using the menu "Update and security" , the user can only postpone the installation for a while, but not prohibit it.
Applying wushowhide
Consider another option:
- We download the tool we need from the Microsoft website and run it. It does not need to be installed and can be used on 32-bit and 64-bit systems.
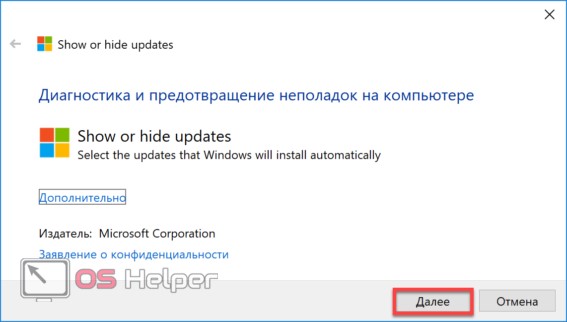
- Click "Next" and go to the workspace.
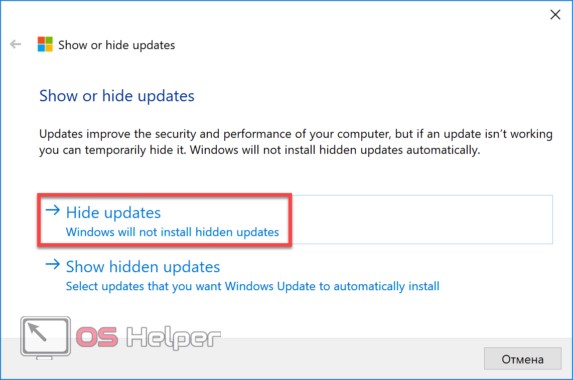
- We select the first item so that the program starts analyzing available updates.
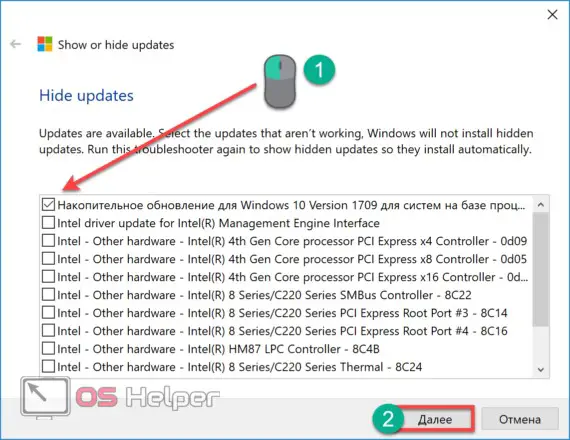
- In the list that appears, we mark unnecessary and undesirable for us to install.
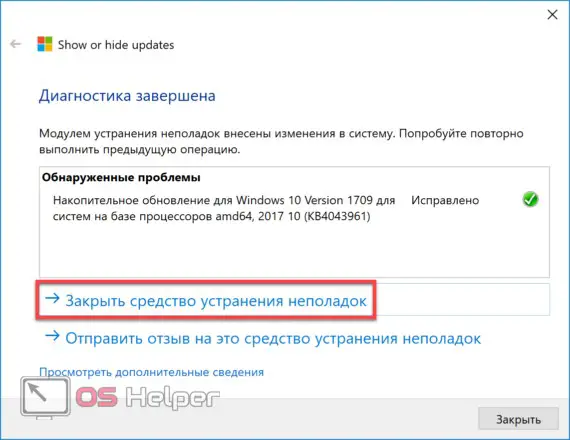
- An update that was excluded from available appeared in the information window with the note "Fixed" . Now, until you decide to remove it from the list, it will be ignored for your computer. If you wish, you can send feedback and a description of the error to technical support. Having tracked that the problem with the forbidden update has been resolved, we launch the utility again and perform the reverse sequence of actions.
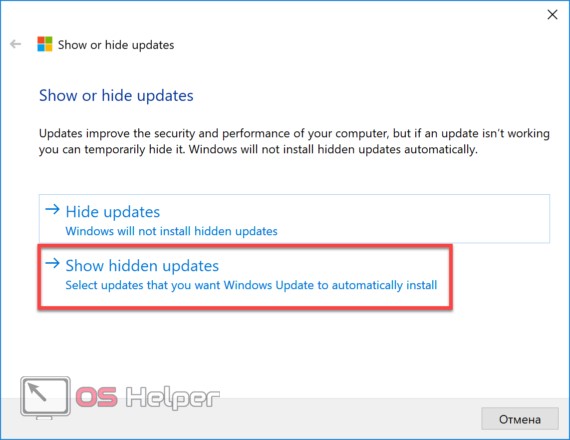
- We select the second item to view the fixes hidden from installation.

- We mark it with a tick, determining it usable and confirming. The same window as in the case of a ban will appear, informing you that the problem has been fixed. At the next check, the update will be downloaded and installed on the system.
Removing a past OS installation
After the release of Windows 10, users could upgrade their previously purchased OS to the new version for free. If the "Upgrade Assistant" (a special utility released by Microsoft) was used for this, the PC was pre-checked for compatibility. If hardware compatibility issues were found, the installation would stop. Files downloaded for updating were automatically deleted from the computer.
Also Read: Turn off Sticky Keys in Windows 10
If there were no problems, a new OS was installed. At the same time, the Windows.old folder was created on the system disk, in which a full copy of the old version was saved. A similar procedure is followed when a major update is released. For example, after the Fall Creators Update released in October.
Users upgrading from younger versions are given 30 days to test, and all subsequent major updates can be rolled back within 10 days. After the end of the allotted time, the OS automatically deletes the copy of the old system. Manually cleaning the disk can be performed before the timeout expires - freeing up, at the same time, about 20 GB.
Let's see how to uninstall a previous version of Windows after upgrading to Windows 10.
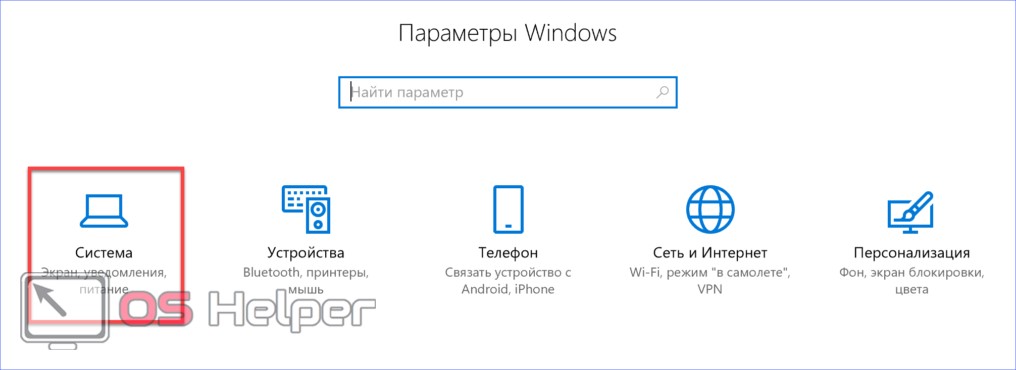
- Open the options and select the section marked in the screenshot.
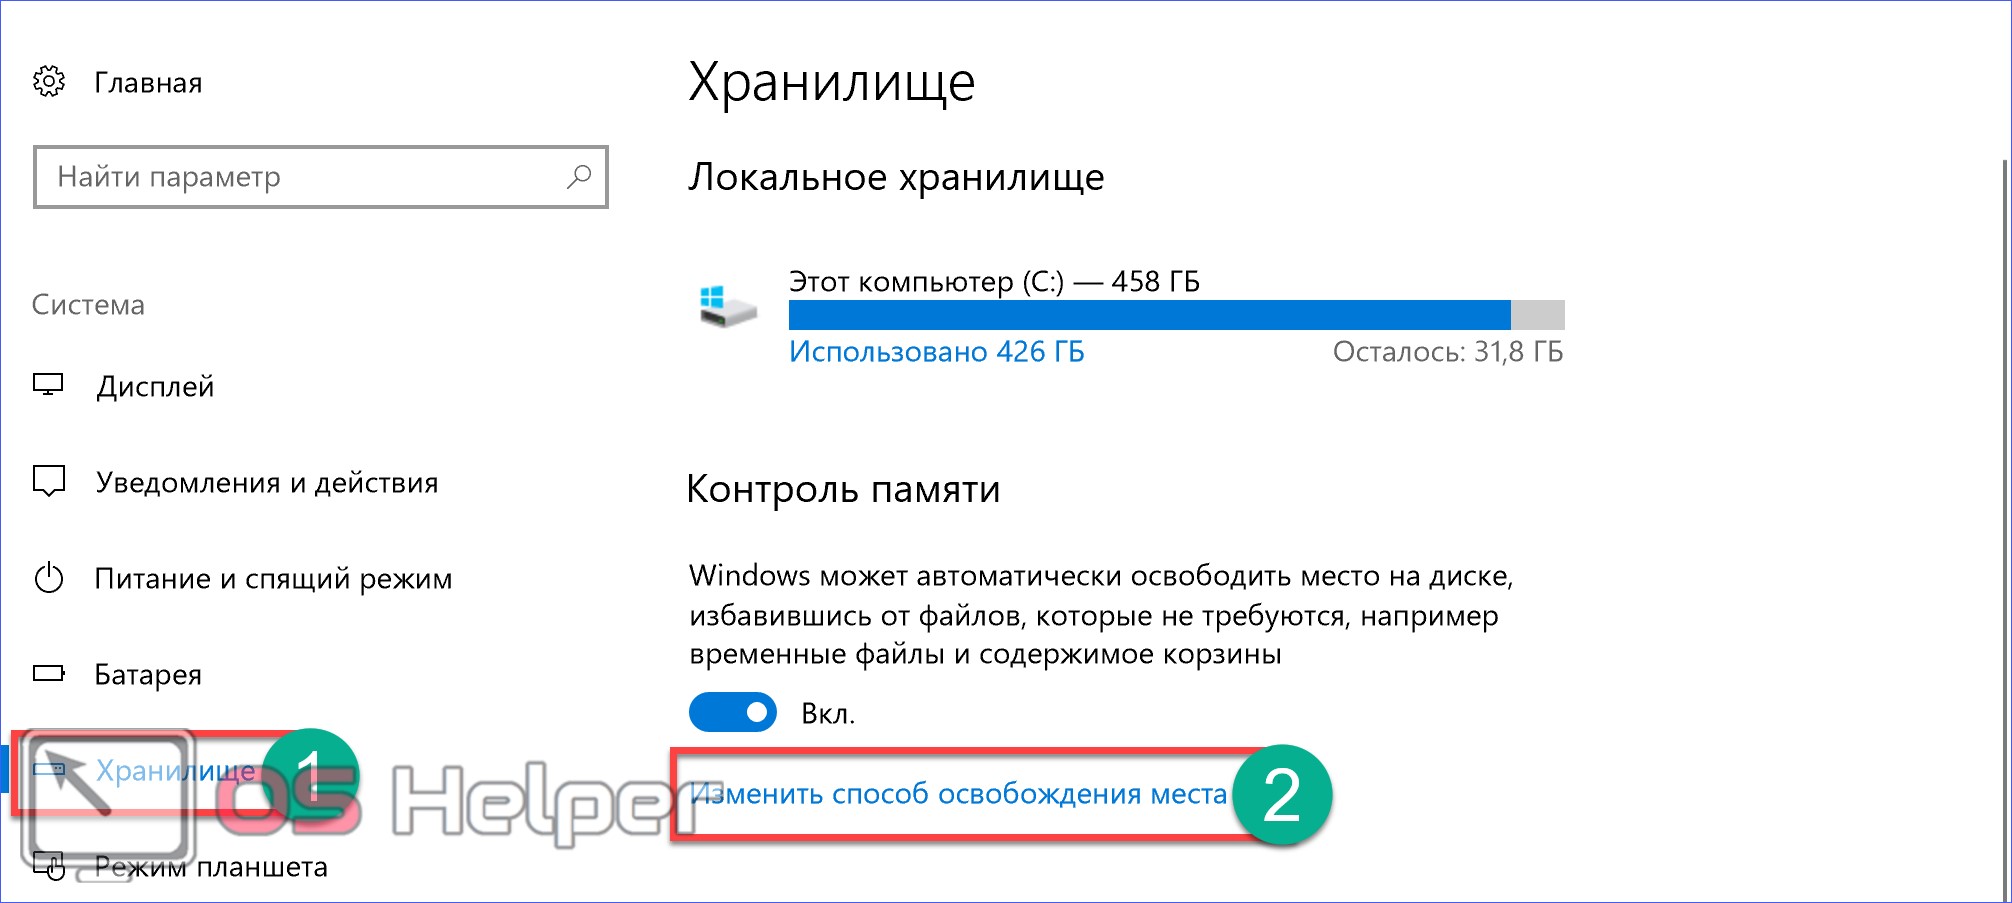
- On the left side, in the quick transition menu, select "Storage" and open the menu to free up space.
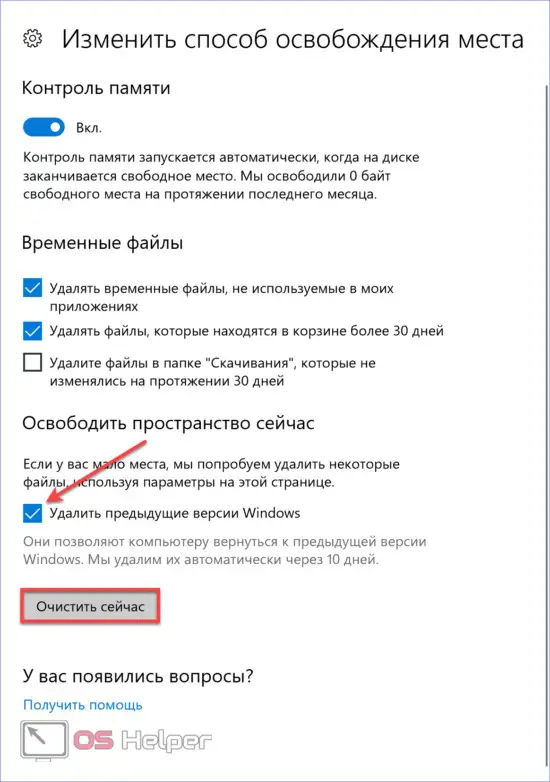
- Check the box and confirm your choice. The system will not ask any more questions, and the contents of the Windows.old folder will be deleted.
System rollback after update
If you are not satisfied with the update, you can also cancel it while the old copy is kept. In this case, the system will return to the previous state.
- To perform this operation, we go to the OS settings in the "Update Center" . We already considered how to get into it when we dealt with system updates.
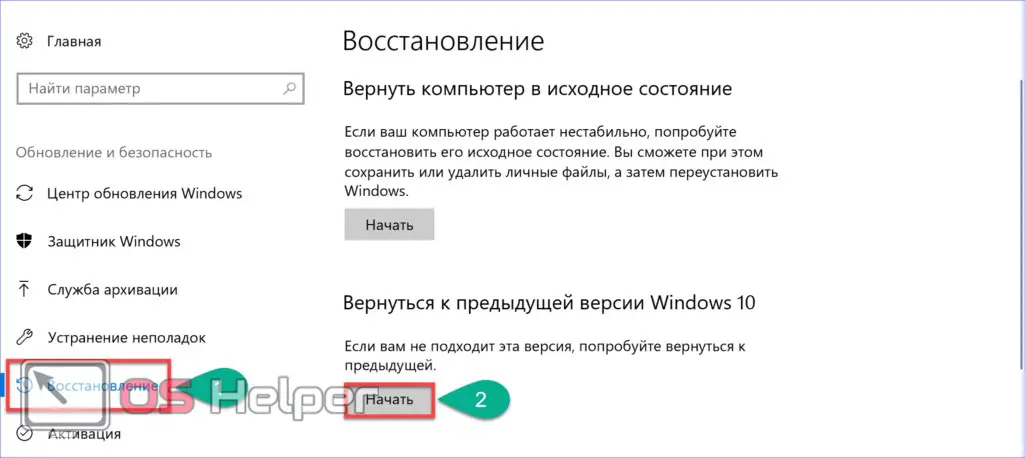
- We perform the sequence of actions shown in the screenshot.
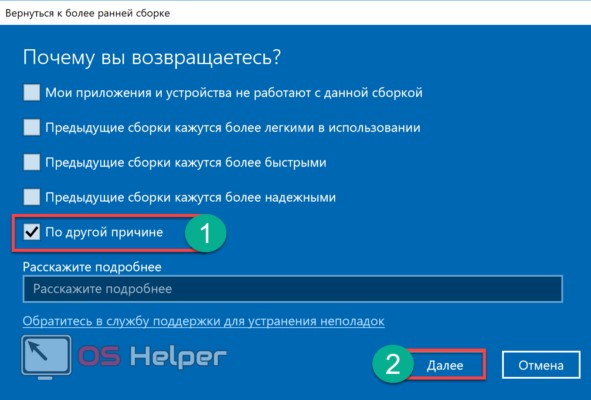
- You can tick any item - after that the "Next" button will become active.
- If you have firmly decided to cancel the OS update, we refuse the offer.
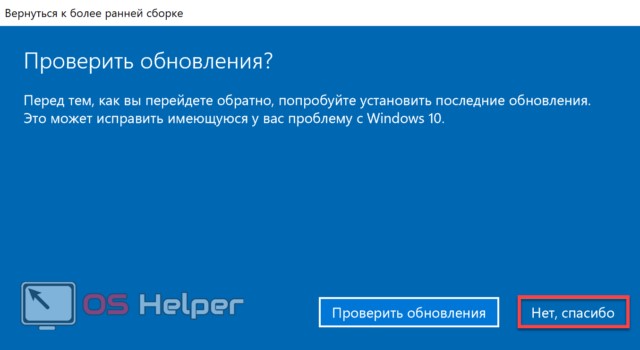
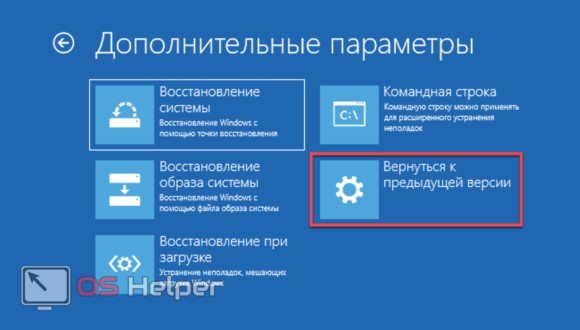
- After pressing the highlighted button, the system will return to the previous stable build. In the same way, you can remove pending updates and preview builds of Windows installed as part of the Insider testing program. If there are serious problems in the new build, the computer will not be able to boot. In this case, we go into safe mode, which we considered when talking about restore points. To roll back to the previous version of the OS, select the marked item.
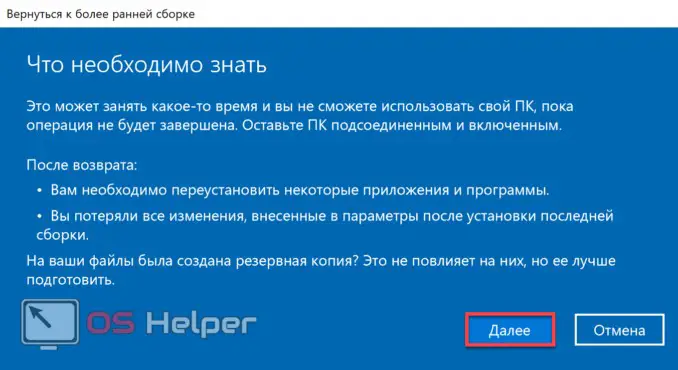
Further dialogue with the system is similar to that already described. The computer will restore the previous version of Windows and boot normally.
Finally
With these tips, you can take full control of the upgrade process, from current improvements to major changes released by Microsoft.
Video instruction
For those who prefer not to read, but to watch the training material, we have prepared its video version.