How to enable Windows 10 Update: The easiest way
 Windows 10 Update allows you to timely download operating system updates from official Microsoft servers. After installing the OS, this service is enabled by default and runs in the background. However, you can disable it yourself and not receive new versions. If you don’t care about loading your computer with processes related to monitoring and installing system files, then you can turn on Windows Update 10 in several ways.
All Methods
This procedure can only be performed using the built-in functionality of the operating system. You don't need third party software. First, check if the default updater is running on your computer. You can do it like this:
- Launch the Task Manager using the combination [knopka]Ctrl[/knopka]+ [knopka]Shift[/knopka]+ [knopka]Esc[/knopka].
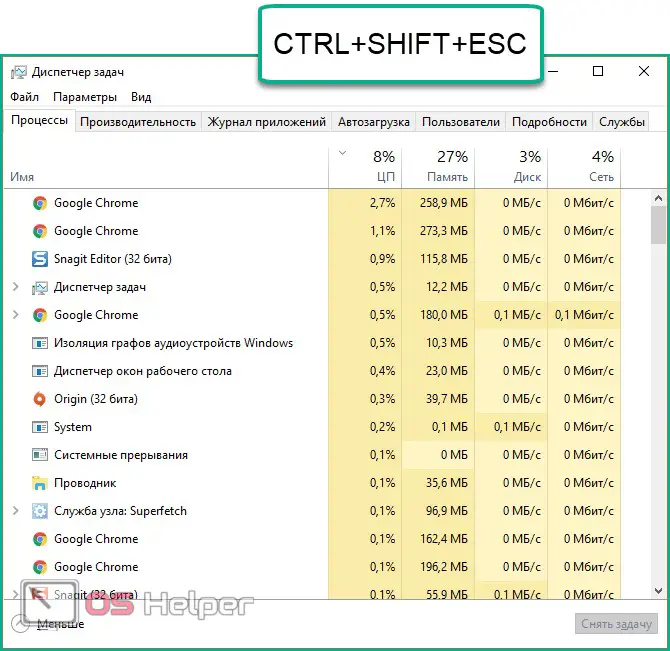
- Open the Services tab. Here, find the service named "wuauserv".

Thanks to it, auto-update works in the background in the operating system. If you don't have "wuauserv", then go to one of the enable methods:
- through group policy;
- through "Windows Settings";
- using the command line;
- through registry settings;
- through Services.
Let's consider each method in detail.
Enabling in Local Group Policy
You can restore the operation of this service in the "top ten" as follows:
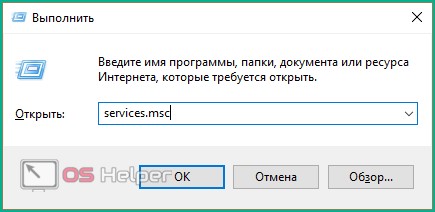
- Open the Run program with the keyboard shortcut [knopka]Win[/knopka]+ [knopka]R[/knopka]. Enter the command "services.msc" and start the execution with the OK button.
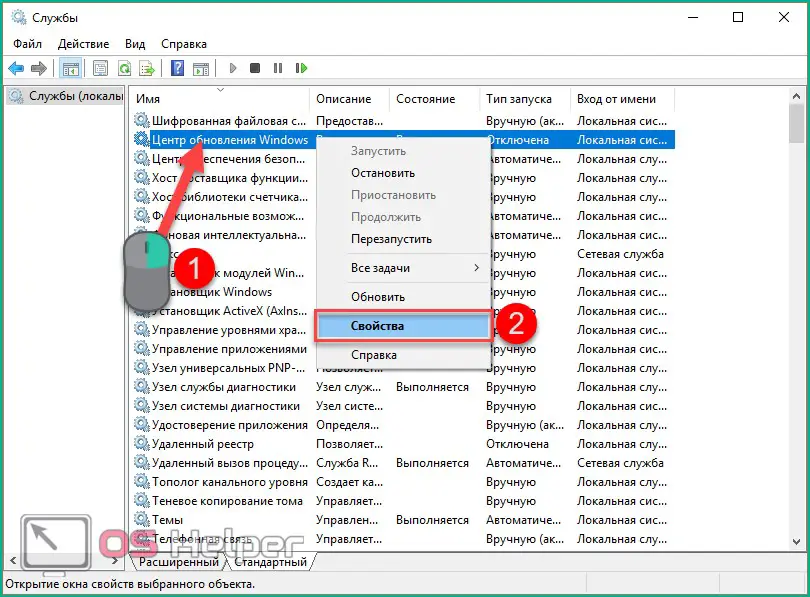
- You will see the "Services" window. In the right list, find the line "Windows Update" and using RMB in the menu, select "Properties".
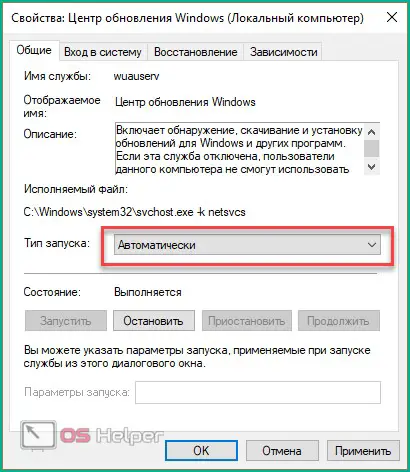
- In the "General" tab, find the line "Startup type" and set the "Automatic" option in the menu, then apply the changes with the "OK" button.
- Restart your PC.
In this way, you can start the AC on the Windows 10 operating system. This method can help you get rid of error code 0x80070422.
"Options"
Now let's figure out how to manually check for available updates and start downloading/installing them. To do this, you need the functionality of the "Parameters" section:
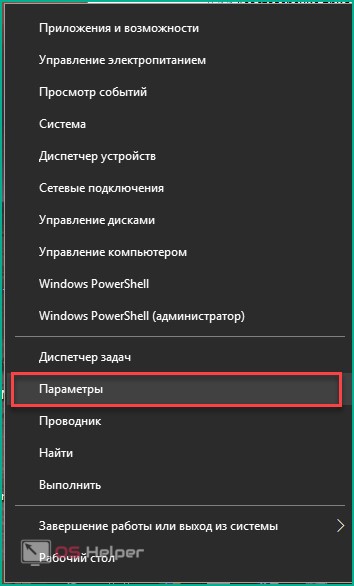
- Right-click on the "Start" icon on the bottom panel and select "Settings" from the menu.
Also Read: Restore Windows 10
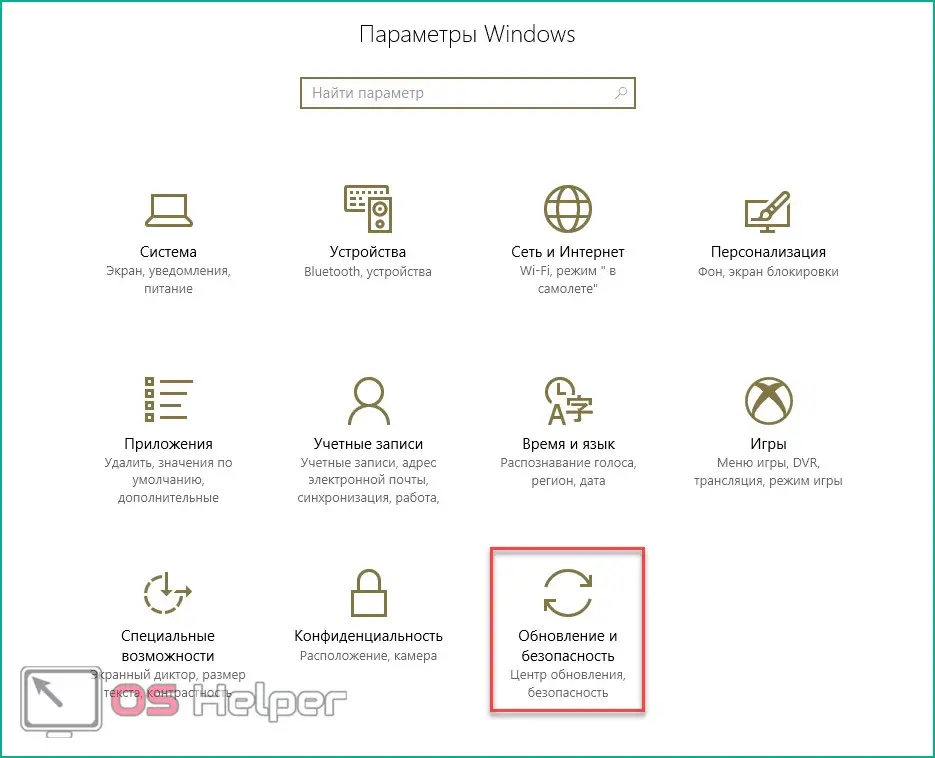
- Open the Update & Security section.
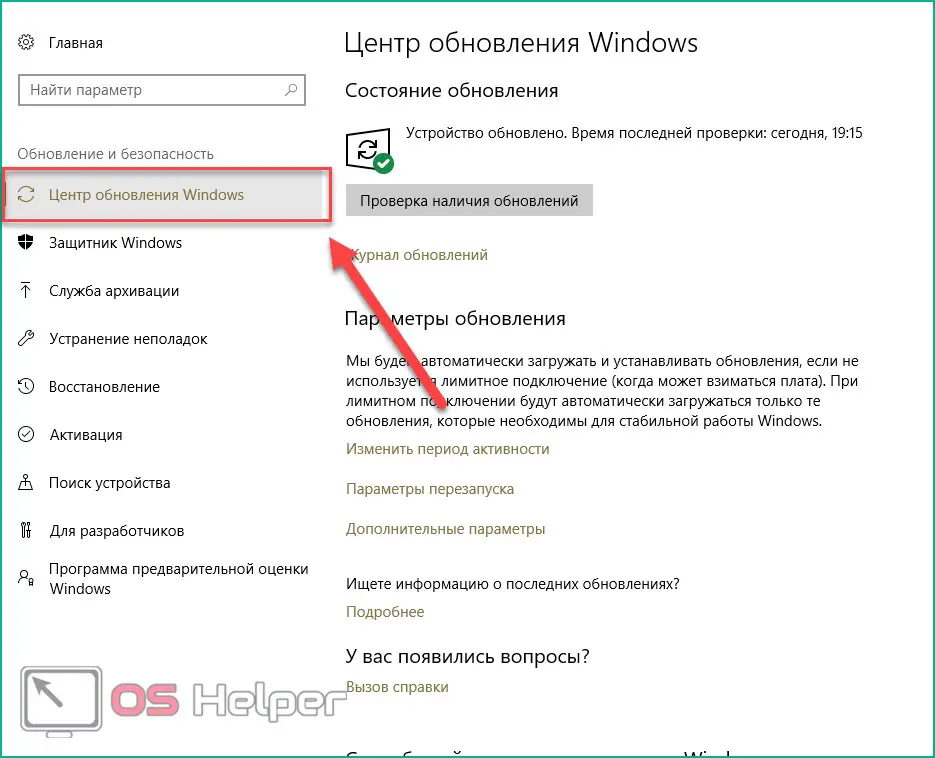
- Go to the "Windows Update" subsection in the left column.
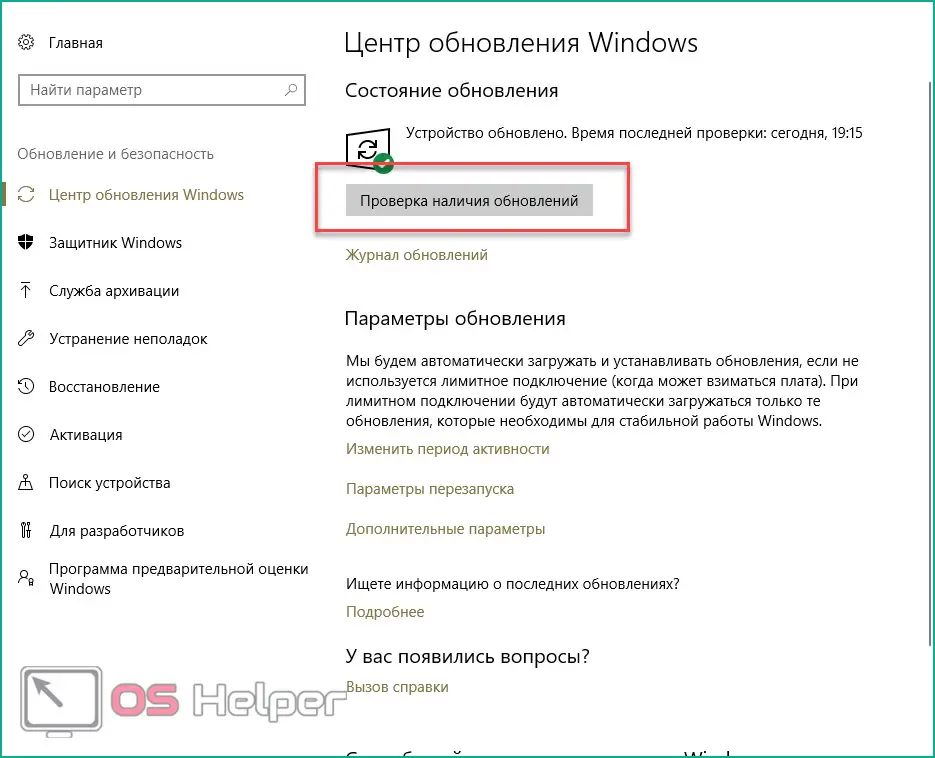
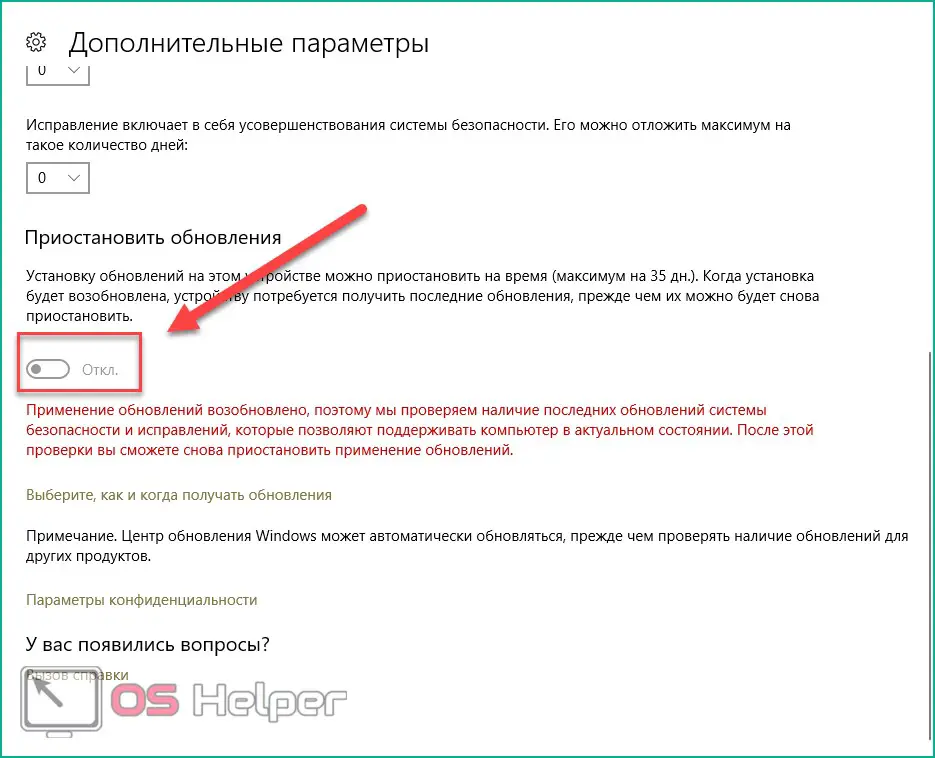
- In this window, you can make all the necessary settings for the CH and check the availability of files to download. To check, you must click on the button marked in the screenshot.
- The tool will now scan for new Windows 10 patches and notify you. In the "Advanced Options" section, change the setting to "Off", as shown in the screenshot. By clicking on “Choose how and when to receive updates”, you can set up delivery methods (from a PC on the local network, the Internet, etc.).
If you have a problem in the operation of the AC, then you need to check the settings in the Group Policy Editor.
"Local Group Policy Editor"
To run the program, follow these steps:
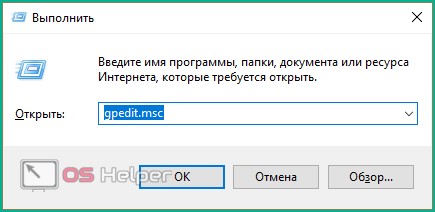
- Go to Run with [knopka]Win[/knopka]+ [knopka]R[/knopka]. Write the command "gpedit.msc".
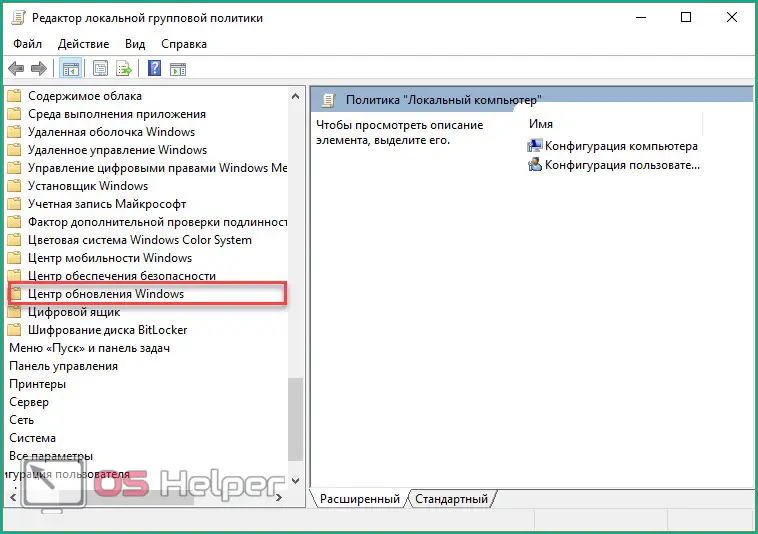
- Open the "Windows Update" branch, which is located along the path "Computer Configuration" - "Administrative Templates" - "Windows Components".
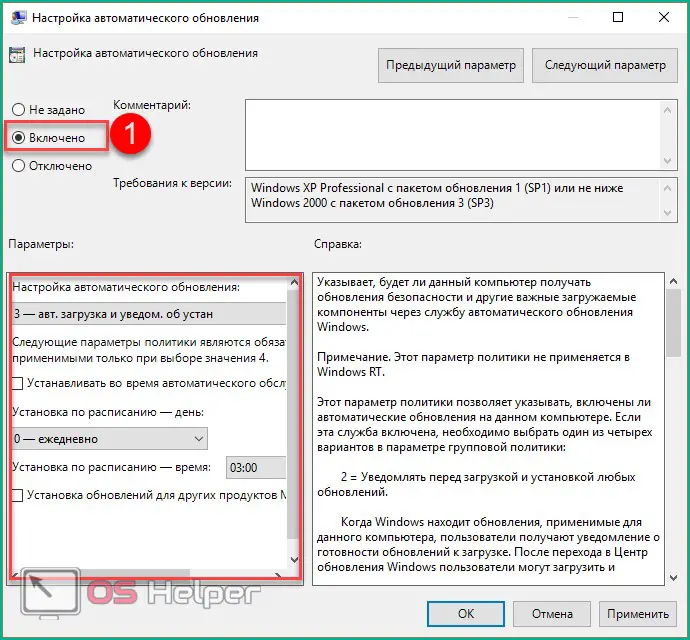
- In the right part of the window, find the line "Configuring automatic updates" and right-click on it. In the menu, go to the "Edit" item.
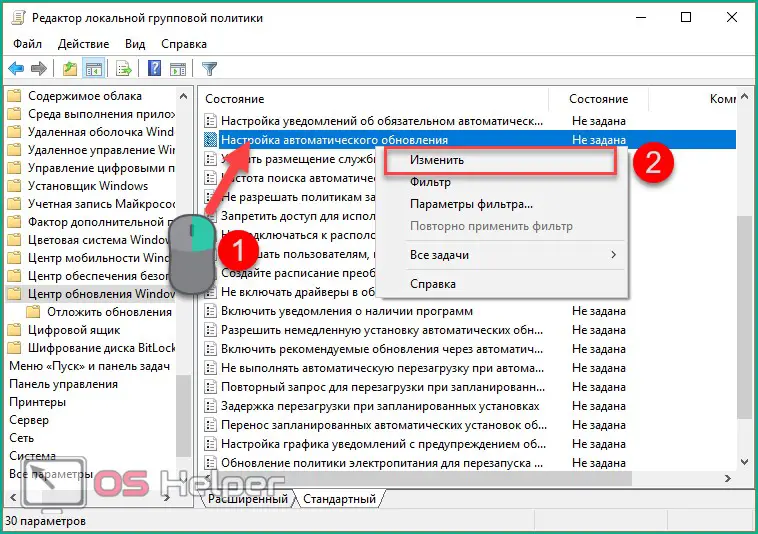
- Set the setting to "Enabled" (1). In the "Options" section, select the settings according to which automatic updates will work (schedule, installation, notifications of available downloads, etc.). Apply the changes with the "OK" button.
Command line
Using the Windows 10 command line, you can disable or enable the "Update Center". Through it, it will be possible to force the “wuauserv” service to start.
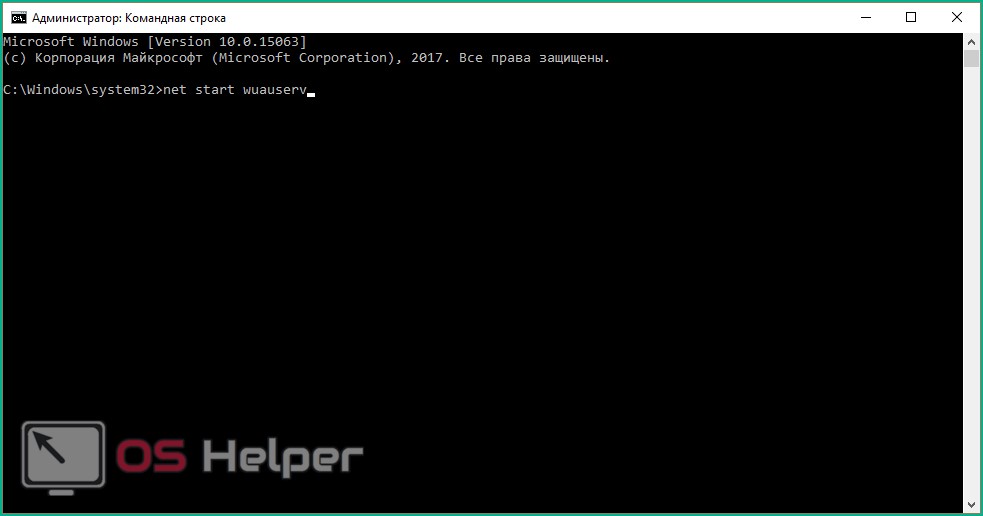
- Open a command prompt with administrator rights. Enter the command "net start wuauserv" and press [knopka]Enter[/knopka].
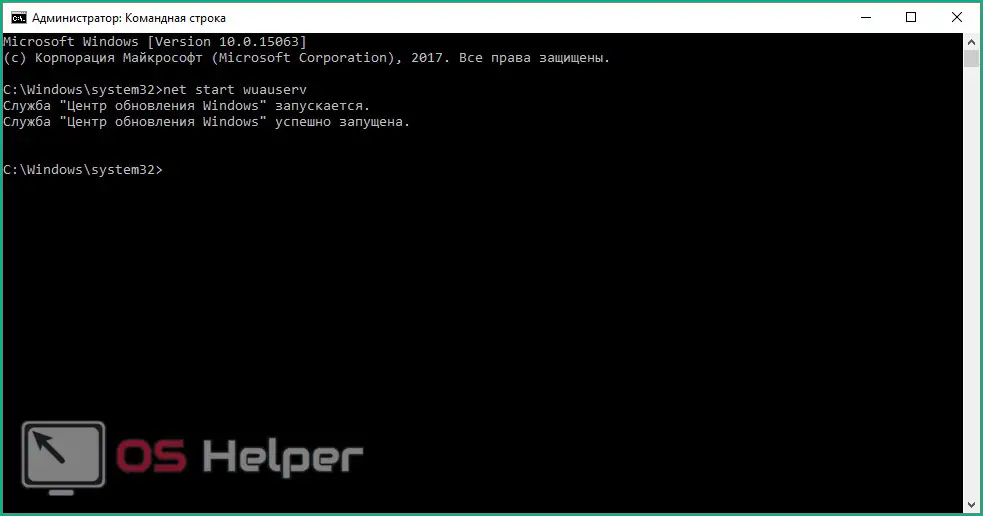
- The program will start the service, after which you will see a corresponding message. The process will run every time you turn on the PC, so you do not have to repeat this procedure. To disable the Windows 10 Central Office, you must enter the command "net stop wuauserv".
See also: How to download themes for Windows 10 with automatic installation
- Now it remains to check whether the system will be updated.
Registry
Also, the AC will not work if the value of the parameter in the registry is not corrected. You need to do the following:
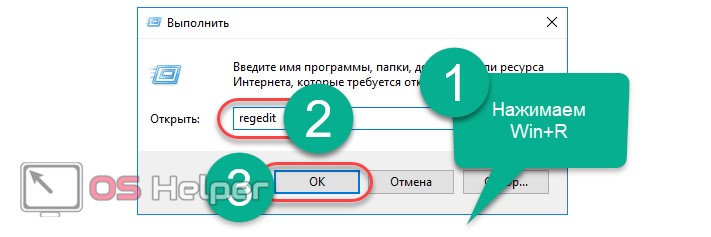
- In the "Run" window ([knopka]Win[/knopka]+[knopka]R[/knopka]) enter the command "regedit".
- In the registry editor, find the branch HKLM\System\CurrentControlSet\Services\wuauserv. It is enough to copy the path from this instruction and paste it into the search bar at the top of the window.
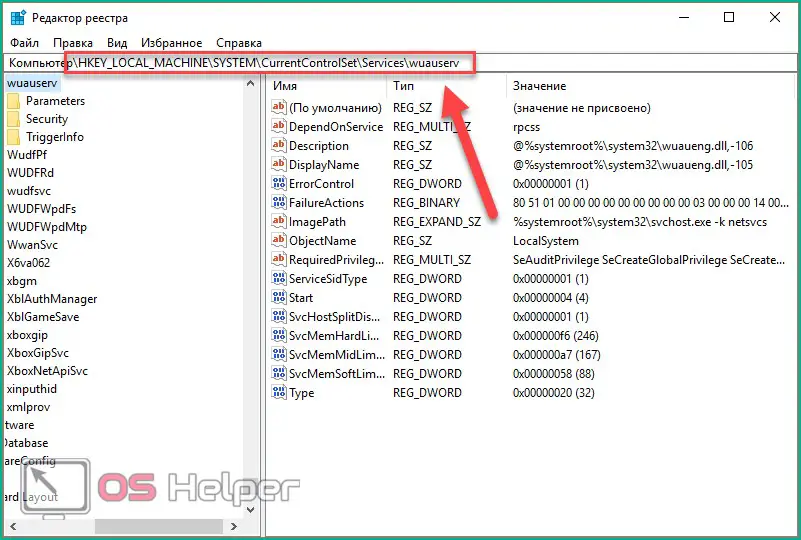
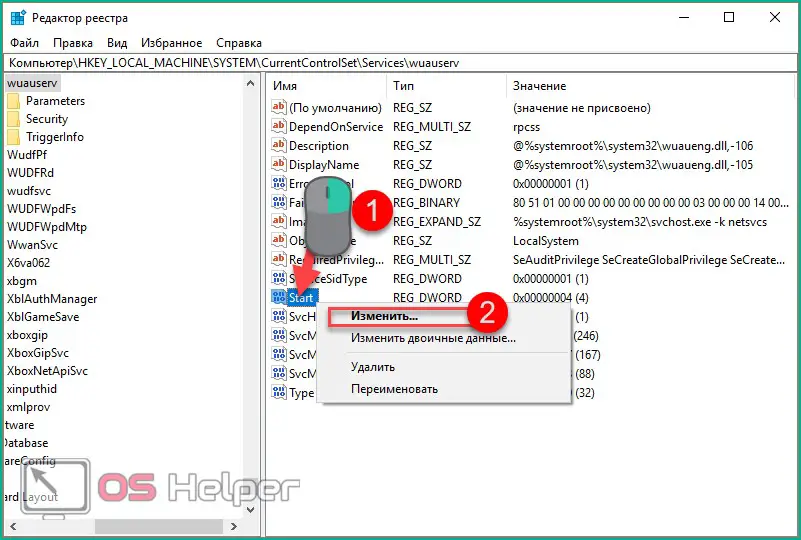
- In the right part of the window there will be a parameter "Start". Right-click to select "Edit" from the menu.
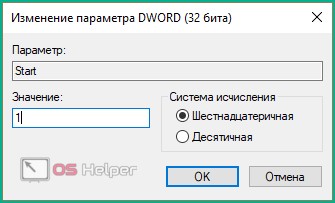
- In the disabled state, the parameter will have a value of 4. In order for the AC to start downloading updates, set the value to 1.
No other service affects the start of this service, so there should be no problems or performance problems. You can also check the HKEY_LOCAL_MACHINE\SOFTWARE\Microsoft\Windows NT\CurrentVersion\Hotfix branch, which contains information about all update files.
Third Party Programs
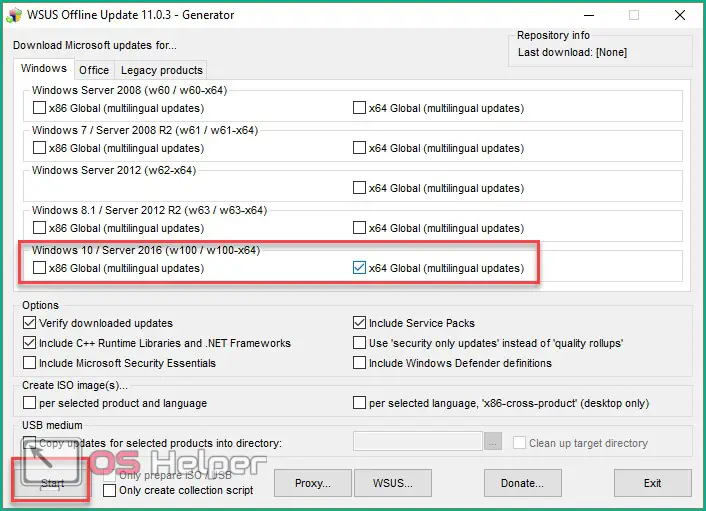
What should I do if I can't set up automatic downloads? Starting the service doesn't help, and you don't have the time or knowledge to find workarounds? Then try updating the operating system using the WSUS Offline Update utility. Download it from the official website of the developers at the link. On the main page, click on the button marked in the screenshot. The creators guarantee complete security for users and their personal data on a PC. After downloading, do the following:
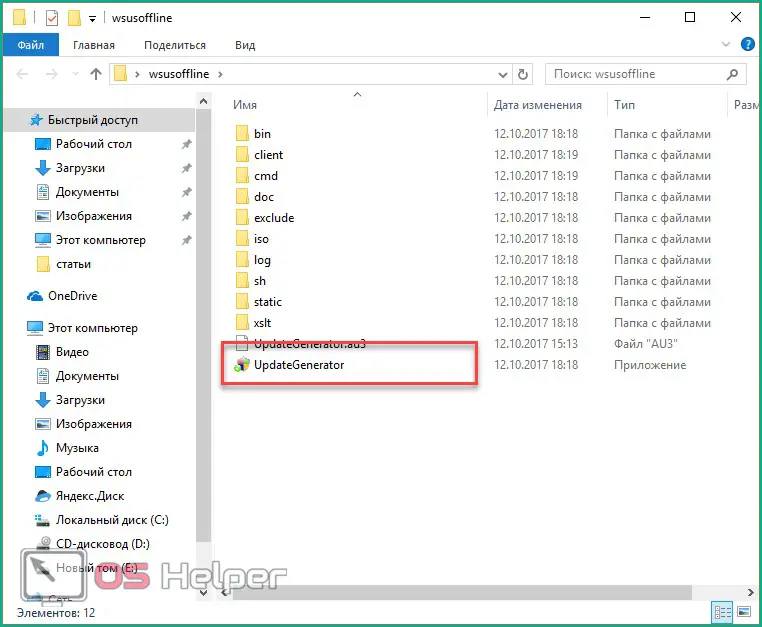
- In the program folder, open the UpdateGenerator.exe file.
- Select your OS version: Windows 10 x32 or x64. To start downloading files, click "Start".
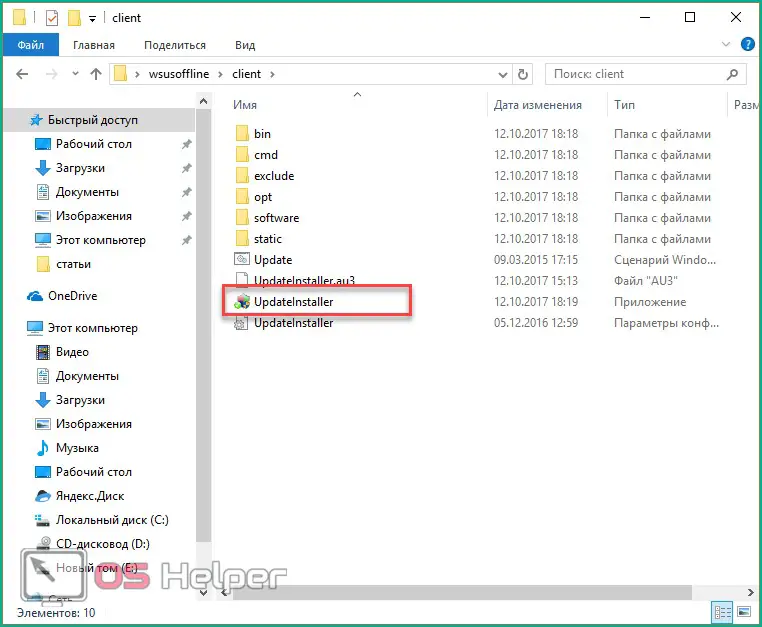
- When the download is complete, you will see a log on the screen with a list of all downloaded files. The download and installation time depends on how long you haven't updated Windows Now you need to go to the "client" folder and open the UpdateInstaller.exe file.
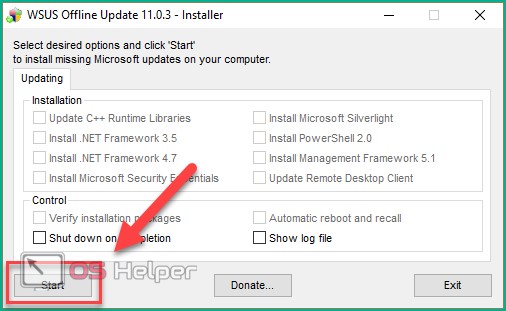
- In the program window, click "Start" to start the installation.
If WSUS Offline Update freezes or stops searching for files, try using an earlier and more stable version of the program.
You need to update the operating system in this way only once, because after installing the patch, troubleshooting will be carried out and the default AC will be launched.
Outcome
If you have a desire to install the latest version of Windows 10, then all the methods described will help you with this. Don't forget to adjust the settings for yourself so that downloading or rebooting with a scheduled installation does not take you by surprise.
See also: MyPhoneExplorer for PC on Windows 10
Video
So, to consolidate the material received, let's watch a video on this topic.