How to turn on the camera on a Windows 10 laptop: all the ways
 Most modern laptops have built-in video cameras in their design. With their help, you can take photos, record videos, conduct online conferences in video format and much more. Thanks to these devices, the capabilities of netbooks and laptops are greatly expanded, which makes them indispensable assistants in travel and travel.
Not so long ago, Microsoft released a new operating system Windows 10. Many users have already managed to update the OS of their laptops and evaluate the proposed innovations. But along with this, some people have encountered problems with the camera on a laptop: for some, the video device does not turn on at all, for others, a black square or an upside-down image appears on the screen. We will talk about the causes of such malfunctions and how to turn on the video camera on a Windows 10 laptop in this article.
How to test the webcam
In Windows 10 operating system, you can check if the camcorder is working or not using the default free Camera app from Microsoft.
To run this program, you must first click on the "Start" menu in the lower left corner of the screen. Further, some users will need to select "All applications" to open the full list, for others such a list of programs will be deployed automatically. Scrolling down with the mouse wheel, the corresponding keyboard key with an arrow or holding down the slider, you should go down to the programs with the name in the Russian letter "K". This is where the Camera app is located.
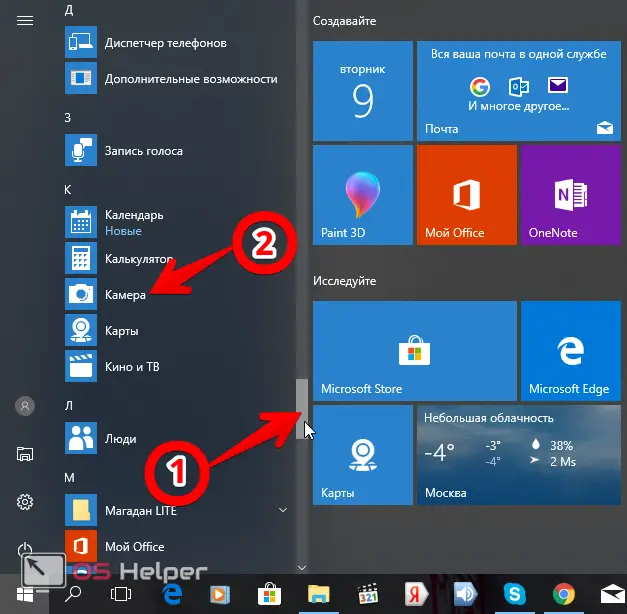
If everything works correctly, the video device will turn on, and an image will appear on the screen. In this application, you can take photos with a set timer and record videos. It is possible to adjust the brightness. Additional settings can be made by clicking on the "Settings" button - the gear in the upper right corner.
See also: What is OneDrive in Windows 10 and what is it for

How to change privacy settings
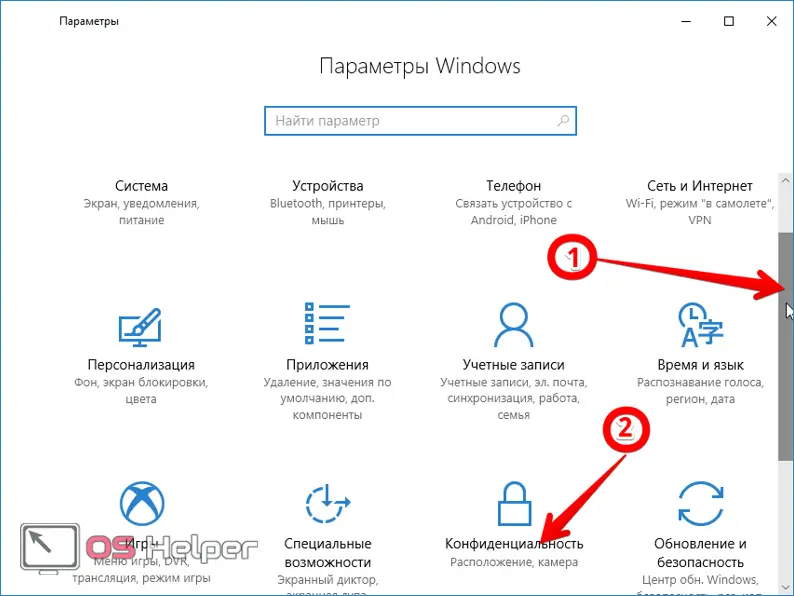
If the video camera in the considered program does not work, one of the options may be that the appropriate privacy settings are simply not enabled. Because of this, applications do not receive permission to use the video device.
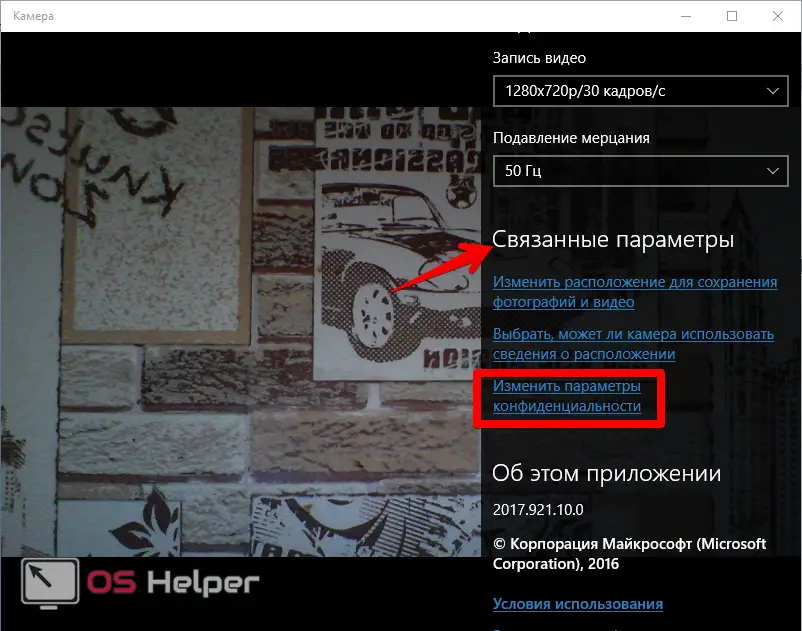
You can make the necessary settings both from the Camera program and through the Start menu. In the first case, you need to click on the gear (as shown in the figure above), then scroll to the “Related settings” section and select “Change privacy settings” from the list.
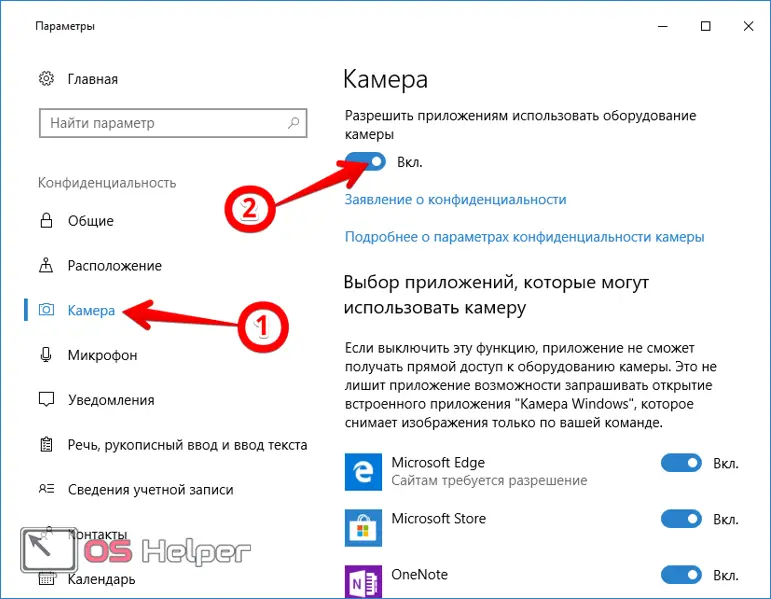
Next, in the "Parameters" window that appears, open "Camera". Here you need to move the slider to the “On” position and allow programs to access the video device. Below in the list, you can independently configure permissions for using the camcorder for various applications.
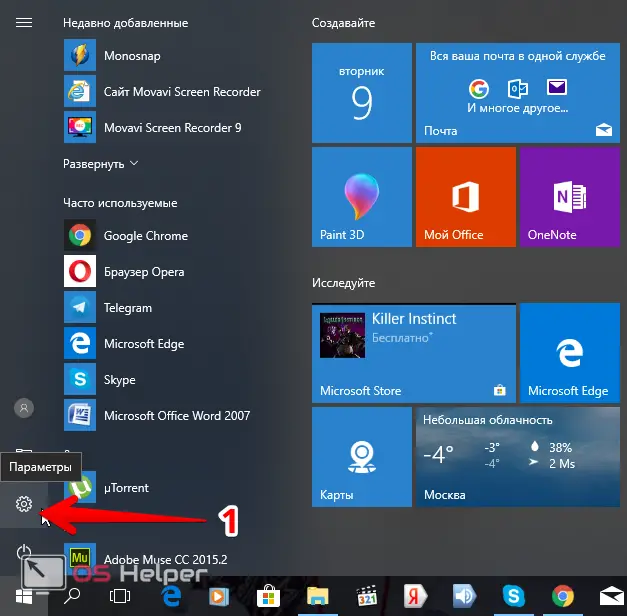
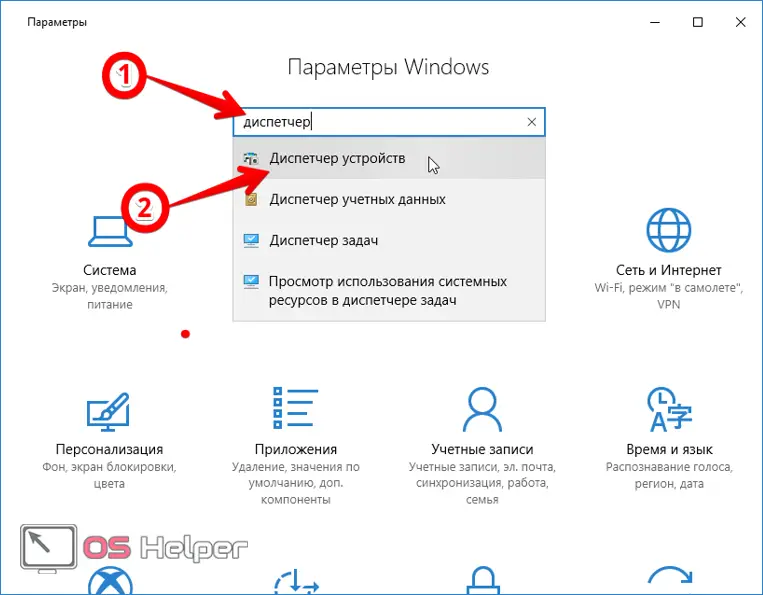
The second way to open the Settings window is through the Start menu. After clicking on the button with the Windows logo in the lower left corner, a list of applications will open. On the left is a column of 4 icons, in which you should activate the already familiar gear.
Next, in the "Parameters" window that opens, use the slider to scroll down the list. Here you need to launch "Privacy", after which a window with already familiar settings opens.
Camera buttons on various laptops
In many Asus, Acer, MSI, Samsung, Lenovo laptops, especially in older models, the design provides special buttons for turning on or switching video cameras. Usually they are located near the laptop start buttons. In Lenovo laptops, such camera controls may be located in the area of \u200b\u200bUSB ports. If the recorders on your laptop don't work, be sure to check these buttons.
Another way to control the camcorder is to use the function keys on the keyboard. You should carefully look through all the keys to find the one with the icon of the video device. On many laptops, you can enable or disable the camcorder using the combination [knopka]Fn[/knopka]+[knopka]V[/knopka]. In Lenovo laptops, the combination [knopka]Fn[/knopka]+ [knopka]F5[/knopka] or [knopka]Fn[/knopka]+[knopka]Esc[/knopka] is often responsible for this function. But in general, each laptop owner needs to individually look at their computer in order to find the required function keys.
Read also: JetFlash Recovery Tool for Windows 10 - free download
Checking the operation in the device manager
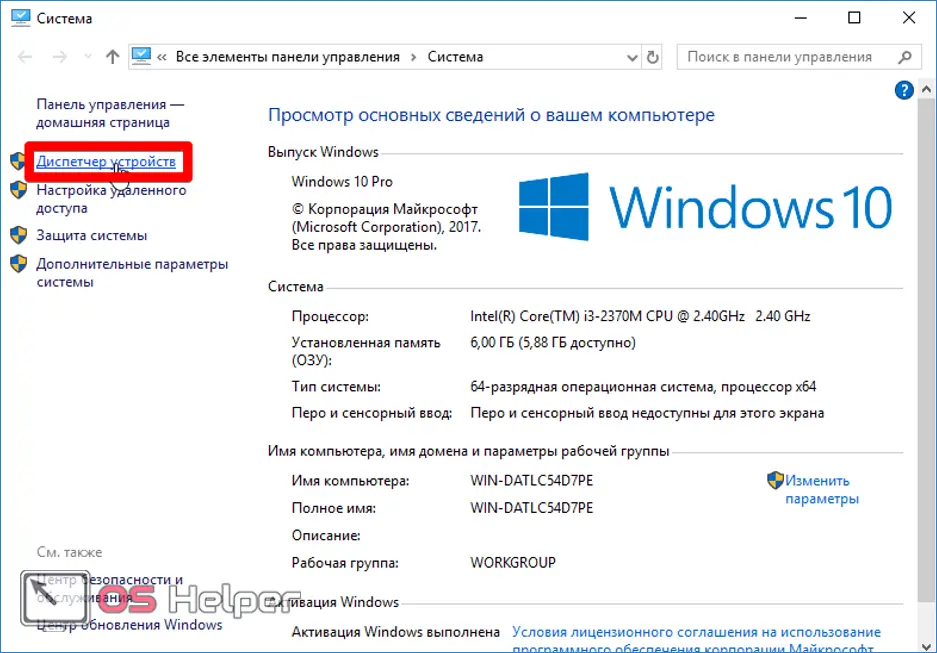
A common reason for a non-working camera is that the video device, although it is in the design of the computer, is disabled from working in the system. To check this assumption, you need to go to the "Device Manager". This can be done in several ways.
The first option is through the Start menu and the Settings window, as already done above. In the search bar, the query "device manager" is entered. Next, from the drop-down prompts, the desired one is selected, and a new window opens.
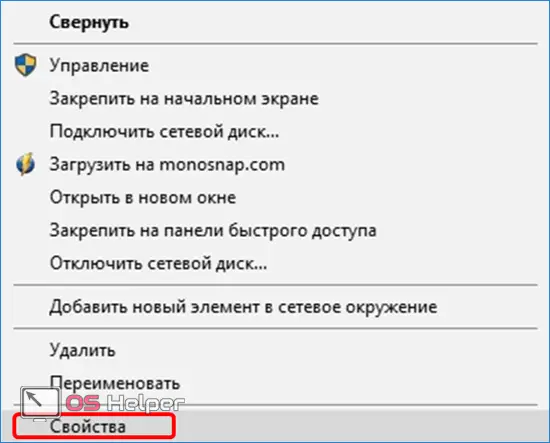
The second option is through "This computer". If there is a corresponding shortcut on the screen, move the cursor and press the right key. In another case, in an open explorer, right-click on "This PC". In the list that appears, select "Properties".
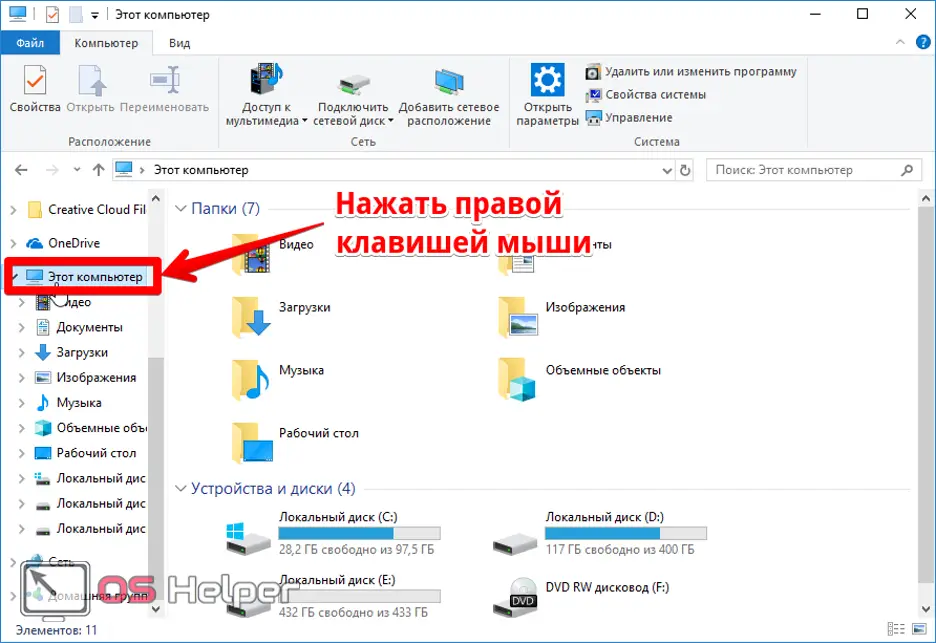
Next, the "System" window opens, where you should activate the "Device Manager" tab.
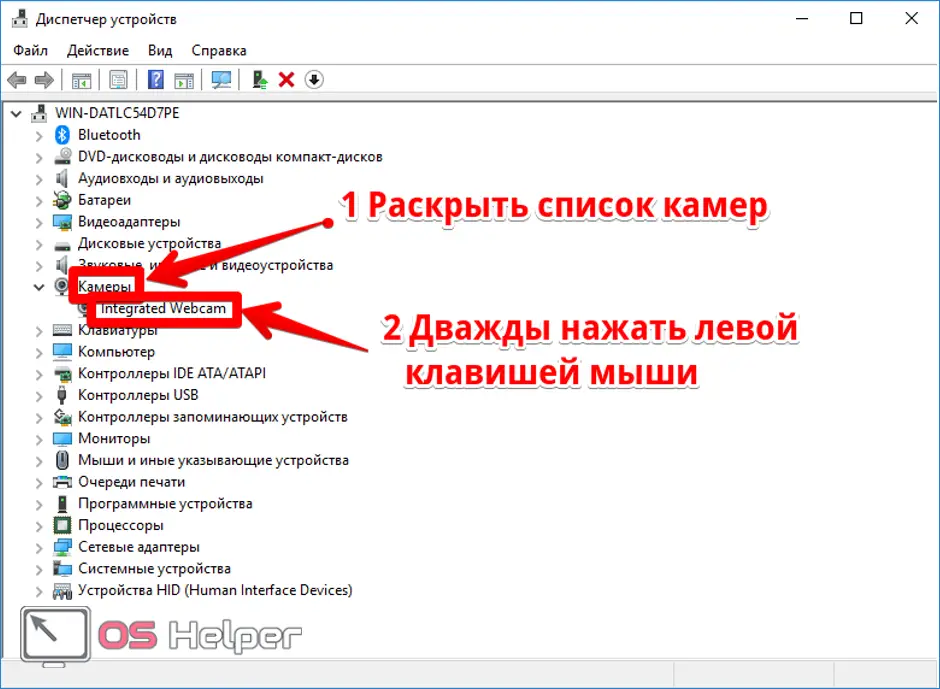
In the window that appears, the item "Cameras" is of interest. The name "Image Processing Device" may also be used. All camcorders used on the laptop are shown here. By double-clicking the left mouse button on the selected video camera, a window with properties will open.
In the "Driver" tab, the recording device can be either disabled or enabled.
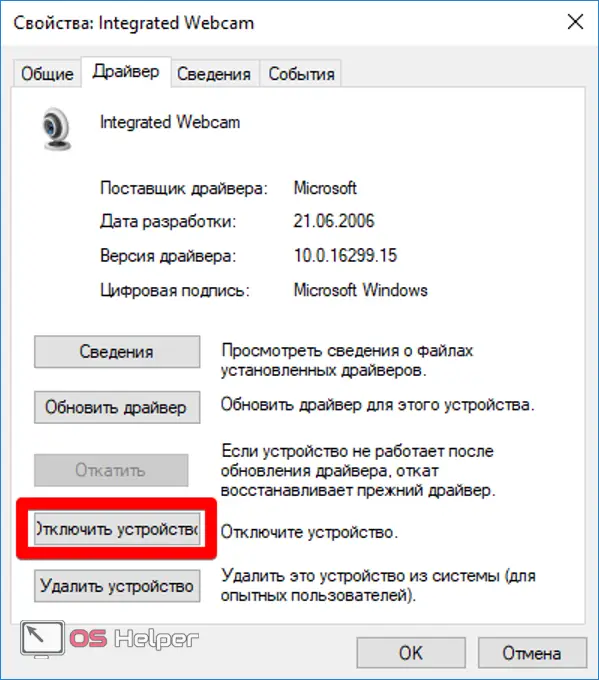
The camcorder may not work properly if the driver is not installed correctly. If this is the reason, then an unknown device may be indicated in the lists of devices for video recording. Also, the fact that there will be an exclamation mark next to the device may indicate a problem. In the properties, you can update the desired utility or roll back the results to the previous version if the driver does not work correctly after the update.
There are times when the driver fails to update automatically. Then you need to find and download it on the official website of the laptop manufacturer. You can also use Google or Yandex search engines to search for utilities on third-party resources.
Also Read: How To Disable Windows 10 Defender Permanently Or Temporarily
Video
For the most curious, we have a video in which what is written is duplicated.