How to open Device Manager in Windows 10: all methods
 Through this utility, the user can access information about connected components, configure drivers, diagnose hardware, etc. There are several ways in which you can open Device Manager in Windows 10. In addition to those that have switched to the new version of the OS from previous generations, new methods were added in the Ten. You can read about all of them below.
How to open device manager
To get all the information about the PC using a standard application, you can use one of the following methods:
- through the search bar;
- through the Start menu;
- through the "Properties" of the PC;
- through the "Control Panel";
- through the "Run" command;
- via command line.
The article also provides instructions for creating a shortcut for quick access. With it, you just need to click on the icon on the desktop to launch the manager. All methods presented in the instructions are fully suitable for OS Windows 10 x32-bit and x64-bit.
Using search
First, let's learn how to open the tool through the standard search bar:
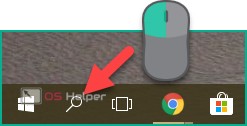
- Click LMB on the magnifying glass icon located on the Start panel.
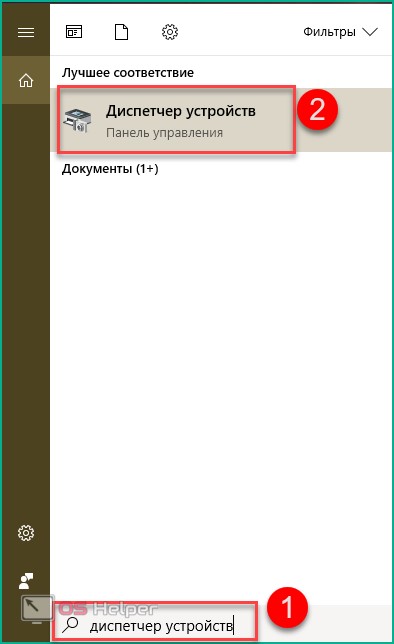
- In the search, enter "Device Manager" (1) and open the corresponding program in the search results (2).
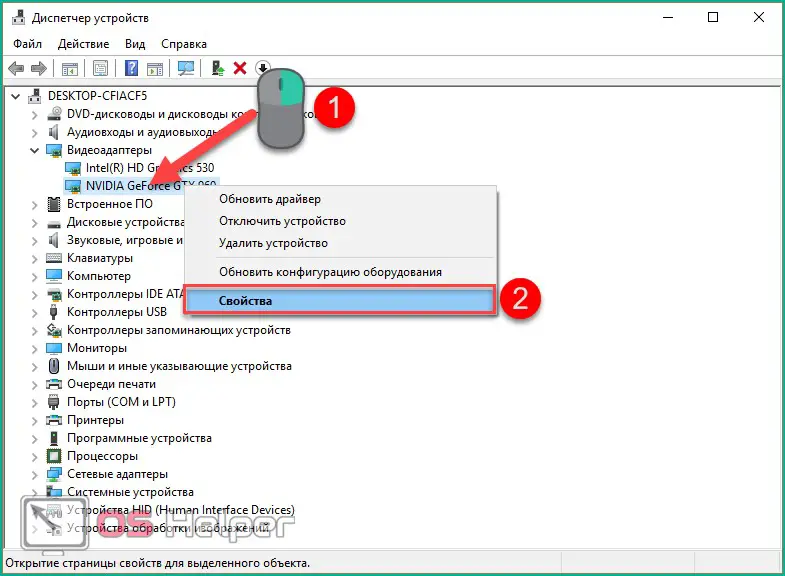
- In the main and only window of the application, you will see the entire list of connected equipment and their current status. You have the opportunity to view the properties of each of the elements. To do this, right-click on a specific position and go to "Properties" in the menu.
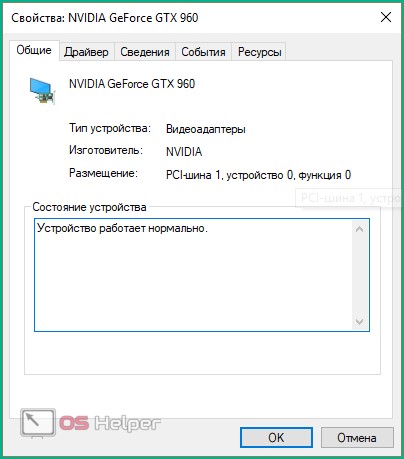
- In the properties you will find general information, data about the driver and everything related to the performance of the hardware.
Read also: Free download calculator for desktop for Windows 10
Using the Start Menu
Now let's try to open the tool using the Start button. For this:
- Right-click on the "Start" icon. Select "Device Manager" from the menu.
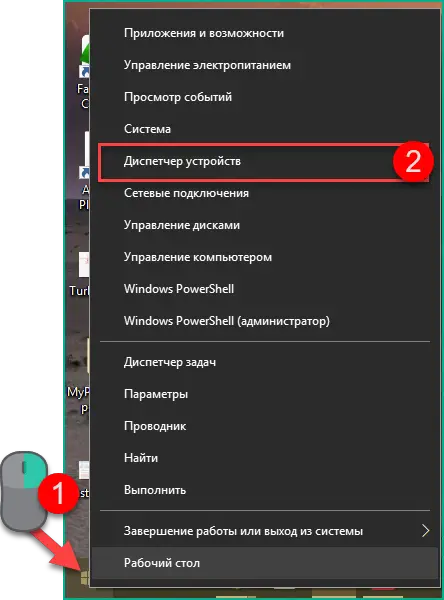
Easy and convenient way to get started. In the event that you cannot open a program on a computer using this method, use four more.
Through "Properties"
For this method, we need the "This PC" icon on the desktop:
- Right-click on it and select "Properties" from the menu.
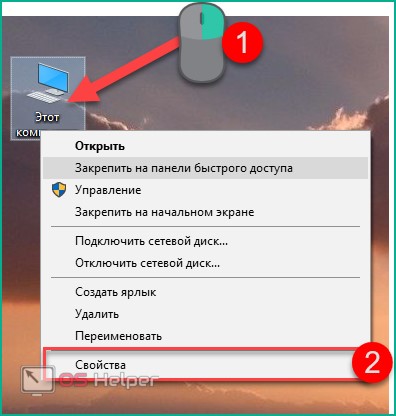
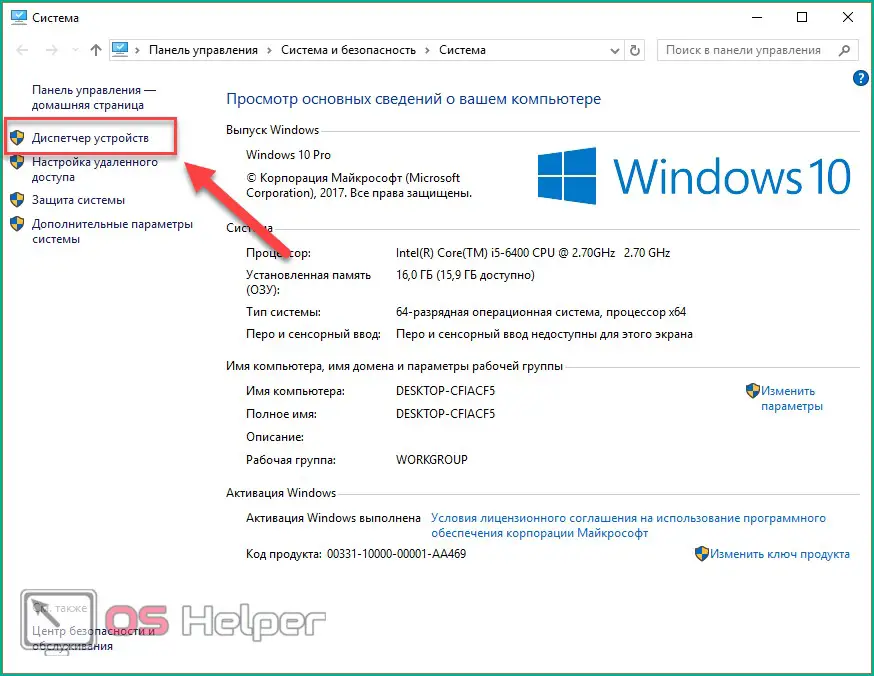
- You will see system and PC information. In the left column, click on "Device Manager".
Using the "Control Panel"
Another alternative is the section in the "Control Panel". You can open it through the search bar:
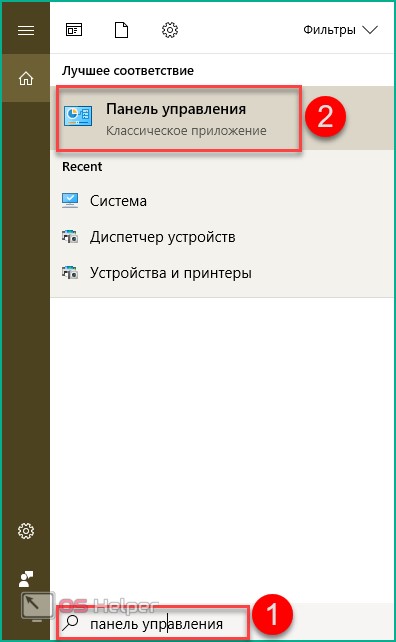
Then follow the instructions:
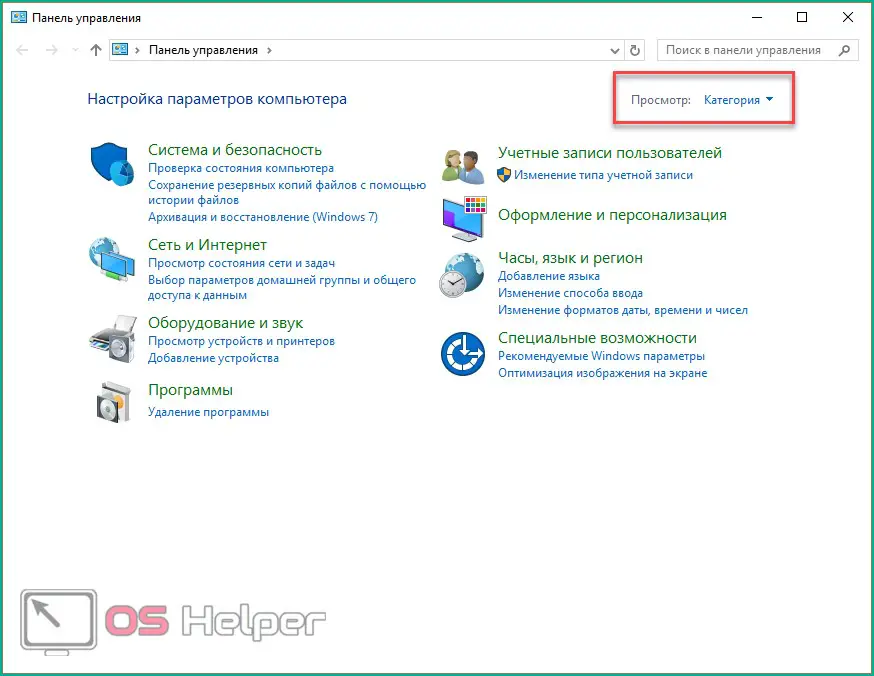
- Change the view type to "Category".
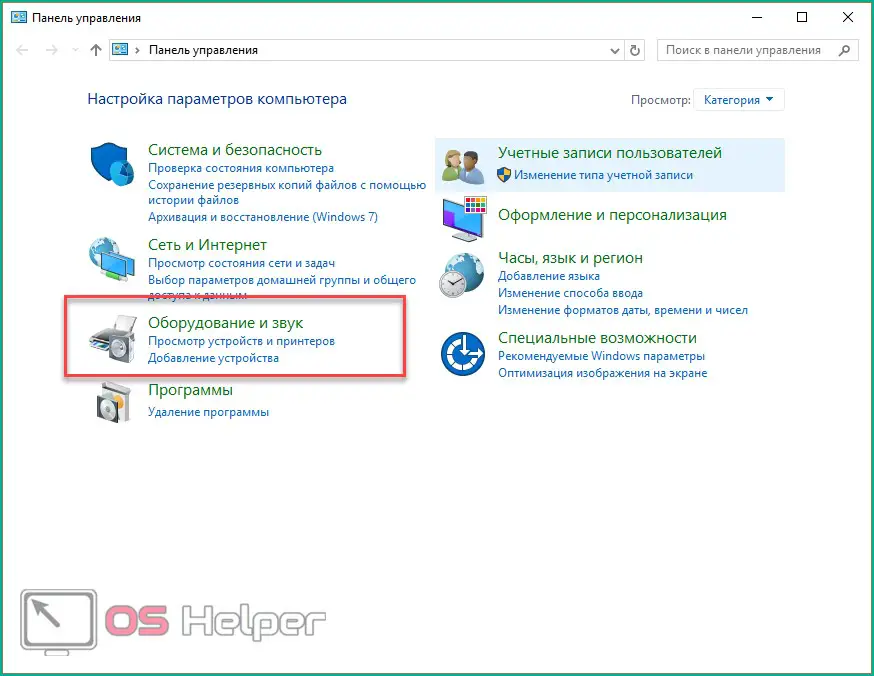
- Select the "Hardware and Sound" section.
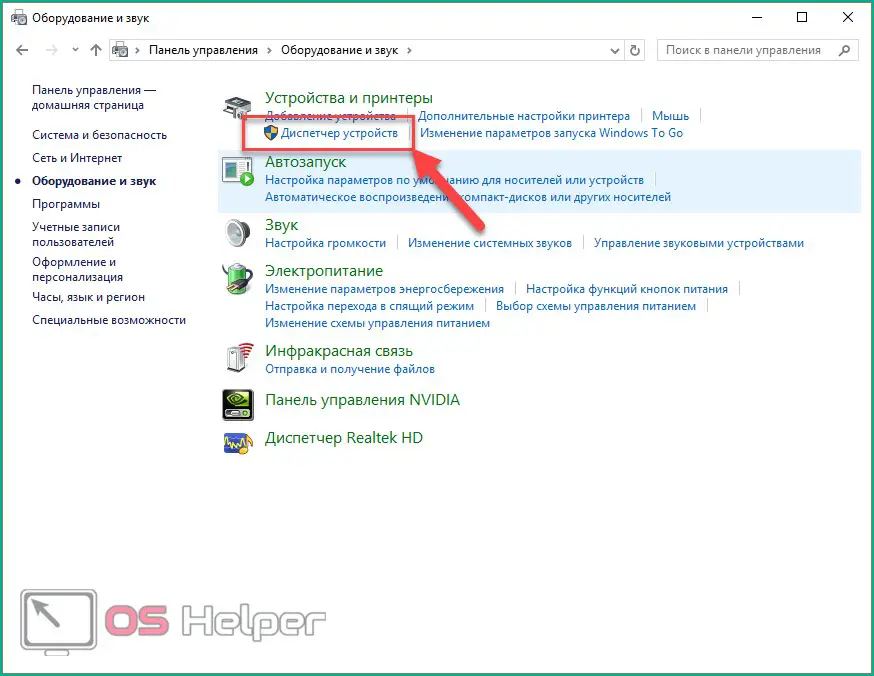
- In the "Devices and Printers" subsection, click on "Device Manager".
Open with command
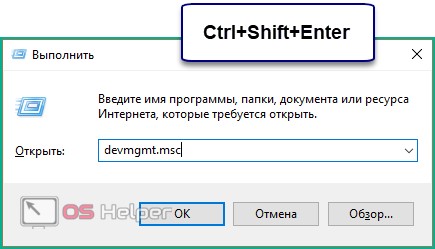
To launch the Run program on a PC, you need to hold down [knopka]Win[/knopka] + [knopka]R[/knopka] on the keyboard:
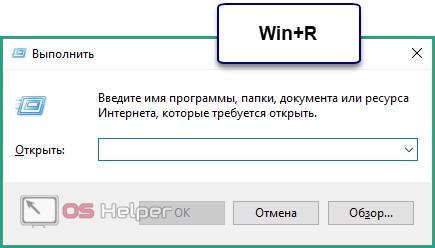
In addition to the fact that the program is launched by keys, it can be found by searching for the corresponding name:

After starting, you must enter the command "devmgmt.msc" and press [knopka]Ctrl[/knopka]+ [knopka]Shift[/knopka]+ [knopka]Enter[/knopka] to run with administrator rights.
Command line
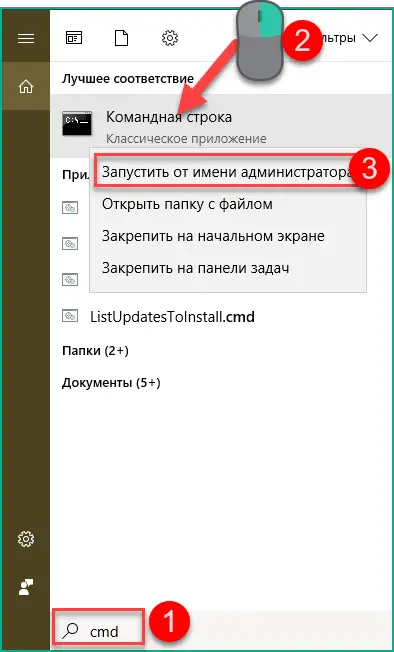
You can enable the "Device Manager" on the PC through the command line as follows:
- In the search window, write "cmd" or "command prompt" (1), right-click on the search result and run the application with administrator rights (3).
- Enter the command "devmgmt.msc" press [knopka]Enter[/knopka].
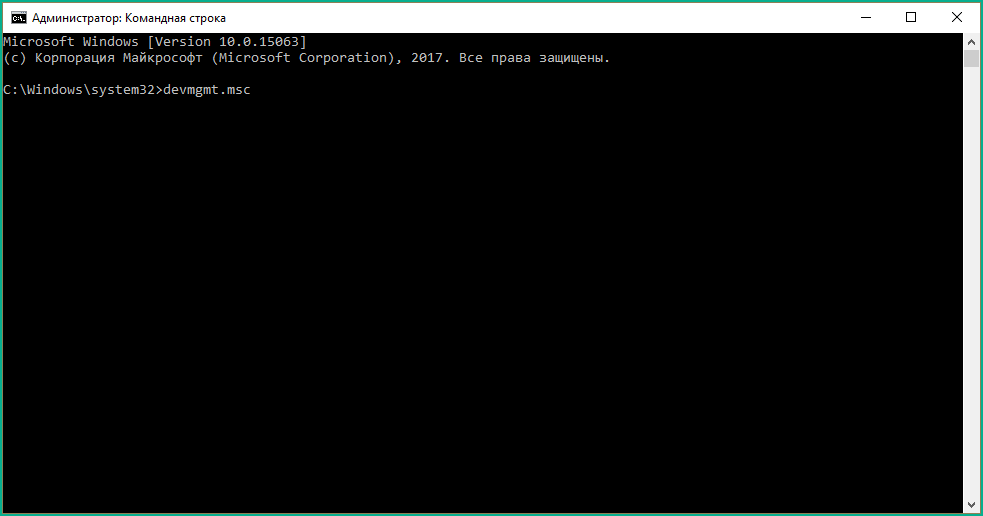
- After that, the "Device Manager" will appear on the screen.
Another method
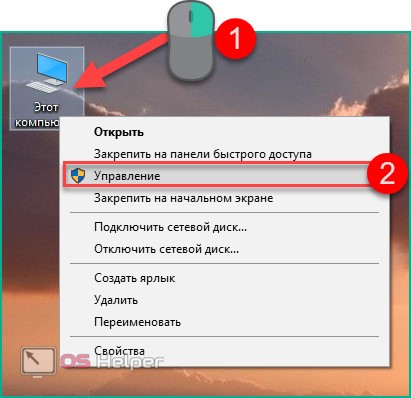
Consider the last method that will allow you to view information about the components of a laptop or PC. To do this, you need to be in "Computer Management". You can call the program in the following ways:
- By right-clicking on the "This PC" shortcut, open the list and select "Manage".
See also: How to install DirectX 9 on a PC or laptop with Windows 10
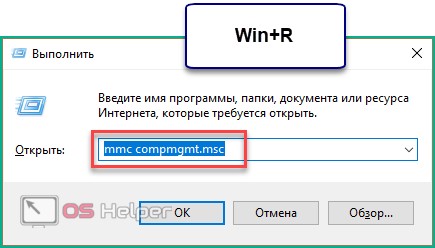
- Open the Run window and type "mmc compmgmt.msc" and press [knopka]Enter[/knopka] to run.
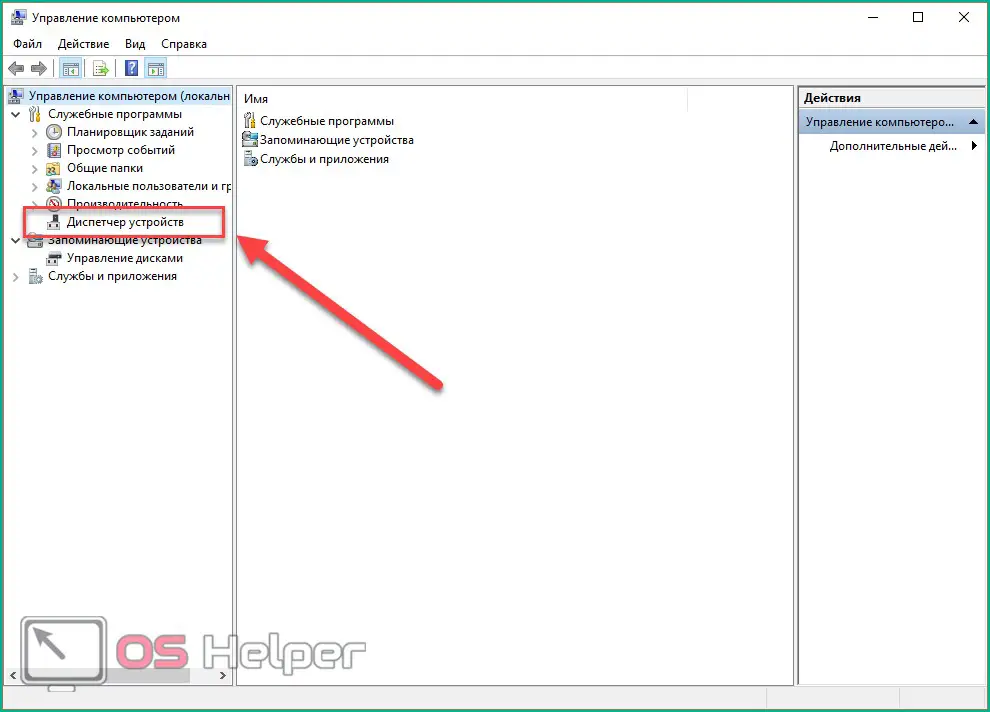
- In the Computer Management application, click on the Device Manager section.
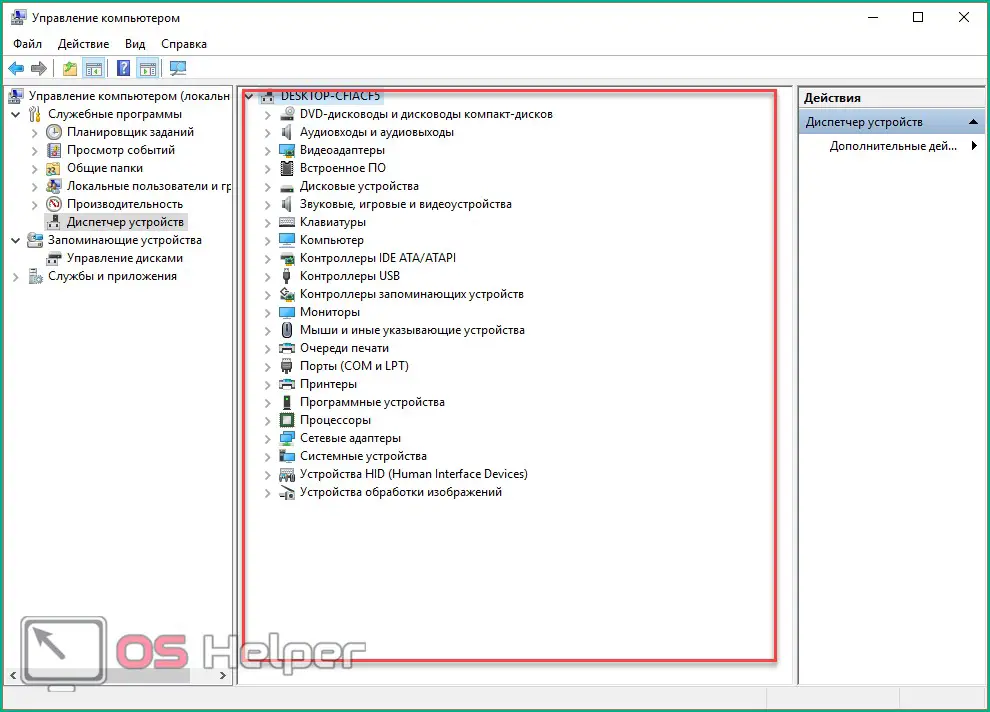
- On the right side you will see a list of all equipment.
The operating system from Microsoft offers many options for downloading standard applications.
Create a shortcut
To ensure that it does not take you long to turn it on, you can create a shortcut and place it on your desktop. It is done like this:
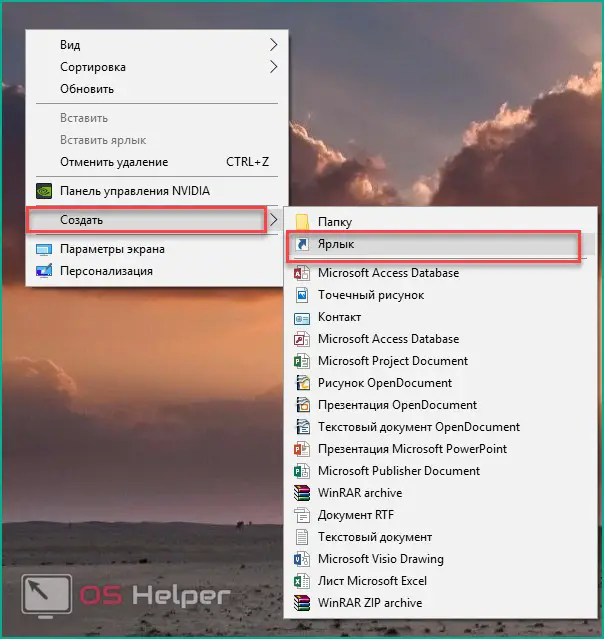
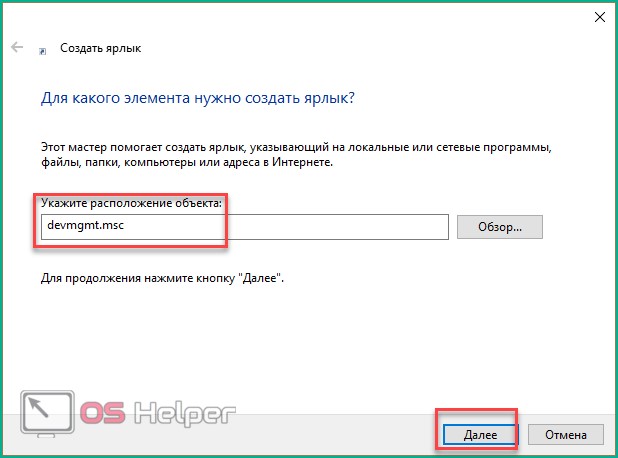
- Right-click on an empty space on your desktop and click on "New" - "Shortcut".
- In the wizard for creating shortcuts, specify the object devmgmt.msc and click "Next".
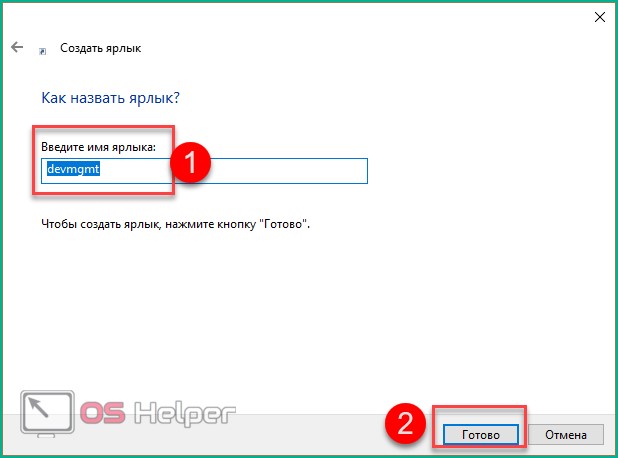
- Specify any name (1) and click on "Finish" (2).
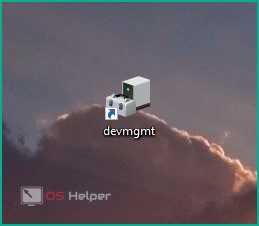
- Launch the utility by double clicking on the icon. After creating a desktop icon, restarting the PC is not required.
Brief description of the functionality
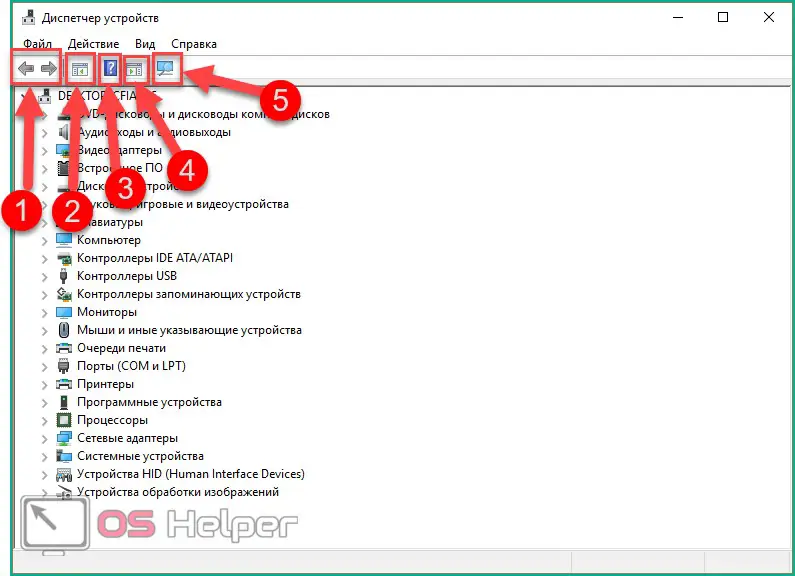
If you are unfamiliar with the functionality of the utility, then read the description:
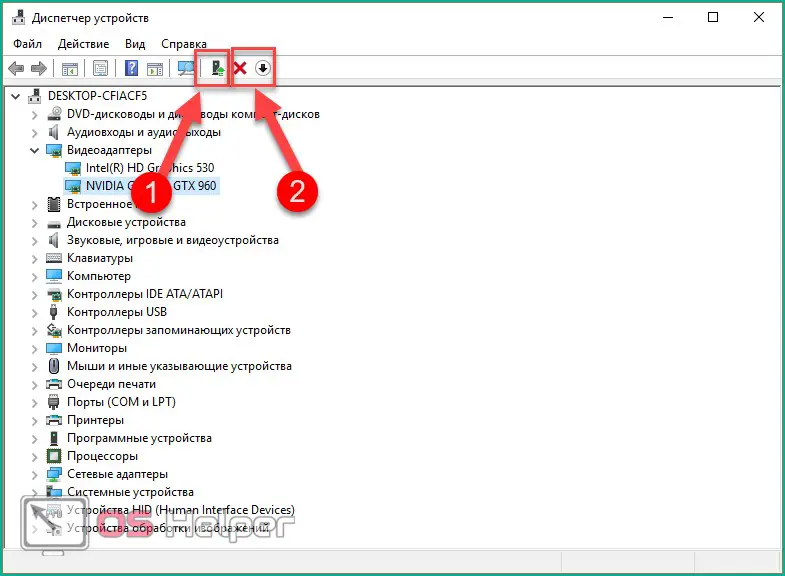
- in the top panel there are buttons for moving between sections (1), a button for displaying the console tree (2), showing the properties of the selected equipment (3), going to help (4), displaying the action panel (5) and a button for updating the configuration (6).
- when one of the items is highlighted, additional keys appear - driver update (1) and hardware removal (2).
Alternative software
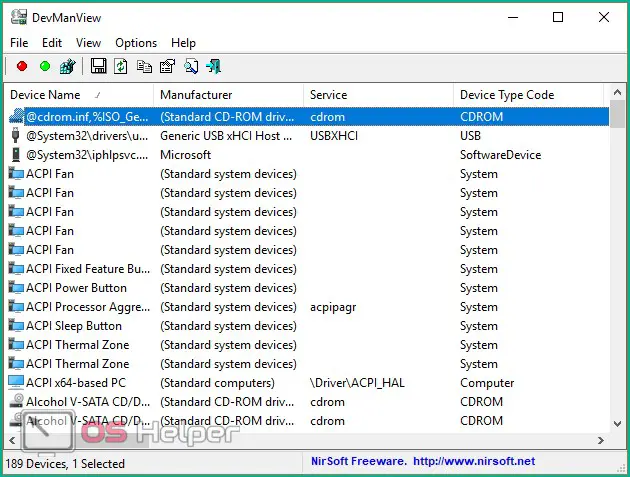
In addition to the standard utility from Microsoft, you can use third-party software. One such application is DevManView, which displays a list of all connected hardware. A small program completely repeats the functionality of the standard utility in Windows 10:
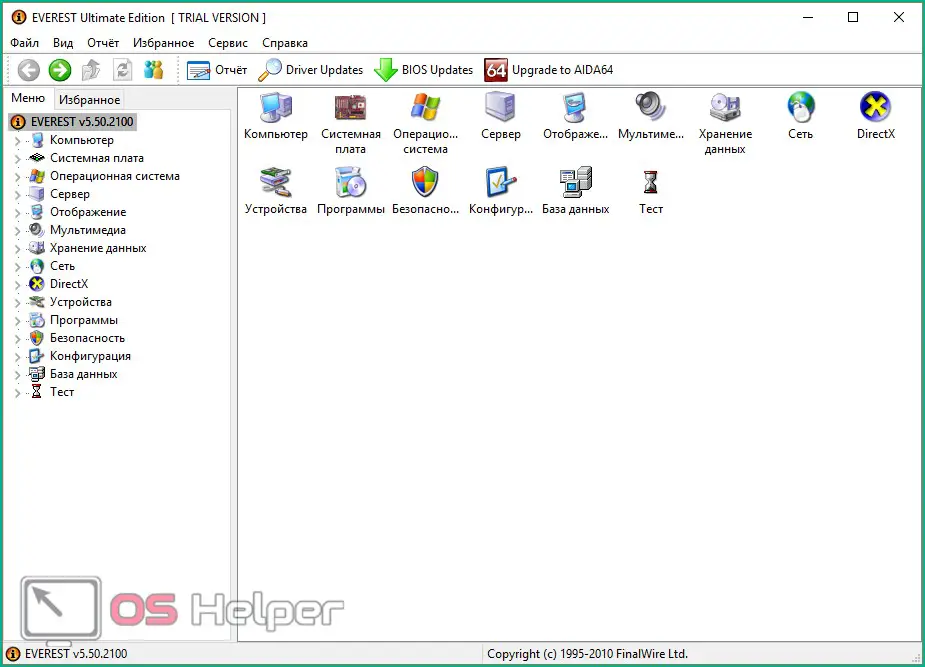
If the functionality of the standard utility is simply not enough for you, use the AIDA64 or Everest software. With their help, you will not only find a list of all connected equipment, but also find out the current status (temperature, voltage), be able to diagnose PC components, and so on.
Results
The developers of the operating system have provided the ability to launch the "Device Manager" in various ways. If your version of Windows 10 for some reason refuses to run the built-in utility, then you can replace it with a third-party application.
Also Read: How To Change Windows 10 Startup Sound?
Video
For clarity of the instructions presented, be sure to check out the video with a detailed description of all actions and steps.