How to completely remove McAfee from Windows 10: instructions
 Often, software vendors offer to install other related products during installation. And it often happens that the user does not pay attention to such software, but only later notices it on the computer. McAfee antivirus can be one such application, and many users have a question about how to completely remove it from Windows 10.
McAfee is a very common antivirus. What is its use? The fact that it is an extremely useful and simple program that can qualitatively protect a PC from threats. In addition, the software has good reviews. However, many users still do not need it for various reasons. For example, another licensed antivirus may already be installed on the computer. In this case, it becomes necessary to remove it, but deleting it in a standard way will not help in this case, since the software leaves its traces throughout the system, including in the registry.
Manual removal
Let's clarify right away that there are several versions of the product - AntiVirus Plus, Internet Security, Total Protection and McAfee LiveSafe.
Uninstallation of any of these versions is carried out by similar methods on an OS of any bit depth, be it x32 Bit or x64 Bit.
The surest way would be to completely remove the antivirus and its accompanying data manually. The sequence of actions in this case can be represented as follows:
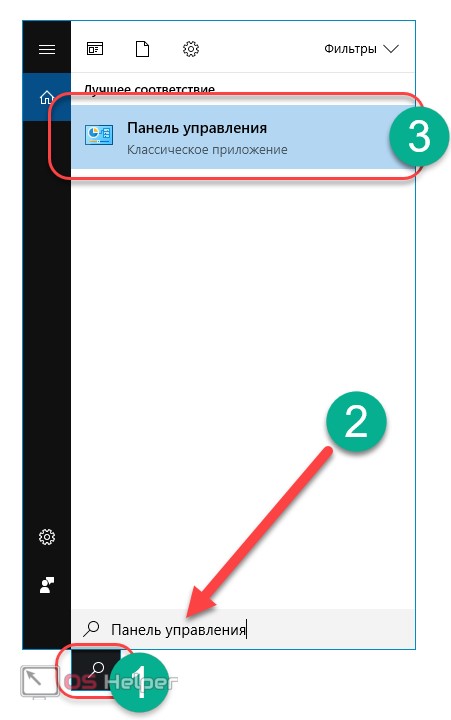
- Get rid of the antivirus itself. To do this, you need to go to the control panel. You can do this by clicking on the search icon located next to the Start menu and entering the appropriate query.
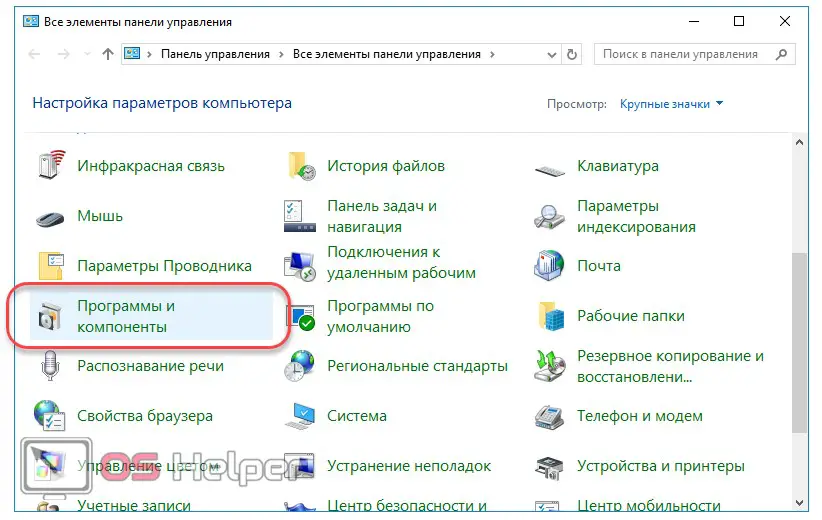
- Go to the "Programs and Features" section in the control panel that opens.
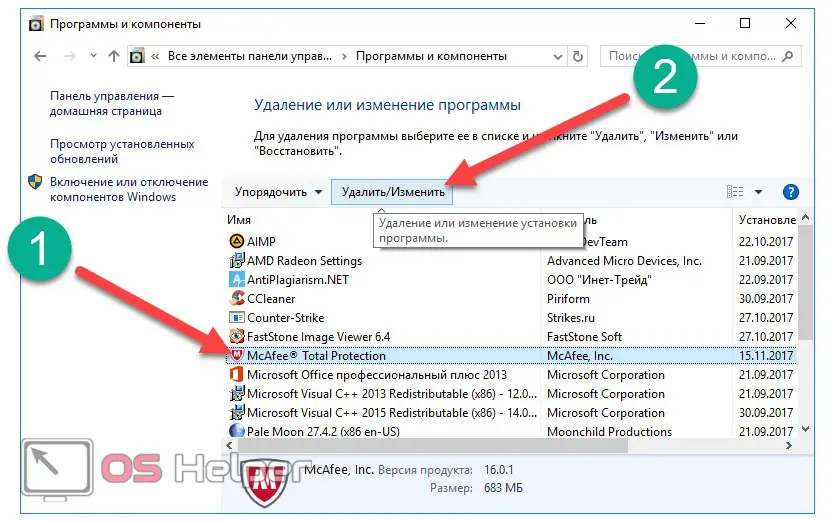
- We find McAfee Security Scan Plus or a similar name in the list of installed programs, click on it and click on the "Uninstall / Change" button. We do the same with the McAfee WebAdvisor program, if it is present in this list.
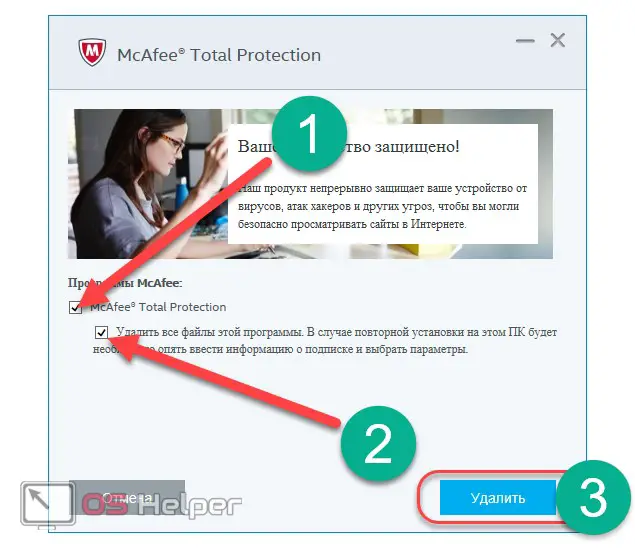
- We activate both proposed items and click on the "Delete" button, and at the end of the process we restart the PC. The program will be removed from the computer, but this will not end there.
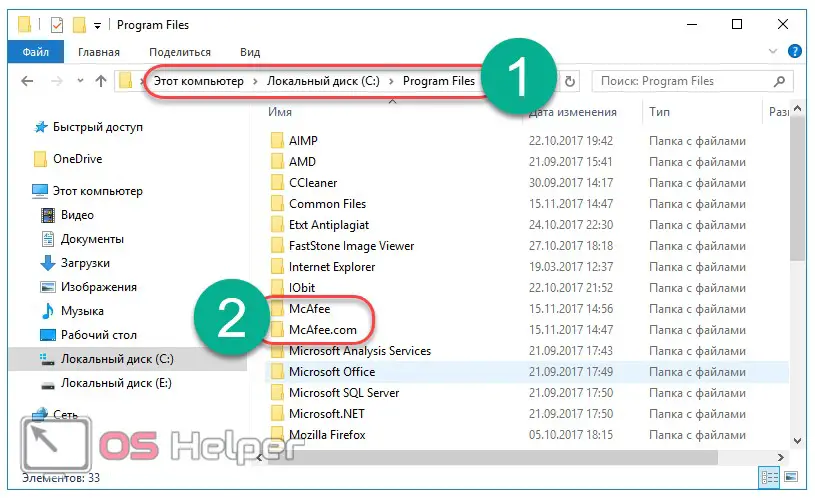
- We destroy the remaining files. To do this, go to the partition on the hard drive on which the antivirus was installed. By default, all programs are installed on the system drive "C:" in the "Program Files" folder, so we are looking for McAfee here. The user should see two folders.
Read also: How to increase or decrease the brightness on a Windows 10 PC
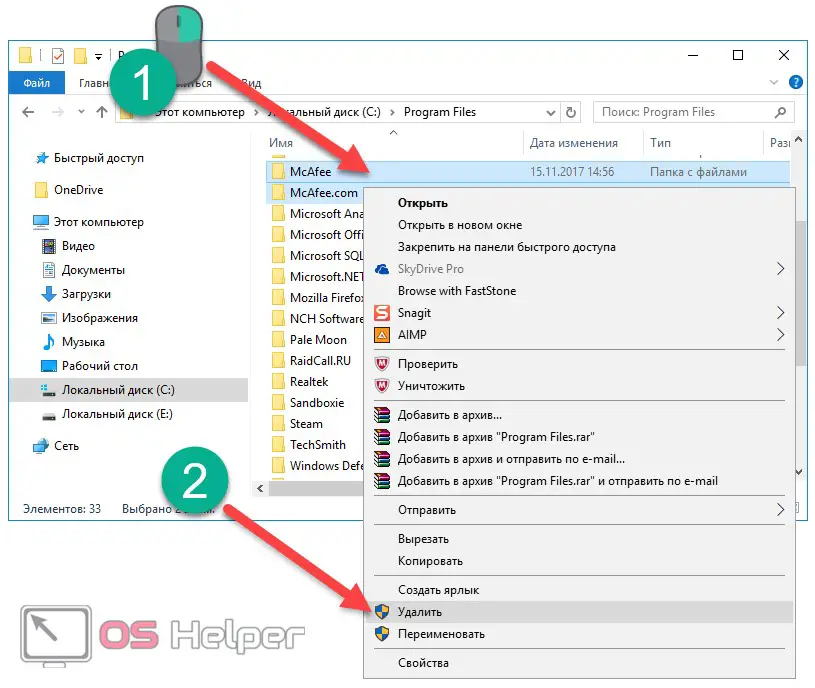
- We delete them: select, right-click, and then click on the "Delete" line.
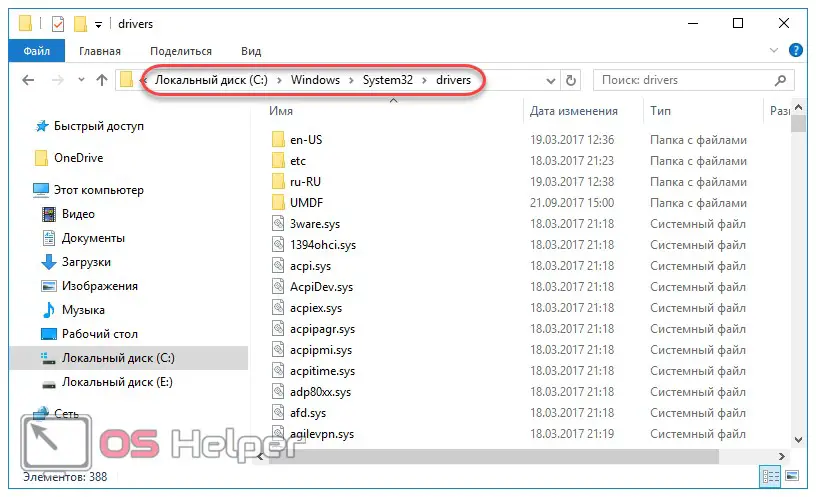
- But this is not the end of the process. You need to uninstall the drivers. To do this, open the “Windows” folder on the system drive “C:”, and then go to the “System32” section and then to the “Drivers” folder.
- We find and remove the following list of drivers using the standard method:
- mfeapfk;
- mfeavfk;
- mfebopk;
- mfeclnk;
- mfehidk;
- mferkdet;
- mfewfpk.
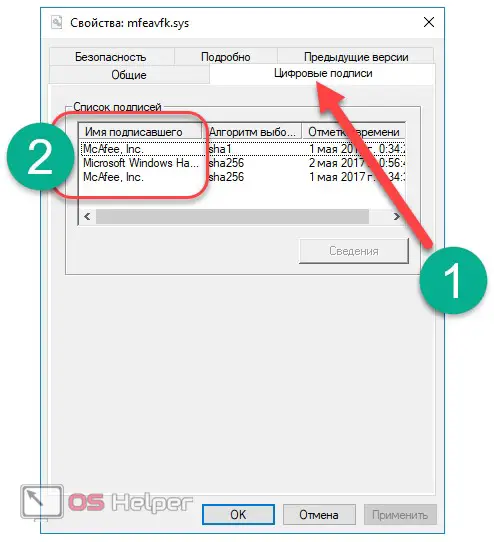
If for some reason there is no certainty that the driver being removed is associated with Macafi, you can right-click on it and go to the "Properties" item.
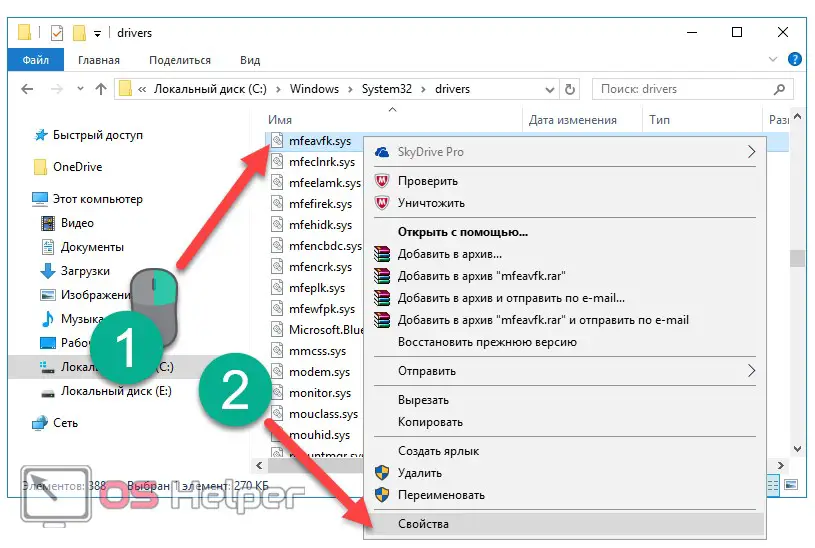
In the "Digital Signatures" section, look at the name of the signer. If McAfee appears in the name, the driver can be safely removed.
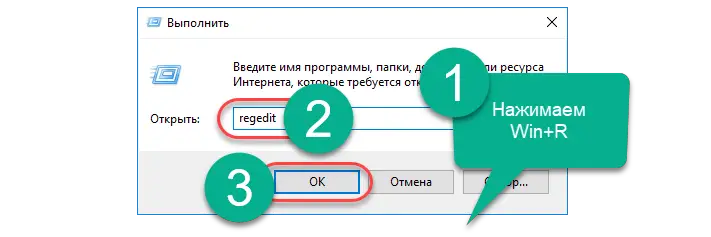
- After removing all of the above drivers, we proceed to cleaning the registry. To open it, enter the key combination [knopka]Win[/knopka]+[knopka]R[/knopka] on the keyboard and enter the command "regedit". Press "OK" or [knopka]Enter[/knopka].
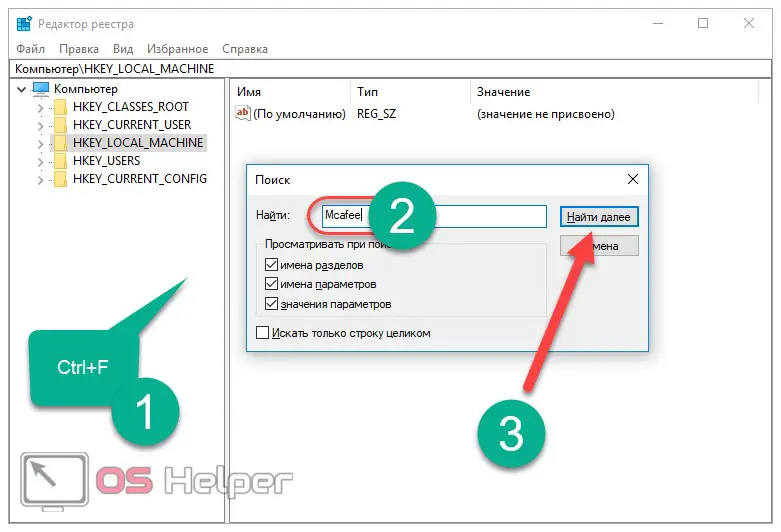
- In the registry editor that opens, press the combination [knopka]Ctrl[/knopka]+[knopka]F[/knopka] and enter McAfee in the search field, then click on "Find next".
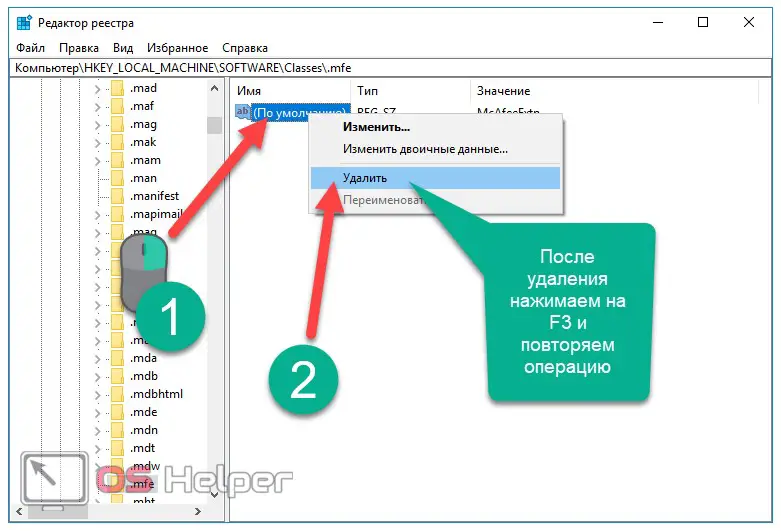
- We make a right click on the found entry and click on "Delete", after which we press [knopka]F3[/knopka] and continue to delete entries until they run out.
You can also clean the registry after removing the antivirus using automated tools, for example, the CCleaner program.
Just open this utility, go to the "Registry" item and click on "Search for problems", and after the search is completed, click on "Fix All".
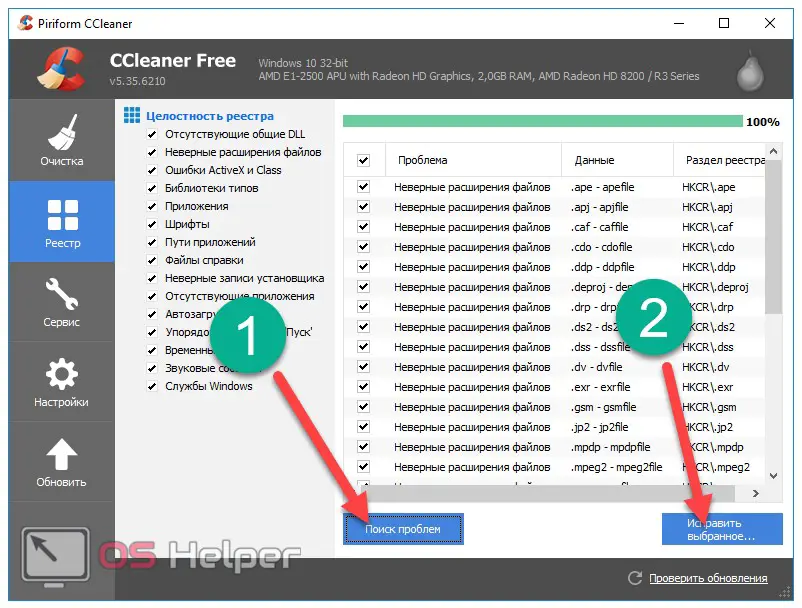
This completes the manual removal procedure. As you can see, this method is quite labor-intensive and requires a lot of time from the user. For those who do not want to uninstall components manually, a separate utility has been developed, which we will consider further.
Using MCPR
McAfee Consumer Product Removal Tool is a standalone McAfee removal program created exclusively for this purpose. The utility does not require installation, so just download it. The next steps look like this:
- After downloading, open the executable file MCPR.exe.
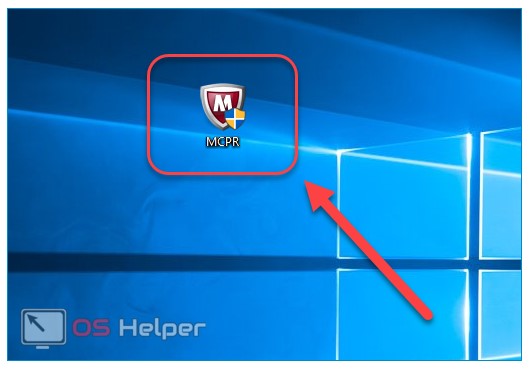
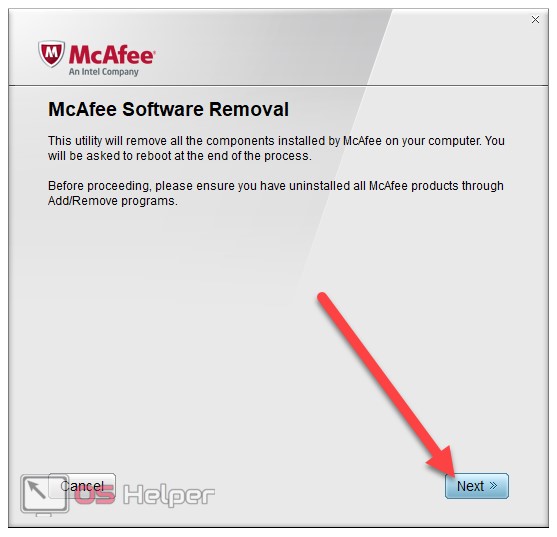
- In the uninstaller window that opens, click on the "Next" button.
See also: How to put a password on a folder on a Windows 10 computer
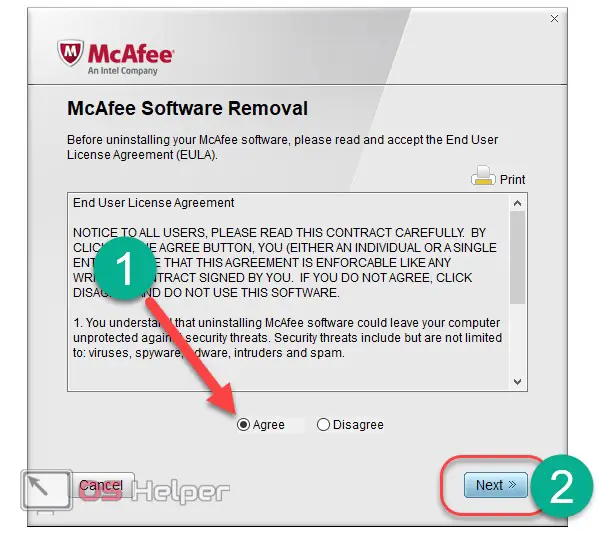
- Activate the “Agree” item and click on “Next” again.
- Enter the proposed captcha in the window provided for it and click on “Next” for the last time. The removal of all components will begin, after which it remains only to restart the computer or laptop.
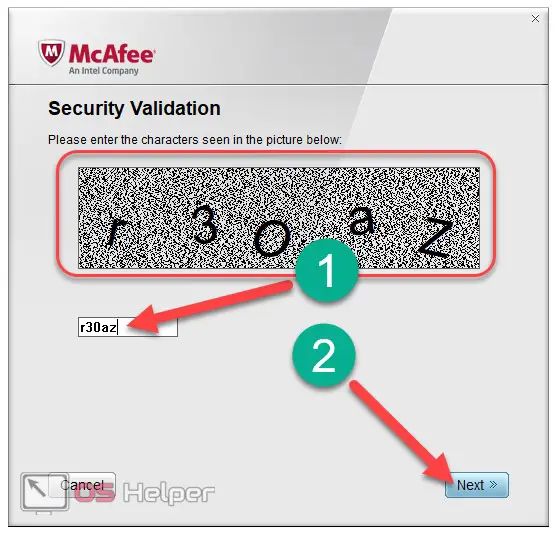
The MCPR Removal Tool is the simplest tool suitable for any user. However, we will analyze the last, alternative method - the use of various third-party utilities.
Revo Uninstaller
We will be using Revo Uninstaller, but other similar programs can do the job successfully. Such solutions are good because they remove not only the antivirus itself, but also all residual files and data.
In this method, everything is as simple as possible:
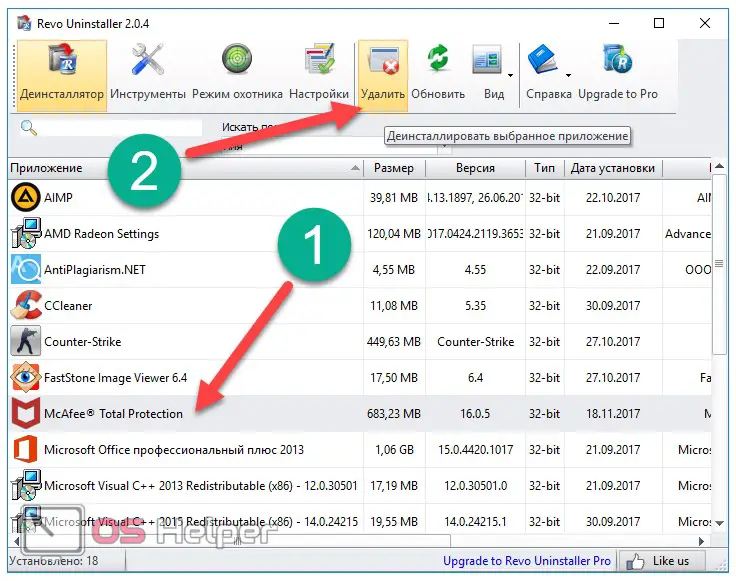
- We open the program (you can download it through the official website), find McAfee in the provided list, click on it and click on "Delete".
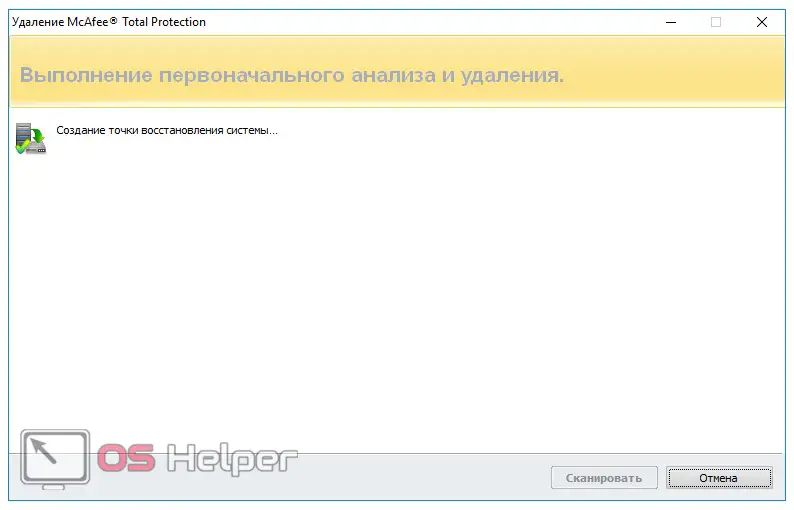
- We are waiting for the end of the process of creating a restore point, with which the system can be returned to working condition.
- We remove the antivirus through the standard uninstaller, which will open automatically. To do this, activate both proposed items and click on "Delete".
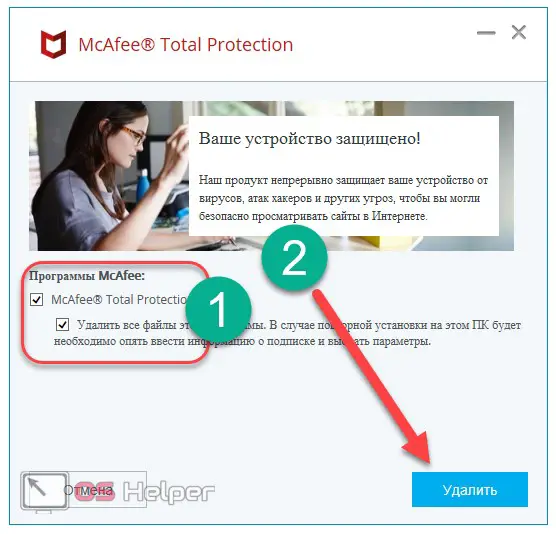
- Click on "Delete" again.
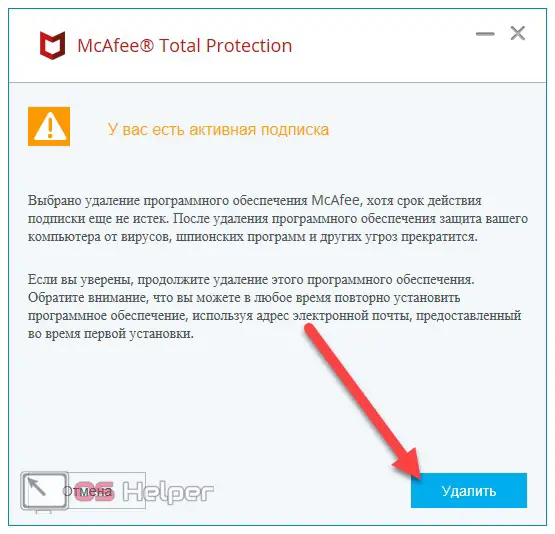
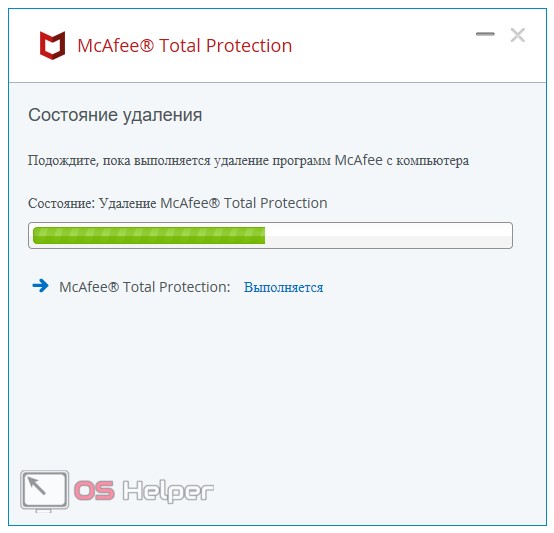
- We are waiting for the end of the process.
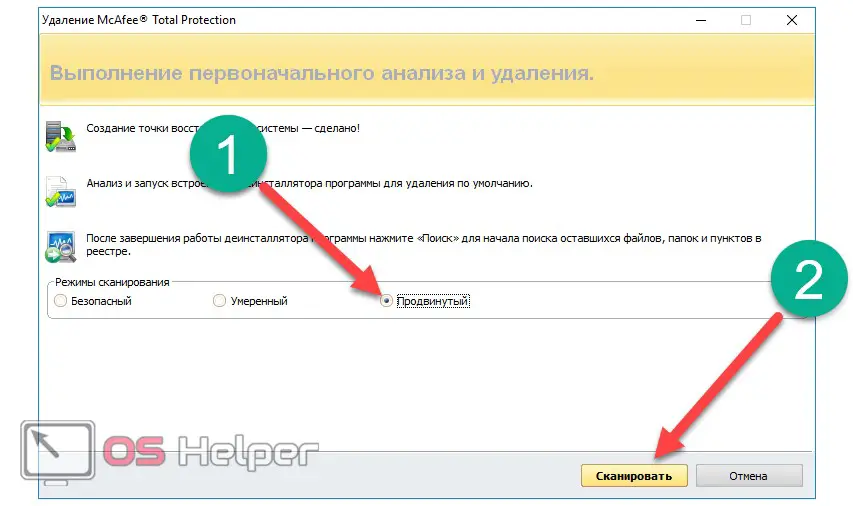
- After the removal is completed, select the advanced mode and click on "Scan". The button will not be active until the antivirus is removed.
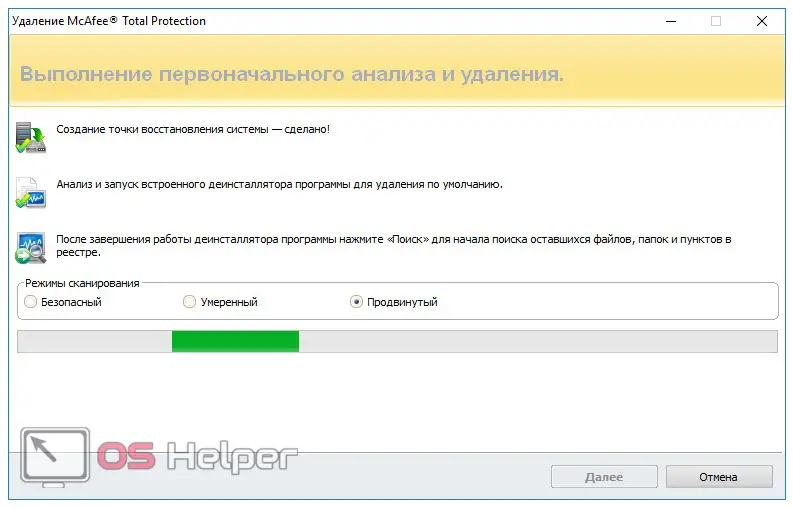
- We are waiting for the end of the scanning process.
- A list of McAfee-related registry entries will be generated. To clean the registry, click "Select All", and then "Delete".
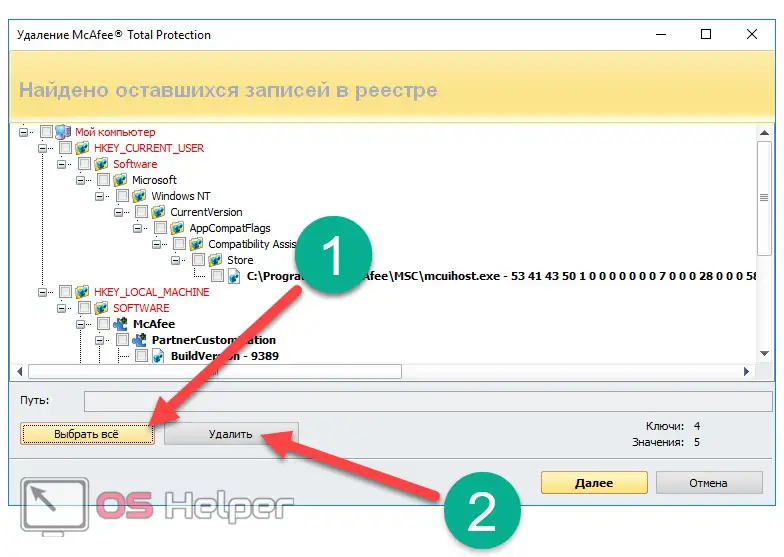
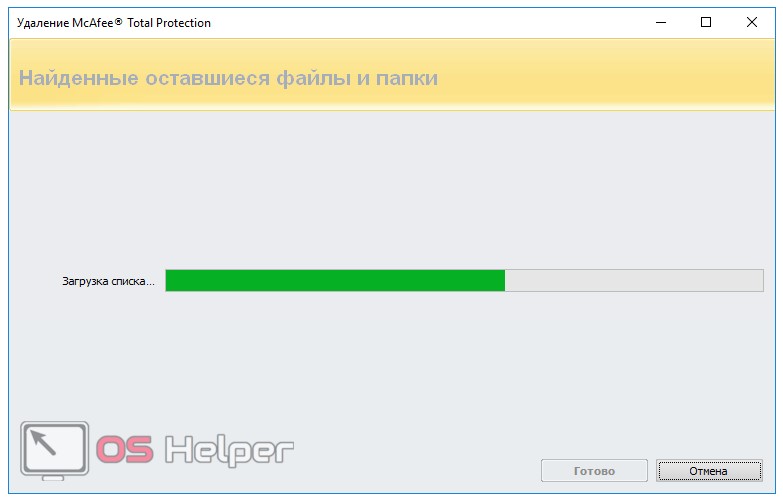
- After deleting entries in the registry, the formation of a list of remaining files will automatically begin.
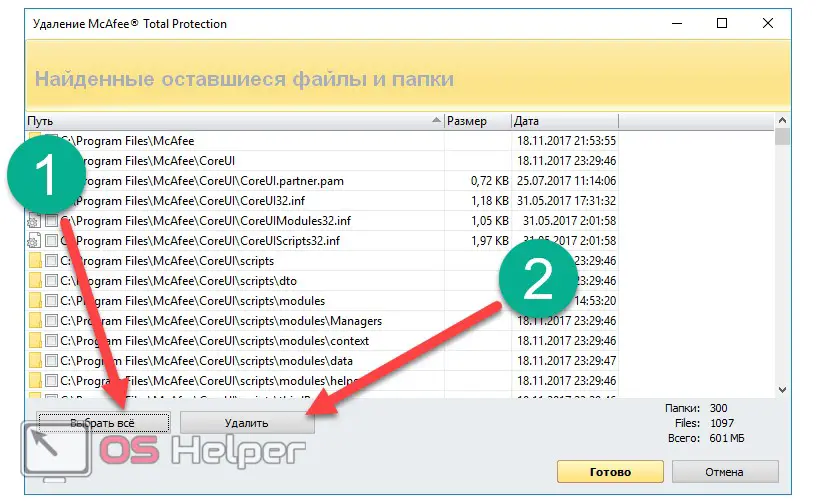
- Again, click on "Select All" and "Delete". All accompanying residual files will be automatically deleted.
Some objects will remain, but the utility will immediately notify you that they will be deleted the next time you start the OS (in our case, only 8 files remained). We click "Finish".
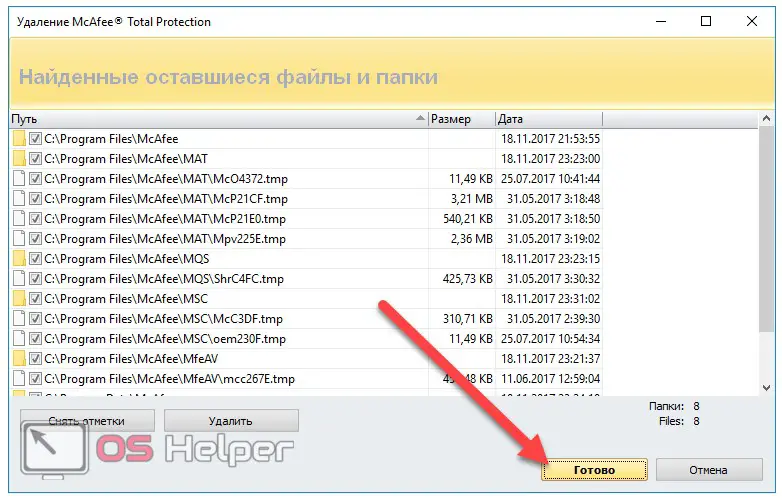
The antivirus product is completely removed from the computer.
In some cases, the user is happy with the functioning of the antivirus, but wants to remove it because he quarantined the necessary files or does not allow any program to install correctly. In such cases, it is not necessary to resort to extreme measures.
Restoring files from quarantine
If the necessary trusted files are quarantined, it is enough to simply restore them. Let's see how it's done:
- Open the antivirus, click on the settings icon and select the "Items in Quarantine" item.
See also: How to enable all cores on Windows 10

- Select the desired object, click on it and click on the "Restore" button. In our case, no files were quarantined.
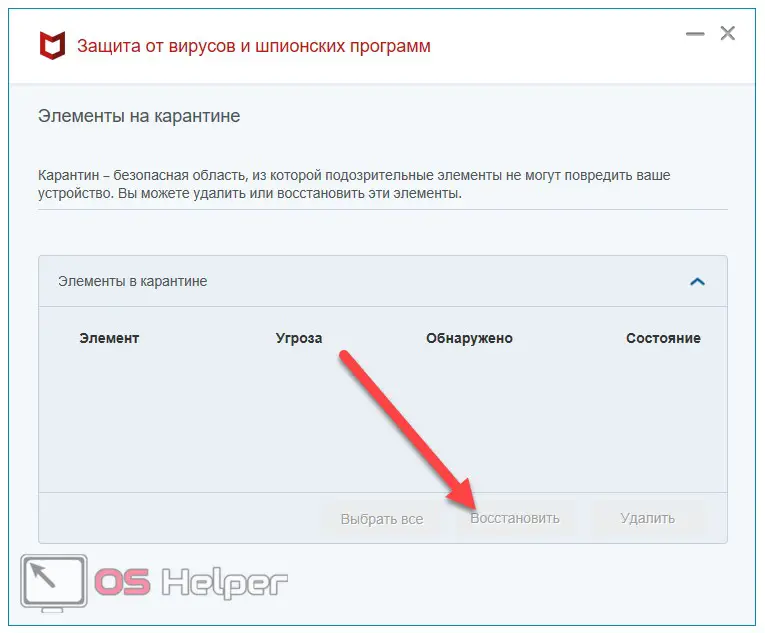
- Close the window and check the required file. Now it should be available.
If the antivirus interferes with the installation of any software or, for example, a game, you can simply disable it for a certain time.
Shutdown
Let's figure out how to turn it off for a while. In this case, everything is quite simple:
- Open McAfee, go to the "PC Protection" tab and click on the "Real-time Scan" item.
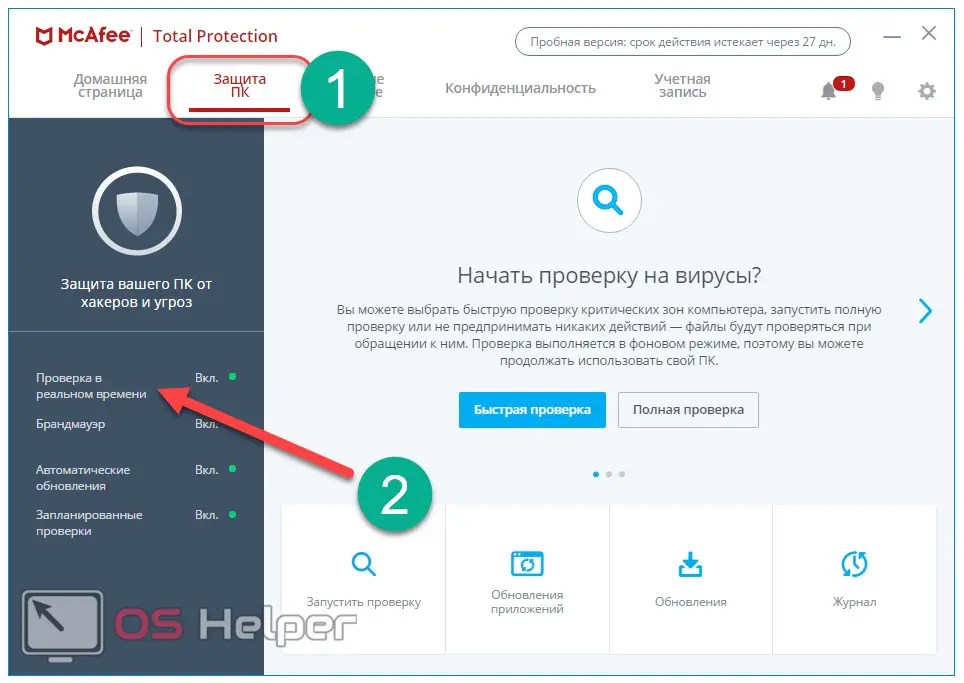
- In the window that opens, click on the "Turn off" button.
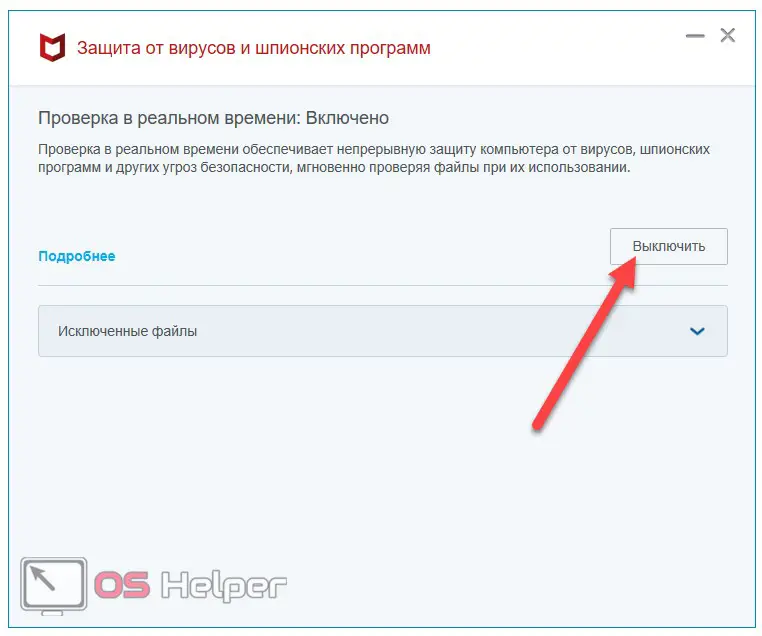
- We choose for how long to disable protection, and then click on "Turn off" again.
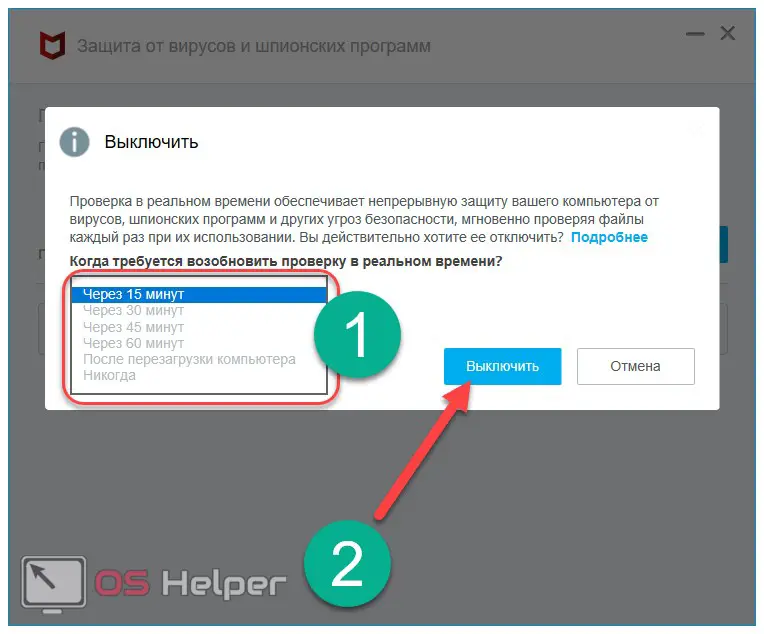
- Protection is disabled, which is also indicated by the corresponding indicator in the antivirus itself. Now you can install the desired application or game without unnecessary interference.
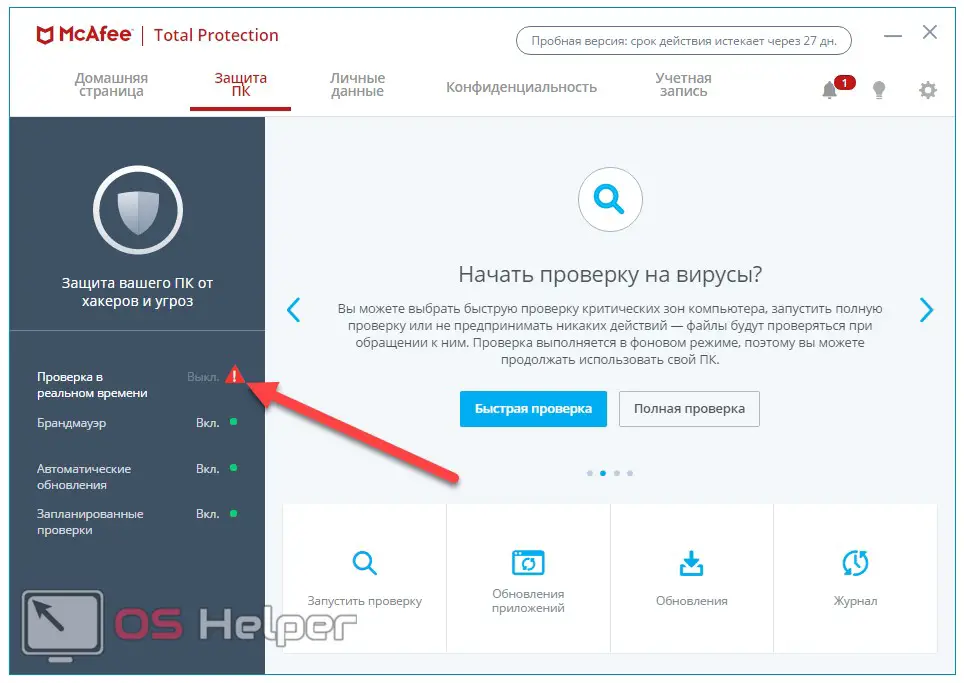
There may be situations when the antivirus needs to be disabled for a longer period of time. To do this, use the instructions below.
Disable McAfee services
If you need to disable the antivirus, but do not want to remove it, you can disable all the services responsible for its operation. To do this, you need to carry out the following sequence of actions:
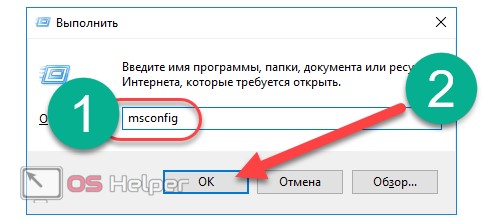
- Press [knopka]Win[/knopka]+[knopka]R[/knopka] on the keyboard and enter the “msconfig” command in the window that opens. Click on [knopka]Enter[/knopka] or "OK".
- Go to the "Services" section, find the services that have McAfee in the name, and uncheck the boxes next to them. Click "OK".
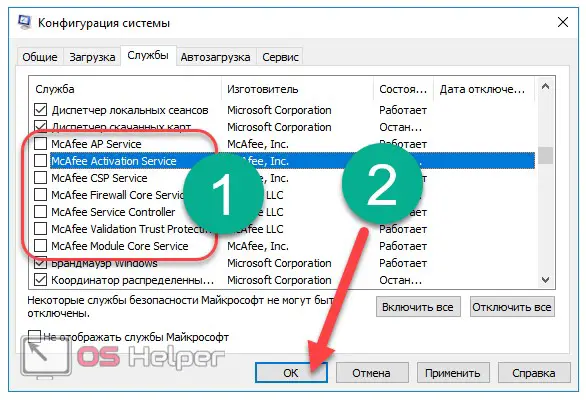
- The anti-virus is disabled, and to activate it, you must enable the services corresponding to it.
On this consideration of the process of work and removal, you can complete and move on to some conclusions.
Results
We examined in as much detail as possible all the methods of removal, as well as methods for temporarily disabling the defender. As you can see, there are a lot of options - from manual removal to the use of specialized utilities.
Antivirus is not a simple program that cannot be removed by all known standard methods. You should not immediately resort to the uninstallation procedure, because it qualitatively protects the computer from various software threats and effectively protects the user while using the Internet. A clear indication for removal will be a replacement for McAfee already installed on the computer - any other antivirus product.
Video instruction
For greater clarity, we attach a detailed video instruction that explains the process of carrying out all the above operations.