How to remove Windows 10 from a computer: we demolish the system completely
 Removing the Windows operating system may be necessary in several cases. First, when switching to another platform, you need to completely erase all OS files. Secondly, a Windows malfunction can cause a complete uninstall. In this article, you will learn how to remove Windows 10 from your computer and in what ways you can do it.
What are the ways
In most cases, you can demolish an OS from Microsoft using the following methods:
- through the command line;
- via bootable media;
- through third party programs.
Also below will be considered instructions with which the user can erase the previous version of the "dozens" from the computer or roll it back.
Using the command line
Most of the system services are managed through the standard command line. Therefore, with its help, you can completely remove the OS from your hard drive.
Since you cannot erase the operating system while the computer or laptop is on, you will have to create bootable media and use it. To do this, we will resort to the help of the official utility from Microsoft:
- Go to https://www.microsoft.com/en-us/software-download/windows10 and click the Download Tool Now button.
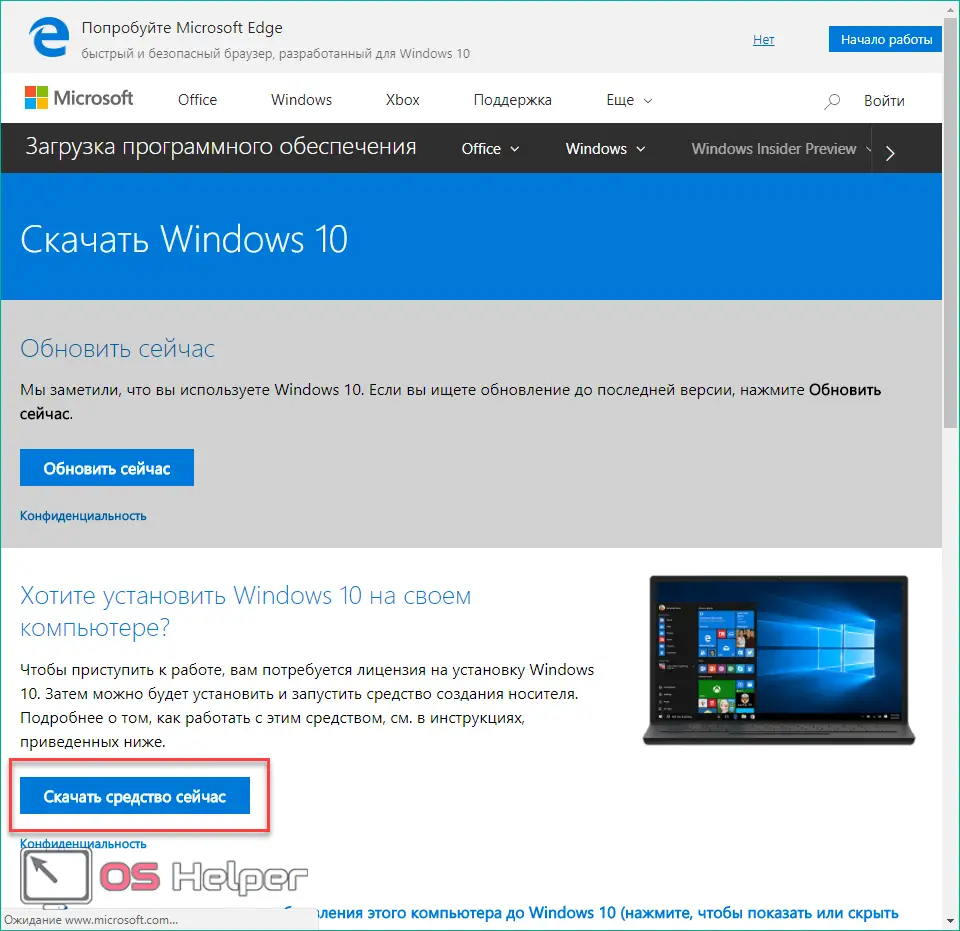
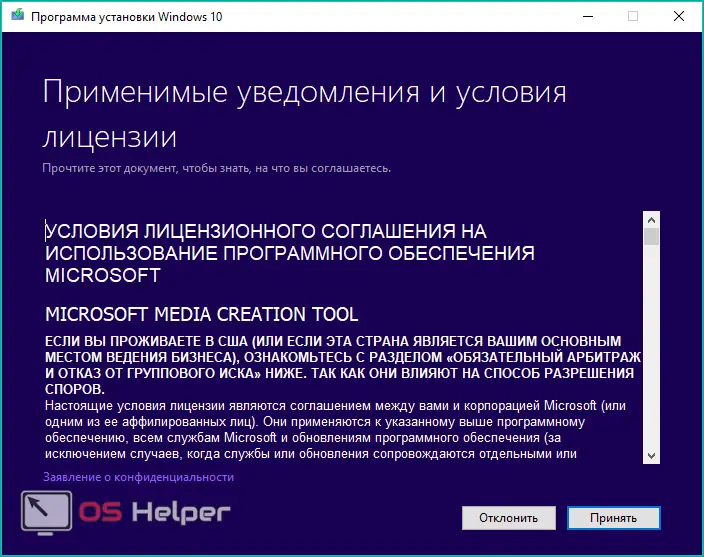
- Once downloaded, run the downloaded file and follow the instructions. Accept the license agreement.
- After completing the preparation, you need to select the second option and click on the "Next" button.
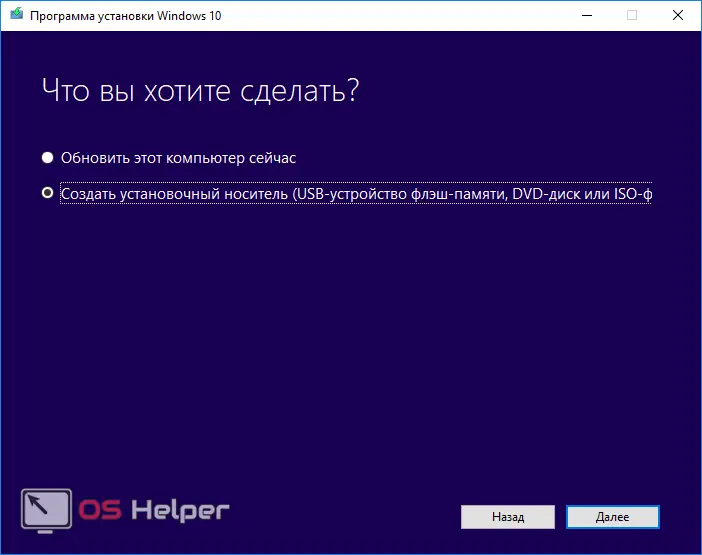
- If you want to install a new version of Windows 10 from this flash drive, then specify the required OS parameters and click the "Next" button. If you only need bootable media for deletion, then this item will not matter.
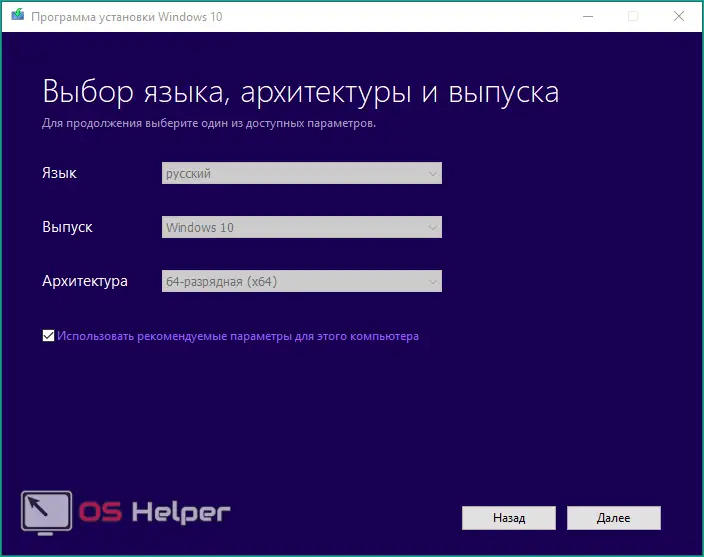
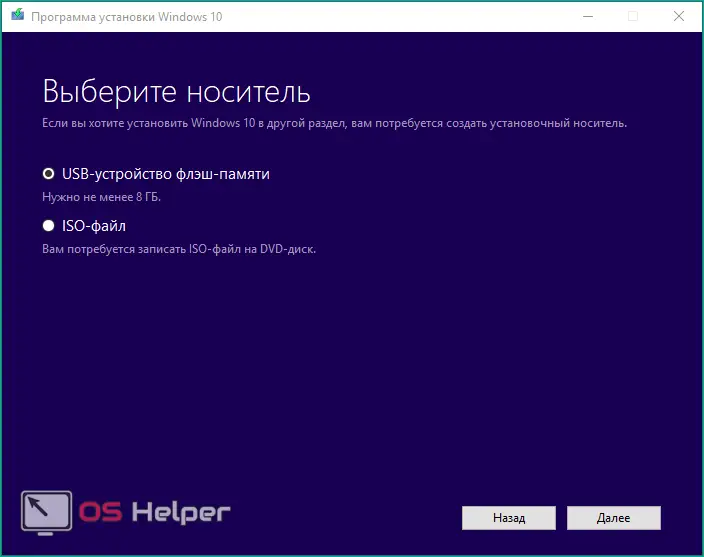
- Select a flash drive or DVD to burn.
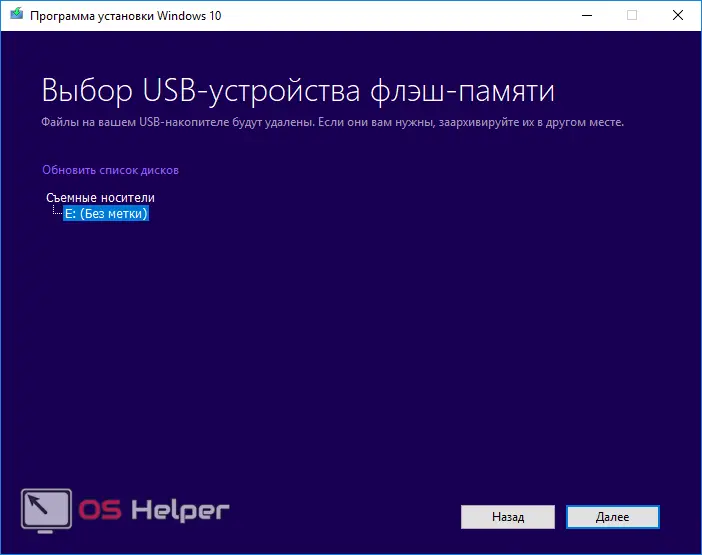
- Specify the connected flash drive and click on "Next" again.
- At the end of the procedure, wait for the OS files to download from the Internet and close the application window.
Now you need to find out the exact name and number of the hard disk partition with Windows 10. Since the designations in Explorer and the system uninstall window may differ, we will resort to using the command line:
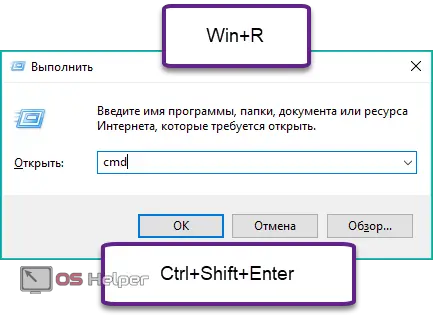
- Open the command line through the "Run" window. Enter the command "cmd and" press the key combination [knopka]Ctrl[/knopka]+ [knopka]Shfit[/knopka]+ [knopka]Enter[/knopka] to launch the application with administrator account rights. You can also start the command line in the search.
Read also: How to safely remove McAfee from Windows 10
- In the window, enter the commands "diskpart", "list disk", "sel disk 0", "list partition" (after each of the commands, press the [knopka]Enter[/knopka] key to execute).
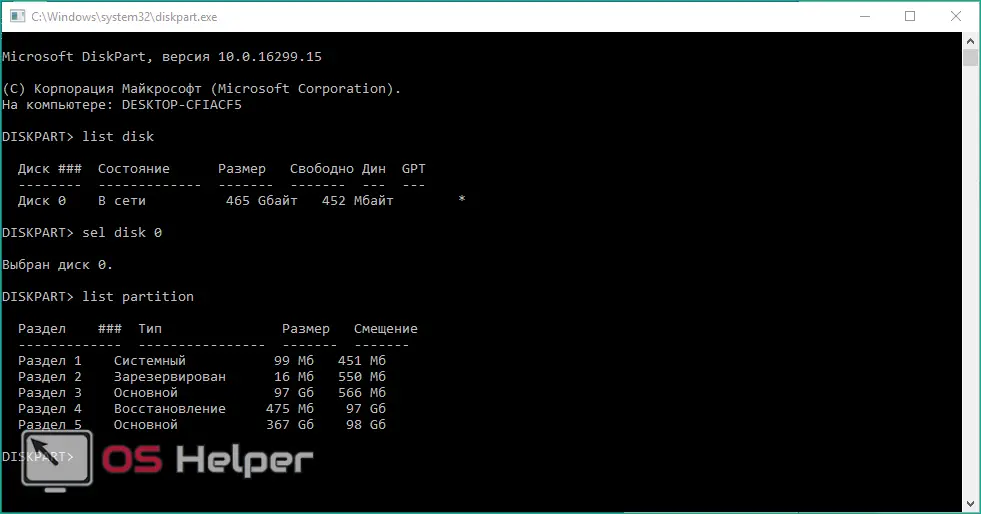
- Look at the volume of the main OS hard drive partition in Explorer and find a completely similar partition in the command line list. Remember his number.
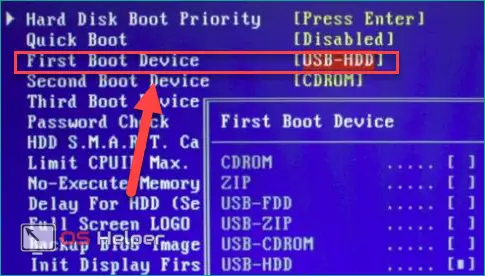
We have prepared everything except the procedure for launching a bootable USB flash drive. Therefore, we connect it, restart the PC and go into the BIOS settings (the required key will be written on the initial screen).
In the settings, you need to go to the "Boot" menu and set the boot priority for the connected flash drive. After that, save the changes with the [knopka]F10[/knopka] key. The computer will restart.

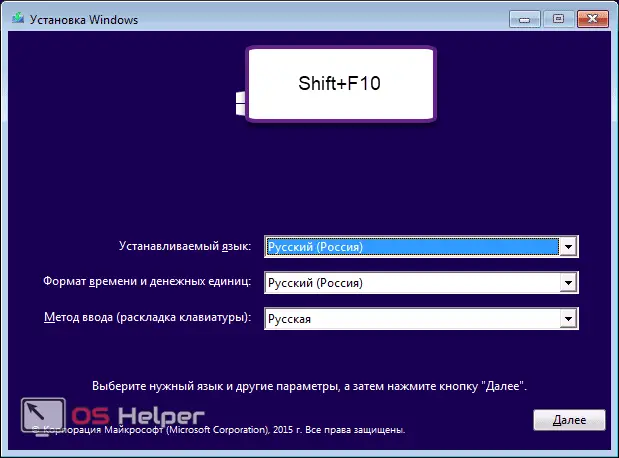
After loading the interface and the following screen appears, you need to hold down the keys [knopka]Shift[/knopka] + [knopka]F10[/knopka] to go to the command line.
Now do the following:
- Re-enter the commands "diskpart", "list disk", "sel disk 0", "list partition" in turn.
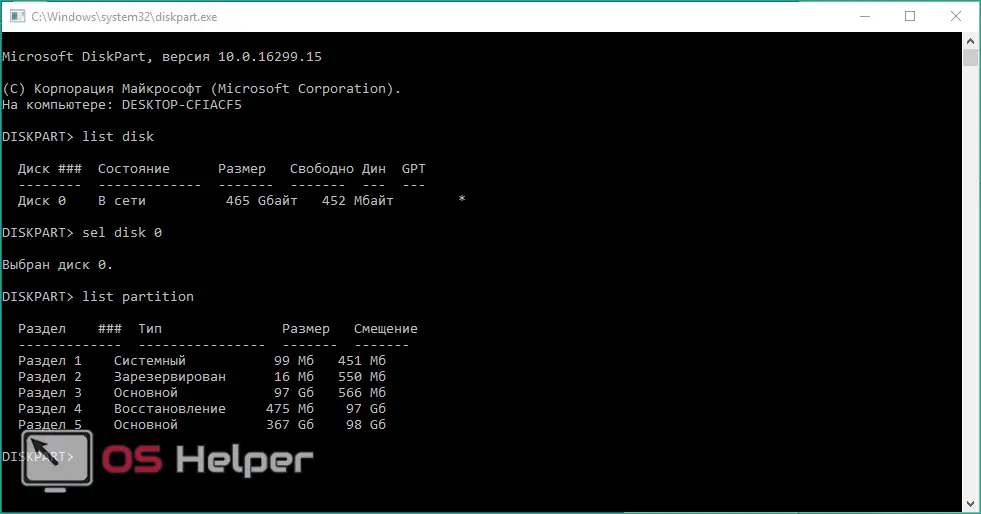
- Remember the number of the system partition and enter the command "sel part" followed by the corresponding number. Now enter the line "del par override" to completely format the hard drive. This way you delete all system files, but leave data on other partitions. You can't get back deleted files.

The same operation can be done through the Windows 10 Setup Wizard. You can also install a “fresh” copy of the OS from it.
Using a bootable flash drive
Since the bootable flash drive is already ready, and the priority is set in the BIOS, you just have to follow the steps described correctly:
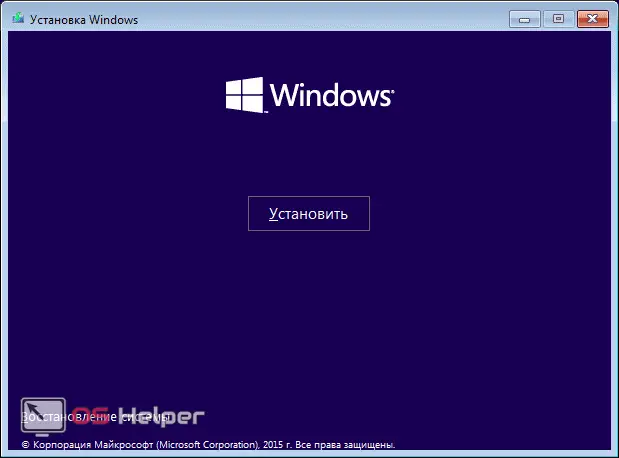
- Turn on your computer and wait for the Install Windows window to appear. On the second screen, click on Install.
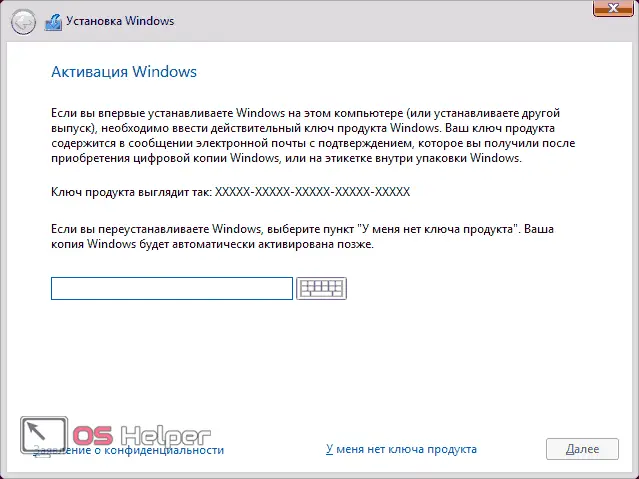
- Skip the step with entering the license key.
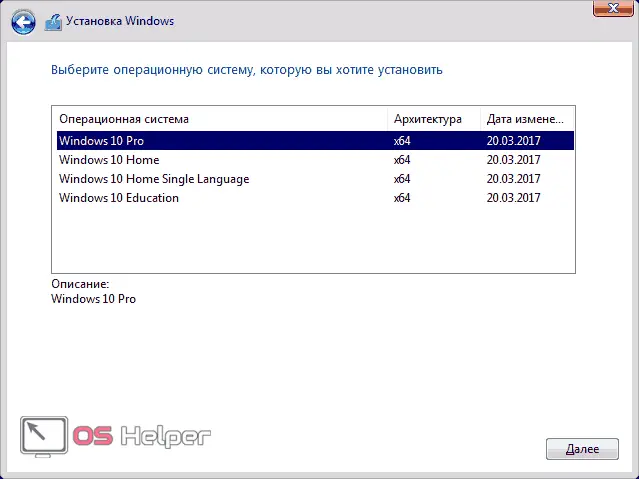
- Select any version of Windows 10 and click Next.
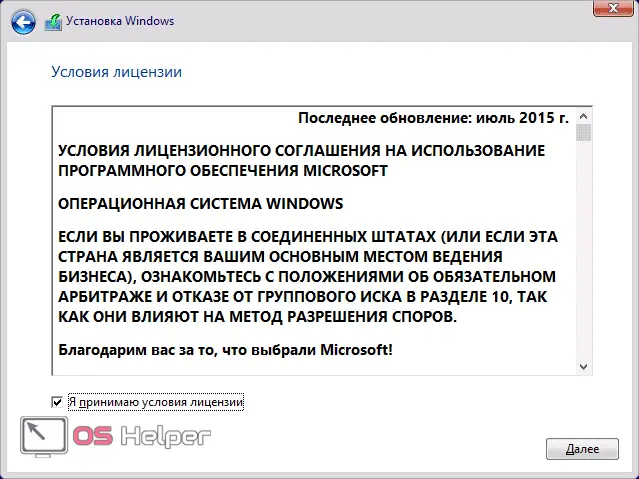
- Accept the terms of the license agreement.
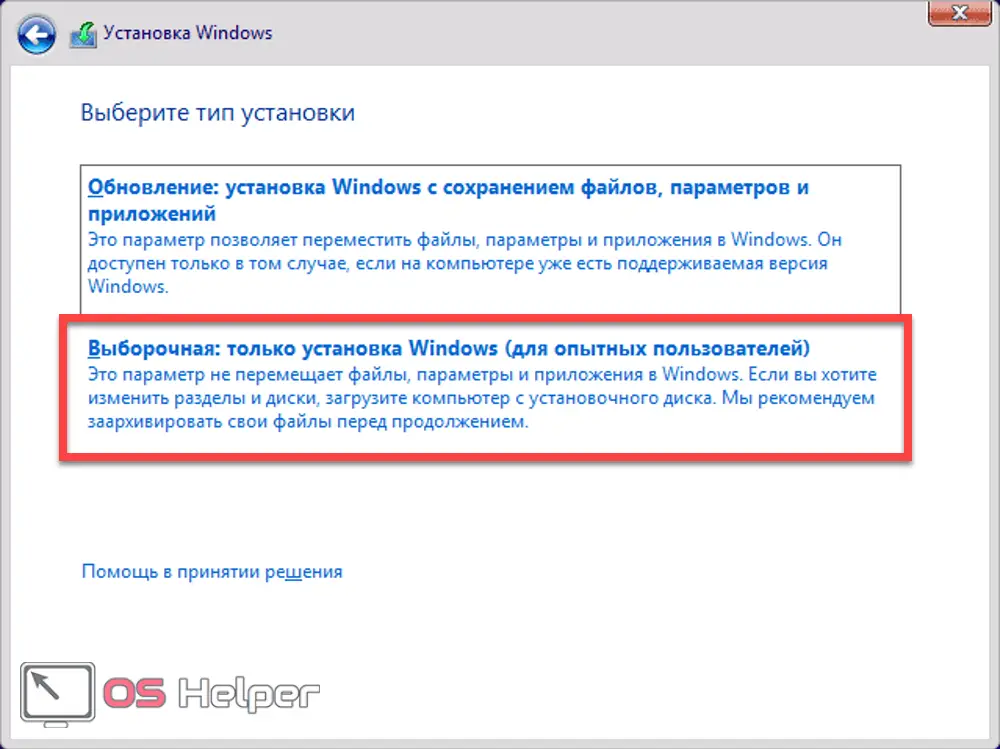
- Click on the custom installation method.
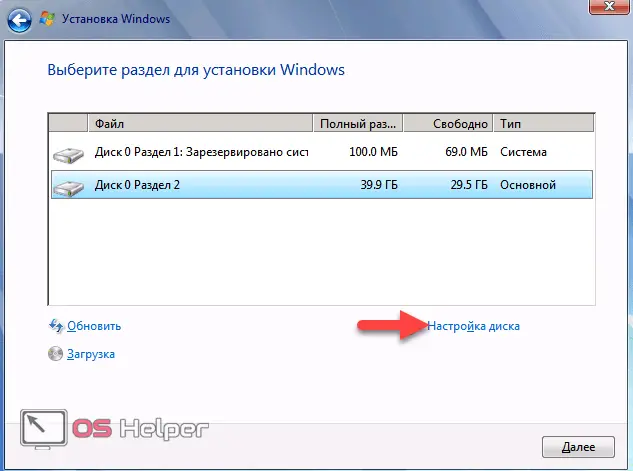
- Select the required partition with the operating system and click on "Disk Setup".
See also: Archivers for Windows 10 free download in Russian
- To start deletion, click on the "Format" button.
Ready! Now the operating system is completely removed, and the files on other partitions are left in their places.
Remember that the methods described above are available not only in the Windows 10 installer, but also in older versions of the OS. You can also access this functionality through third-party software.
Using the EaseUS program
You can download and install this utility from the official website of the developers. You can run it for free, without purchase, without additional passwords or keys. Next, follow these steps:
- In the main window, select the system partition and right-click on it. Select "Delete Partition" from the context menu.
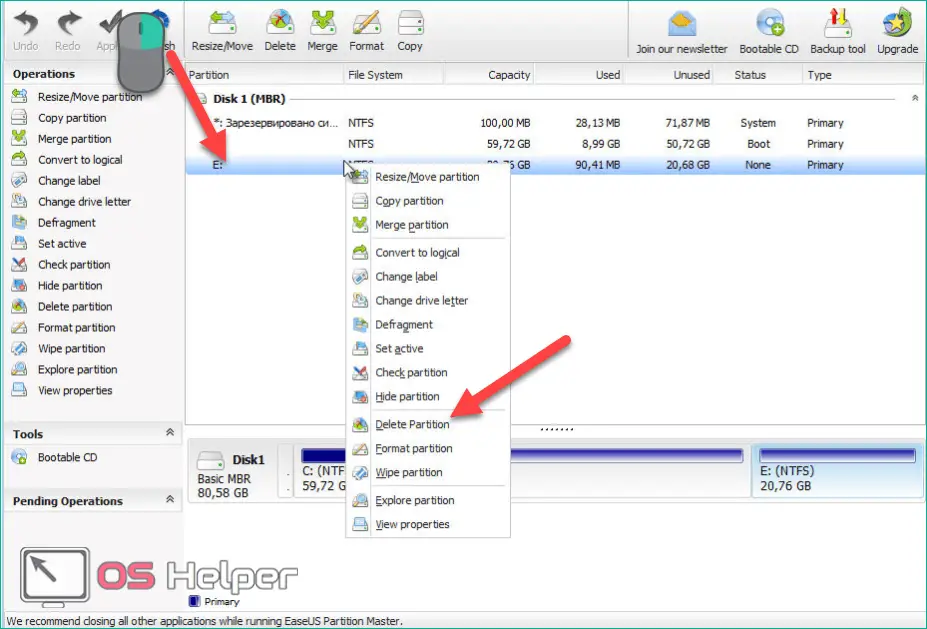
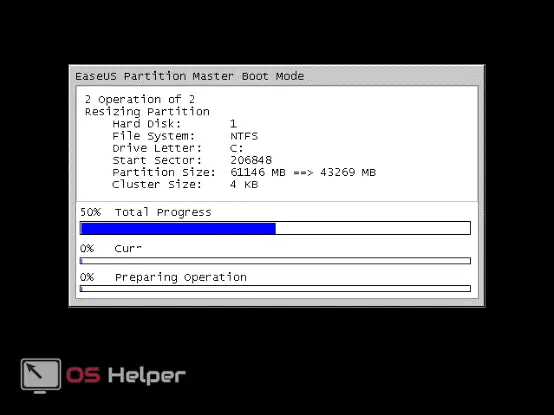
- To confirm the operation, click on the "Apply" button. Now restart your computer and wait for this window to appear. When the line "Total Progress" is filled to 100%, the operating system will be completely erased. Therefore, before restarting the PC, copy all important files and documents to another partition or external drive.
Gparted program
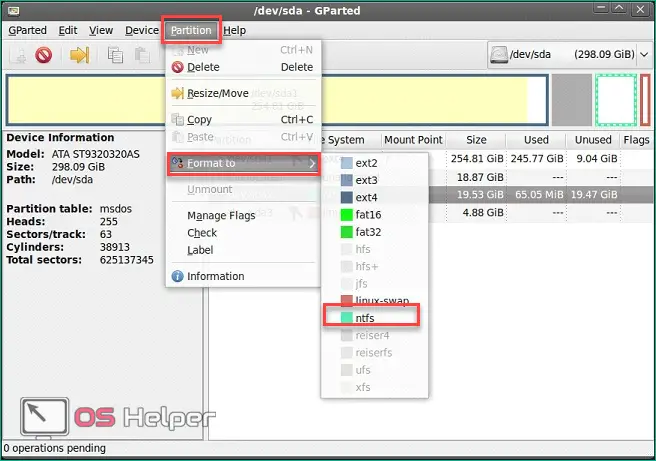
Gparted LiveCD is another utility with similar capabilities. However, this time you will need a bootable USB flash drive with an iso image of the program. You can download the installer on the official website of the application creators. Then you need to write it to a flash drive. After restarting the PC, a window will appear with a list of all connected hard drives. You need to select the desired partition, then click on "Partition" - "Format to" - "NTFS". It is in NTFS that you need to format the hard drive for the subsequent installation of Windows.
Removing the previous OS
If you have installed Windows 10 on your hard drive, but have not formatted it before, the OS will automatically create a Windows.old backup folder that will store unnecessary system files. Since they take up space on the hard drive, they must be removed as follows:
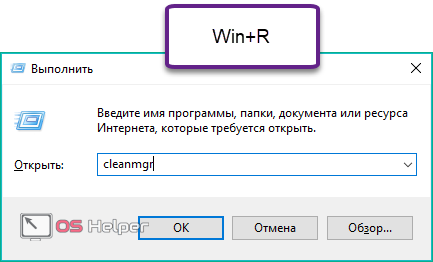
- Launch the Run application using the keyboard shortcut [knopka]Win[/knopka]+[knopka]R[/knopka]. In the line enter the command "cleanmgr" and click "OK".
Read also: Driver for LaserJet 1010 for Windows 10
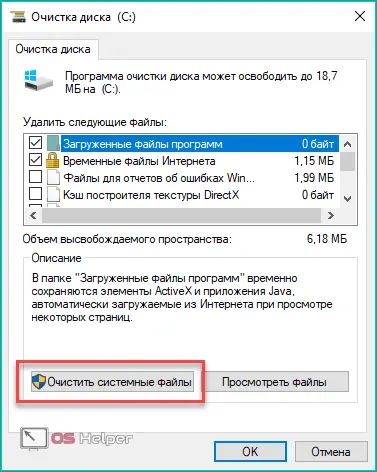
- In the window that opens, click on the marked button.
- In the list of system files, find the item "Previous installations of Windows" and check it. Click "OK" to finish.
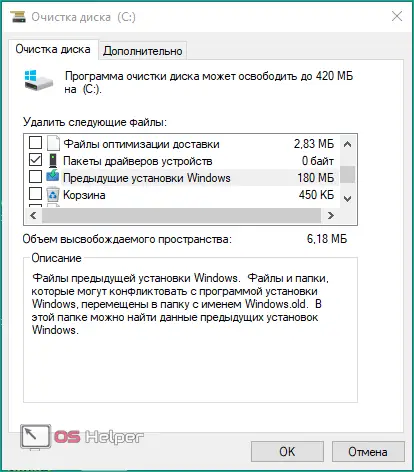
The standard program will remove Windows.old and thus free up space on the system hard drive.
Roll back Windows to a previous version
Windows rollback is possible only if you use a licensed copy. Also, the Windows.old folder should be saved on the system partition, and more than a month should not have passed after the update. You can roll back to Windows 11 or 8 using standard tools. To do this, do the following:
- Right-click on the "Start" icon and select the "Settings" line.
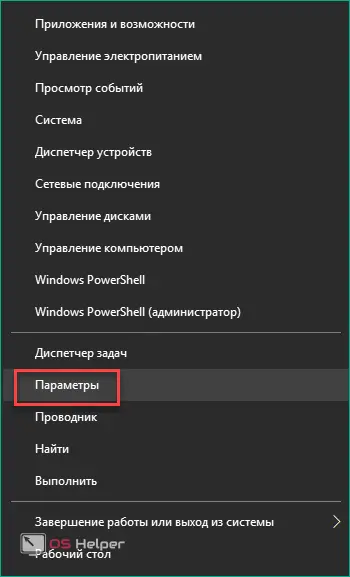
- In the window that opens, go to Update & Security.
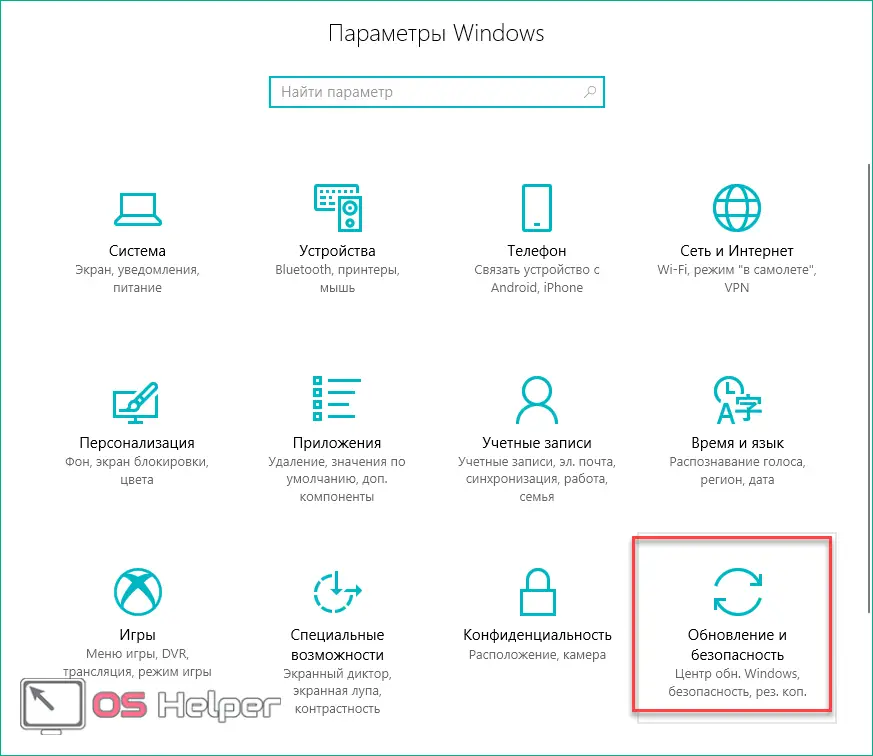
- Next, open the "Recovery" subsection.
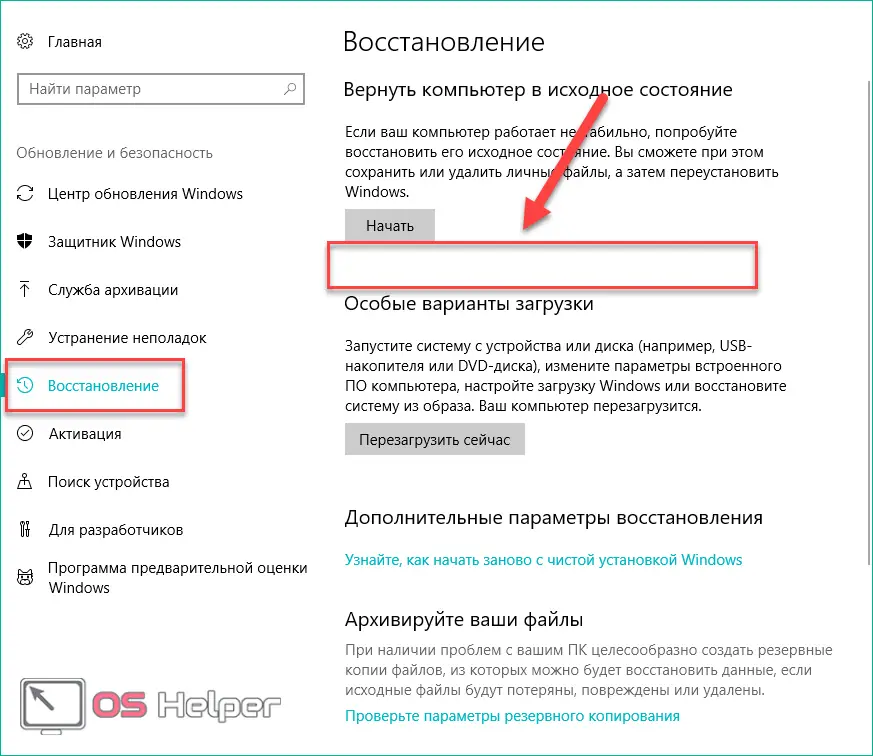
- It should contain the "Return to Windows 11 / 8.1" button in the marked place, if one calendar month has not passed since the installation of "tens". Click on it to start the rollback procedure.
If you encounter any errors or computer inactivity, be sure to scan the operating system for viruses, and also check that all drivers are installed correctly.
Outcome
To completely remove Windows 10, you will not need anything other than a USB flash drive or a third-party utility. If you do not speak English well, we recommend using the convenient interface of the OS installer in Russian.
Video
You can learn more about all the removal methods and see visual guides for each method in the attached video. After watching, you will no longer have any questions regarding getting rid of Windows 10.