How to slow down video in Adobe Premiere Pro
 Adobe Premiere Pro is a great video editor that can easily bring your creative ideas to life. It is about him in our today's article that will be discussed. Specifically, you will learn how to slow down the video. So let's get right down to business without delay.
Slow down video in Adobe Premiere Pro
Now let's move on to solving our problem. Below you will find a detailed step-by-step instruction with screenshots that answers the question of how to slow down a video in Adobe Premiere Pro.
And this is done as follows:
- The first thing we will need to do is launch the video editor itself. Naturally, it is assumed that you already have the program installed. When the application starts, we will need to create a new project. To do this, you can use the main menu by clicking on the "File" item and selecting the "Create" subsection. In the new submenu that opens, select the "Project" item. For the same purpose, we can use the hotkey combination [knopka]Ctrl[/knopka]+[knopka]Alt[/knopka]+[knopka]N[/knopka] on the keyboard.

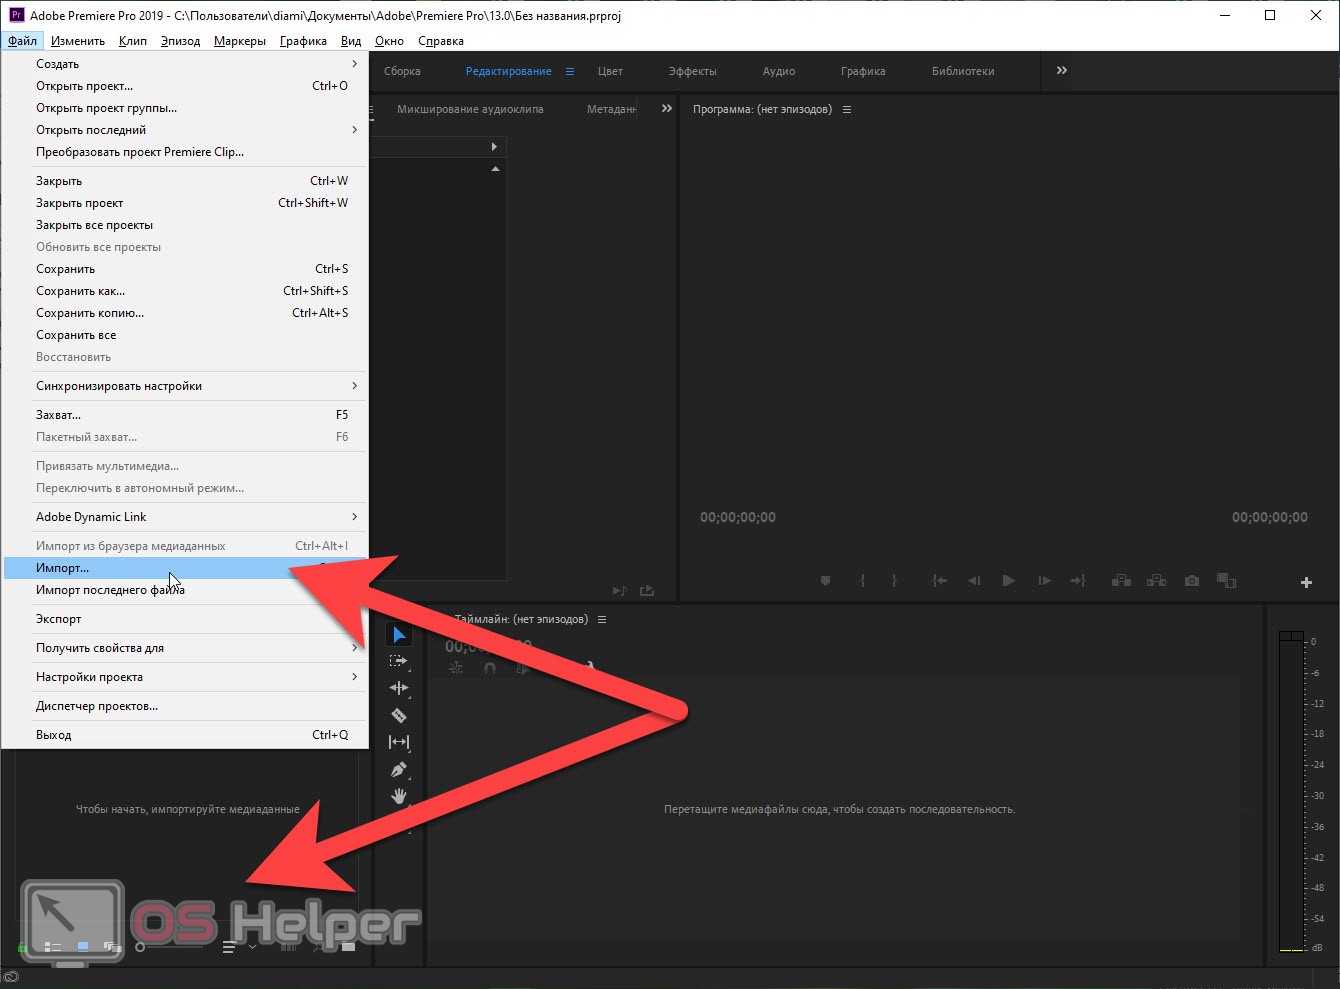
- Next, add the video we want to slow down to our project. To do this, you can use the same main menu, where in the "File" section you must select the "Import" item. Accordingly, the set of buttons [knopka]Ctrl[/knopka]+[knopka]I[/knopka] is also supported for faster content import. As a result of the actions taken, Windows Explorer will open and it is in it that we will have to select our video.
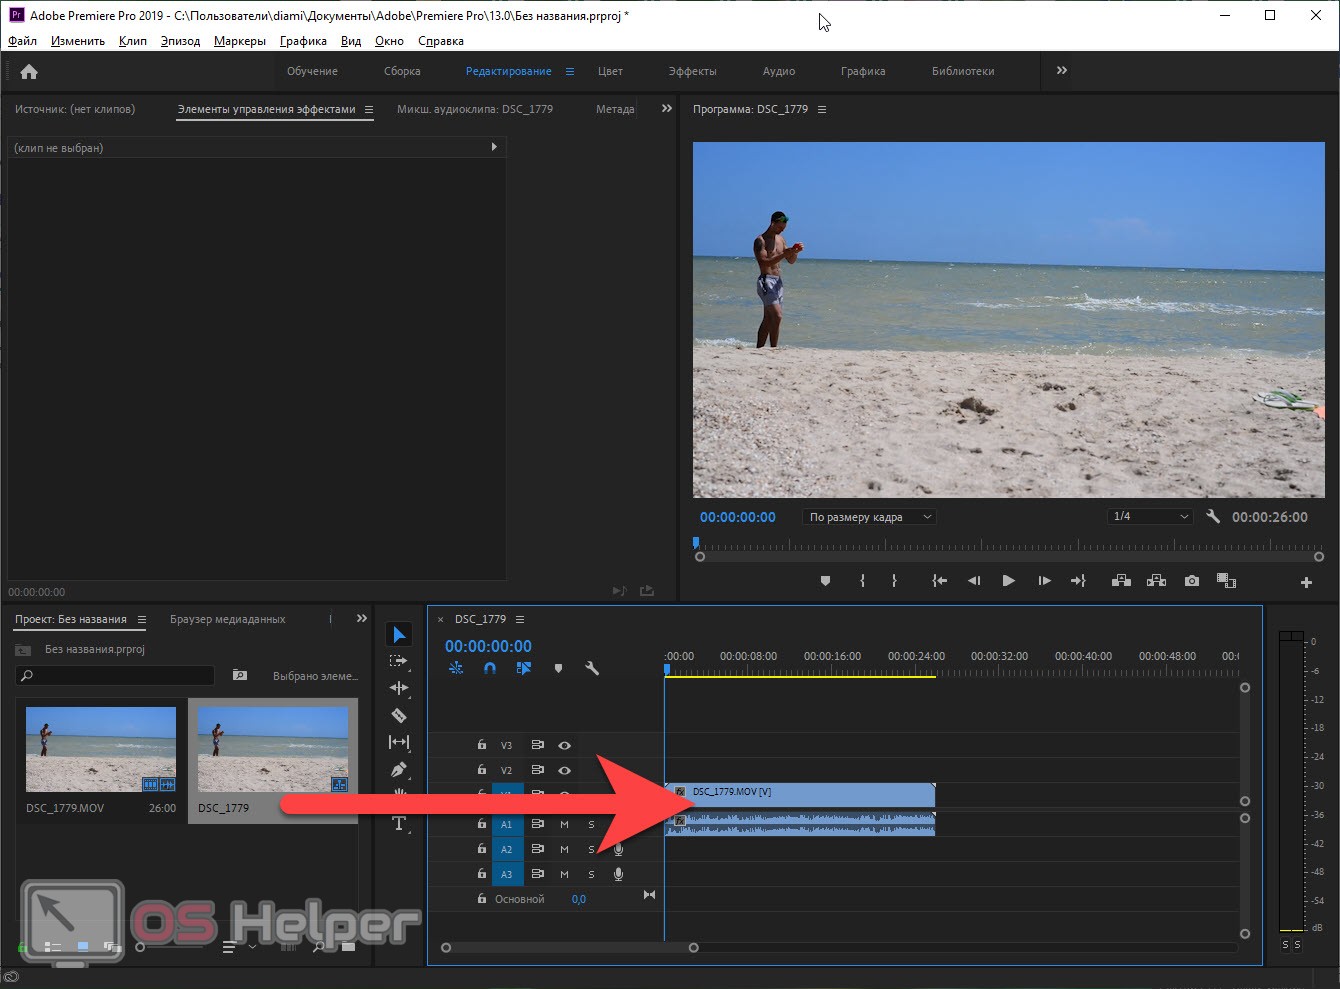
- So, the movie has appeared in the project library and the next thing we need to do is move it to the workspace. To do this, simply take the video and drag it to the area marked with an arrow.
Expert opinion
Daria Stupnikova
Specialist in WEB-programming and computer systems. PHP/HTML/CSS editor for os-helper.ru site .
Ask Daria Attention: if you do not know how to save the final video, then read the detailed step-by-step instructions on this topic.
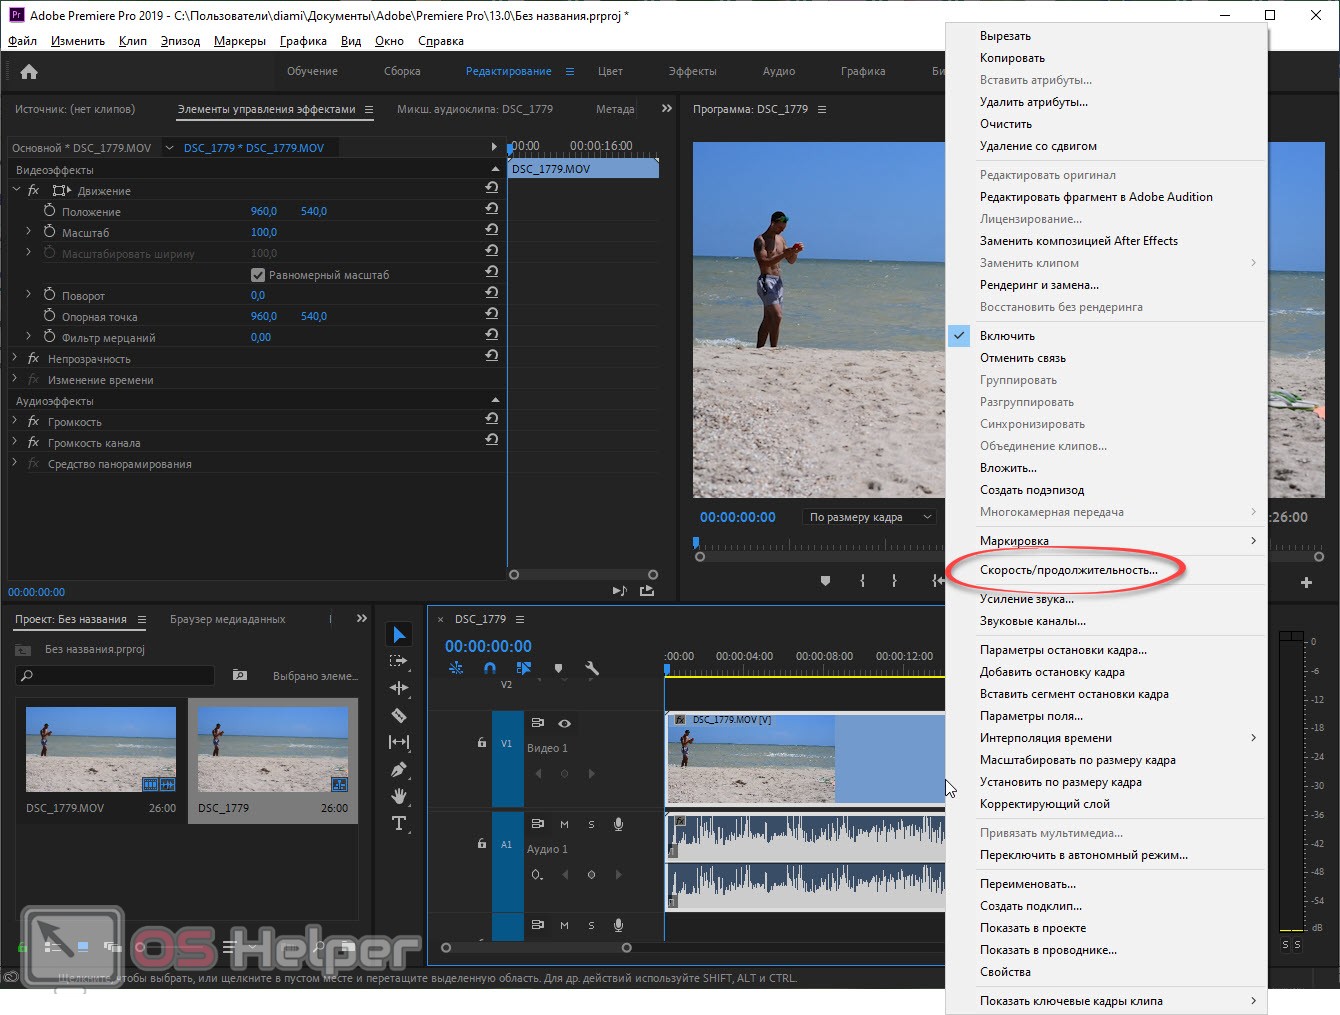
- Now you can proceed directly to the slowdown. Please note that a clip recorded at 25 frames per second or less will appear jerky when slowed down. It is better to slow down the content that is recorded at 60 frames per second or higher. One way or another, we can slow down anything. To do this, simply right-click on the track with the video and select the item that we marked in the screenshot from the context menu.
See also: How to speed up video in Adobe Premiere Pro
- After that, another small window will open, in which the playback speed will be displayed as 100%. When we move the mouse pointer over this number, the cursor will take the form of a double-sided arrow. By holding the left mouse button and moving the manipulator to the left or right, we can change the video playback speed. In order to make this movement more precise, we can simultaneously hold the [knopka]Ctrl[/knopka] button, and the [knopka]Alt[/knopka] key, on the contrary, will speed up the adjustment of the value.
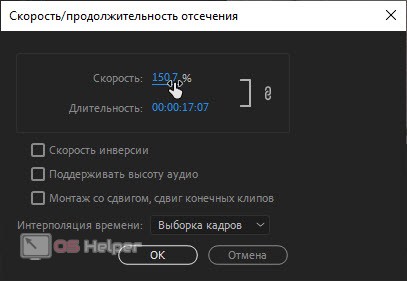
In the same window, there are a number of other options: for example, setting the playback inversion, shifting the end clips and, in general, editing with a shift, as well as automatically adjusting the height of the audio.
There are a number of other interesting articles on Adobe Premiere Pro on our site. They include, for example:
- video acceleration instructions;
- how to rotate content in Adobe Premiere Pro;
- a visual aid for clip stabilization;
- pruning instructions;
- adding text to video;
- exporting the finished result.
After viewing a number of these articles and videos attached to them, you can easily work with this video editor at a basic level.
Video instruction
For those of you who don't particularly like reading long step-by-step instructions, we have attached a video explaining the topic at hand. Thanks to it, you can easily understand how to slow down a video in Adobe Premiere Pro. Therefore, we strongly recommend that you watch the video to the end before proceeding to practice.
Summing up
On this, in principle, we can safely end our article. After all, for sure, each of you has 100% figured out the issue. And if something still remains unclear, ask about it in the comments. The feedback form on our website is checked daily and we, as necessary, give practical advice in a given situation to each user who has asked for help.