How to render video in Adobe Premiere Pro
 Continuing the series of tutorials on one of the best video editors, we will show you how to render video in Adobe Premiere Pro. This time we will not talk about how to display the finished result and save it, but about the nuances of setting the codec, resolution, bitrate and other parameters. As a result, you will get a video with excellent quality and a minimum size, exactly the one that all users want to see.
Setting up rendering in Adobe Premiere Pro
So, let's say you already have some kind of ready-made video. All we need to do is output it as a video file. In this case, it is imperative to obtain the highest quality, with a normal size of the final file. To do this, we do the following:
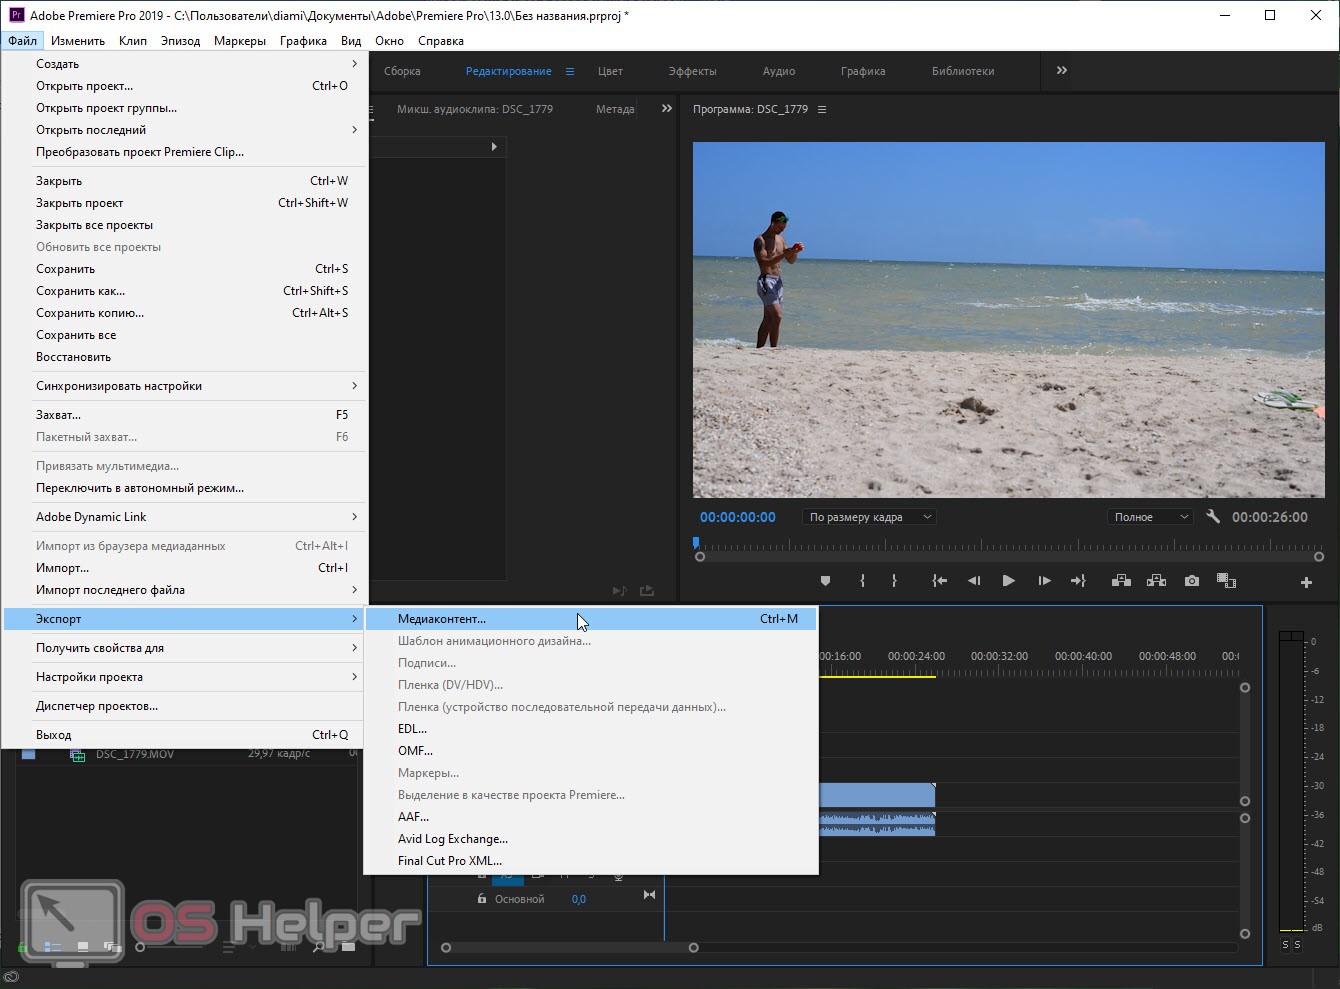
- Using the main menu, click on the "File" item. Next, find the "Export" section in the list that opens and hover over it with the mouse. In the expanded subsection, select the "Media Content" item. All the same can be done much faster by using the hotkey combination [knopka]Ctrl[/knopka]+[knopka]M[/knopka] on your computer keyboard.
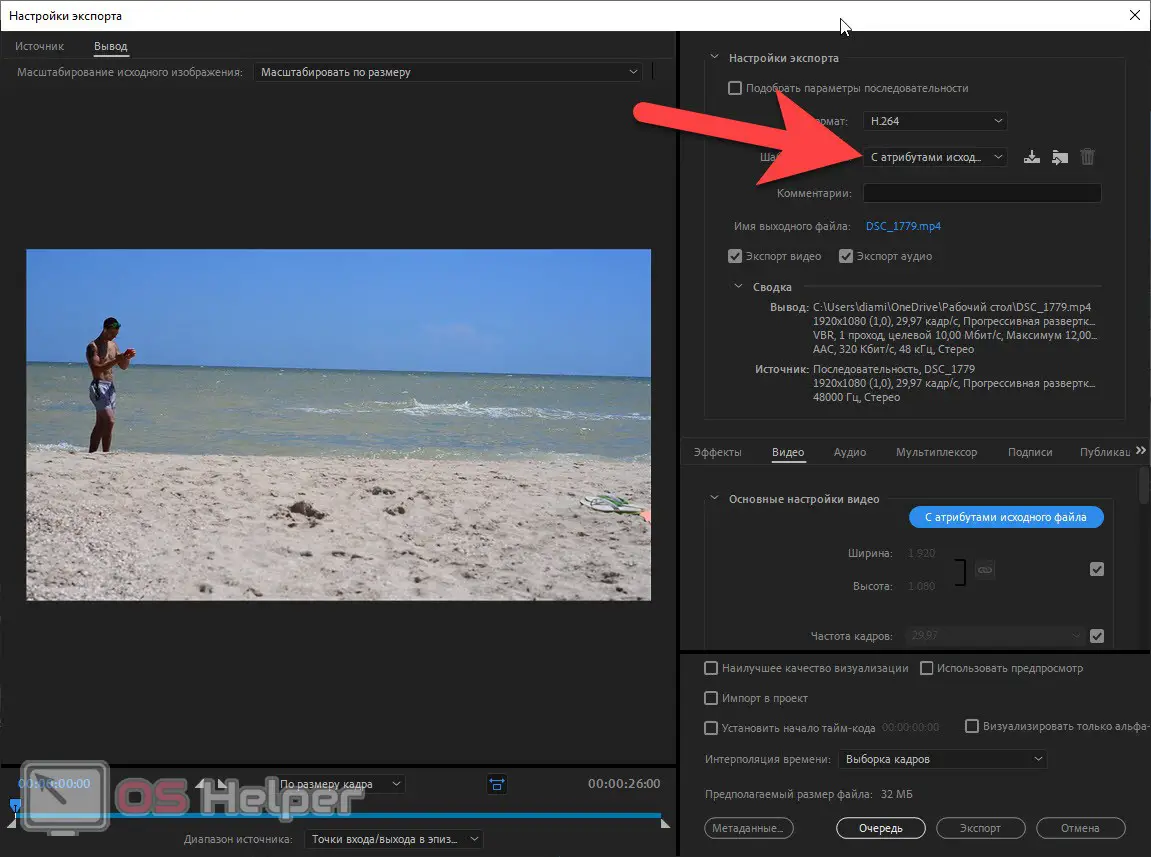
- Another window will start, in which we will immediately see a preview of the finished result (located on the left side). And in the right half of the window, we are waiting for the same settings that will help make the video optimal in size and quality.
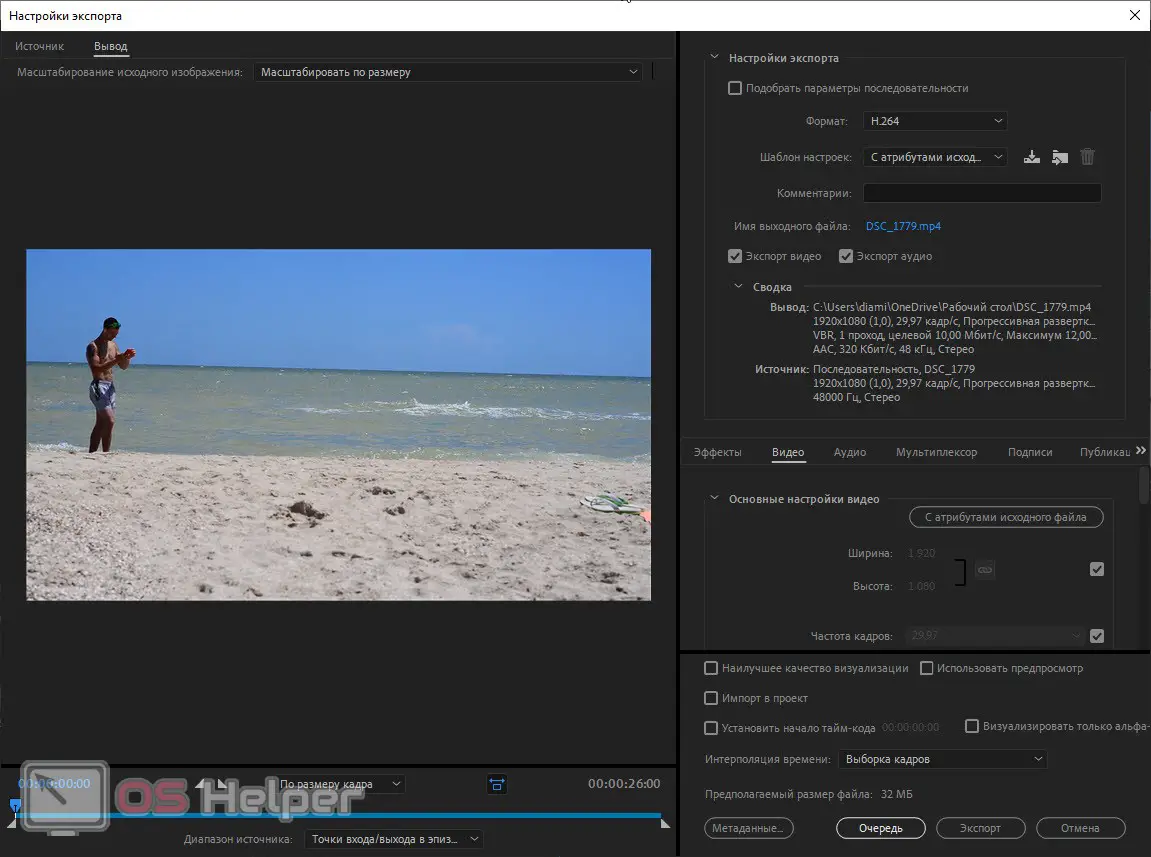
- In order to convert our video initially to the correct format, we need to select a codec. For most tasks, the H.264 format is suitable. there are newer formats, such as H.265, however, there may still be problems with their playback. So let's leave this codec.
- Next We choose what exactly needs to be exported. By default, there are 2 checkboxes "Audio" and "Video", however, you can change this and save, for example, one sound.
- Opposite the inscription "Output file name" we see a link that you will need to click on. This is done in order to determine the final folder in which the video will be saved.
See also: How to use Adobe Premiere Pro

- A little lower is another functional block that contains:
- setting export effects;
- output video configuration;
- sound settings;
- multiplexer;
- signatures and publications.
- After that, it remains for us to configure the best rendering quality, enable or disable preview during rendering, render only the alpha channel and set the timecode.
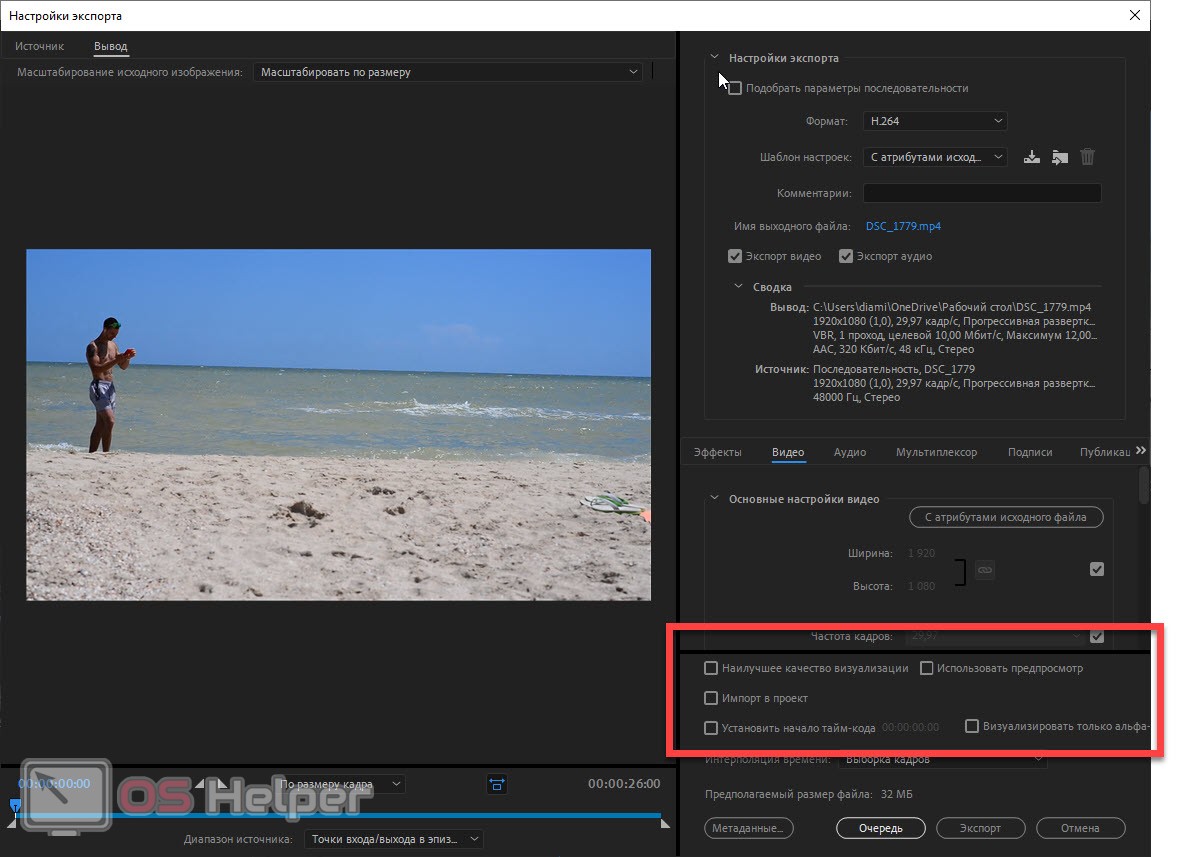
It remains for us to make only one, the most important setting, and we can proceed to export. This is the button that we have labeled in the screenshot below. By default, it is written with the attributes of the source file. This means that all codec parameters will be imported from the file we were processing. However, this does not suit us at all. Therefore, we press this button.
As a result, we will get a whole list of different formats, one of which we will use depending on where our video will go. For example, if we are preparing content for YouTube in Full HD format, then we need to select YouTube 1080p Full HD. Accordingly, there are a number of other formats, the purpose of which can be understood by name.
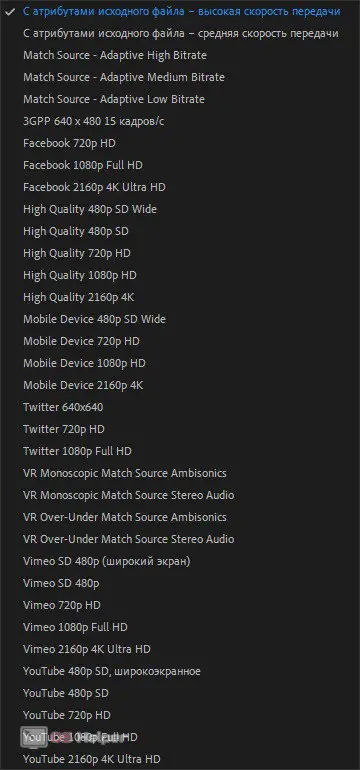
When the desired format is selected, we can manually adjust some of its parameters. This is, for example, resolution or frame rate. When all the necessary settings are made, we press the export button.
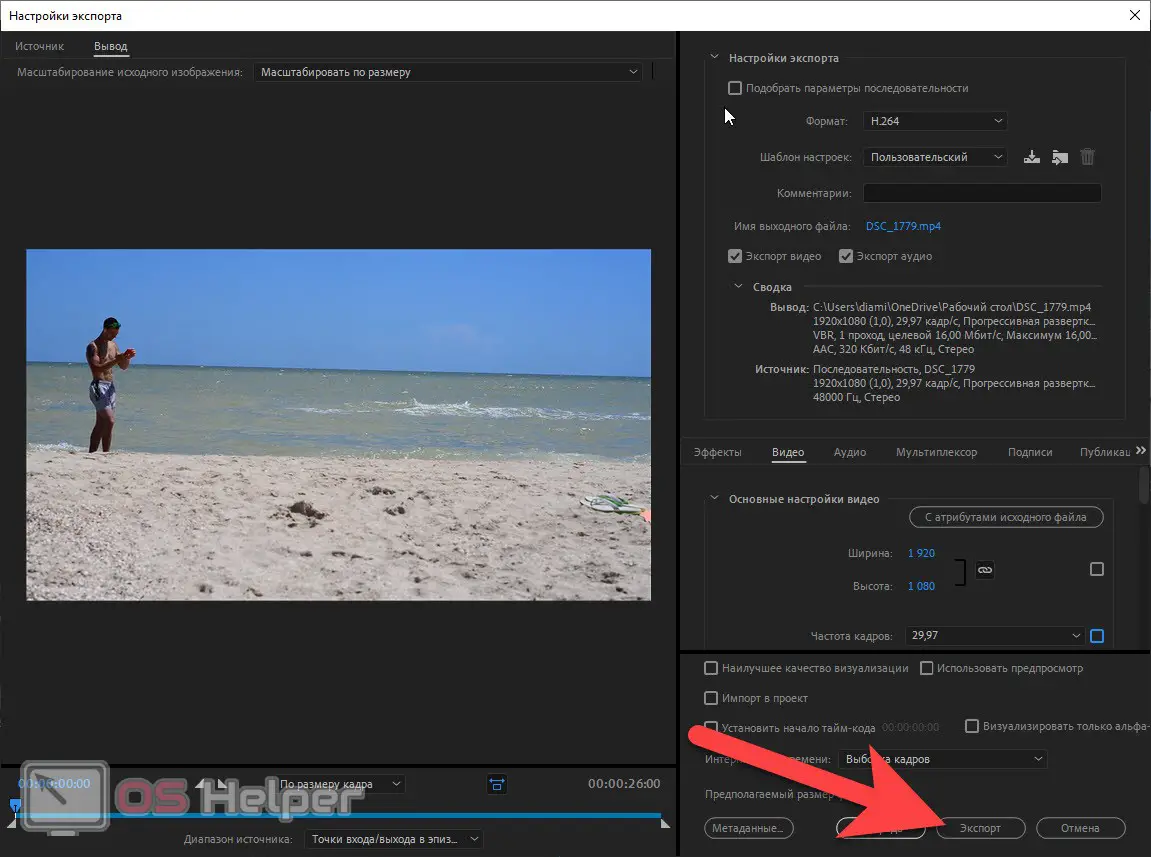
As a result, the rendering itself will start in our Adobe Premiere Pro, after which the finished file will be saved in the selected directory.
Expert opinion
Daria Stupnikova
Specialist in WEB-programming and computer systems. PHP/HTML/CSS editor for os-helper.ru site .
Ask Daria All the settings made and any changes made, we can save and then apply in one click. To do this, use the settings template item, which is located directly below the codec selection field.
Video instruction
Also for our readers, we have prepared a training video in which the author tells in detail and clearly shows everything that we wrote about above. We recommend that you definitely familiarize yourself with the video, since knowledge will definitely not be superfluous, and in time it will take no more than 5 minutes.
Also Read: How to Stabilize Video in Adobe Premiere Pro
Summing up
So, now that you have a good understanding of how to render video in Adobe Premiere Pro, we can safely end our article. However, if you have any questions, you can always ask them in the comments. The feedback form is located a little lower and everyone, even an unregistered user, can write to us.