How to Remove Noise in Adobe Audition
 Today in our article we will talk about professional audio processing software from Adobe. Specifically, you will learn how to remove noise in Audition. By the way, for this task it is simply not better to find software. Now you will see how easy it is to work with this program, so without delay, let's get down to business.
Export an audio track to Adobe Audition
In order to remove noise from our audio track, it is initially necessary, of course, to add it to the Audition program. You can do this in two ways:
- Using the main menu of the program, namely, select the "File" menu, then "Import" and again "File". Also, this operation can be launched using the hot keys [knopka]Ctrl[/knopka]+[knopka]I[/knopka] on your keyboard.
- The second method involves exporting our audio track to Adobe Audition directly from Adobe Premiere Pro. In order to do this, we simply click on the audio track and select the item indicated in the screenshot below from the context menu.
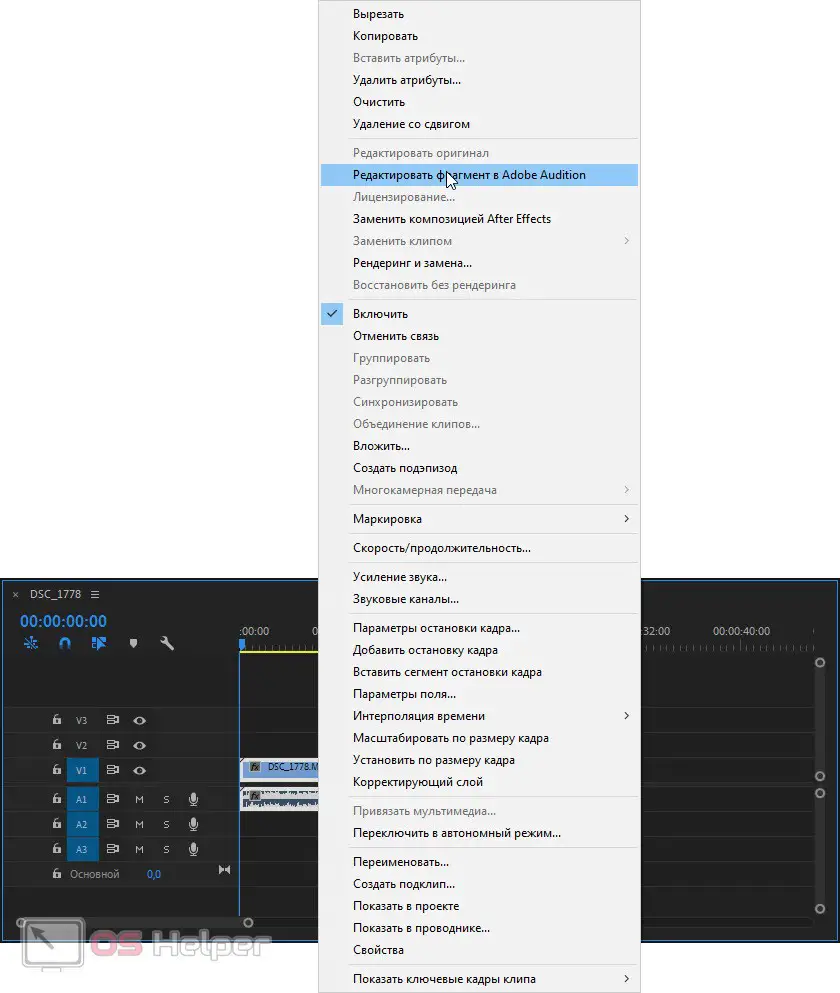
In both cases, our track will open in Adobe Audition and will be available for processing.
Noise Removal
So, in order to remove noise from our sound, we follow a few simple steps:
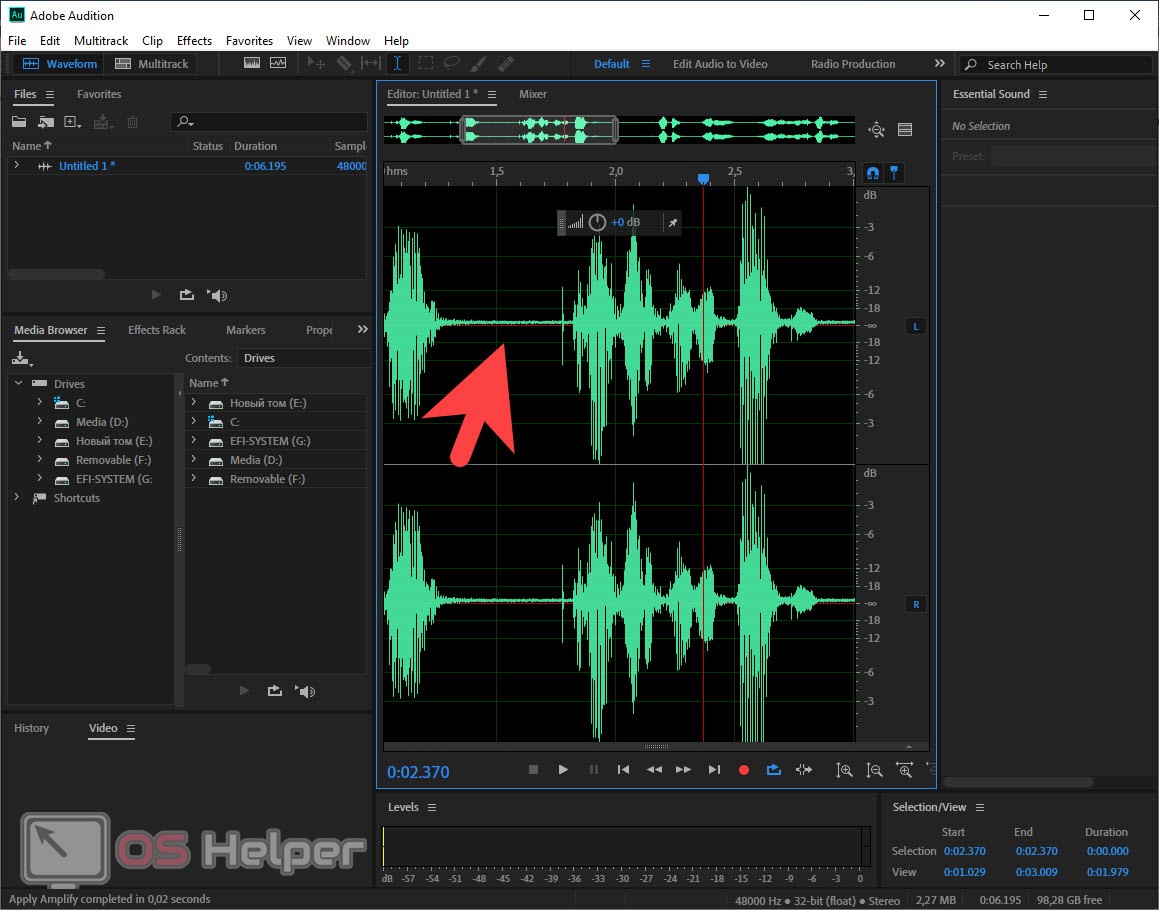
- First, zoom in on the sound wave using the wheel on the mouse to such an extent until the gaps between the sounds and the noise itself become visible. For clarity, take a look at the screenshot we have attached below.
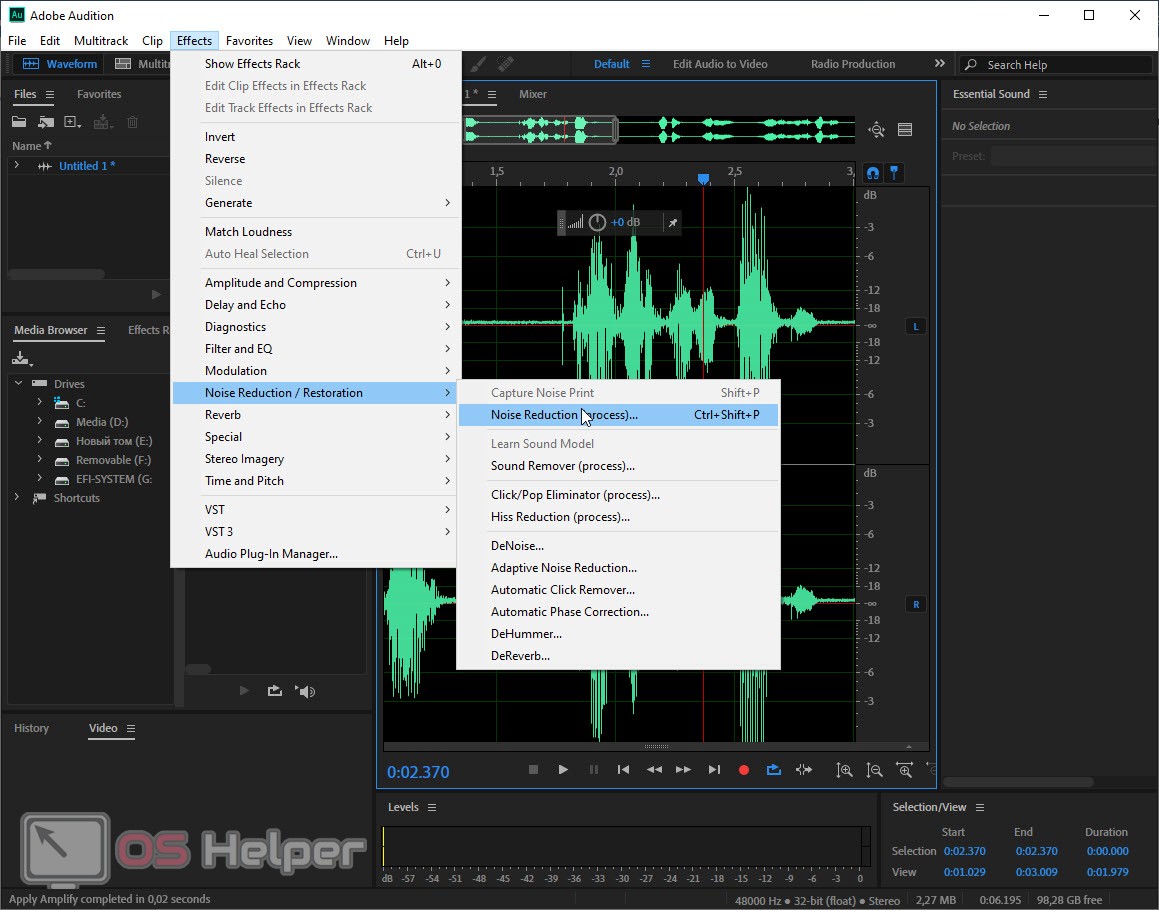
- Next, using the information from the screenshot below, we launch our plugin for noise reduction in Adobe Audition. We deliberately do not write the names of certain items, since you may have a Russian or English version of the program.
Read also: 5 tips for magical photos - secrets from the photographer!
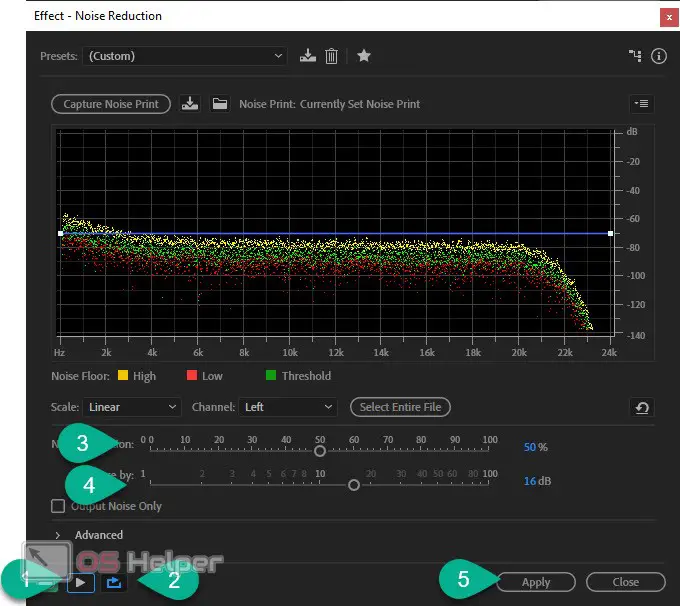
- After that, using the mouse, select the area with noise (at the same time, no other sounds should be present on it) and in the window of the plug-in for noise reduction, press the button marked with the number "2". Thus, we will take a noise sample, and the program, based on it, will remove everything unnecessary on the track.
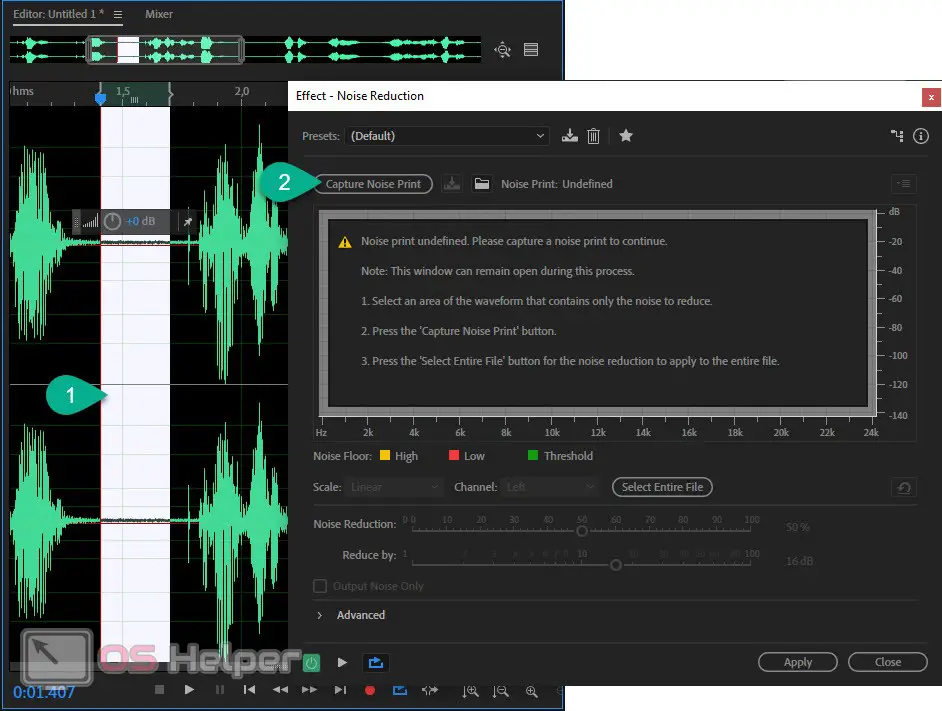
- Now you need to start listening to the area with noise (indicated by the number "1") and at the same time activate circular playback (number "2"). With the help of the sliders marked with the numbers "3" and, respectively, "4", we adjust the strength of the effect in such a way that we stop hearing the noise. When the desired effect is achieved, remove the selection from our track in Adobe Audition and in the small window of the noise reduction plug-in, press the button for applying changes (marked with the number "5").
As a result, our noise will disappear and the audio recording will become clean.
Expert opinion
Basil
Project manager, comment moderation expert.
Ask a Question Important: stop boosting the noise reduction plug-in as soon as the noise becomes barely audible. If you go too far with the settings, they will hook both the voice and other desired sounds on the track, which is extremely bad.
Other beneficial effects
Since we've started noise reduction in Adobe Audition, let's bring our audio track to its proper form to the end. To do this, we take a few simple steps:
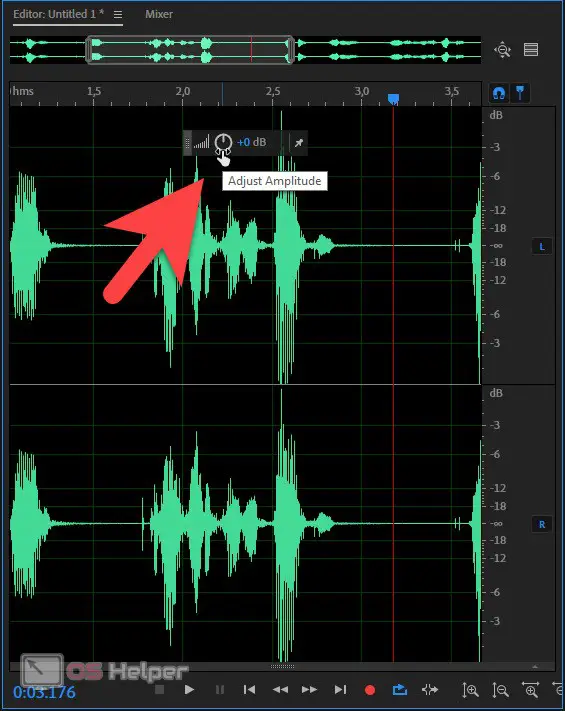
- We point the arrow at the wheel, which we answered in the screenshot below, and adjust the level of the upper limit of the sound wave so that it approaches the edge of the waveform. This will make the sound loud, but there will be no busting.
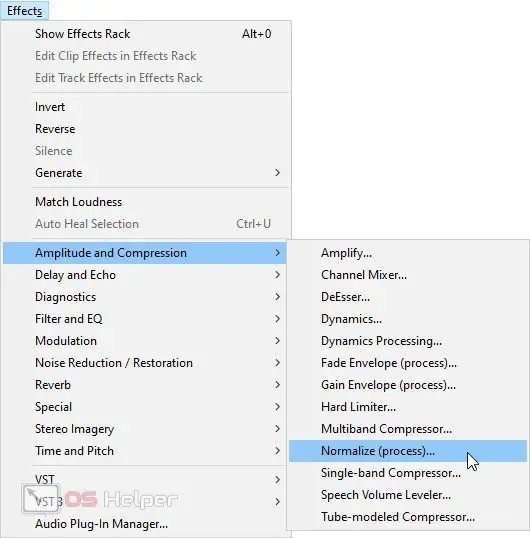
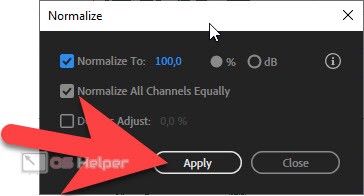
- We can also use the automatic tool that you will find along the path shown in the screenshot below. When the small window appears, simply press the button indicated by the arrow.
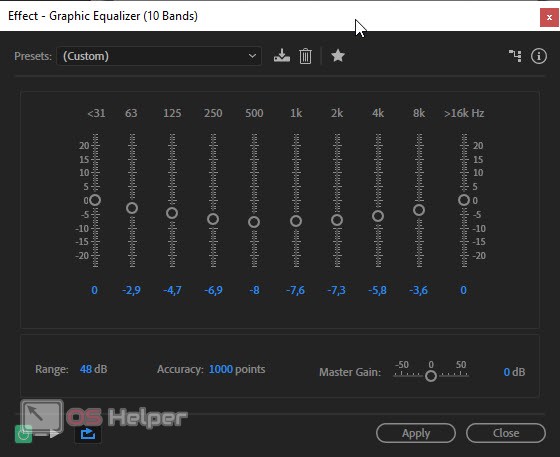
- Right there, right in the program, we can use one of the equalizers and give the sound a pleasant color. For example, we recommend that you apply a 10-band graphic equalizer.
See also: How to download video from VKontakte to PC

- This is how we set up the position of all the sliders for coloring a normal voice recorded from a regular microphone. You can try to independently move the filters of different frequencies and, by running a loop listening, achieve the best result.
As a result, you will get a more or less tolerable sound that people will not be ashamed to show.
Video instruction
We also recommend that you check out the video, which shows in detail how to remove noise in Adobe Audition.
Finally
This is where we can end our article, and you can move on to practice and try to clean the recording from extraneous sounds on your own. If as a result there are any incomprehensible moments, write about it in the comments. We will definitely read the messages from each user and, if necessary, help with advice.