Remove Windows 11 account password
When you sign in to Windows 11, you must enter your account password or PIN, which the system requires you to create at the very beginning of the setup. However, you can log in without such manipulations.
In our article, we will tell you how to make sure that the password is not required, and the login is automatic.
Disable password prompt when signing in to Windows 11 for Microsoft account and local account
By default, password and PIN prompts will be disabled so that you don't have to enter them all the time when you turn on your PC. That is, the login at startup and after reboot will be performed automatically.
However, this password remains valid and may be required in other rare cases.
Steps to remove the password requirement:
- You will need the Settings section (this can be done from the Start menu or by pressing Win+I).
- Then go to Accounts - Login Options.
- In the "Advanced settings" section, turn off the "For increased security, allow sign-in to Windows Hello for Microsoft accounts on this device" and exit the settings window.
- If the option from the previous step is not active and cannot be disabled, then you will need to start the command line. This must be done as an administrator.
Then enter the following command:
reg ADD "HKLM Microsoft Windows NT CurrentVersion PasswordLessDevice" /vDevicePasswordLessBuildVersion /t REG_DWORD /d 0 /f
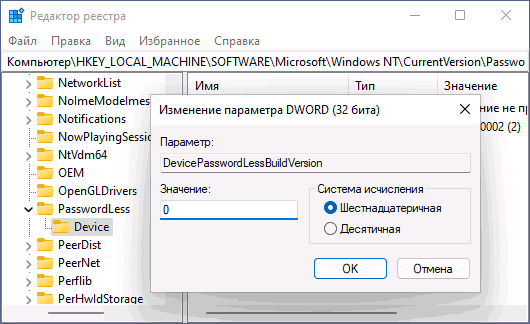
- You can also do this in the registry editor by going to the category:
HKEY_LOCAL_MACHINE™SOFTWARE™Microsoft™Windows NT™CurrentVersion™PasswordLess™Device
- Change DevicePasswordLessBuildVersion to 0.
- Hold down the Win + R key combination on the keyboard (Win is the Windows logo), write netplwiz or control userpasswords2, and then confirm the command with Enter.
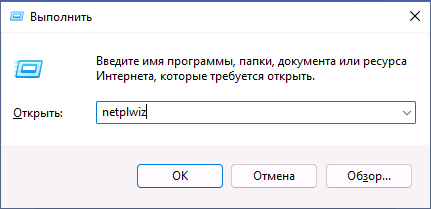
- The user list window will open. To disable the password prompt, uncheck "Require username and password" and apply the settings. It should be noted that the checkbox does not always appear if the first steps were not correctly completed.
- After application, you will need to enter a password and confirm it. Be very careful with location and case, and remember to enter your Windows 11 password (local account or Microsoft account), not a PIN.
After completing all the described points and restarting your PC or laptop, you will not be prompted to enter a password to enter Windows 11.
This is the basic way, which is equally focused on both Microsoft accounts and local accounts (offline account). However, there are other methods as well.
If you entered the wrong password in step 6 (for example, wrong keymap or case), you will not receive an error after confirmation.
You won't be automatically logged in, instead you'll get a message every time that your username or password is incorrect and you may see two identical users on the login screen.
Sysinternals Autologon
The free Autologon sign-in tool is available from Microsoft and is very easy to use:
- Download the utility from the official website and unzip the archive to a convenient location.
- Launch the downloaded tool and accept the terms of use.
- The name of your current user and computer (domain) will be automatically inserted into the program window, you will only have to enter your current password and click the "Enable" button to activate passwordless login.
Using the Registry Editor
There is a method to remove the password using the registry editor, but note that the registry password in this case will be stored in plain text and can be viewed if necessary.
Follow these steps to disable the registry password:
- Launch the Registry Editor by pressing Win+R, type regedit, and then press Enter.
- Go to the "Registry" section.
HKEY_LOCAL_MACHINE ™Software ™Microsoft ™Windows NT ™CurrentVersion ™Winlogon
- Double click on the AutoAdminLogon parameter and change its value to 1.
- In the right pane of the Registry Editor, right-click and create a string value called DefaultPassword, then change the value of this setting to your password.
- Similarly, create parameters named DefaultDomainName and DefaultUserName. Change the value of DefaultDomainName to the name of the current computer (it can be seen in Settings - System - About), and the value of DefaultUserName to the name of the current user (it can be seen in the LastUsedUsername parameter).
After completing the changes, exit the Registry Editor, then restart your PC. As a result, the login to the account should become automatic.
Completely remove the password for a local account
If you have a local account on a Windows 11 computer, you can remove the password for this account so that you do not need to enter it (you may also need to remove the PIN, to do this, follow steps 1-3 from the above method, and then remove PIN code in Accounts - Sign-in options).
How to do it in Settings:
- Go to Settings - Accounts - Login options.
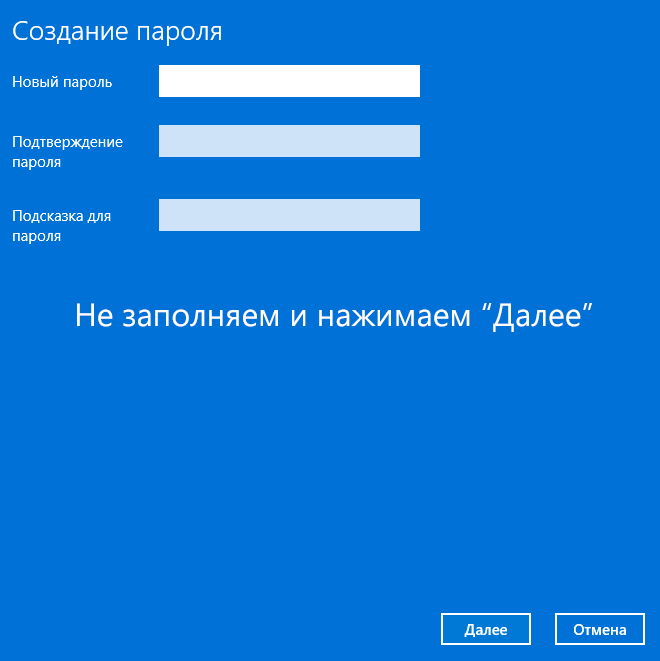
- Open the Password option and click Change.
- Enter your current password and click Next.
- Leave all fields for the new password blank and click Next.
The password can also be removed using the command line:
- Activate command prompt as admin.
- In it, enter the net user command, and then confirm the actions with the Enter key.
- In this step, write down the username that will be used in the next command.
- Enter command
net username ""
- Press Enter.
- Close Command Prompt.
Now the specified user does not have a password and will not have to enter it when logging in.
Disable password entry on wakeup
After doing this, your laptop or PC may still require a password after Windows 11 wakes up from sleep.
To prevent this from happening, follow these steps:
- Go to Settings - Accounts - Login options.
- In the "Advanced Options" section, look for "If the user is not present, how long should Windows require you to sign in again?".
- Click the arrow next to the dropdown and select Never.
These actions are enough to ensure that the password is not requested when using sleep mode.
If for some reason disabling the password prompt after sleep did not work, you can use the registry editor:
- Create a section in the registry
HKEY_LOCAL_MACHINE\SOFTWARE\Policies\Microsoft\Power\PowerSettings\0e796bdb-100d-47d6-a2d5-f7d2daa51f51
- In this category, create two DWORD values named ACSettingIndex and DCSettingIndex with a value of 0 for each.
- Close the registry editor and restart your computer or laptop.