How to Remove Arrows from Shortcuts in Windows 11
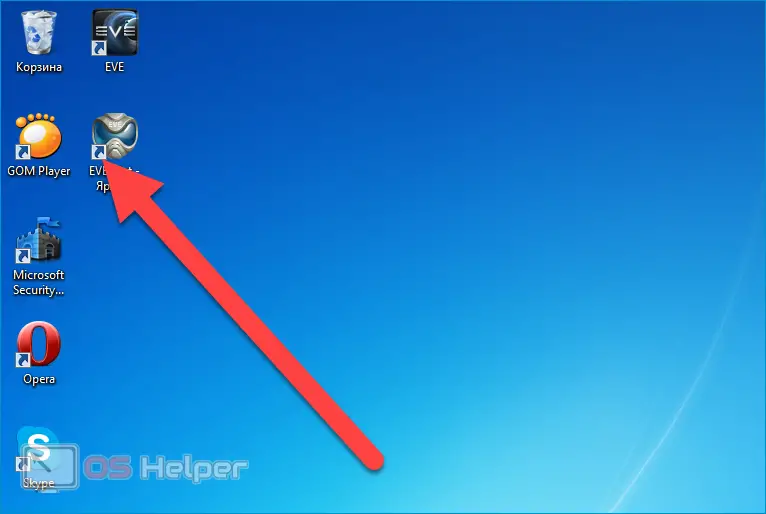
 Initially, each shortcut in Windows 11 is marked with an arrow icon located in the lower left corner. For many users, this way of highlighting shortcuts seems not entirely aesthetic - moreover, for some, these icons are completely annoying. Let's take a closer look at how to remove arrows from shortcuts in Windows 11 - we will offer some of the fastest methods that absolutely any user can easily use.
Removing icons from labels
You can get rid of annoying arrows using standard system tools, as well as using various third-party utilities. Let's take a look at all the available options.
Through the registry editor
To begin with, we will tell you how to get rid of the arrows without resorting to using third-party software. One of the options available to each user involves processing the system registry - perform all actions only at your own peril and risk.
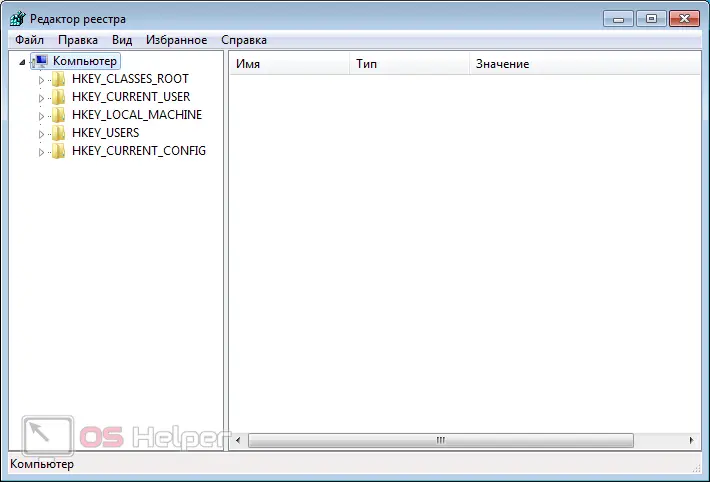
So, in order to remove shortcuts through the registry, you will need to create an additional parameter. This can be done using the following algorithm:
- Press the key combination [knopka]Win[/knopka]+[knopka]R[/knopka], enter the “regedit” command, execute it.
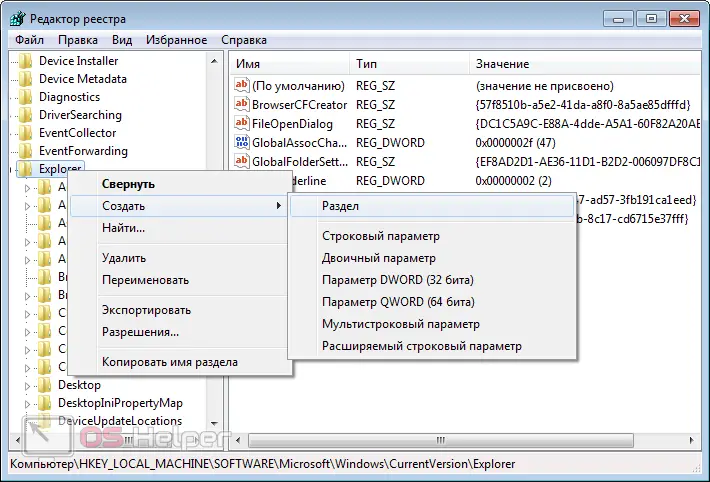
- We move according to the path: HKEY_LOCAL_MACHINE - SOFTWARE - Microsoft - Windows - CurrentVersion - Explorer - Shell Icons. If the required block is not found, right-click on "Explorer", click on "Create" > "Section".
- Open the prepared directory, right-click on an empty area, select New > Stock Parameter. In the column "Parameter" we insert "29", in the "Value" we enter "% windir% \ System32 \ shell32.dll, -50".
When the operating system is rebooted, the icons will disappear automatically. If the method did not work, move on to the next one - one of the options suggested in the article will definitely help.
By creating a REG file
If you don't want to manually modify registry settings, you can trust the operating system to do all of the previous steps. To do this, create a new document in Notepad and paste the following set of commands into it:
See also: How to clean up the WinSxS folder in Windows 11
Windows Registry Editor Version 5.00
[HKEY_LOCAL_MACHINE\SOFTWARE\Microsoft\Windows\CurrentVersion\explorer\Shell Icons]
"29"="%windir%\\System32\\shell32.dll,-50"
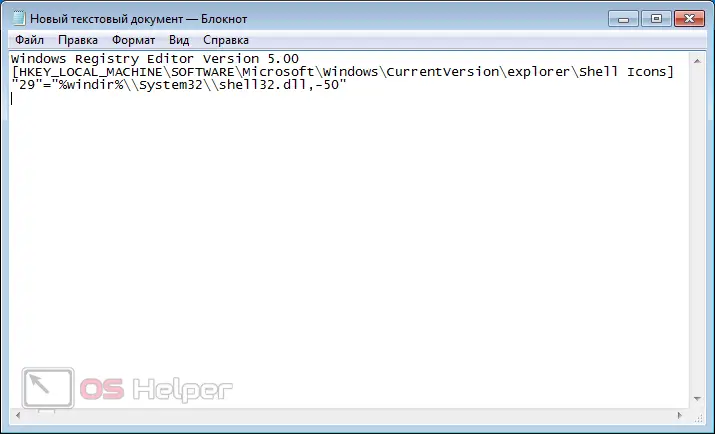
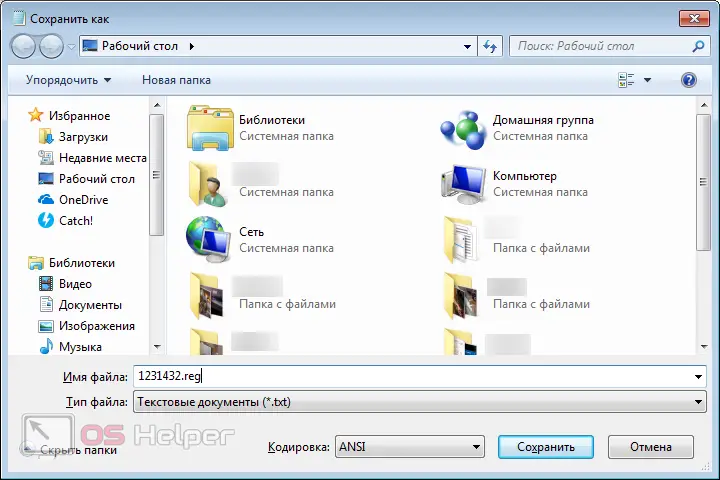
Then all that remains is to go to the "File" menu item, click on "Save As", enter any file name and add ".reg" at the end - for example, 123456.reg. After trying to save, the system will display a request to make changes to the registry - we agree.
Expert opinion
Basil
Project manager, comment moderation expert.
Ask a Question Using the steps above, the system will automatically create a new parameter with the desired value. It remains only to restart the PC.
Using a third party utility
The manipulations with the registry that need to be carried out to remove the arrows may seem rather complicated and incomprehensible to the average user. If you also thought so, then third-party utilities will be the only solution.
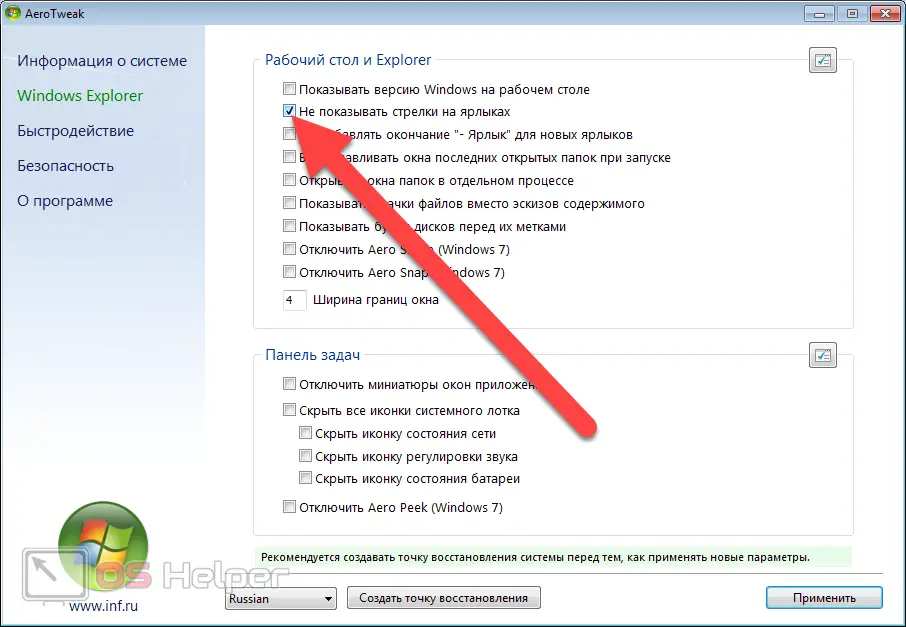
Let's take the Aero Tweak program as an example:
- We download the application (or from any other, the official resource is currently unavailable), run the downloaded file - you do not have to install the program.
- Go to the "Explorer" block and in the "Desktop" block, activate the item "Do not show arrows ...".
- Apply the changes and restart the PC.
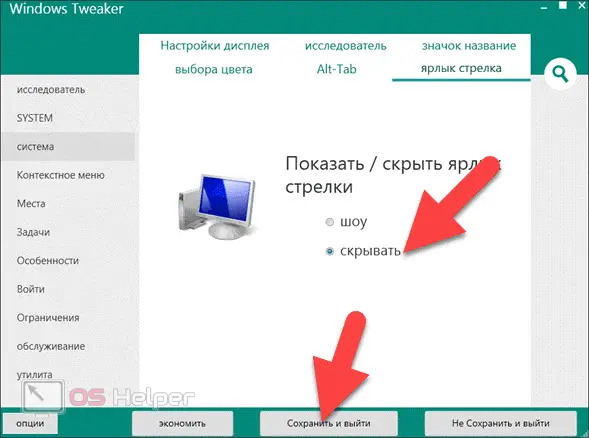
As an alternative to Aero Tweak, you can use a simple Windows 11 Tweaker application:
- Download the program, run it, open the "System" tab.
- We find the menu item "Shortcut label", set the label to "Hide".
- Click on "Save and Exit".
Any changes of this nature are applied after a reboot. The method associated with the use of utilities is quite safe - the proposed programs have been tested by many users.
Video instruction
We offer you to watch a short video that shows the main ways to hide arrows from shortcuts on the desktop and in File Explorer.
Conclusion
If after using the registry instead of shortcuts black squares appear, try to roll back the changes and use one of the programs presented in the last paragraph. We hope that the task was successfully solved.