How to remove the stream delay in OBS
 There are many things to keep in mind when setting up your live streaming software as you prepare to stream. Today we will talk about how to remove the stream delay in OBS. You will be able to respond to your viewers almost instantly if you set the settings, which are described in our guide.
Some live streaming platforms have introduced a minimum latency option, so for best results, you must enable the feature in both the OBS program and your channel settings.
What is low latency?
First, let's figure out why this function may be needed. The main purpose is to transfer content as quickly as possible to the viewer. Users visiting your channel will be able to ask questions and write their comments on every moment of the stream almost at the same moment. In turn, the streamer communicates with viewers in real time, instantly answering questions and reading the necessary chat messages.

However, a longer delay can be useful in some situations. For example, this feature is popular with competitive game streamers. The viewer sees the events that took place 1-2 minutes ago, which makes it difficult to track the streamer in the game.
Delay settings in OBS
So, now let's figure out how to set the optimal settings in the OBS program. To do this, follow the instructions provided:
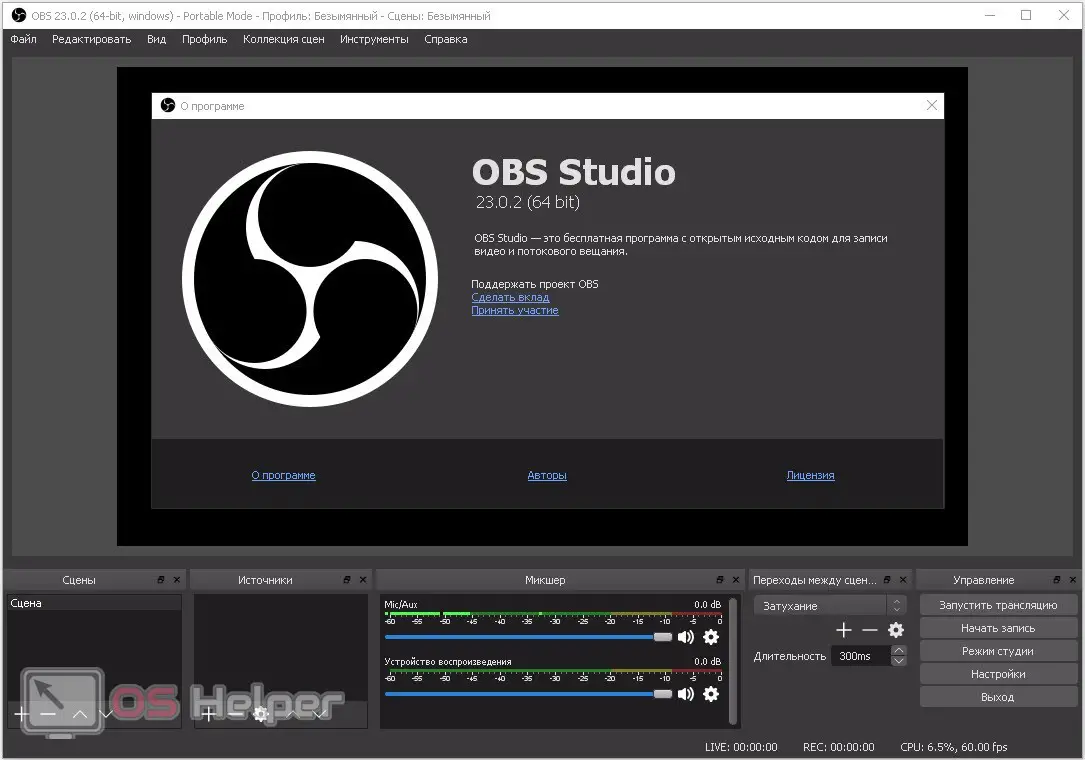
- Launch OBS and open the options window.
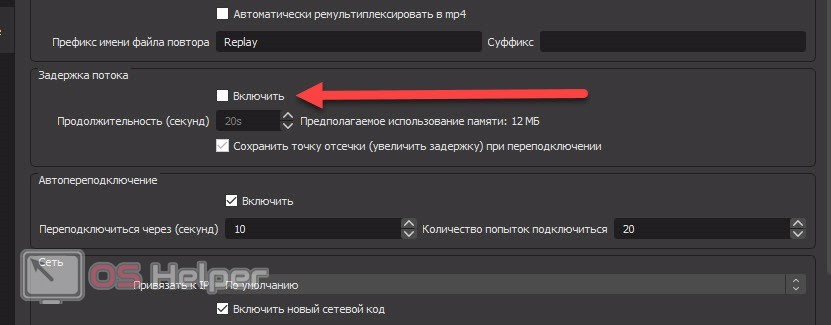
- Go to the "Advanced" tab.
- Find the "Stream Delay" settings block. Here you need to uncheck the box next to the “Enable” item.

Using the same section, you can set any delay value that will be optimal for your stream. Click on "Enable" again, and in the bottom field, specify the duration in seconds. Remember that when the delay is enabled, additional memory is used, the amount of which is indicated next to the setting.
See also: How to post a VKontakte story from a PC
However, settings in the OBS app are not the only way to reduce latency. If you disable this function in the program, then 1-2 seconds of delay will remain due to the nature of data transfer. You need to enable the minimum latency mode on the streaming platform.
Streaming Platform Latency Settings
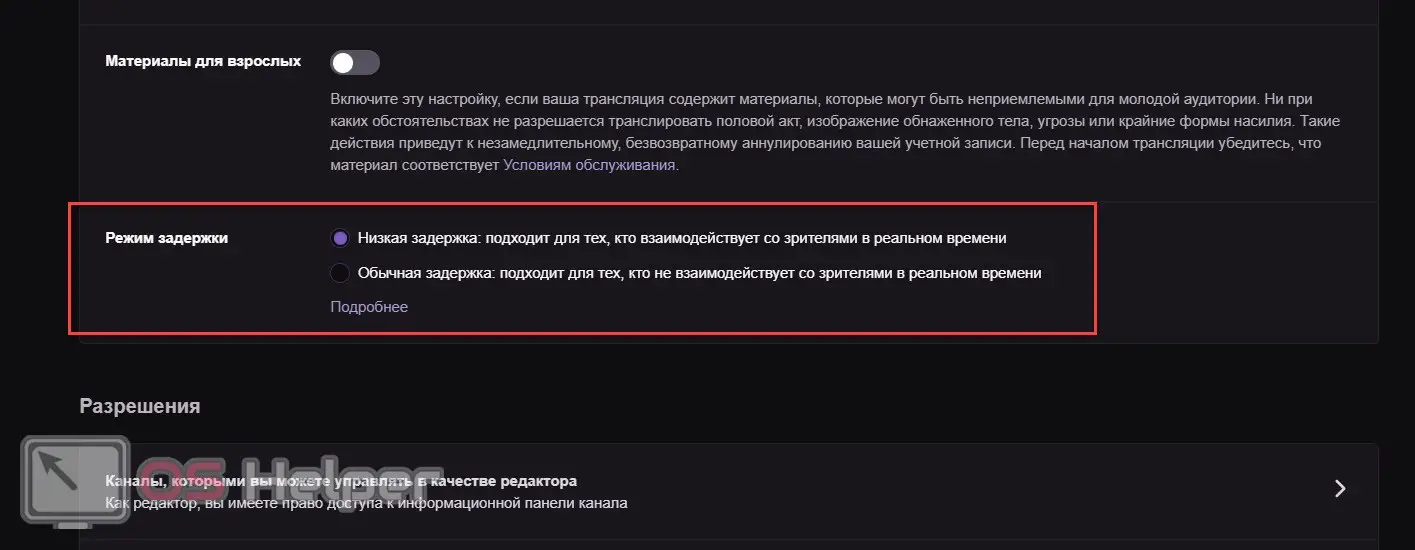
To achieve the maximum effect, after setting the setting in OBS, you need to go to your channel settings. Consider this procedure using the example of Twitch.tv:
- Open the site and log in with your account.
- Go to settings through the side menu.
- Open the "Channel and Videos" tab.
- In the "Delay Mode" block, you can switch between low and normal delay.

Expert opinion
Basil
Project manager, comment moderation expert.
Ask a Question If you click on the "More Info" link, you will open a page with a detailed description of the feature.
If you're a YouTube streamer, you'll be able to adjust your delay settings before each broadcast. To do this, you need to open a creative studio and go to the "Live broadcasts" section. Open the Options tab and review the broadcast settings. YouTube allows you to set standard, low, or low latency. If you select the latter option, you will not be able to select the quality of the 4K broadcast and turn on subtitles.

If you select the standard delay, you can specify the exact time in seconds in the field located at the bottom of this settings block.
Remember that in low latency mode, any interruptions and drops in Internet speed can affect the quality of the image, sound and continuity of the broadcast.
Video instruction
If you want to learn more about stream latency, be sure to watch this video tutorial. It describes in detail all the steps to set up in the OBS program and on streaming platforms.
Conclusion
So, now you know how to set the delay settings on the stream. To achieve the maximum effect, you must disable this option not only in the OBS program, but also use the functionality of your channel's control panel. Together, both methods will reduce the delay on the stream to 1 second or even less.
Expert opinion
Daria Stupnikova
Specialist in WEB-programming and computer systems. PHP/HTML/CSS editor for os-helper.ru site .
Ask Daria If you have questions about the topic of the instruction, then write them in the comments. We will read each message and, if necessary, help with advice!