How to write an image to a USB flash drive using UltraISO
 Once again, welcome to our website! Today we will talk about how to write an image to a USB flash drive via UltraISO. For this task, this application is best suited. With it, you can create a bootable drive for any operating system, including Windows XP, 7, 8, 10, MacOS or Linux. However, now you will see everything for yourself.
Download and install the program
Initially, of course, we need to download and install the latest Russian version of this program on a PC. Then we will proceed directly to writing the image to a USB flash drive. Initially, we take a few simple steps:
- We go to the official UltraISO website and download the application from there. When the file is received, run it and proceed to install the utility.
- The process is quite simple and it makes no sense to paint it especially. The only thing I would like to mention is the need to activate the virtual drive at the very end of the installation.
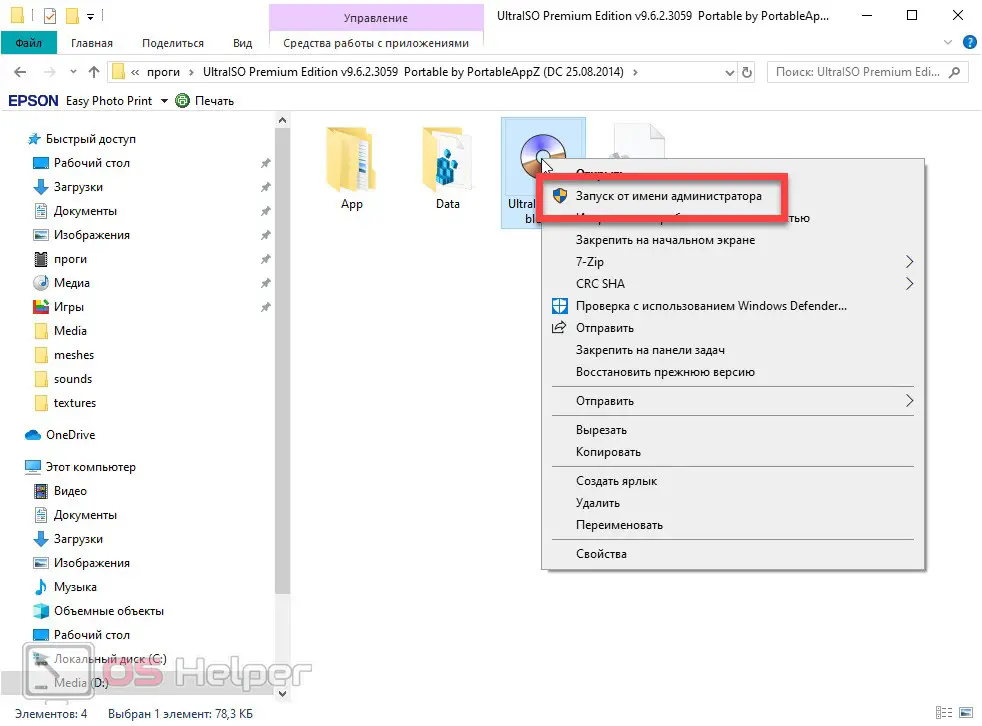
- When the installation is completed, be sure to run the program as an administrator. To do this, right-click on the launch icon and from the context menu select the item that we have indicated in the screenshot.
So, the installation of UltraISO is over, and we can proceed directly to the process of creating a boot image and writing it to a USB flash drive.
Burning an image to UltraISO
So, in order to write our image to a USB drive, we take a few simple steps:
- First of all, insert the USB flash drive into the USB port of the computer. Next, go to UltraISO and, using the "File" menu, open Windows Explorer and select the image that we will write to the USB flash drive. We can also replace this action with the hotkey combination [knopka]Ctrl[/knopka]+[knopka]O[/knopka] on your keyboard.
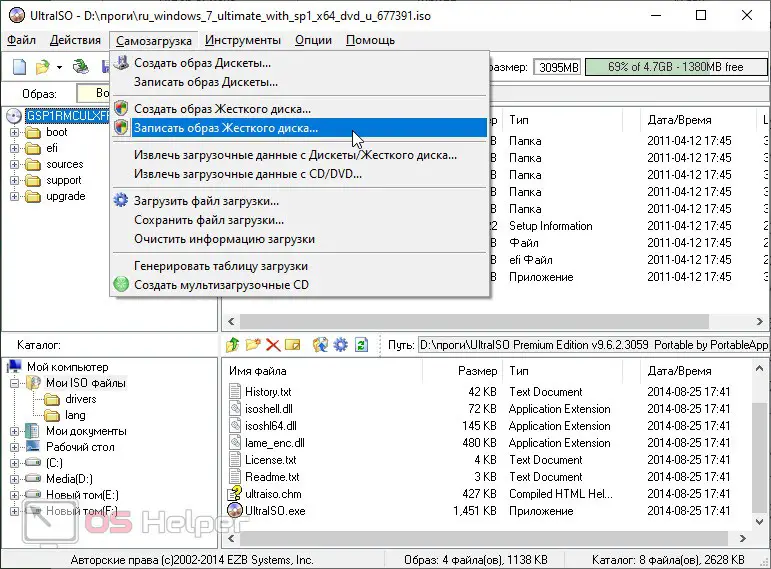
- For example, in our case, an image of the Microsoft Windows operating system will be taken. When the object is opened, we will see its file system in the right part of the program window. To start writing data to a USB flash drive, you need to open the "Boot" main menu item, and then select the "Burn hard disk images" sub-item.
Also Read: Top 3 Windows Explorer Secrets
- As a result, another window will open in which we will need to make a few simple settings:
- In the upper part of the window, we make sure that our flash drive is selected as the target medium.
If the device is listed incorrectly, there is a possibility of losing personal data from the drive that will be listed here.
- We check the path to the image file, which should already be registered here.
- We do not change the recording method, the default options, too.
- Once again, we make sure that all data from the flash drive is saved (if any) and press the button to format our drive. Another window will open, in which we also do not need to change anything. We just start the process.
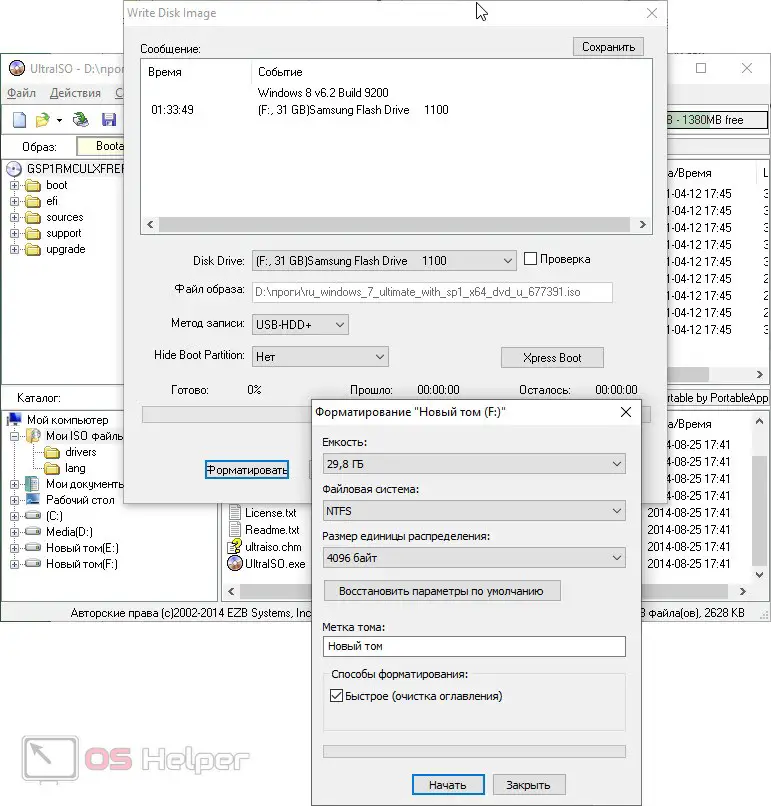
- Now that everything is ready, we start writing our image to a USB flash drive via UltraISO. To do this, respectively, click the "Record" button. The system will give us another warning that all data from the flash drive will be deleted. This no longer frightens us, so we confirm our intention.
- We just have to wait for the end of the process of writing the image to the USB flash drive.
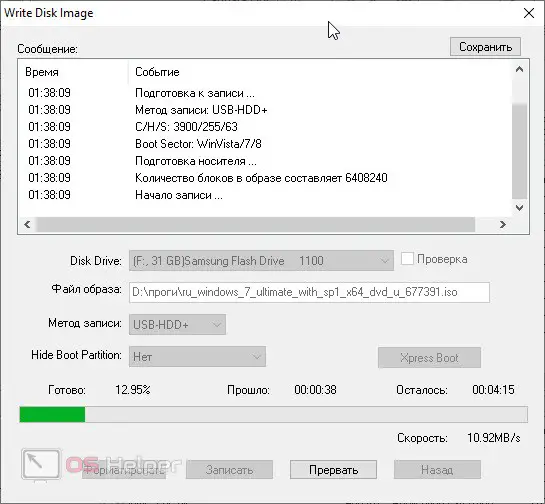
As a result, we will get a bootable drive that can be used to install the operating system on a computer or laptop. As you can see, there is nothing complicated in this.
Expert opinion
Daria Stupnikova
Specialist in WEB-programming and computer systems. PHP/HTML/CSS editor for os-helper.ru site .
Ask Daria By the way, any other operating system can be recorded in the same way.
Video instruction
In order for you to understand the issue in question as best as possible, we have also prepared a training video on this topic. We recommend that you definitely familiarize yourself with the video and only then move on to practice.
Conclusion
As you can understand, UltraISO is an excellent application for burning an image to a USB flash drive. With it, you can easily install any operating system on a USB drive and install it on your computer from it.
See also: Black screen with inscriptions when turning on the computer
This is where we will finish our article and recommend that if you have any questions, ask them using the feedback form attached below. Naturally, we will respond to every person who asks for help.