How to remove a blank page at the end of a document in Word
 The Microsoft Word text editor has many features and capabilities that make it easier to work with documents. Many users have encountered a situation where a blank sheet appears at the end of a document. Today we will talk about how to delete a blank page at the end of a document in Word.
Expert opinion
Basil
Project manager, comment moderation expert.
Ask a Question This guide is suitable for any version of Microsoft Word. All described features and functions are present in every edition of the editor.
Blank lines and paragraphs
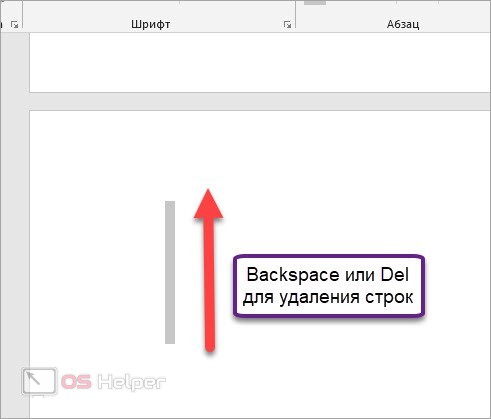
The first thing to check is the presence of empty lines at the end of the document. Each time you press the [knopka]Enter[/knopka] key, the editor creates an empty line for entering characters. If at least one empty line does not fit on the last sheet, it will be moved to a new page. As a result, we get a document at the end of which a blank page appears. To remove it, you need to do the following:
- Scroll through the document to the last page.
- Place the print cursor anywhere on the page.
- Use the [knopka]Backspace[/knopka] or [knopka]Del[/knopka] key to try erasing invisible paragraphs. If the cursor starts to move up, then delete empty lines until the last sheet disappears automatically.
There is a special "Find and Replace" function with which you can remove all empty paragraphs at once. To do this, place the cursor on the last sheet and press the key combination [knopka]Ctrl[/knopka]+[knopka]G[/knopka]. In the line for entering the page number, specify \page and apply the conditions.
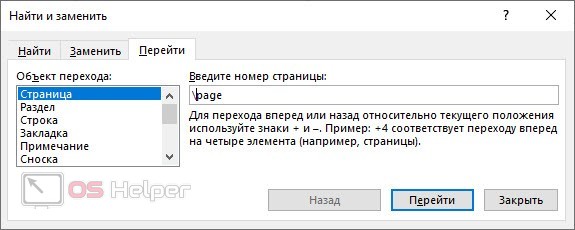
As a result, all available rows will be selected on the page. You can delete them with one press of the [knopka]Del[/knopka] key.
You can also select the whole document with the combination [knopka]Ctrl[/knopka]+[knopka]A[/knopka], see the content of the last sheet and erase it manually.
Hidden symbols
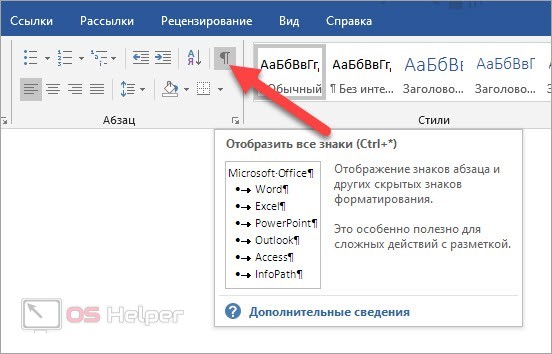
Microsoft Word has a special feature for displaying non-printing characters. It allows you to find extra characters, double spaces and other nuances that you cannot catch on your own when viewing a document. You need to activate the function using the sign on the top bar. It is marked in the screenshot below:
Also Read: How to Convert Excel to Word
After pressing the button, you will see all the paragraphs and hidden characters, so you can select them and erase them in any convenient way.
If there is no icon for displaying hidden characters on the toolbar, then you can activate the option by pressing [knopka]Ctrl[/knopka]+[knopka]Shift[/knopka]+[knopka]8[/knopka].
Removing breaks
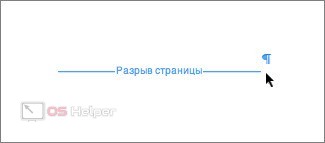
Most often, blank pages with breaks occur in the middle of a document, but this situation can also occur when using the function on the last sheet. To remove this element, do the following:
- Re-enable non-printable characters using the button that was mentioned in the previous instructions.
- With one click of the mouse, select the "Page Break" mark.
- Delete the element with the [knopka]Del[/knopka] key.
Ending the document with a table
By default, Microsoft Word inserts an empty paragraph after each table, and only after it can the user type. If the table is used at the very end of the document, and there is no room for a blank line after it, then it is transferred to the next page. You can hide this paragraph like this:
- First you need to select a paragraph. To do this, place the cursor on the left edge of the sheet and click LMB.
- Right-click on the selected rectangle and open the "Font" item.
- In the "Font" tab, check the box next to "Hidden" and save the changes.
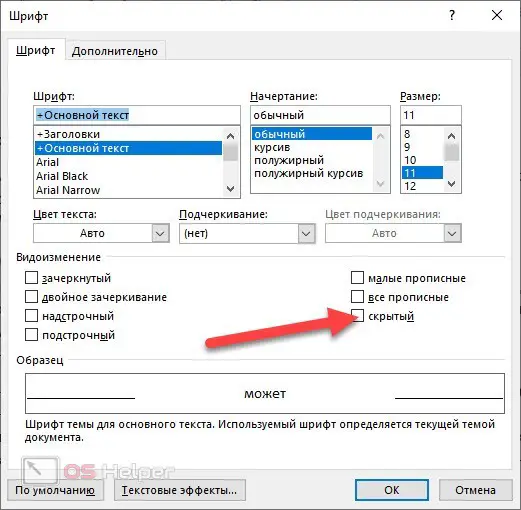
Ready! After that, the paragraph will disappear, and with it the extra page at the end of the document will be deleted.
Video instruction
A visual implementation of actions to remove extra and empty pages in a document is discussed in the presented video.
Conclusion
Now you know a little more information about the correct formatting of documents in Microsoft Word. As you can see, there is nothing complicated in deleting blank pages - one of the described methods will definitely suit you!