How to set up OBS
 In our article today, we will talk about the Open Broadcaster Software program again. This software is designed to record the contents of the computer screen and broadcast to various video hosting sites. However, in order for this to work well, OBS needs to be properly configured. It is about how to do this that we will discuss below.
Correct installation of the program
You can run this application on your computer in two ways at once. This is a standard installation that involves copying files to the Windows system directory, or running a portable version.
We recommend using the second option for several simple reasons:
- No entries will be added to the Windows registry. As a result, Microsoft's operating system database will be less cluttered.
- After reinstalling the OS, all settings of your application will remain unchanged.
- The application can be transferred to another computer.
If you have multiple drives installed on your PC or laptop, one of which is a solid state drive, move the folder with the portable version of OBS to it. This will provide better performance.
Sound settings
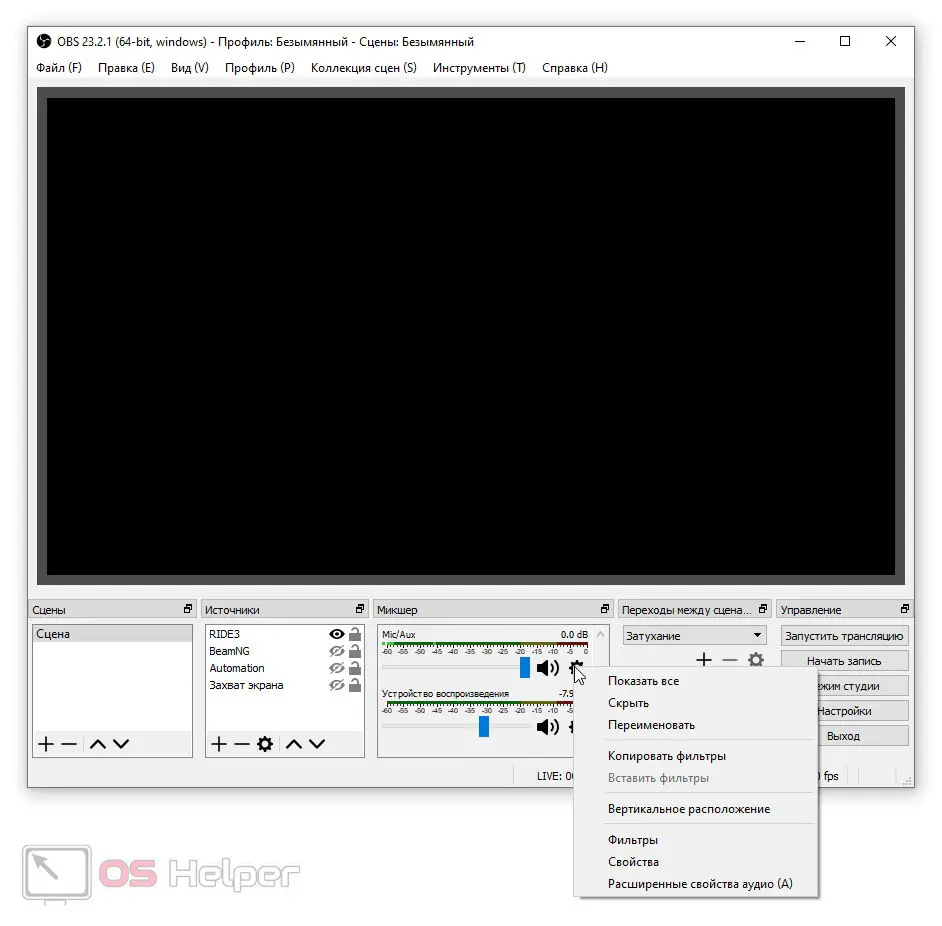
When the program is launched we will have access to the sound settings. To do this, click on the gear icon next to the level adjustment slider. As a result, we will get the following features:
- Add and configure any filter, including noise reduction, VST plugins and so on. At the same time, Open Broadcaster Software will apply the filter that you create here in real time to your voice.
- The section with sound properties allows you to set the device through which, in fact, our recording is carried out.
- Advanced properties allow you to set the timing offset or enable listening. As a result, you can adjust the microphone while listening to the final result.
See also: JBL Quantum 350 Wireless gaming headset review

Now that we have dealt with the sound, we go directly to the picture.
Video setup
Users often set the streaming quality and recording quality separately. We will install the same codec for both modes. This is actually done as follows:
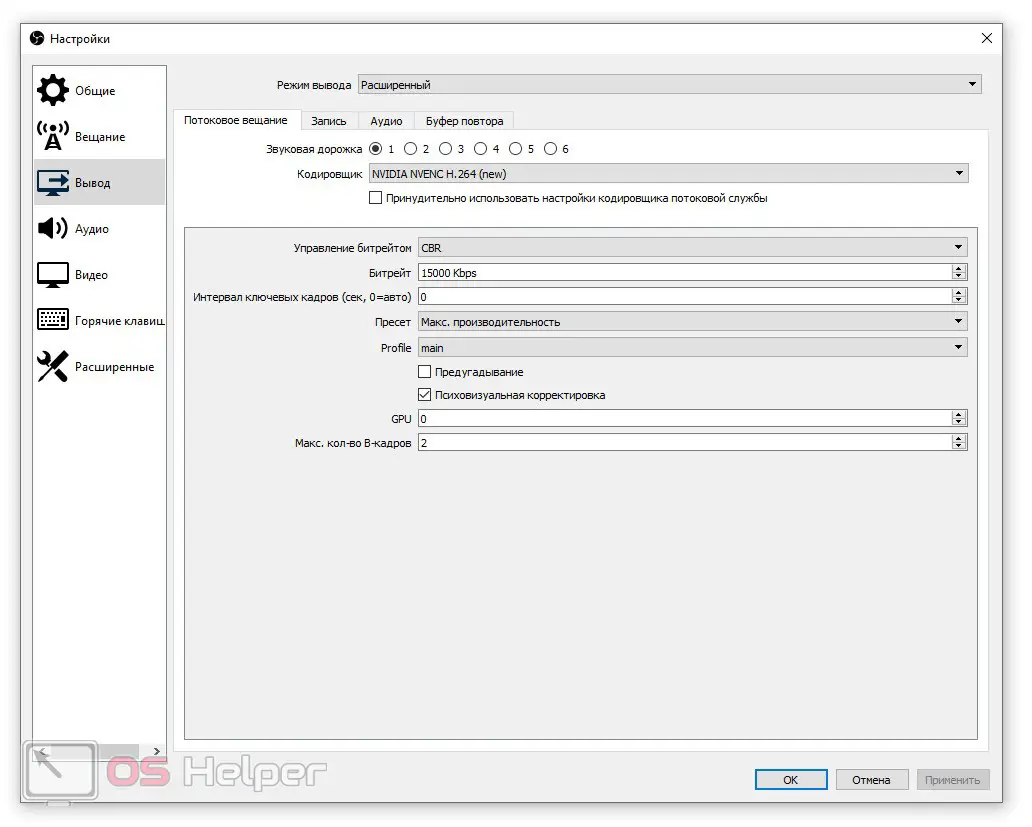
- Initially, go to the settings by clicking the button in the lower right corner of the window. After that, go to the "Output" tab on the left side of the window that appears.
- Open the "Streaming" tab and install our encoder. Here, events can develop according to two scenarios:
- If you have a video card that supports hardware encoding mode, install the codec shown in the screenshot below.
- If only the CPU will encode the stream, set the code to x264. All other options do not need to be touched.

In this case, you can experiment with the bitrate value. In theory, the higher it is, the better the picture. However, as the value increases, the load on the hardware also increases.
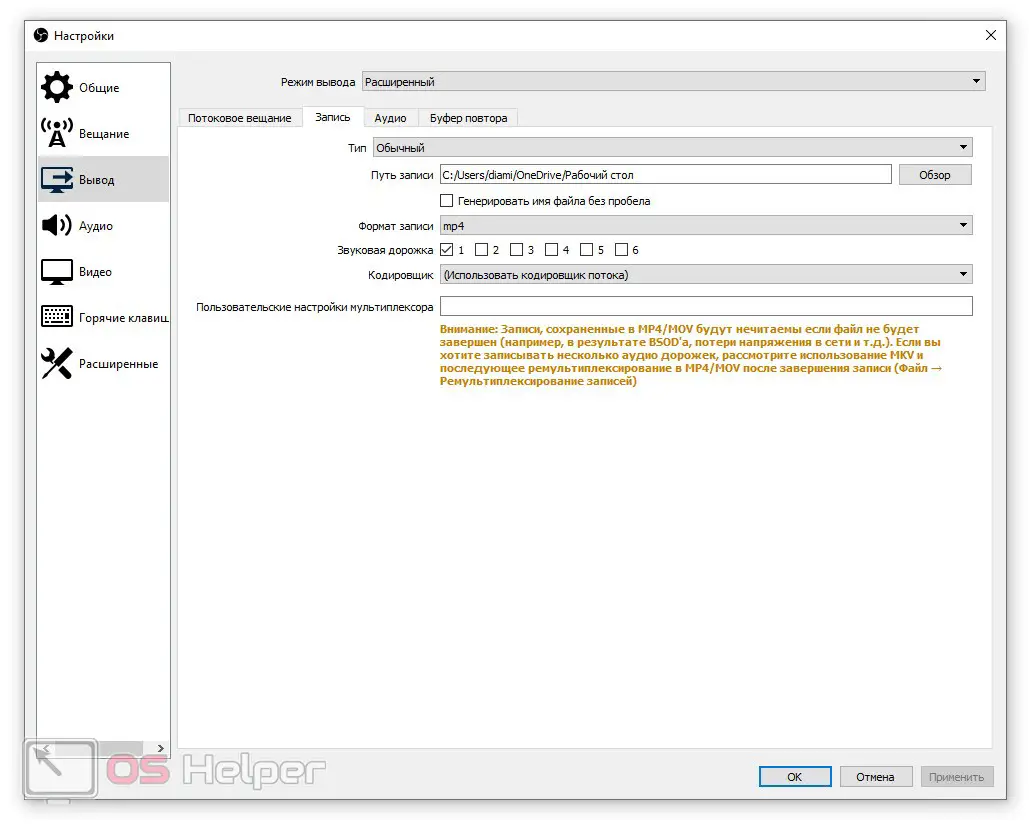
- Next, switch to the "Record" tab. In the "Encoder" field, select "Use stream encoder". Now the settings from the broadcast tab will be imported to record our video. you do not need to separately configure both items.

How to start streaming
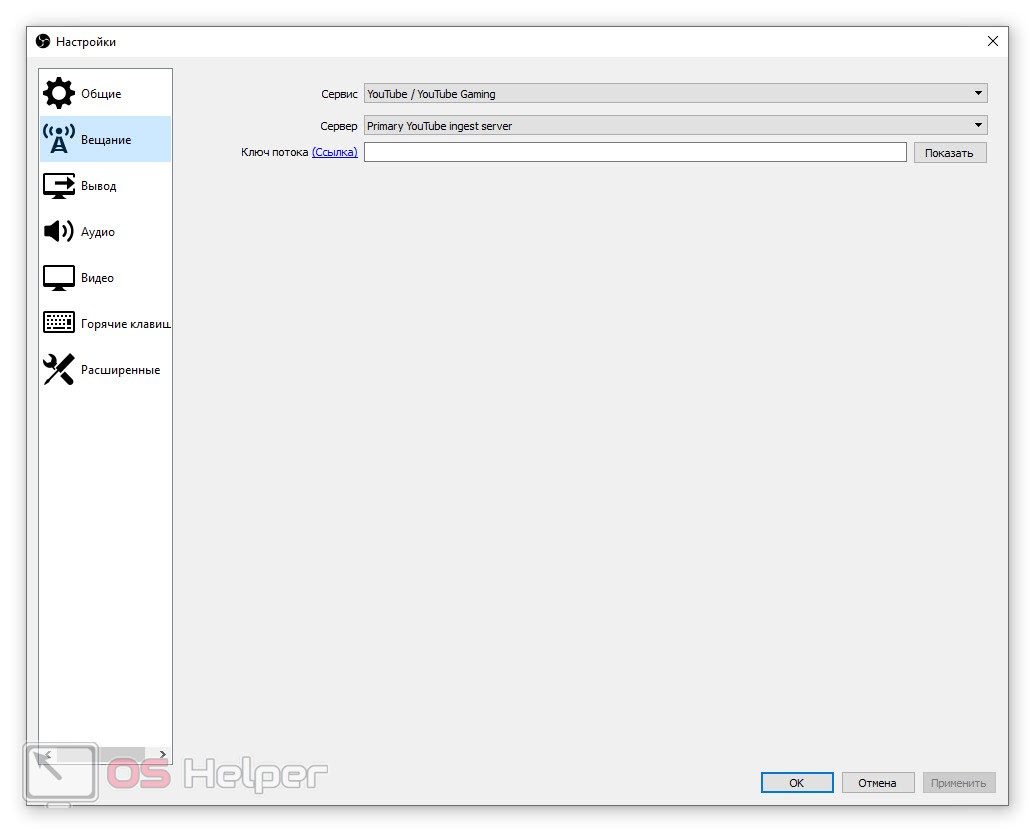
In order to actually start broadcasting, we need to set up a stream key:
- Let's go to the settings again.
- Switch to the "Broadcast" tab.
- Select the service on which we will stream.
- Specify your stream key (you can find it in the broadcast settings on your channel).

Expert opinion
Daria Stupnikova
Specialist in WEB-programming and computer systems. PHP/HTML/CSS editor for os-helper.ru site .
Ask Daria To save all changes, click the "OK" button.
Video instruction
In order to make it easier for you to understand what we wrote above, we also recommend that you familiarize yourself with the contents of the training video on the topic. Perhaps, after watching the video, you no longer want to read the article.
See also: What is more gigabytes or megabytes
Finally
This is where we end our article, as we understand well that you have clearly mastered the topic. However, if you still have some questions, feel free to ask them in the comments, and get answers that can help in a given situation.