How to remove acne from the face in Photoshop? | Secrets from a pro! Frequency decomposition method Summing up
How to remove acne from the face in Photoshop? | Secrets from a pro!
 When working with a phone camera, with a camera or other devices capable of taking photographs, we sometimes encounter an unpleasant situation. It consists in the fact that acne, blackheads or other skin defects are present on the face of the model. So, in our today's article, I, as a professional, will tell you how to solve such a problem using regular Photoshop in just 5 minutes. Very soon you will learn how to work with the frequency decomposition method and will be able to retouch any photo right on your computer. Well, let's go!
Frequency decomposition method
Now I will go to the network and download from there a picture of a girl whose skin is not all right. Already on her example, I will show how to remove all foreign objects from the face. For this:
- We launch our Photoshop and open the image using the main menu or hotkey combinations.
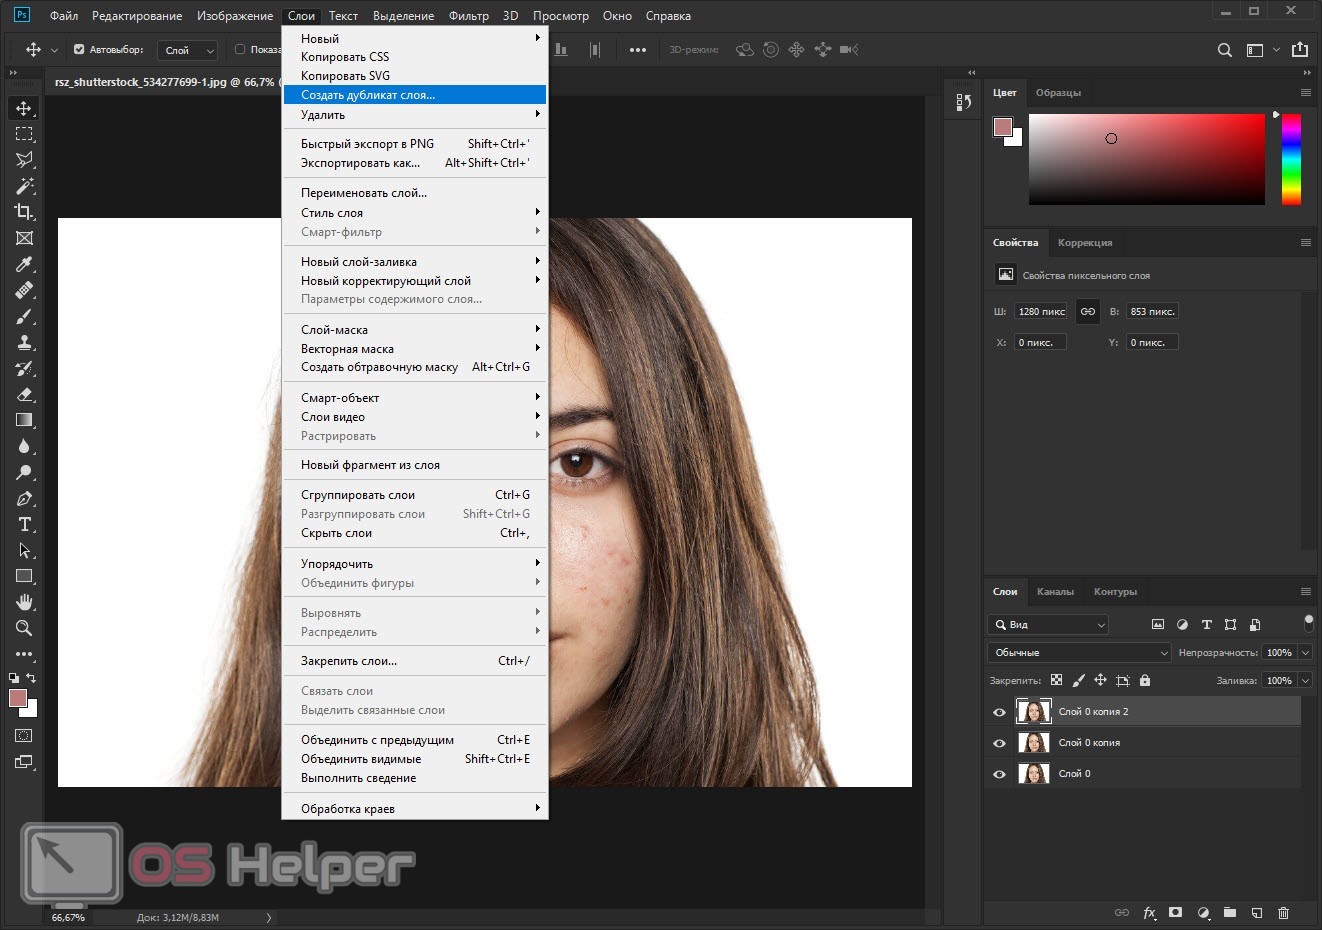
- If a lock is installed on the working layer, click the left mouse button to remove it. After that, we need to create two duplicates of the layer using the "Layers" main menu item.
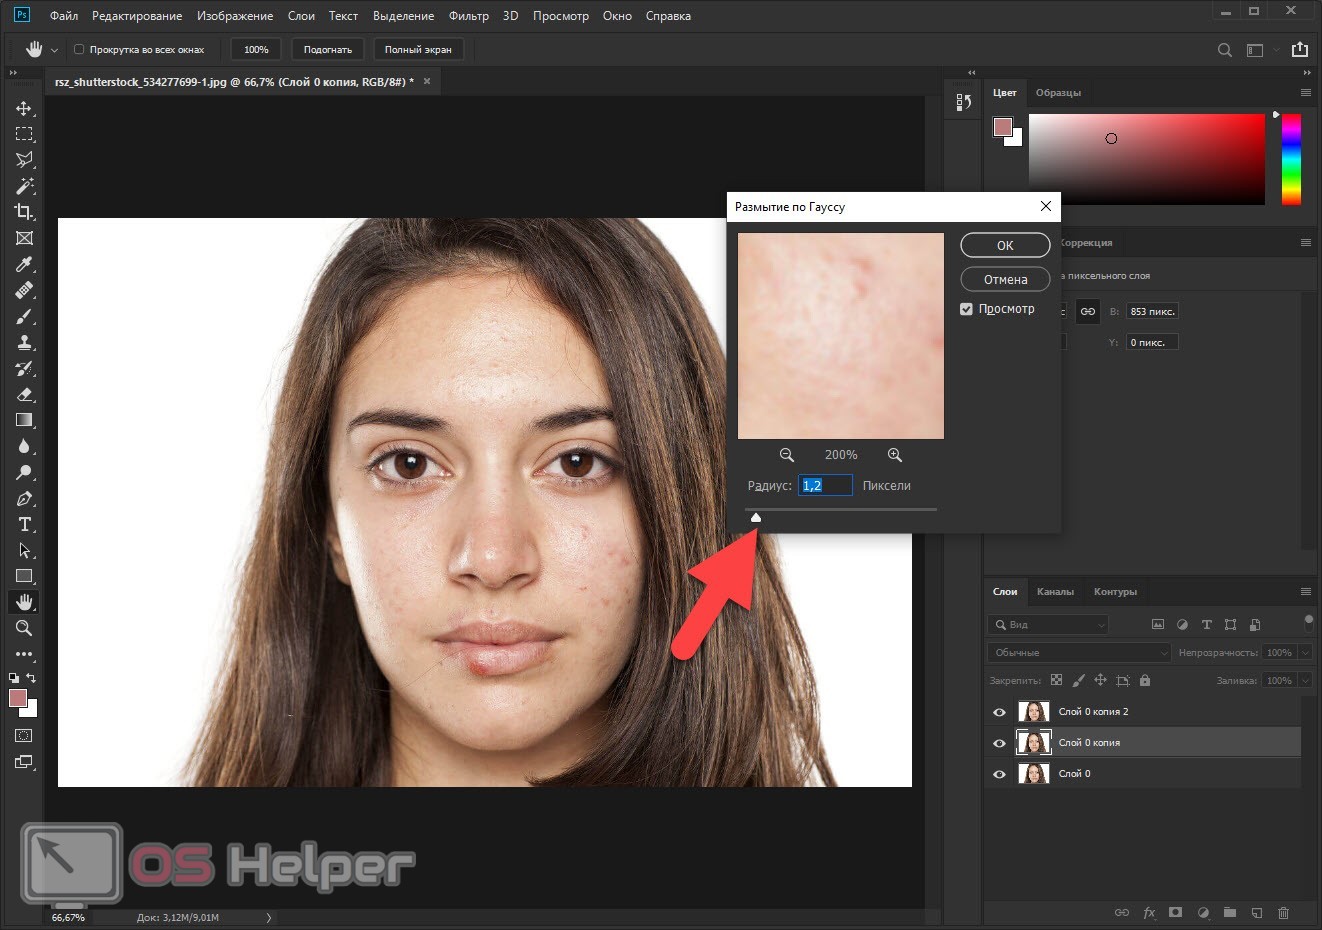
- Next, go to the "Filter" item, select "Blur" in the context menu, and then "Gaussian Blur". Use the slider to set the blur in such a way that the fine texture of the skin disappears, and the defects remain visible.
Attention: the value obtained at this stage will be different in each case. It all depends on the resolution of the photo and other factors. Therefore, with each treatment, it should be selected experimentally.
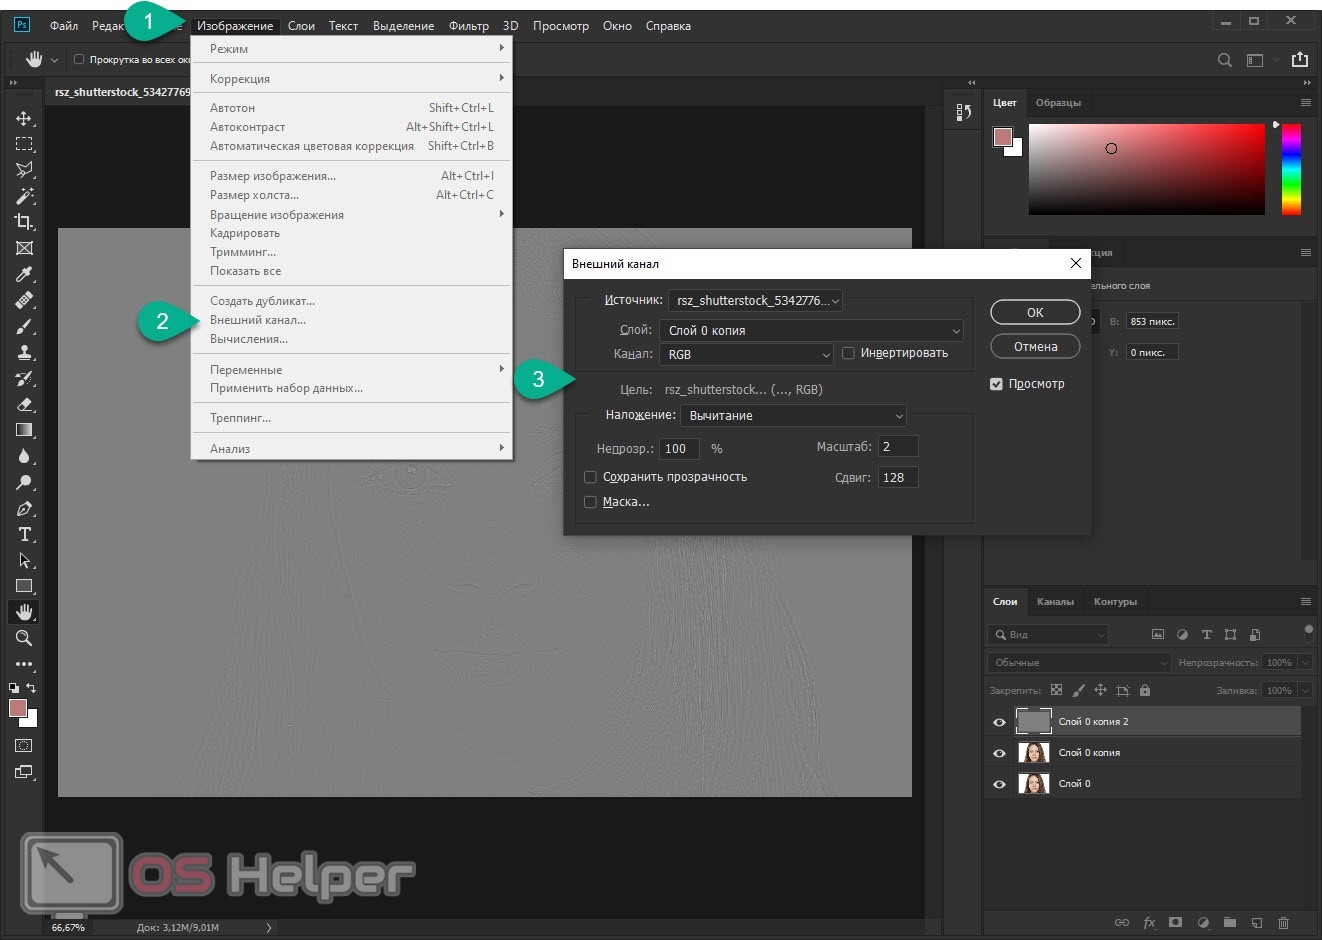
- When the blur is applied, go to the last layer by selecting it in the lower left part of the window. In the main menu, select the "Image" item, and then "External channel". In the "Layer" field, specify the layer that we blurred using the Gaussian filter. In the "Overlay" field, select "Subtraction". Set the scale value to "2" and the offset to "128". In this case, we remove the checkbox from the item "Invert". Confirm the settings by clicking the "OK" button.
See also: How to overlay a photo on a photo in Photoshop online
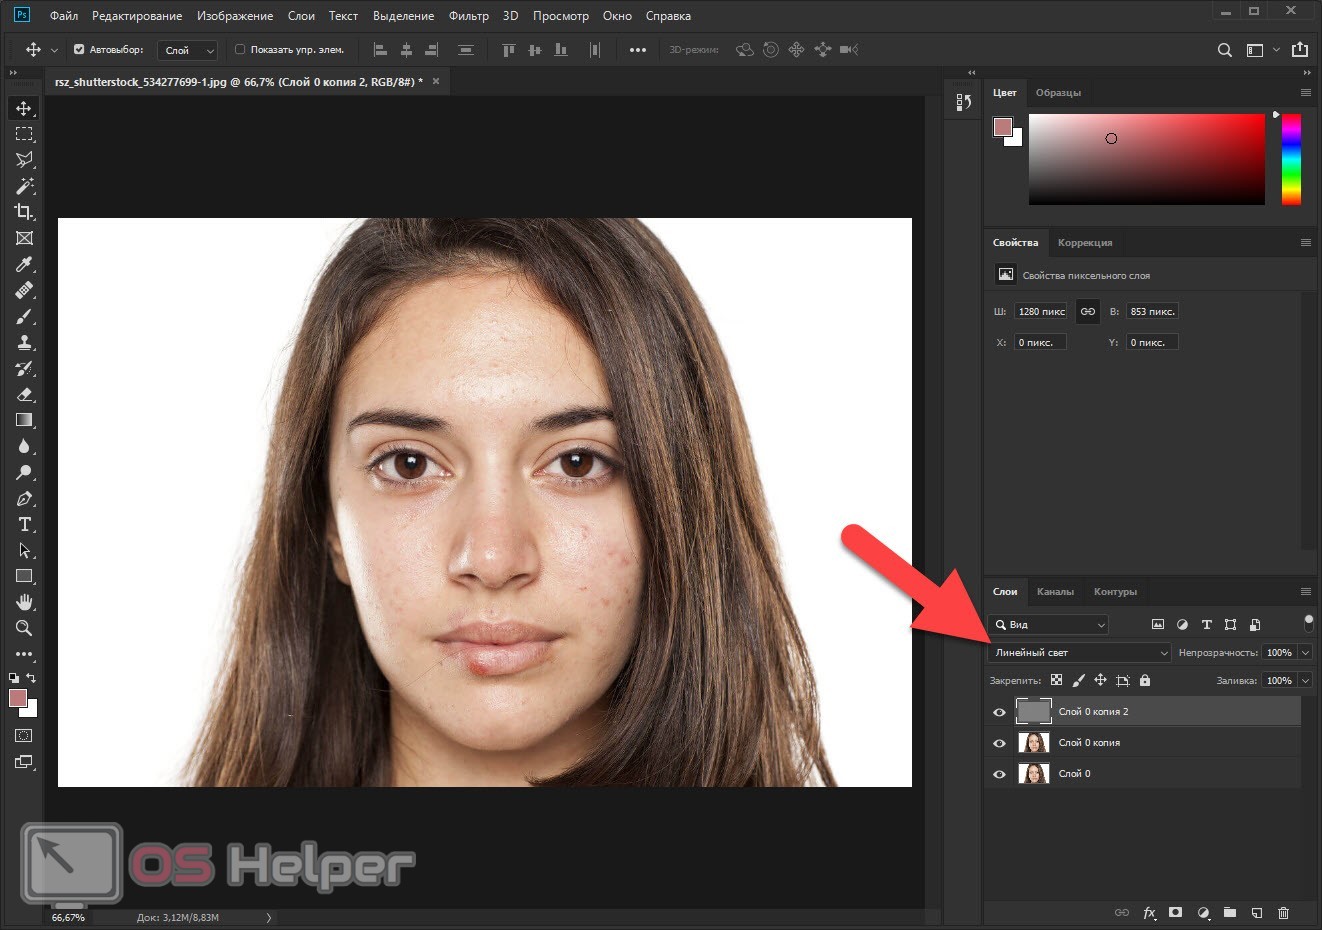
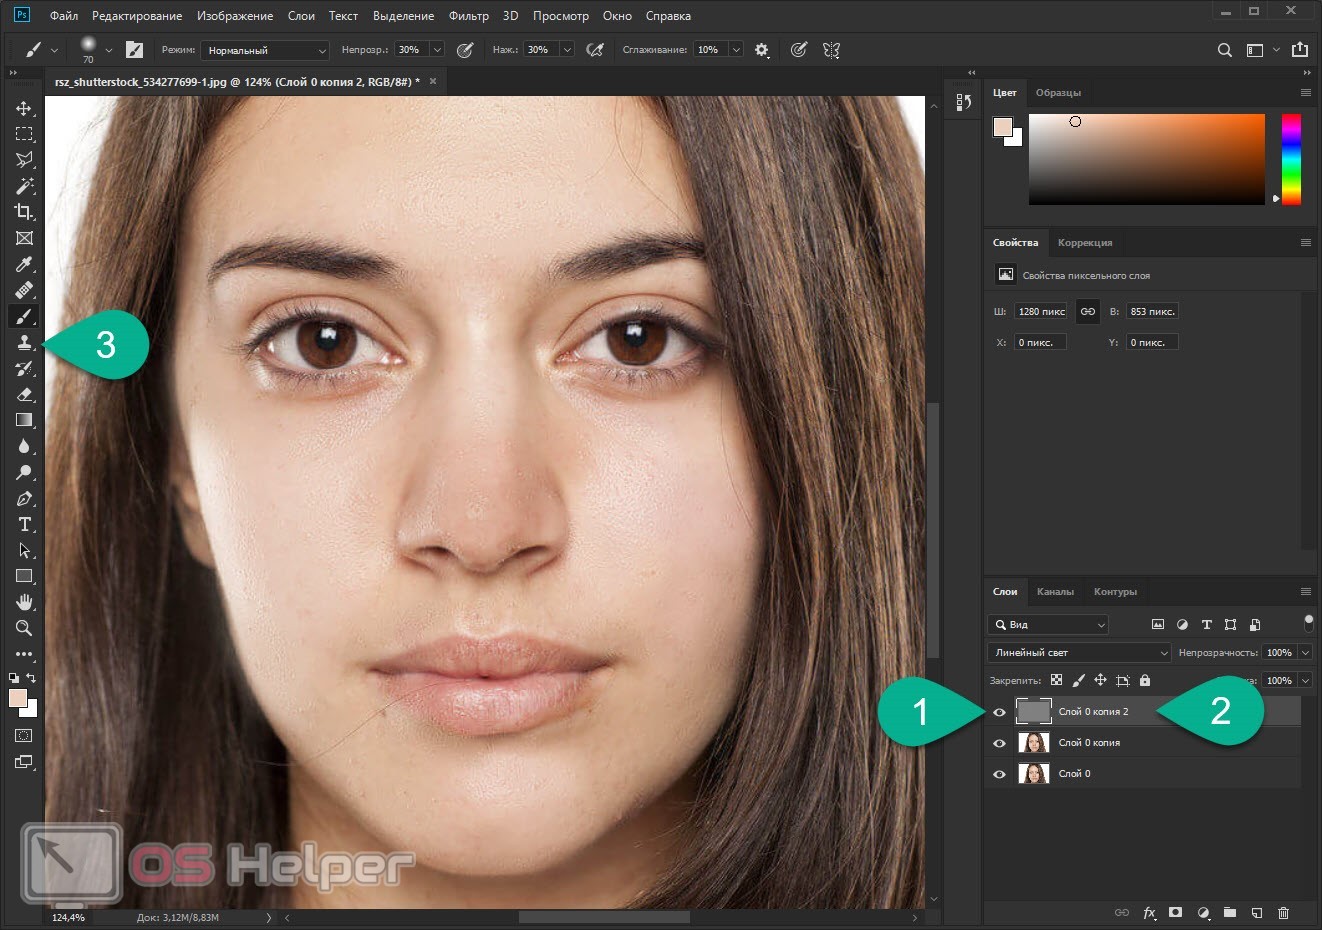
- In the field marked with a red arrow, switch the blending mode to Linear Light.
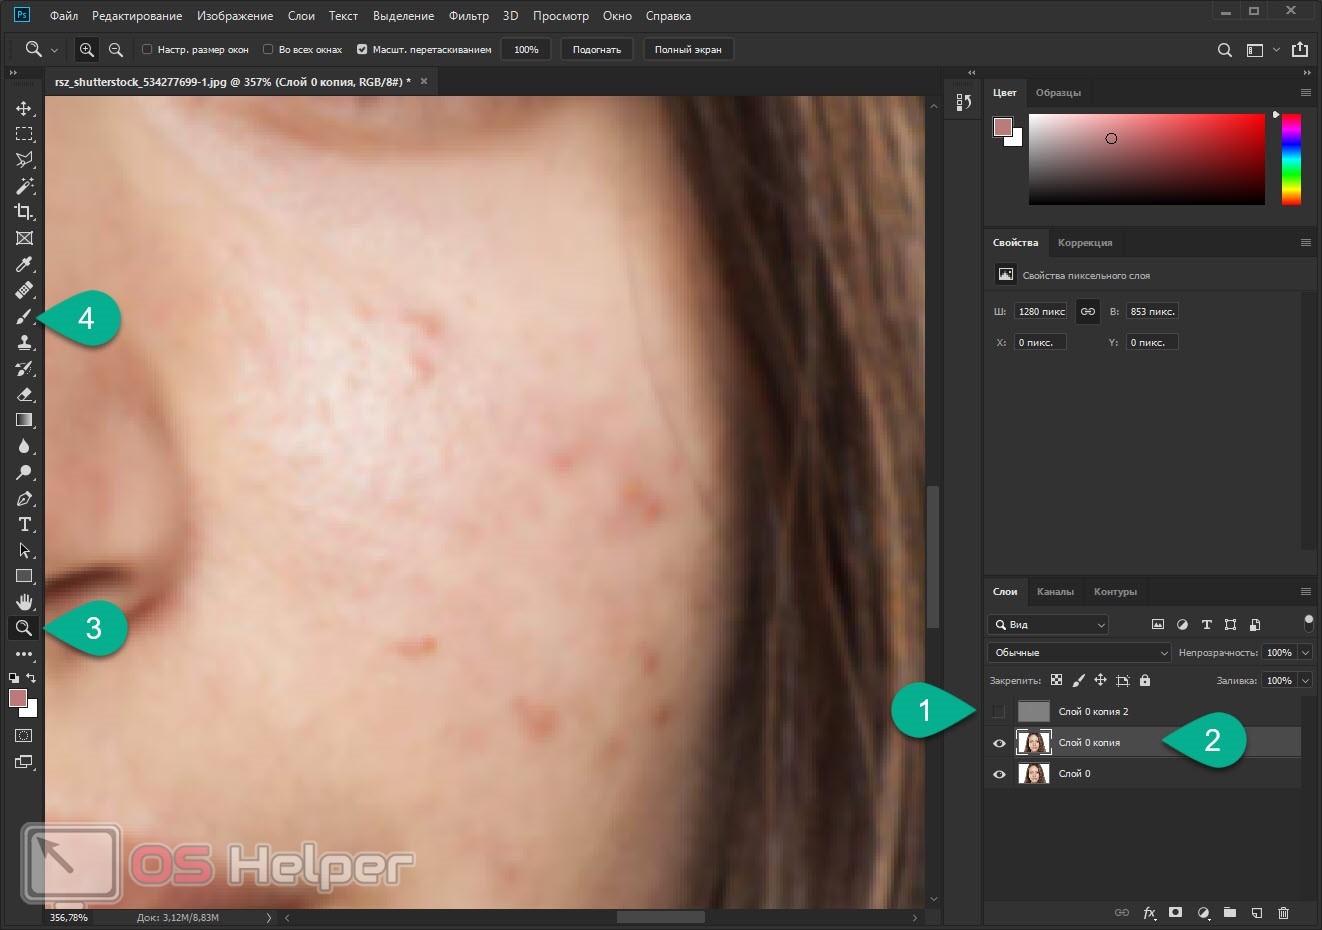
- Turn off the top layer by removing the eye icon on its left side. After that, switch to the middle layer (the one we blurred with the Gaussian filter). Using the magnifying glass icon, we scale our picture so that we can clearly see skin defects. Then switch to the brush tool.
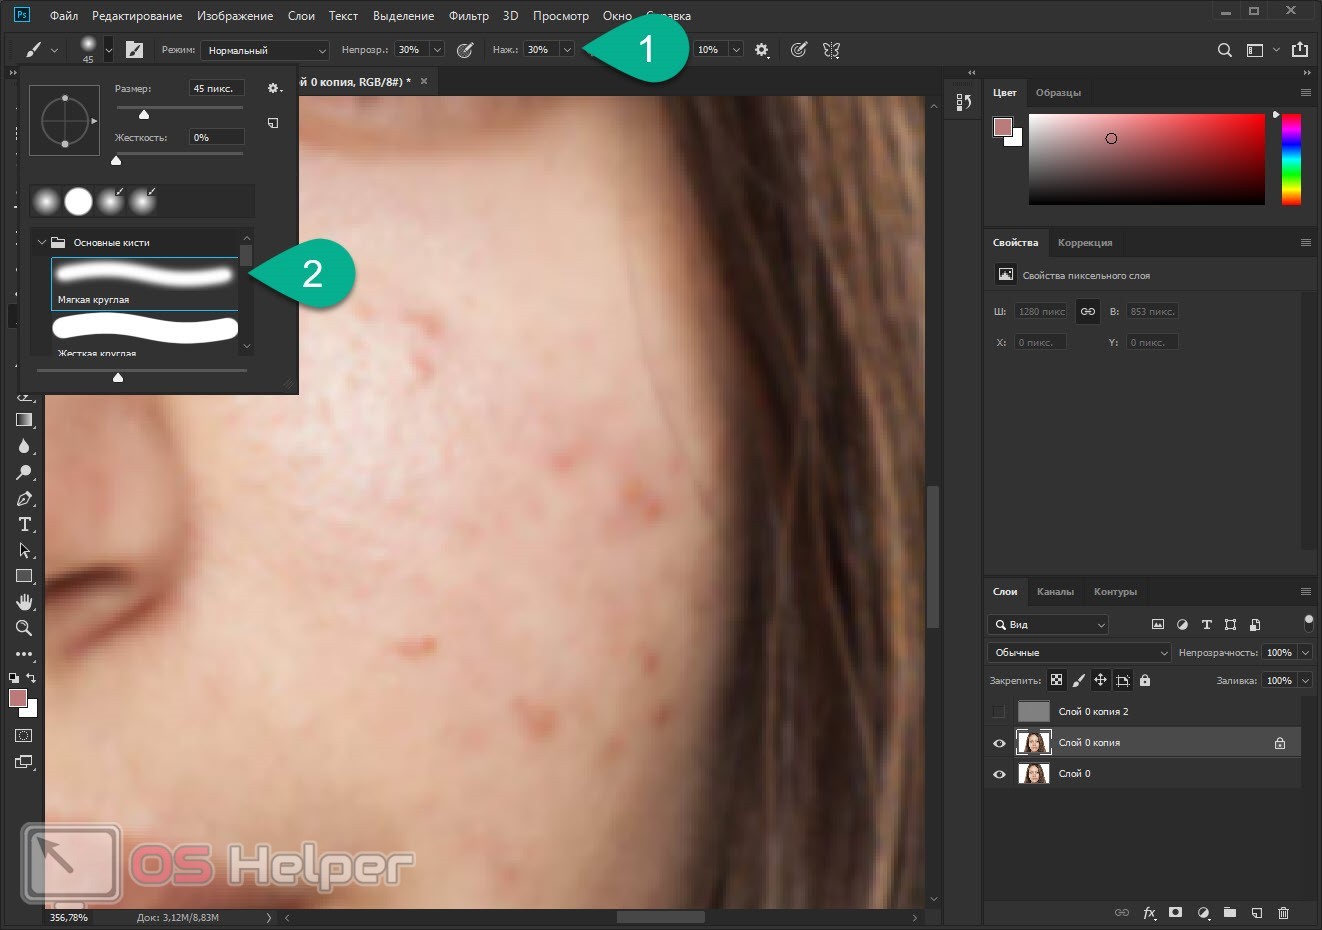
- In the upper part of the window, set the opacity and pressure of the brush to 30%, and also in the field marked with the number "2", use a brush with soft edges.
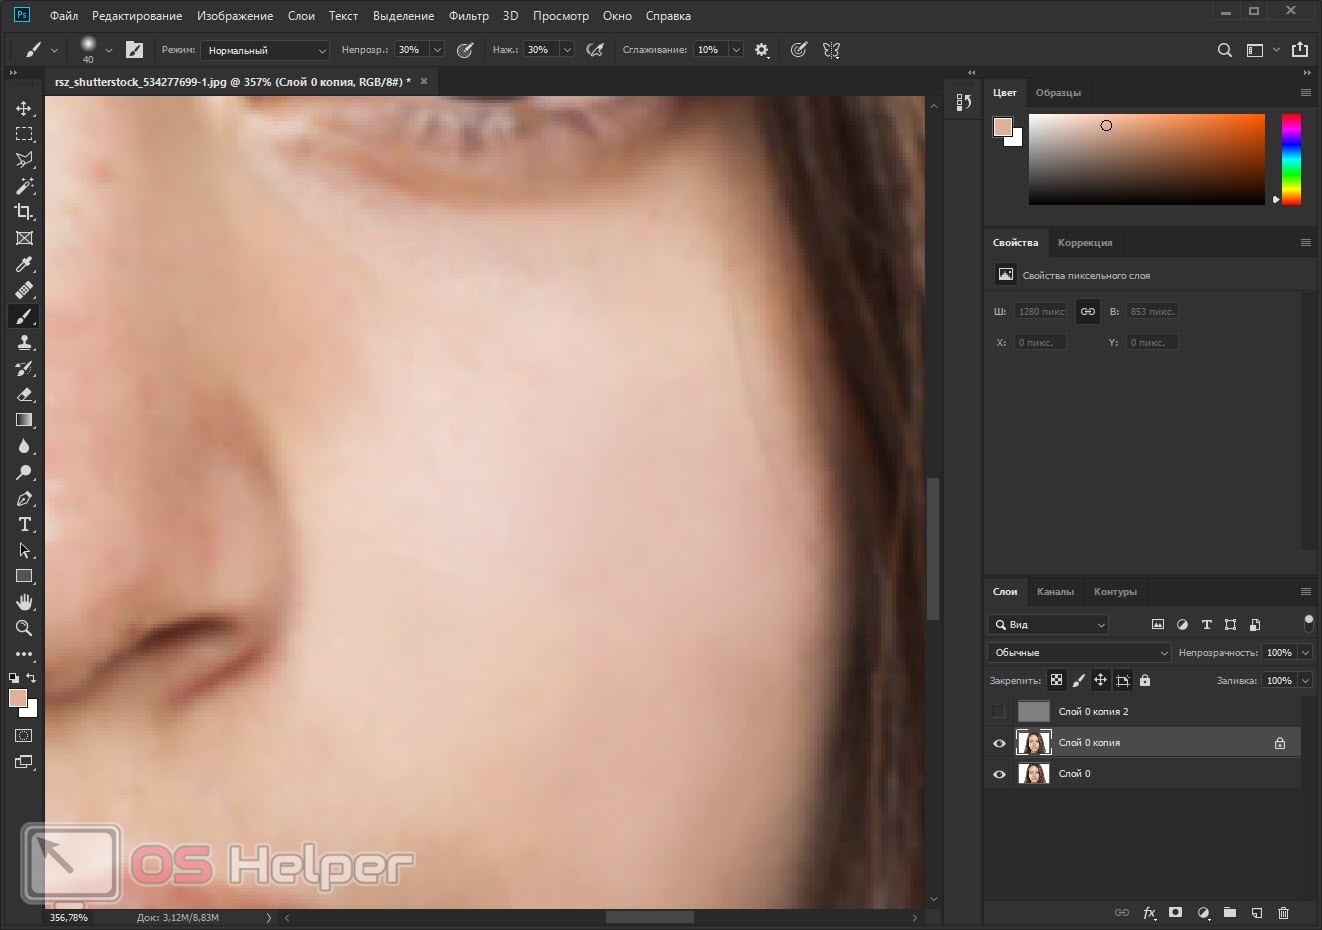
- Hold down the "Alt" button and use the left mouse button to take a sample of healthy skin color. This must be done in the immediate vicinity of the defect. Let's release "Alt" and reciprocating movements to smooth out the blemish.
- Working in this way, we remove all defects from the face of our model. Next, switch to the top layer, having previously returned the icon with the image of the eye to its place, and activate the Stamp tool.
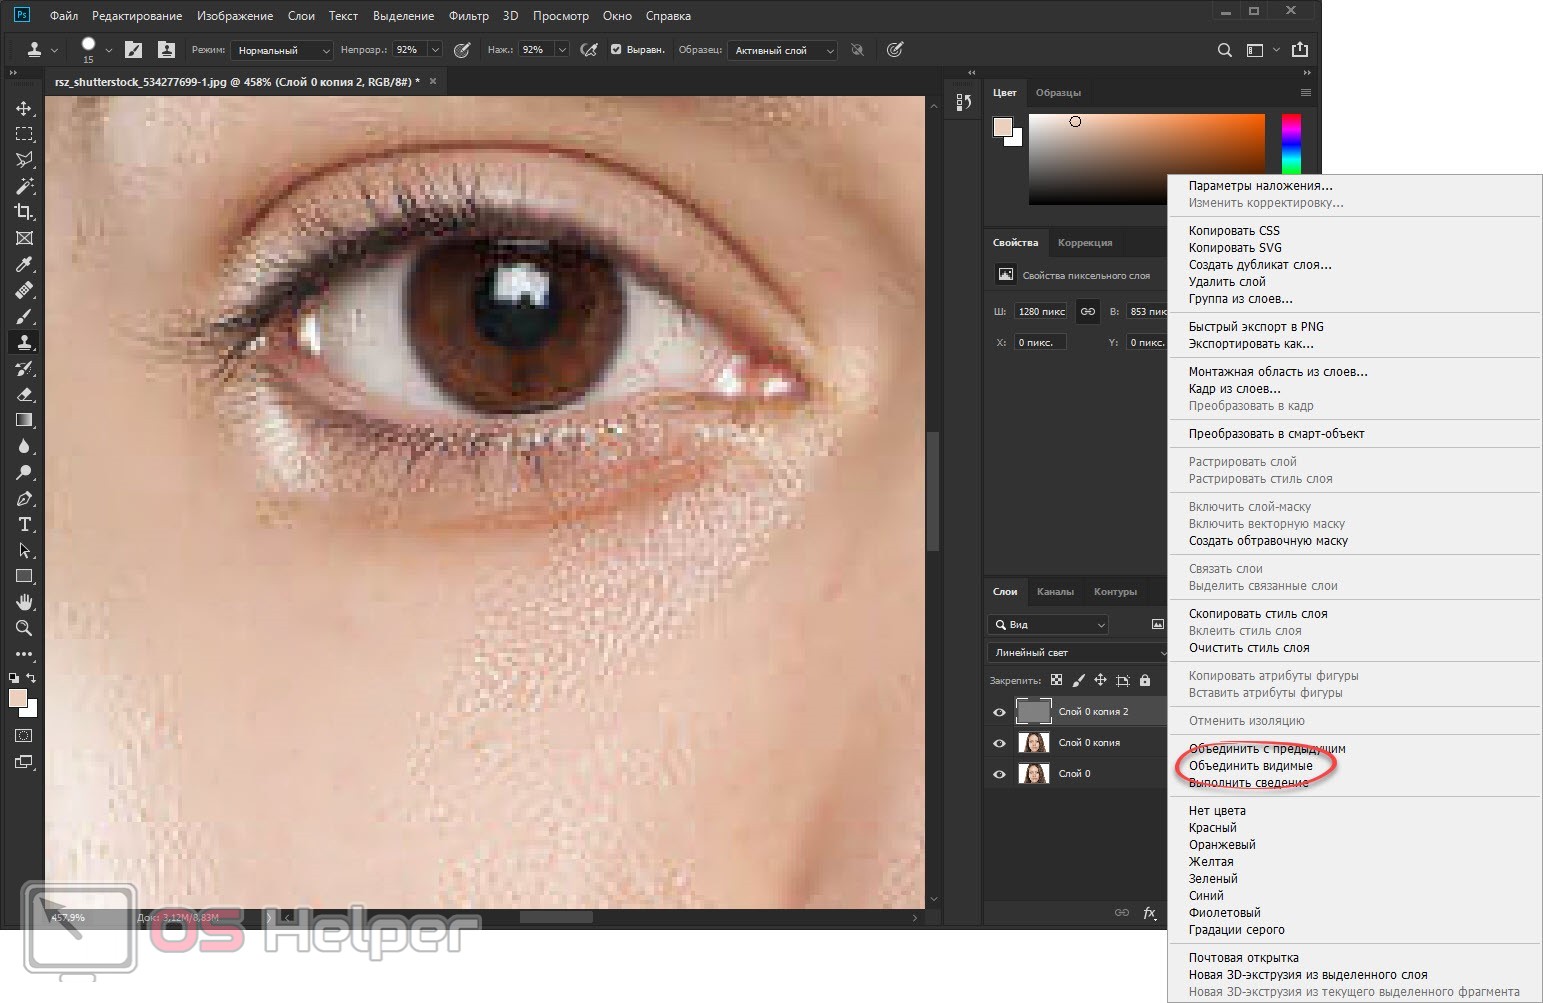
- Opacity and pressure are set to about 90%. Using the zoom tool, zoom in on the model's face in such a way that it is convenient for you to work with it. In the same way as with a brush, we take a sample on a healthy area of \u200b\u200bthe skin and transplant it to a place damaged by a pimple or blackhead. Thus, we correct all the shortcomings. Next, merge all three layers using the context menu.
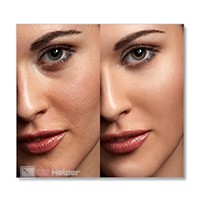
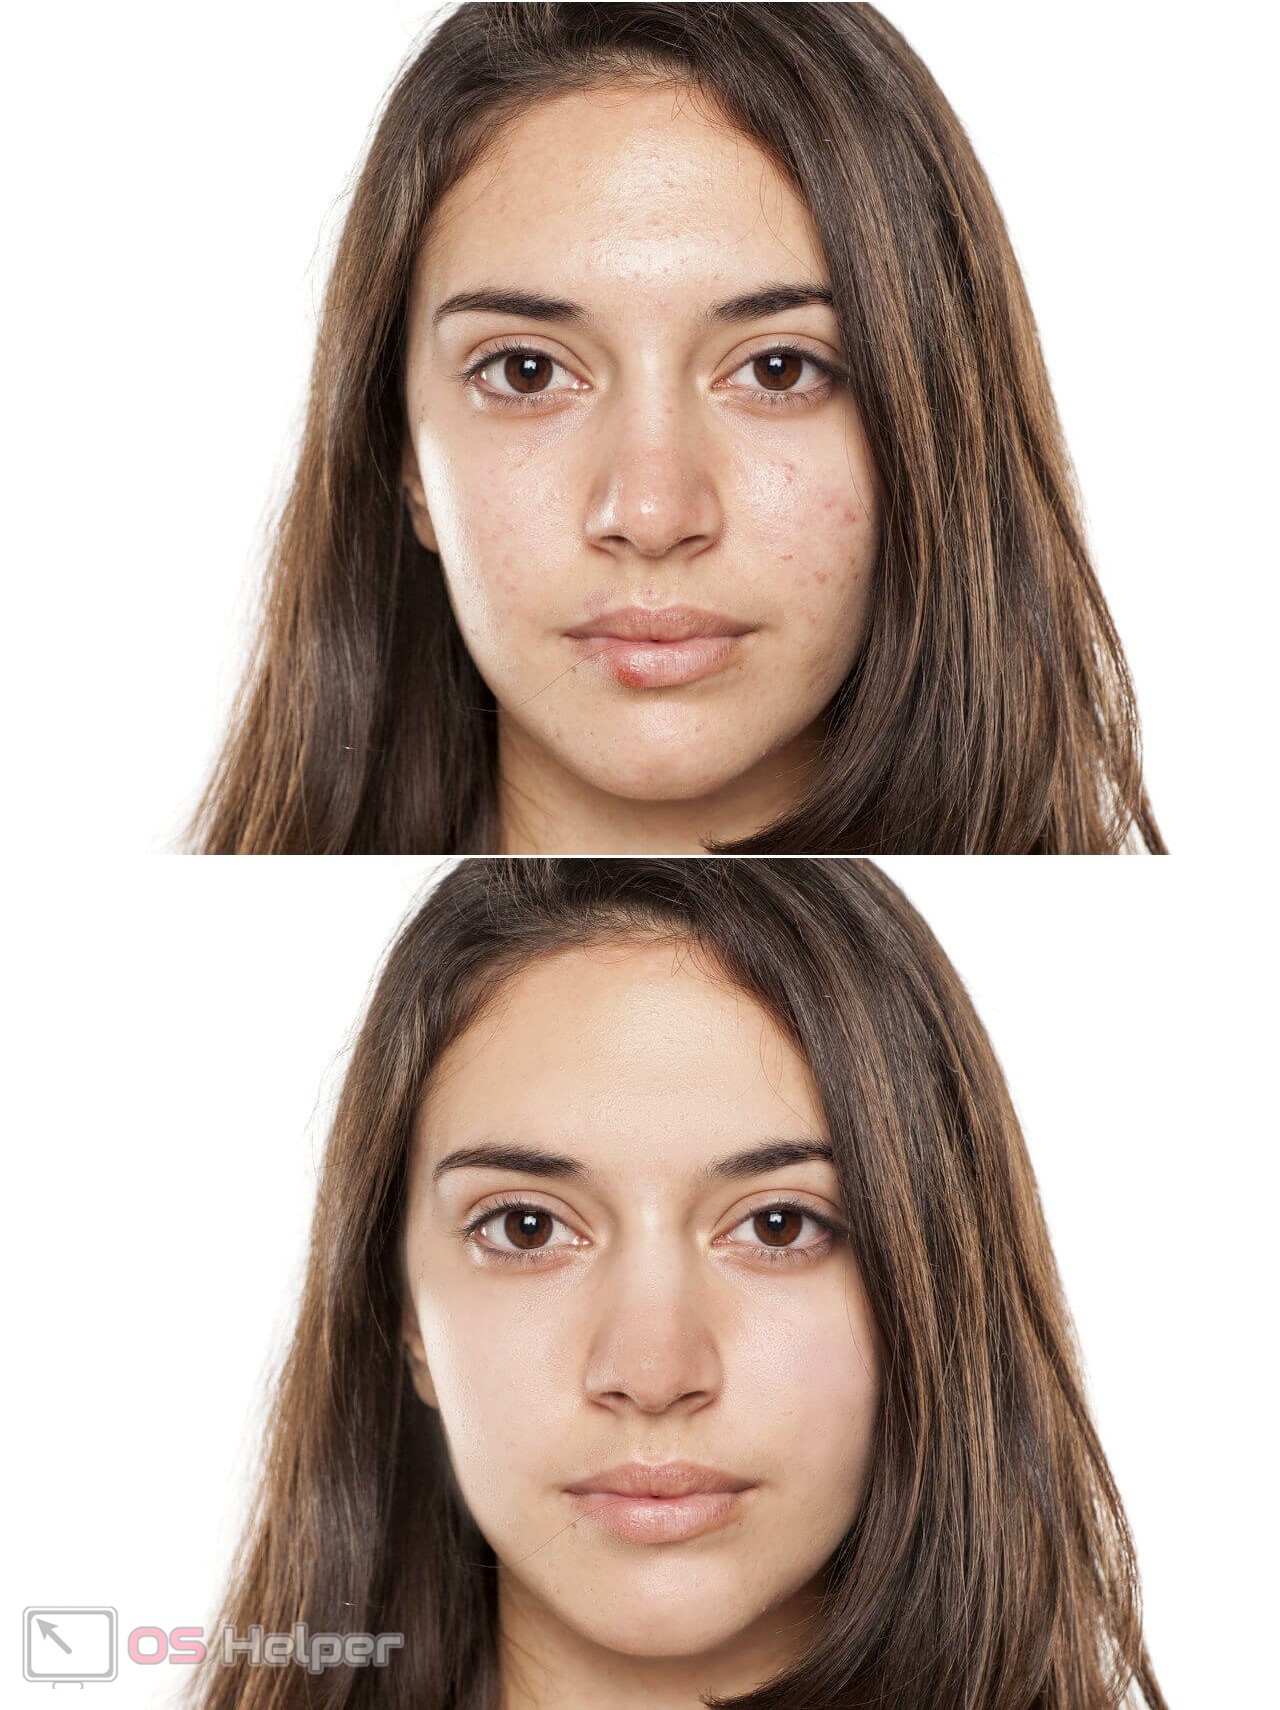
Now let's see for comparison what we had and what has become.
Expert opinion
Basil
Project manager, comment moderation expert.
Ask a Question The beauty of this method lies in the fact that we remove all the defects, while maintaining the texture of the skin.
Summing up
What I would like to add: this option for processing the skin of the model is ideal. However, in order to learn how to work well with it, you will have to practice a lot. Even I did it far from immediately, but the main thing was desire. And it was this factor that helped to achieve significant success in the industry of skin retouching in Photoshop. Which is exactly what I want for you. Good luck!