How to transfer Windows 11 system from HDD to SSD
 Once again, we welcome everyone to our website and today we will talk about how to transfer the Windows 11 operating system from HDD to SSD. Several important nuances are connected with this issue, which we will also definitely mention. After reading the short step-by-step instructions, you can confidently migrate from an old slow hard drive to a new SSD and thus significantly speed up the performance of the entire system as a whole.
PC preparation
The first thing we need to do is install a new solid state drive in the system unit. Accordingly, if it is a laptop, into the device case. By the way, if you don’t know how SSDs differ from HDDs, then read the recently published article about this.
So, only when both devices (the old hard drive and the new solid state drive) are simultaneously installed in the computer's system unit, we can start transferring the OS.

Both devices must be securely fixed by attaching them with at least two screws. Also, both the first and second drives must be connected with a power cable and, accordingly, with a cable for data transfer (most often it is SATA).
Required Software
Now that everything is ready to be migrated, we also need to install the software that can accomplish the task. The fact is that the default functionality of Windows 11 is not enough for this. That's why:
- Initially, follow this link and download the AOMEI Backupper program.
- When the download is complete, run the file obtained in the step above.
- Guided by the prompts of the step-by-step wizard, we install the necessary software.

Now we can proceed directly to the process of cloning our operating system.
Please note: before proceeding, if there is any important data on the target drive, we must make sure to save it to another location. The fact is that the process of transferring the operating system deletes all files from the drive to which the recording will be made.
System transfer
Now that we're all set to migrate our Windows 11 from our old HDD to our new SSD, we can get straight to the point:
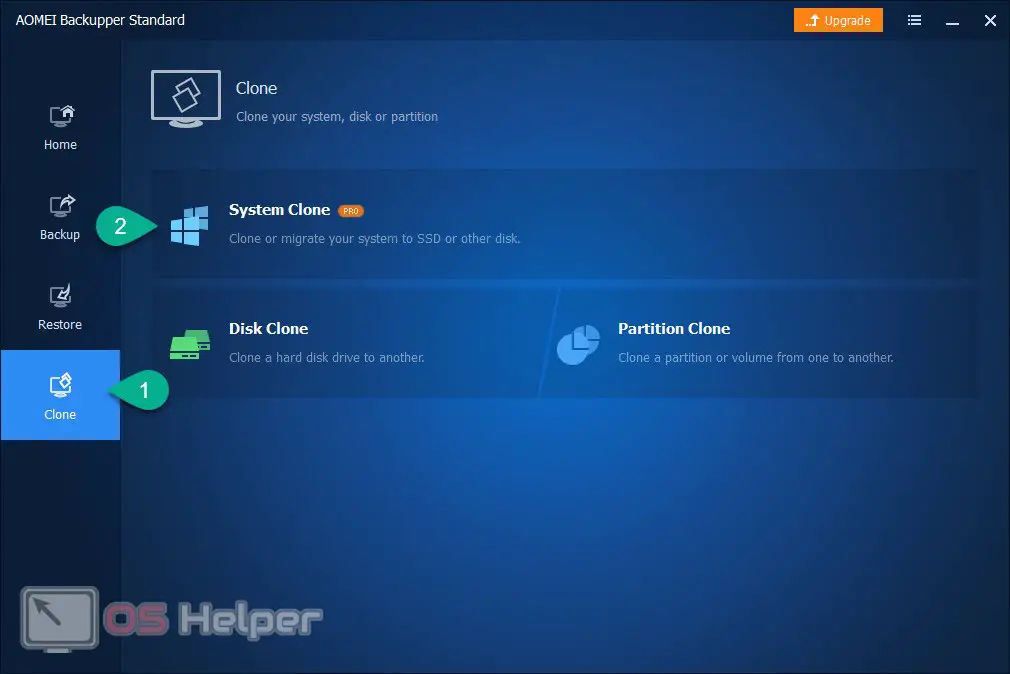
- We start the program received earlier on behalf of the administrator. To do this, right-click on the application's shortcut and select "Run as administrator" from the context menu that opens.
- In the left part of the window that opens, select the item marked in the screenshot with the number "1". Next, click on the tile, which we marked with the number "2".
See also: Computer won't turn off via Start in Windows 11
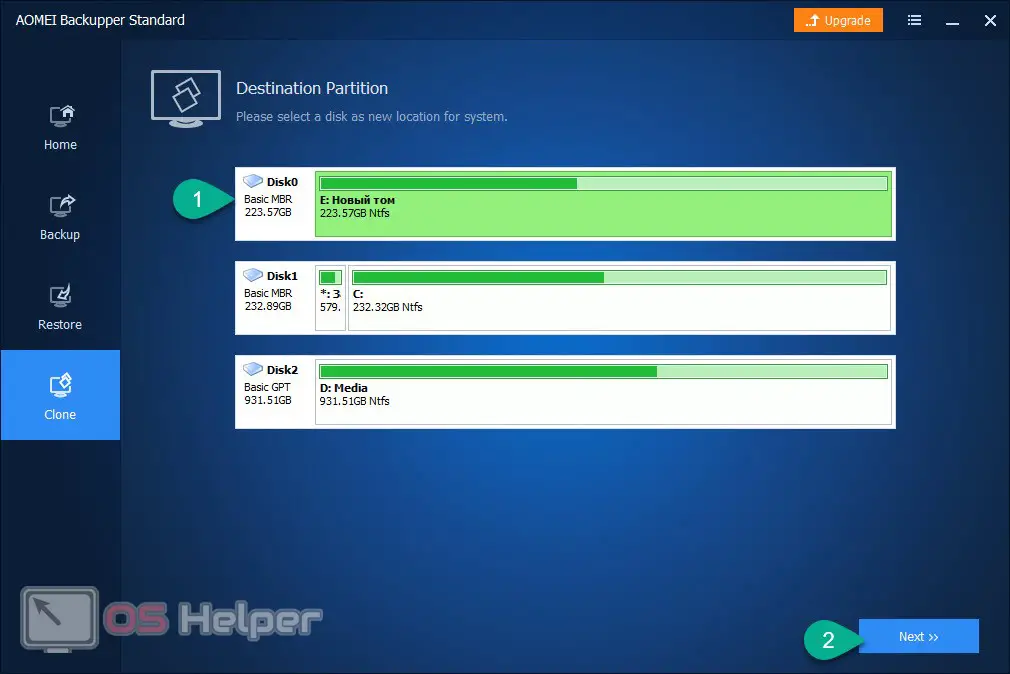
- After that, another window will open in which we will need to select the drive on which, accordingly, the transfer will be carried out. This should be our new SSD. When the choice is made, press the button marked with the number "2".
Expert opinion
Daria Stupnikova
Specialist in WEB-programming and computer systems. PHP/HTML/CSS editor for os-helper.ru site .
Ask Daria Attention: choose disc carefully! If you specify the wrong drive, all data may be permanently deleted.
- We will be warned again that all data from the target drive will be deleted. We confirm our intention.
- As a result, we will have to start the copying process by pressing the button marked in the screenshot.
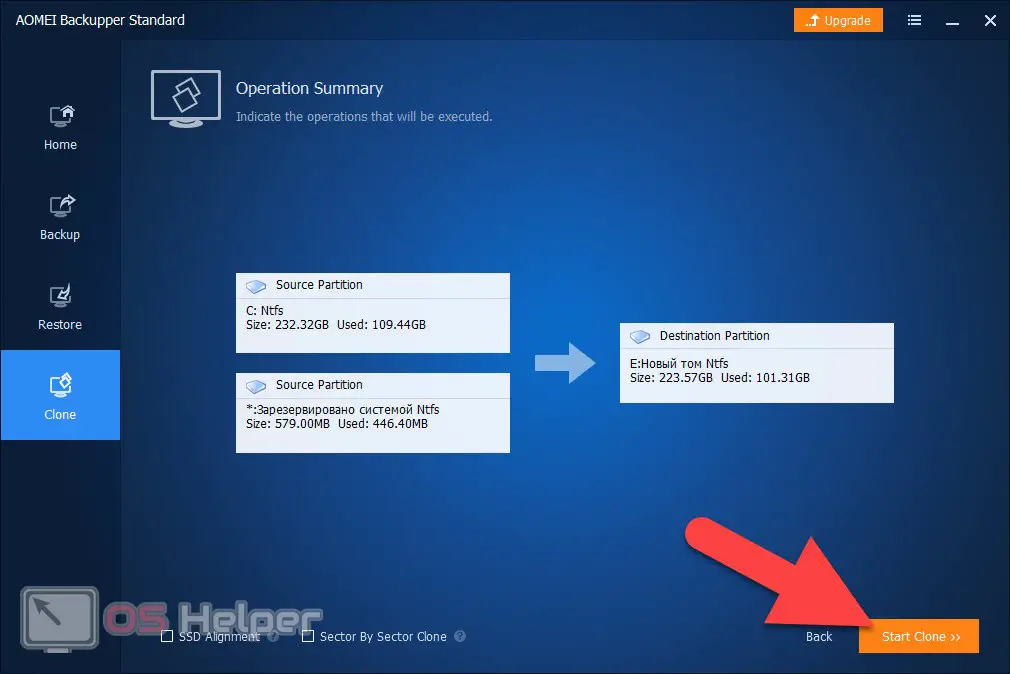
An automatic copy process will start, after which our Windows 11 operating system will be transferred to the SSD. All that remains for us to do is to shut down the PC and, having reassigned the boot order in the BIOS, start it from a new disk.
Setting
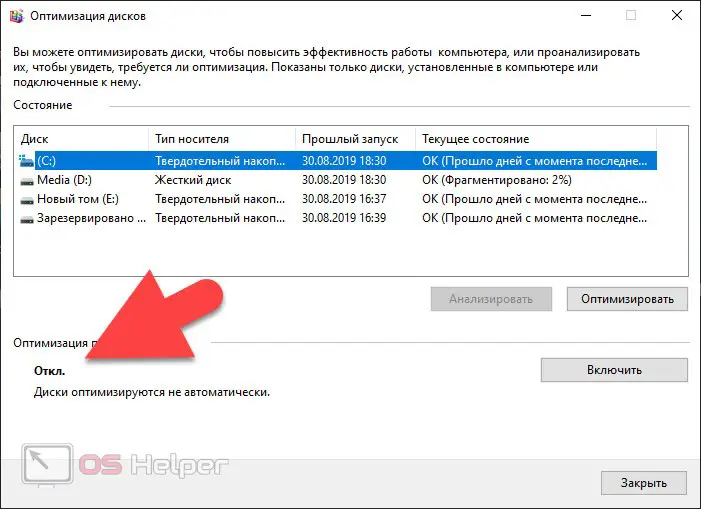
There is one important point that should not be forgotten. This is a mandatory disabling of automatic defragmentation. The fact is that defragmentation performed on an SSD drive catastrophically kills its resource. At the same time, no increase in performance is observed.
Therefore, to disable the malicious process, go to Windows 11 Explorer, right-click on our SSD drive and select the properties item from the menu that opens. Further, in the "Service" section, or rather, "Optimization and defragmentation", we need to disable automatic defragmentation. As a result, you should come out as shown in the screenshot.
Ready. Our operating system has been ported and we can use the computer without changing anything else.
Video instruction
For clarity, we have also attached a training video, which you would do well to familiarize yourself with.
Finally
Now that you know how to transfer the Windows 11 operating system from HDD to SSD, we can finish our step-by-step instructions. Get down to business, but treat the process as carefully as possible. If you do something wrong, you may lose user data. However, following the algorithm that we voiced above, you will not encounter any of these problems.