How to make content in Word: step by step instructions
 Each student during his studies at least once, but write an essay or term paper. Of course, at the end, there is also a thesis. According to GOST, it must have a table of contents. In this article, we will look at how to make content in Word, since not all students are aware of this editor feature.
Why do you need content
Some make a regular table in which all the headings and subheadings are manually put down. In addition, it is very difficult to number such content, since with the slightest editing everything will move down, and this object will be static. Everything will have to be redone and look for changes. It is very long and difficult. Moreover, some unknowingly begin to put down the ellipsis manually.
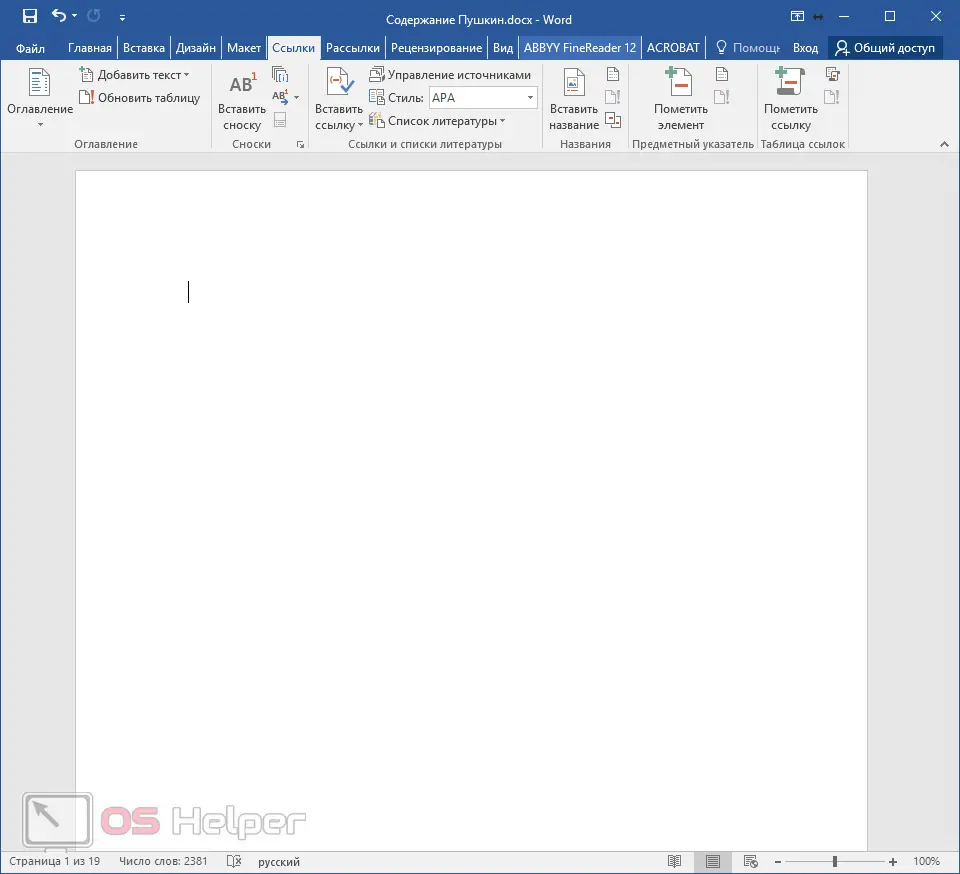
It is much easier and more convenient to select the automatic mode. In this case, the compilation of the table of contents will take several seconds, since in order to create such an element, it is enough to make a few clicks. Let's take a closer look at this process. First of all, let's open a document in which there are many different chapters and for easy navigation we need to set up an interactive list of content.
Pagination
Before you can customize the content, you need to insert the numbering. To do this, do the following.
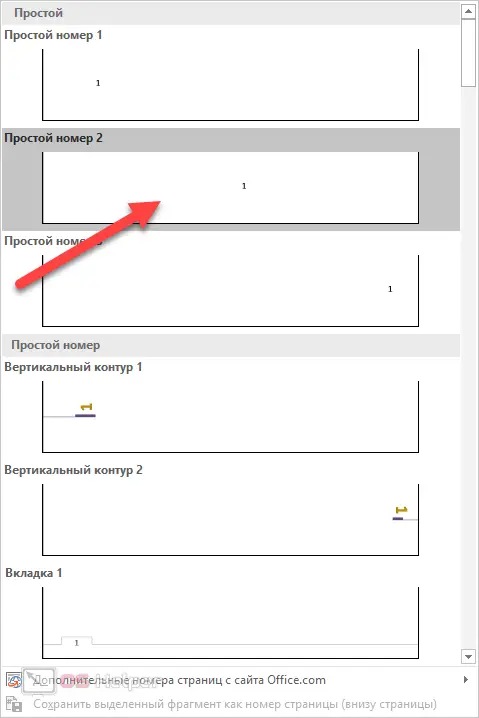
- Go to the "Insert" tab. Click on the "Headers and Footers" icon. Select "Page Number" from the menu that appears. For documents of this kind, it is better to select "Bottom of the page".
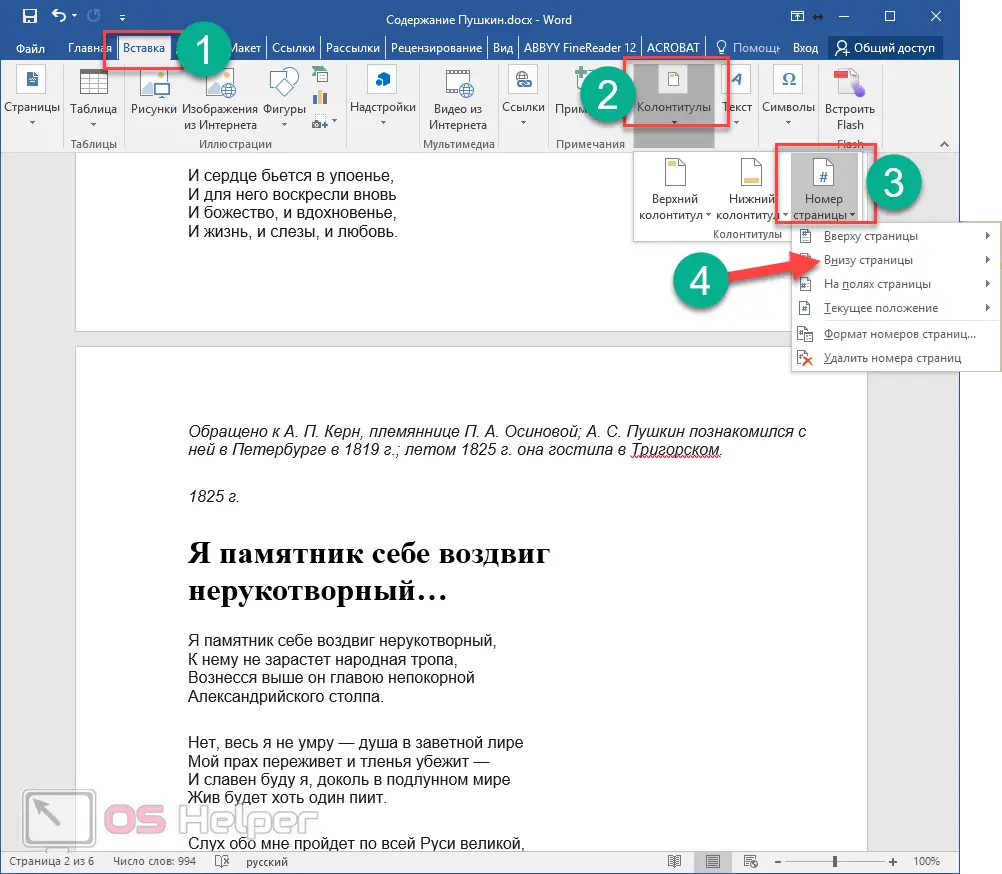
- Then you will need to select the desired alignment. It is advisable to set a simple number clearly in the center (not to the left and not to the side), otherwise the document will lose its beautiful appearance.
- In order to save the changes, you need to click on the "Close Header and Footer Window" button.
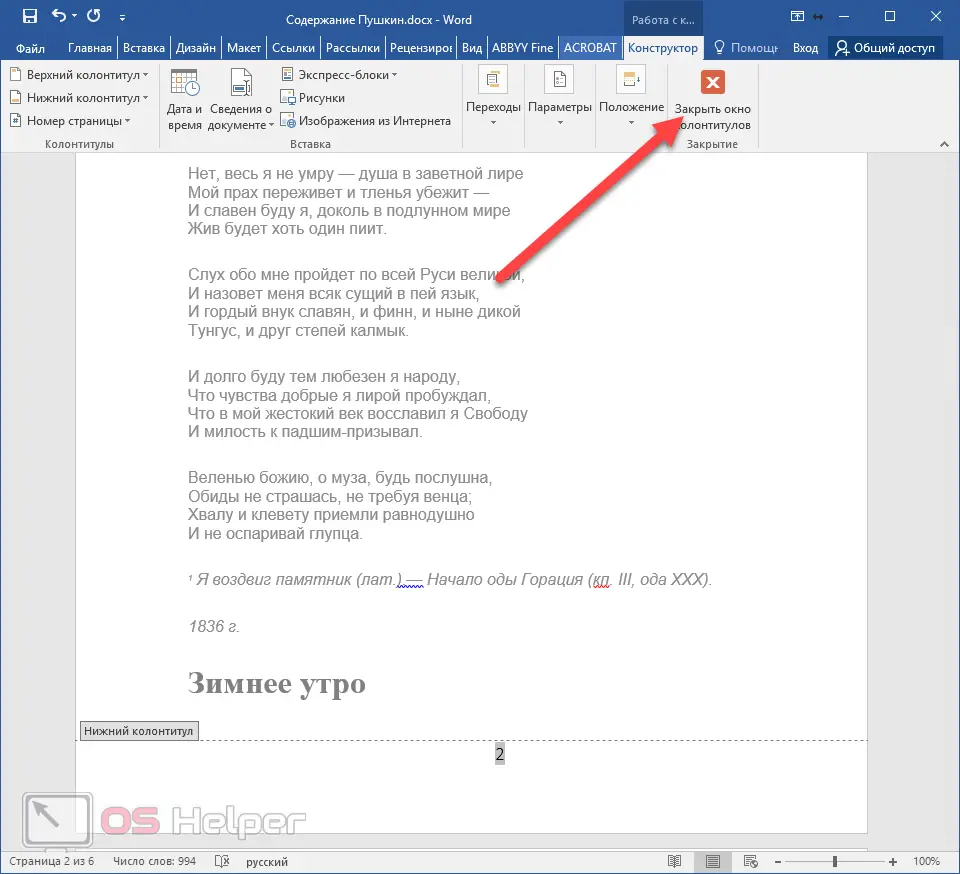
- As a result of this, a neat number will appear at the bottom of each sheet.
Content Creation
In order to correctly assemble the table of contents, it is desirable to go to the beginning or end of the document, since such an element should not be in the middle of the file. This is done in the following way.
- First you need to put the cursor in front of the first letter among all your text information.
- Then you need to type on the keyboard the key combination [knopka]Ctrl[/knopka]+[knopka]Enter[/knopka]. As a result of this, you will be able to add an empty sheet.
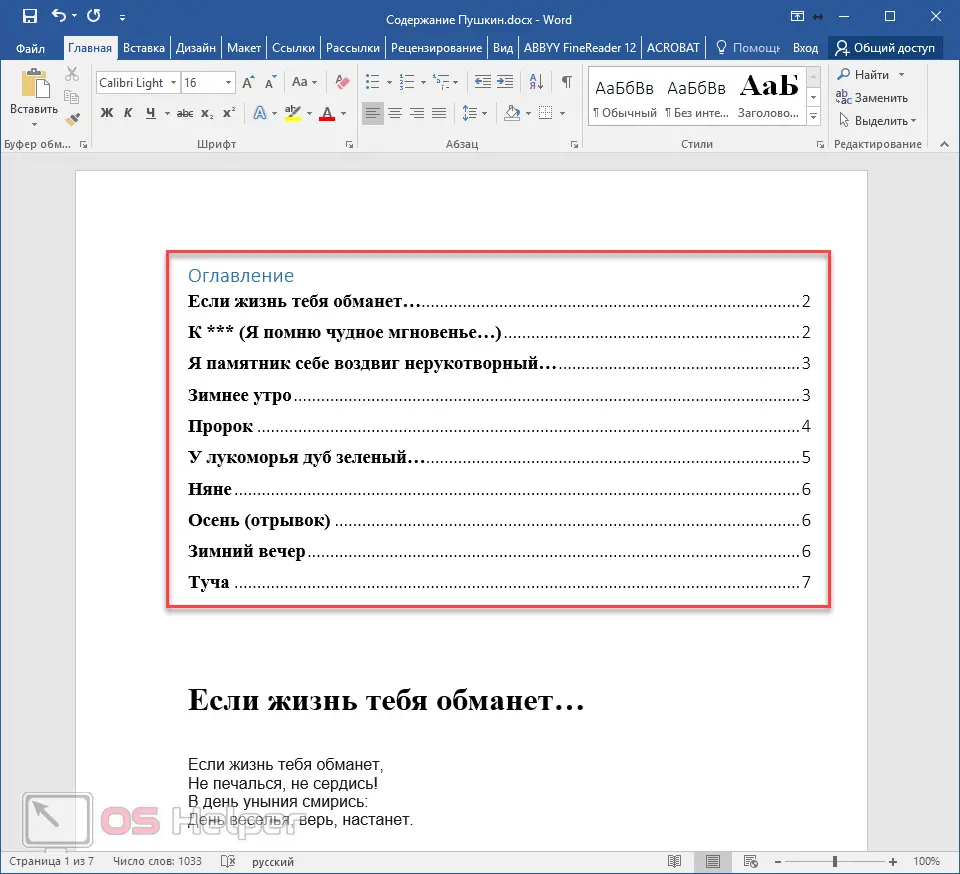
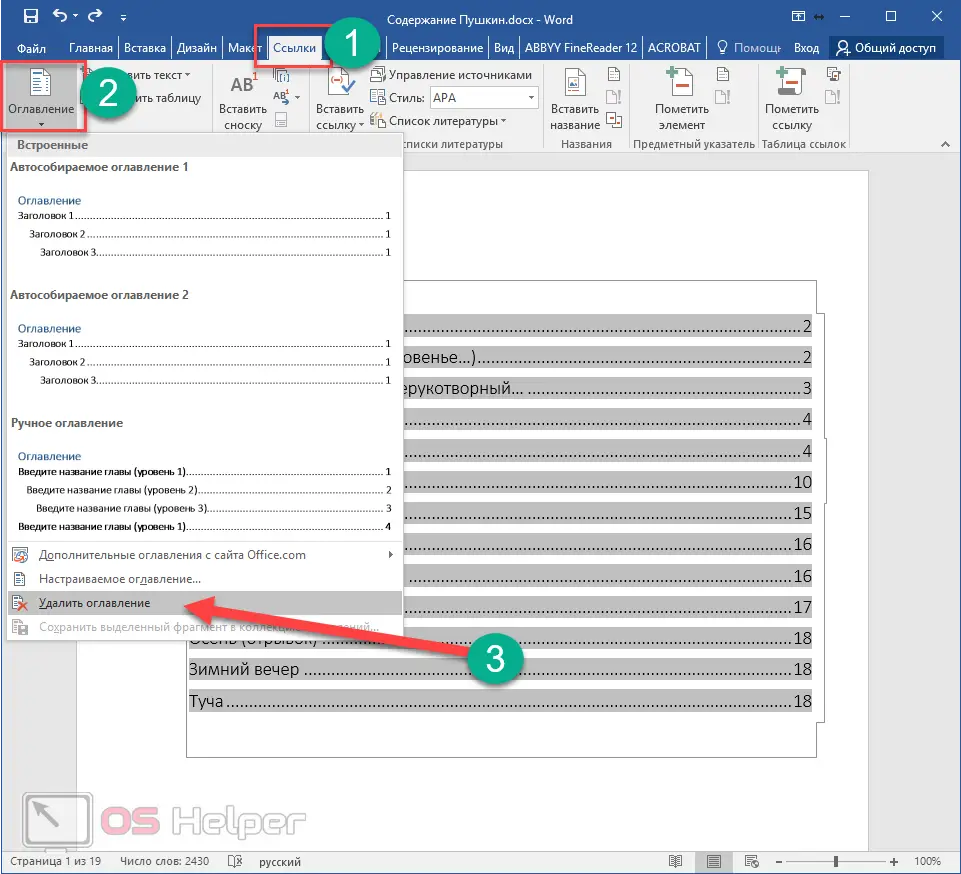
- We rise to the beginning of the document. Then go to the "Links" tab. Click on the "Title" icon. In the menu that appears, select the item "Auto-collected table of contents 1" (you can also choose the second option - it will still be correct).
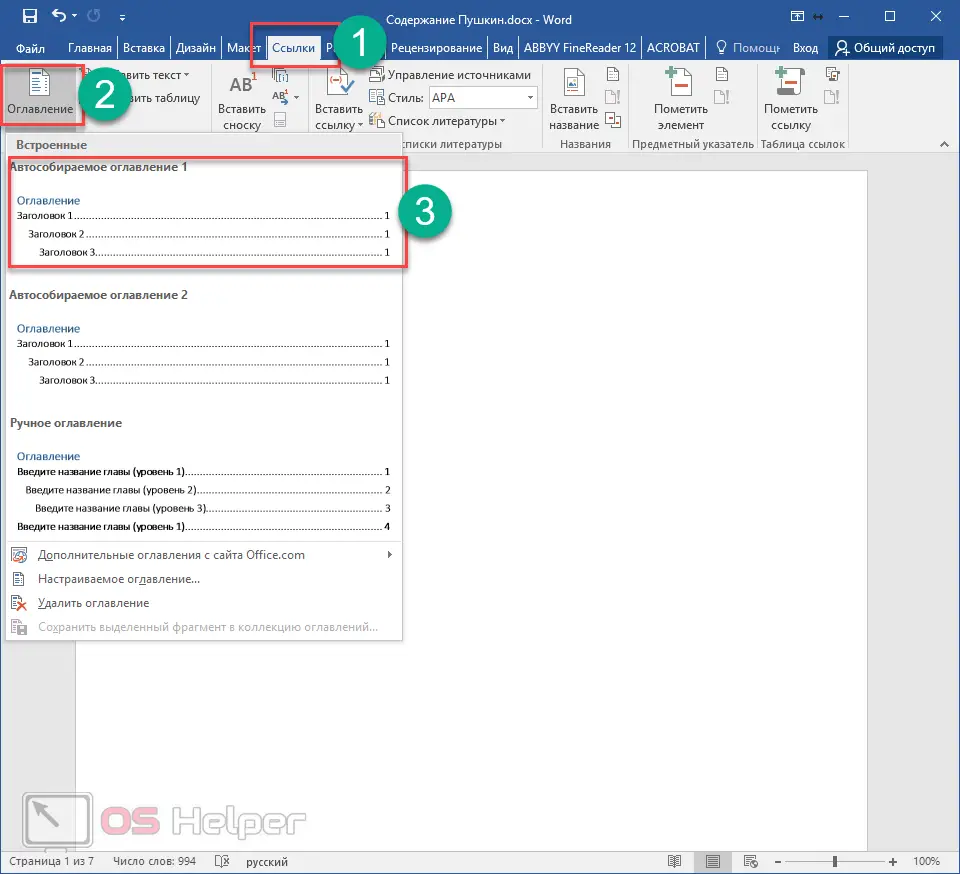
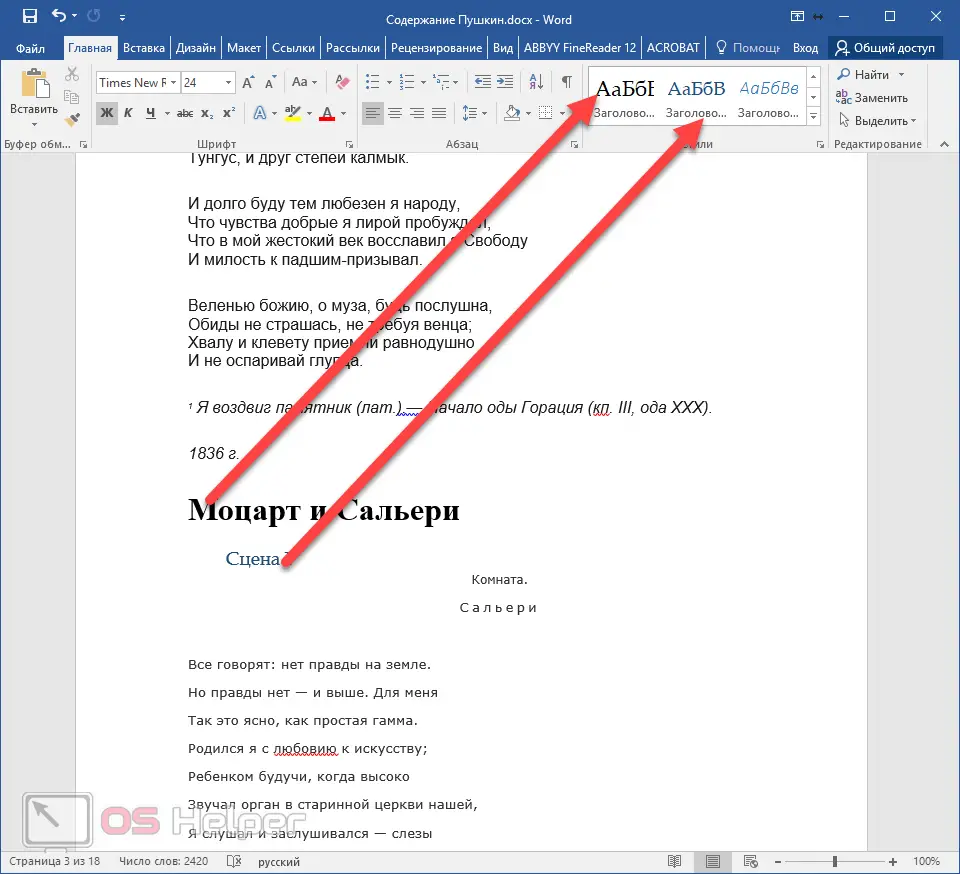
- Most likely, you will get this result. The fact is that in order to compose competent content, you need to arrange the titles of sections (in our case, the titles of poems) with heading styles.
See also: How to create a table in Word
If this is not done, the Microsoft Word editor will try to put down the contents of the table of contents automatically at its discretion. In this case, he chose what was in bold text, but he could have included something else in the list.
Header customization
In order to form the correct and beautiful content, you must perform the following steps.
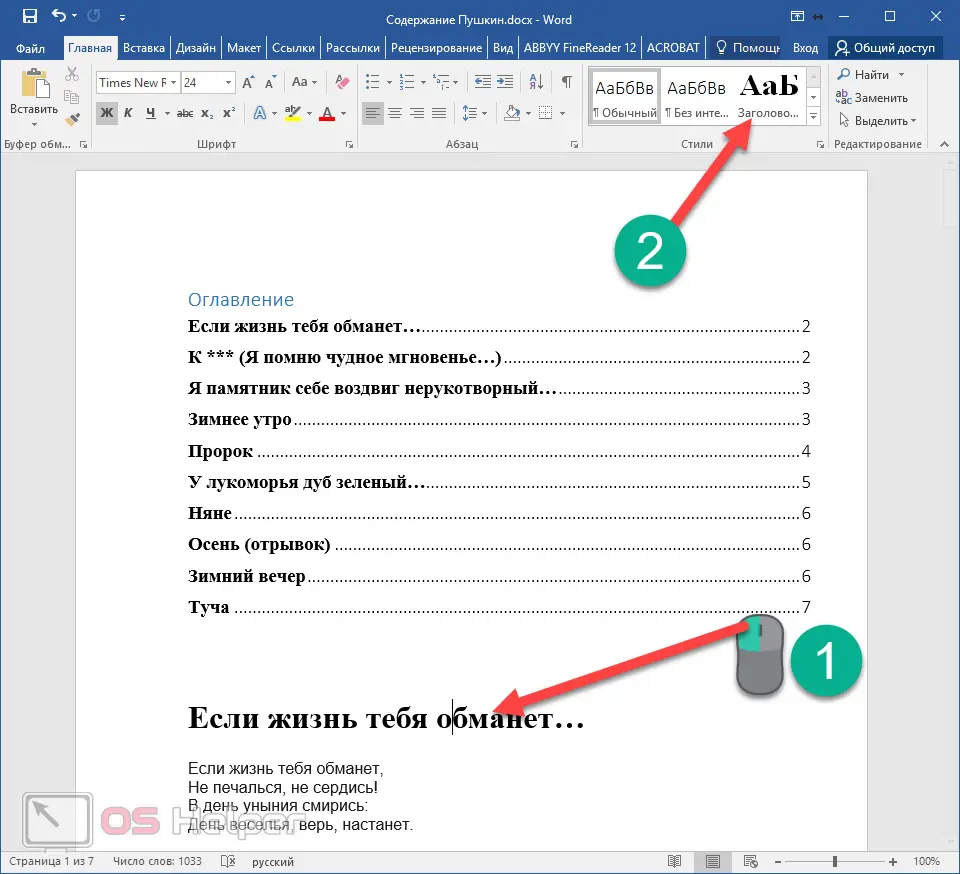
- Click on any name of the verse (you need to make this text active and editable).
- Notice that it's set to normal text.
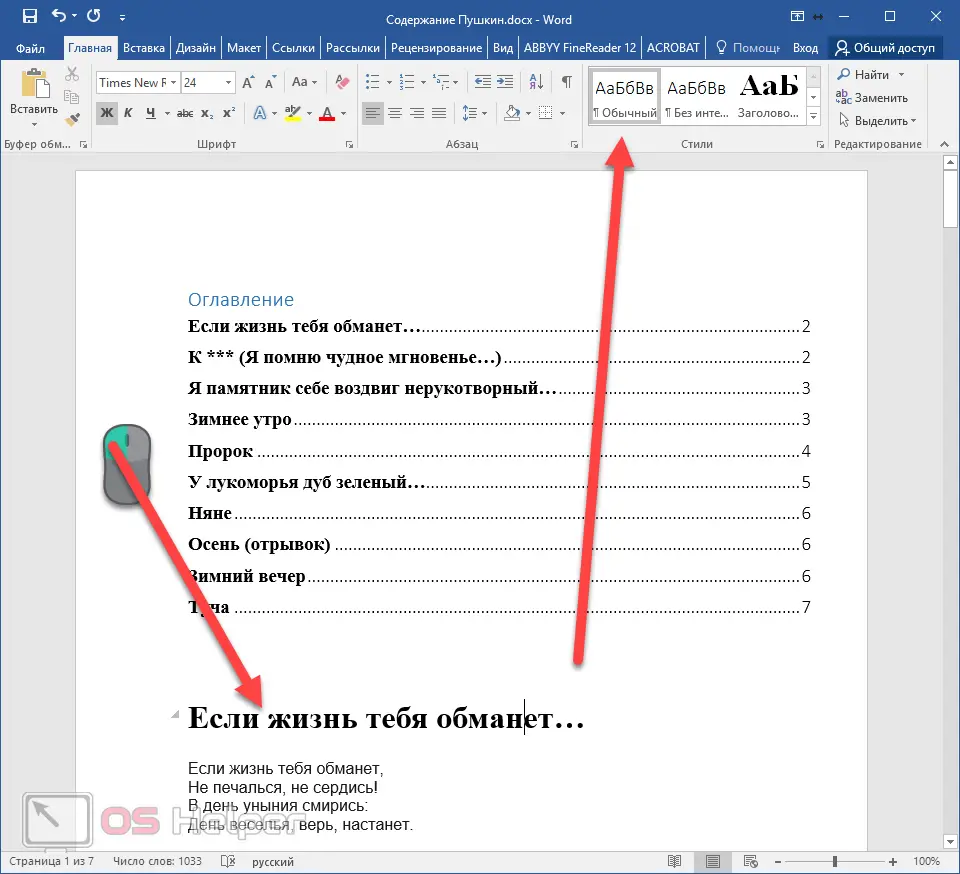
- In order to fix this, you need to click on the “Heading 1” style icon (after putting the cursor in the right place).
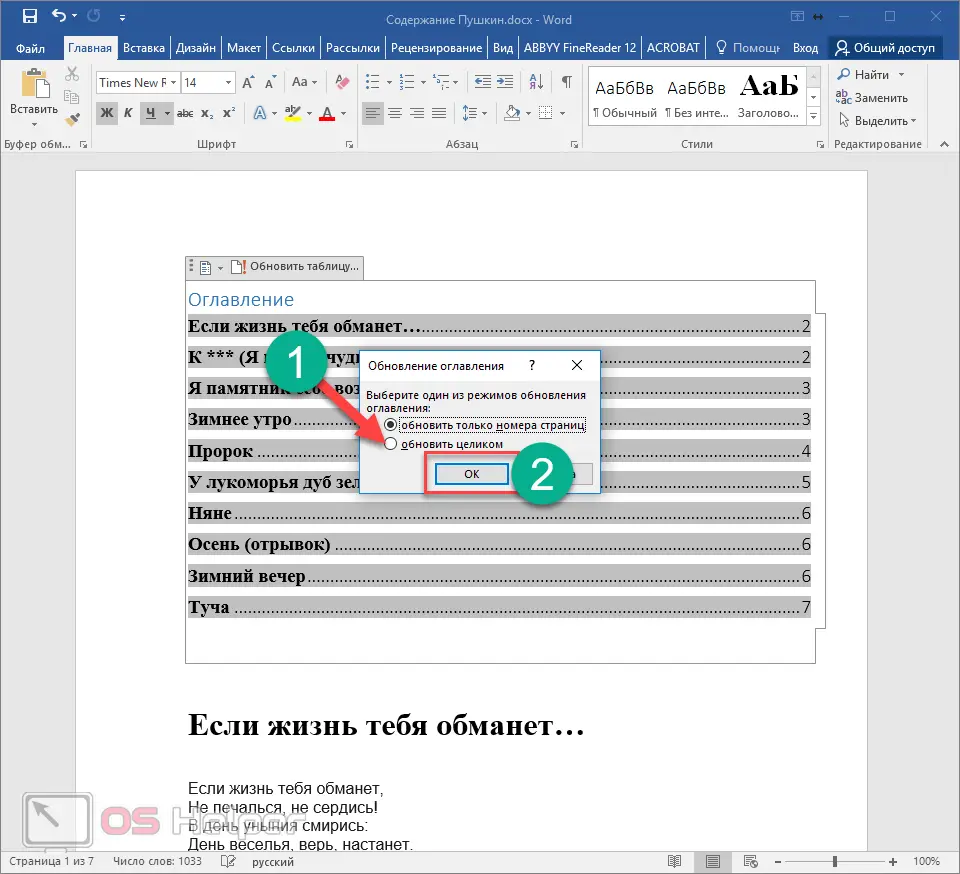
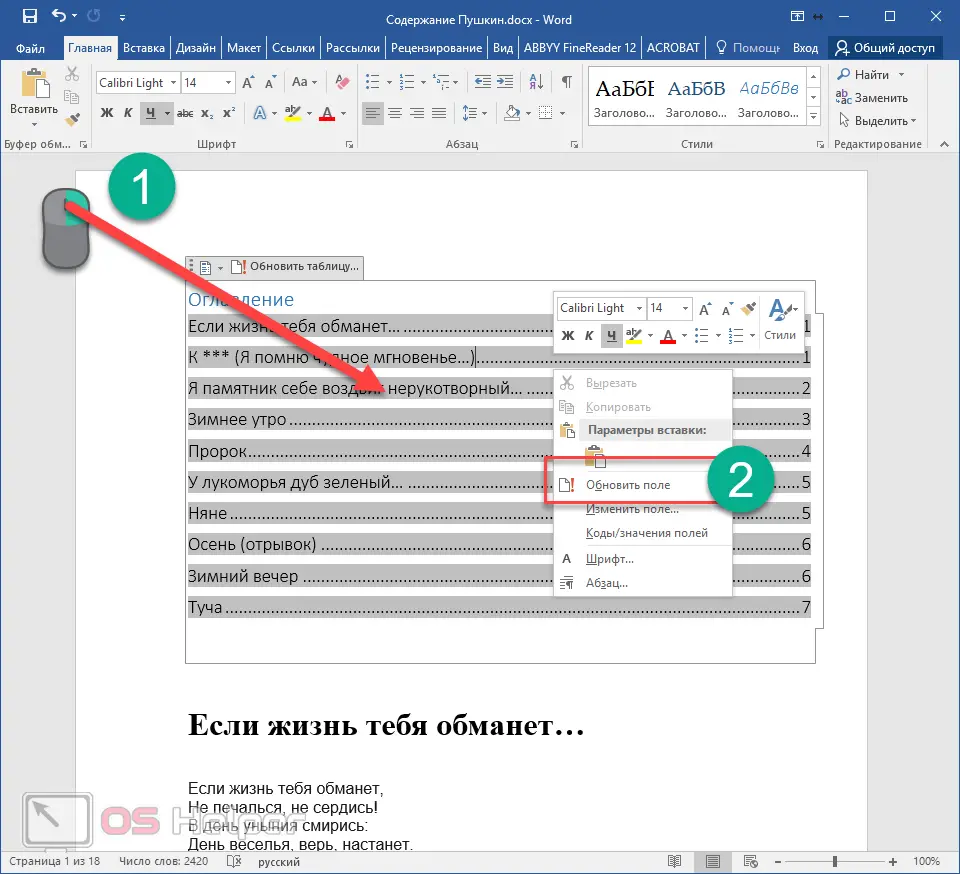
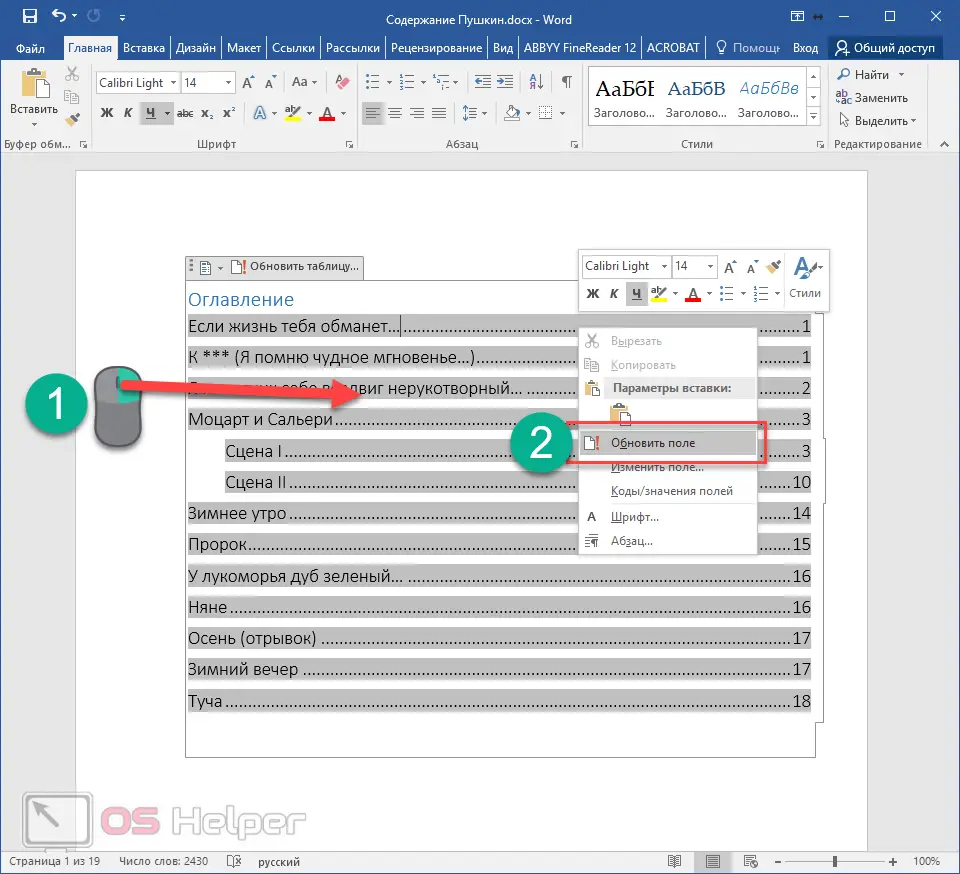
- After that, you need to return to the table of contents again. Make a right mouse click on this element. In the context menu that appears, select Update Field.
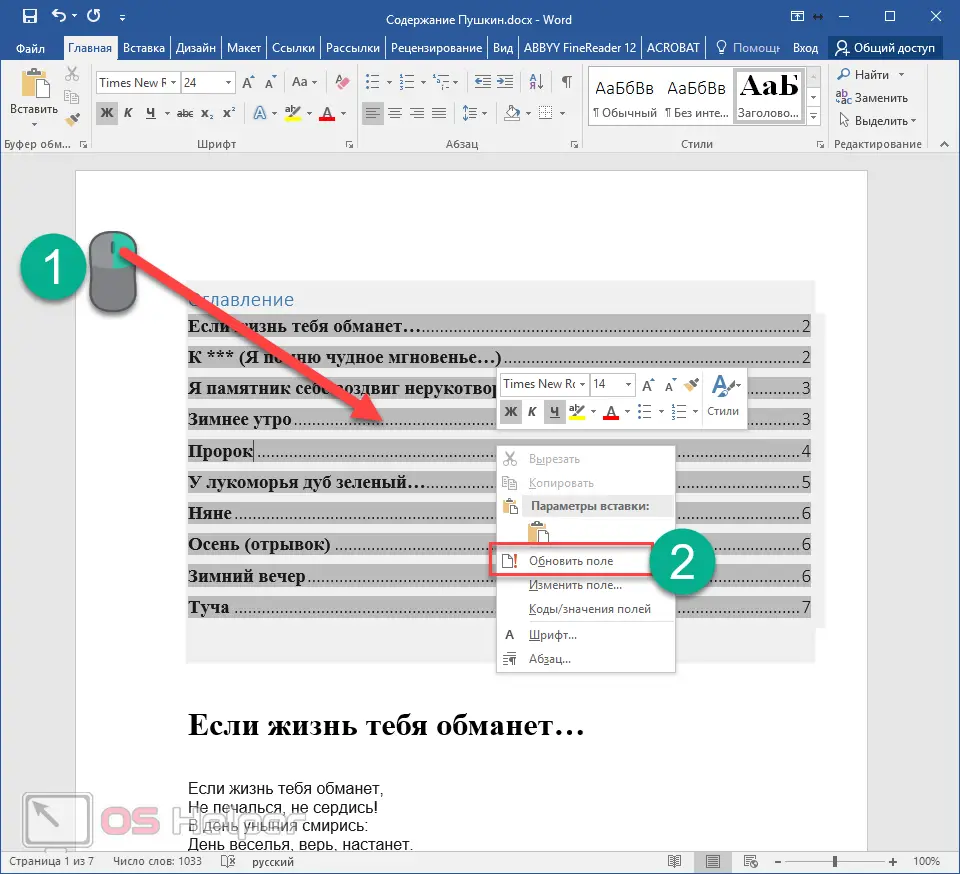
- You will then be asked what exactly needs to be edited. Select "Update Entire". To save the settings, click on the "OK" button.
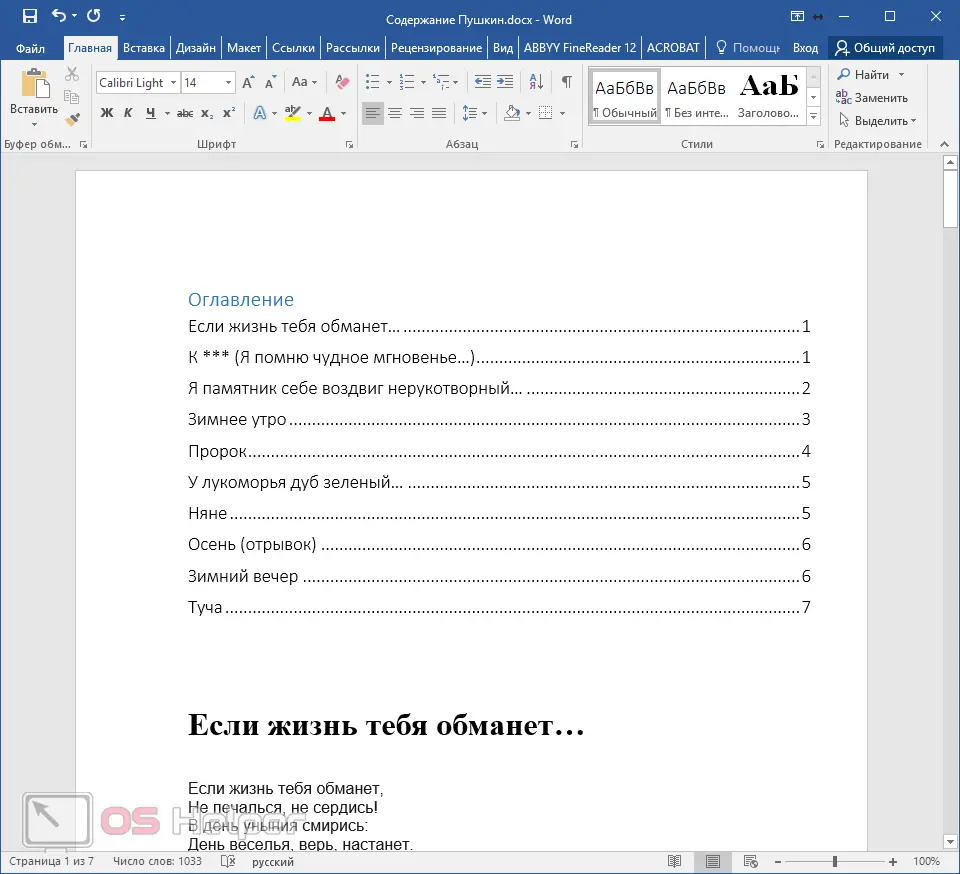
- Now everything will be nice and neat. But only where we fixed the title.

- In order for the rest of the items to be the same, you will have to draw up everything else in exactly the same way. That is, the style “Heading 1” must be attached to all other titles. Then repeat the steps above to update the content. After that you will see the following.
Agree that manually making such an even and neat list will not work. Each point is in its place and nothing has moved. It is much more pleasant to work in such a document.
Multilevel table of contents
In the case described above, all first-level headings were used. Consider an example in which there will be subheadings. To do this, you need to insert all the missing elements into the text.
- Add a second-level heading to your Word document. To do this, just click on the appropriate style on the toolbar.
- Then, to bring up the new item in the table of contents, we'll right-click on that item again. Select "Update Field" from the context menu.
- Next, click on the "OK" button.

- Immediately after that, new subheadings will appear in the content.
Such actions must be done after each change in the structure of the document.
Please note that the content should not overlap with the title page. Everything must be in its place.
How to write headlines
In the process of working with content, as a rule, part of the text rises, and the other goes further. As a result, "naked" headings (titles) may appear at the bottom of the sheet. This looks ugly. It is necessary that at least one line remains after them.
See also: How to disable reduced functionality mode in Word

In addition, it is also wrong to put the first verse on the content page. Fixing this problem is easy. To do this, let's take a few simple steps.
- We remove everything from the first page, except for the content. Then we make it so that there are no headings at the end of the page in the entire document. After that, right-click again. Select "Update Field" from the menu that appears.
- But this time we select the option "Update only page numbers". To save, click on the "OK" button.
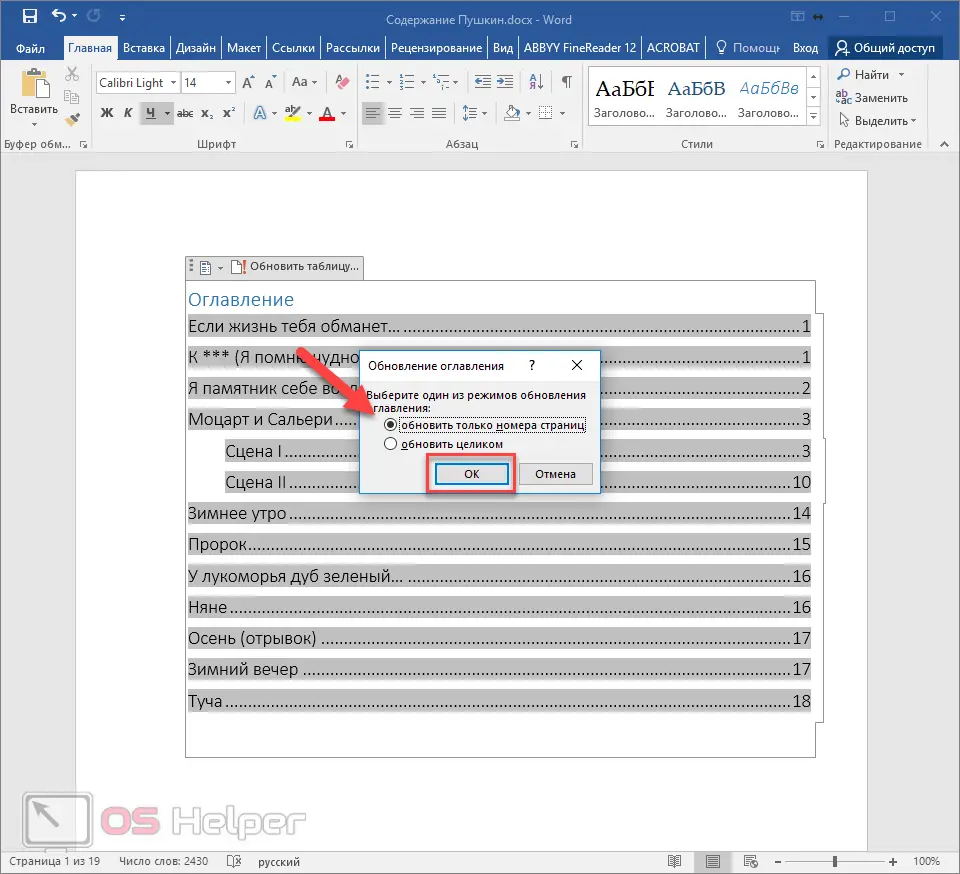
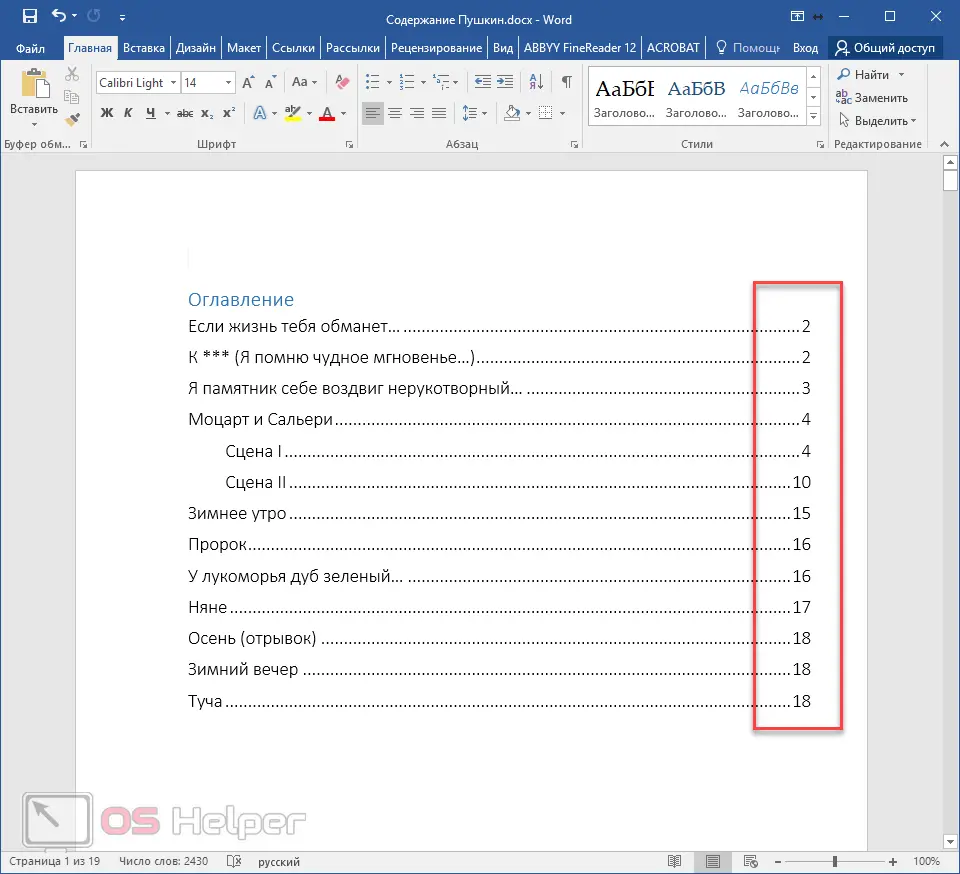
- As a result of this, only the numbers will change, but not the content itself.
On the other hand, it would be possible to select the item "Refresh entire". In the case of our example, nothing will change. But if you made any changes manually, then all this would disappear.
For example, some people like to align the word "Table of Contents" in the center or write something extra from themselves. Other users, on the contrary, may remove some items from the content.
Position setting
The Word editor can insert content in the right place without your help. To do this, do the following.
- Go to the "Links" tab.
- Open the "Tables" menu.
- Make a right click on some table of contents (it doesn't matter where exactly you will collect it).
- Then choose any of the proposed options.
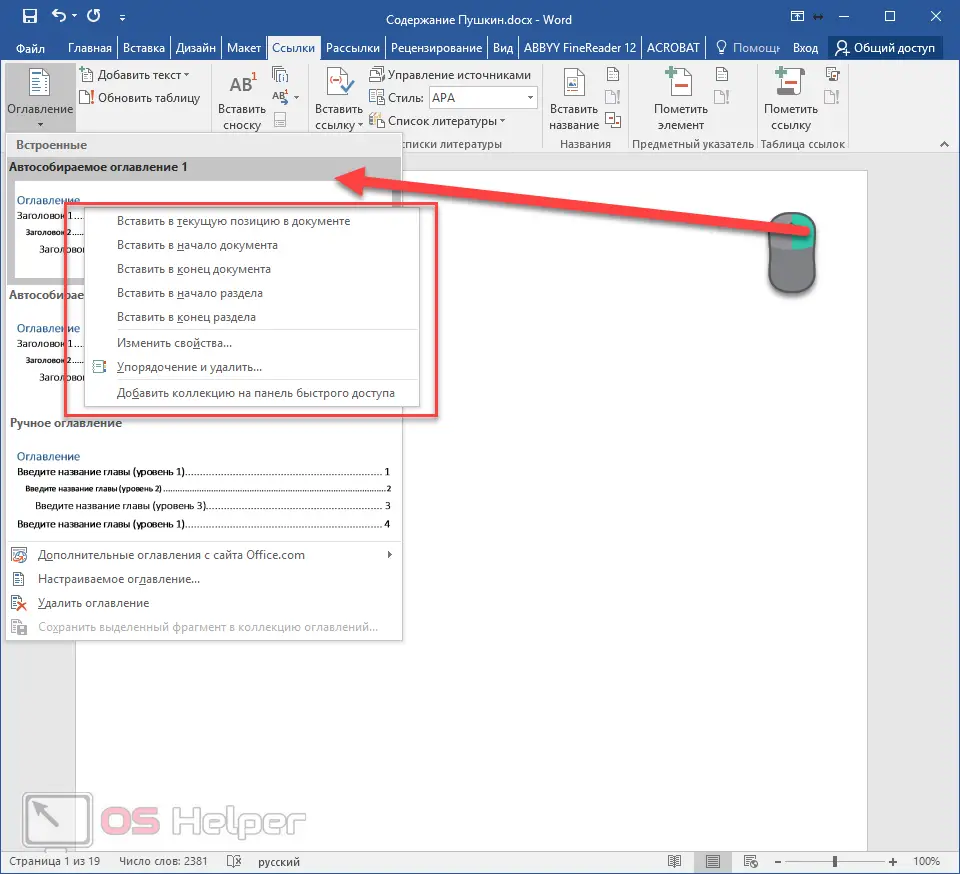
Table of contents properties
This element, like almost everything else in the Word, has its own parameters. In order to change them, you need to follow a few simple steps.
- We repeat everything that is described above.
- Only this time we select the item "Edit properties".
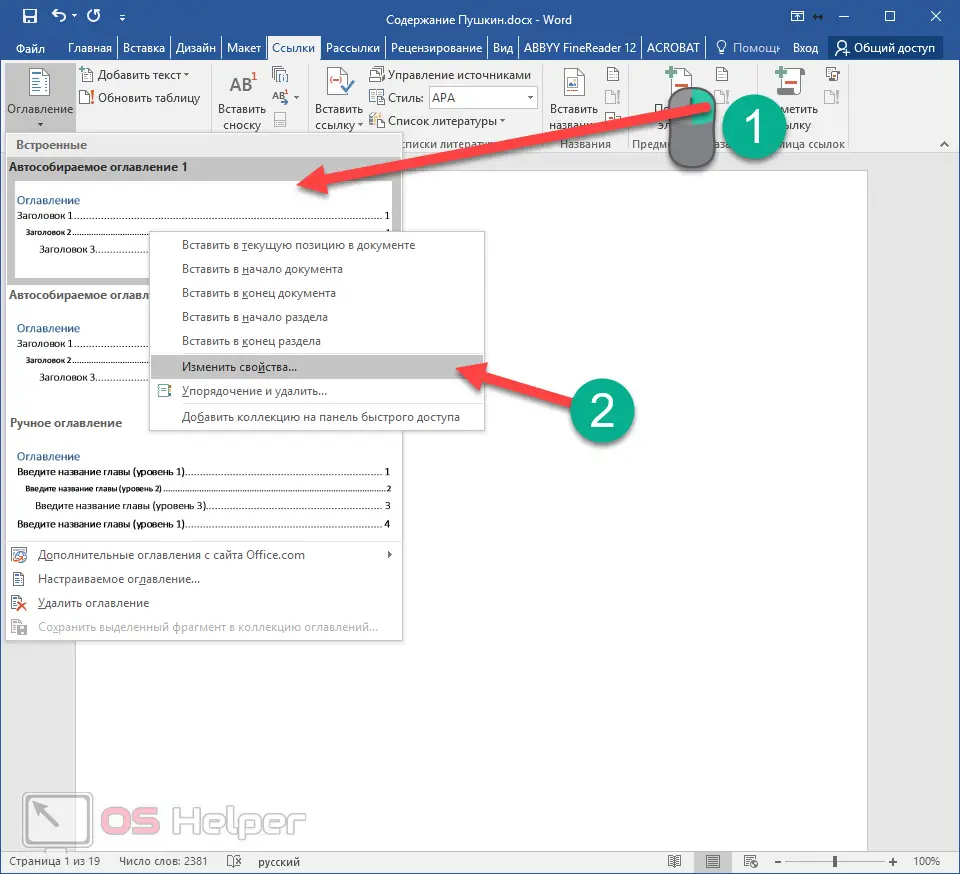
- As a result, the following window will appear.
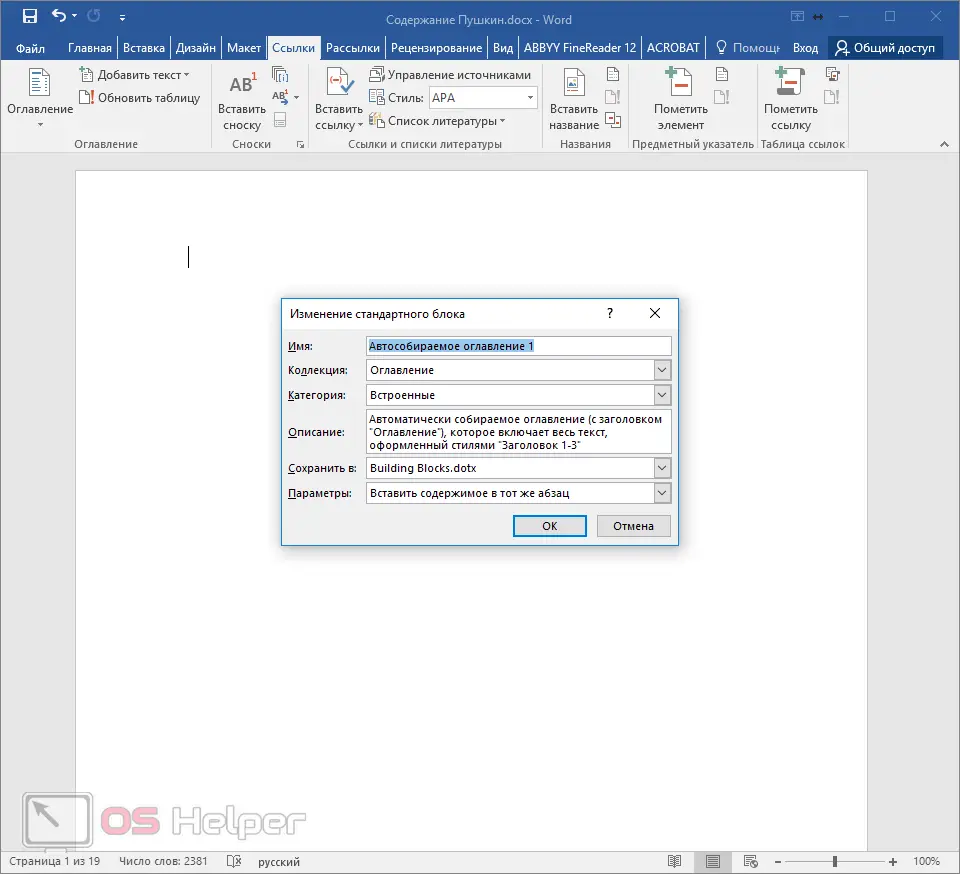
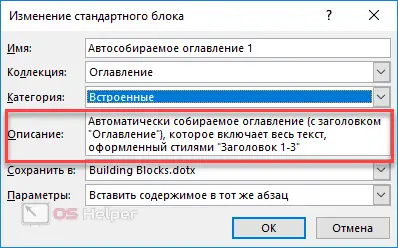
- Here you can change:
- name;
- collection;
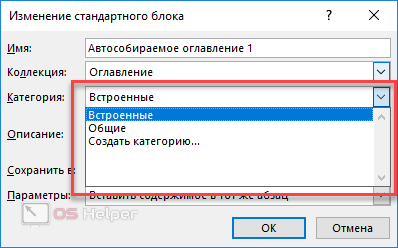
- category (you can create your own template);
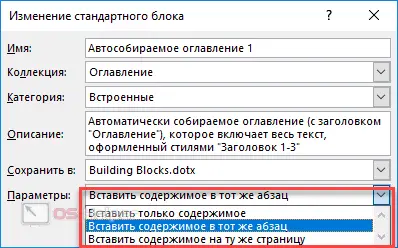
After editing, you must click on the "OK" button, otherwise the changes will not be saved.
How to use the content
This item is not only for beauty or convenience in printed form. When working with a document, to quickly jump to the desired chapter, just click on any item, after holding down the [knopka]Ctrl[/knopka] button. That is, you must understand that a hyperlink is hidden behind each line.
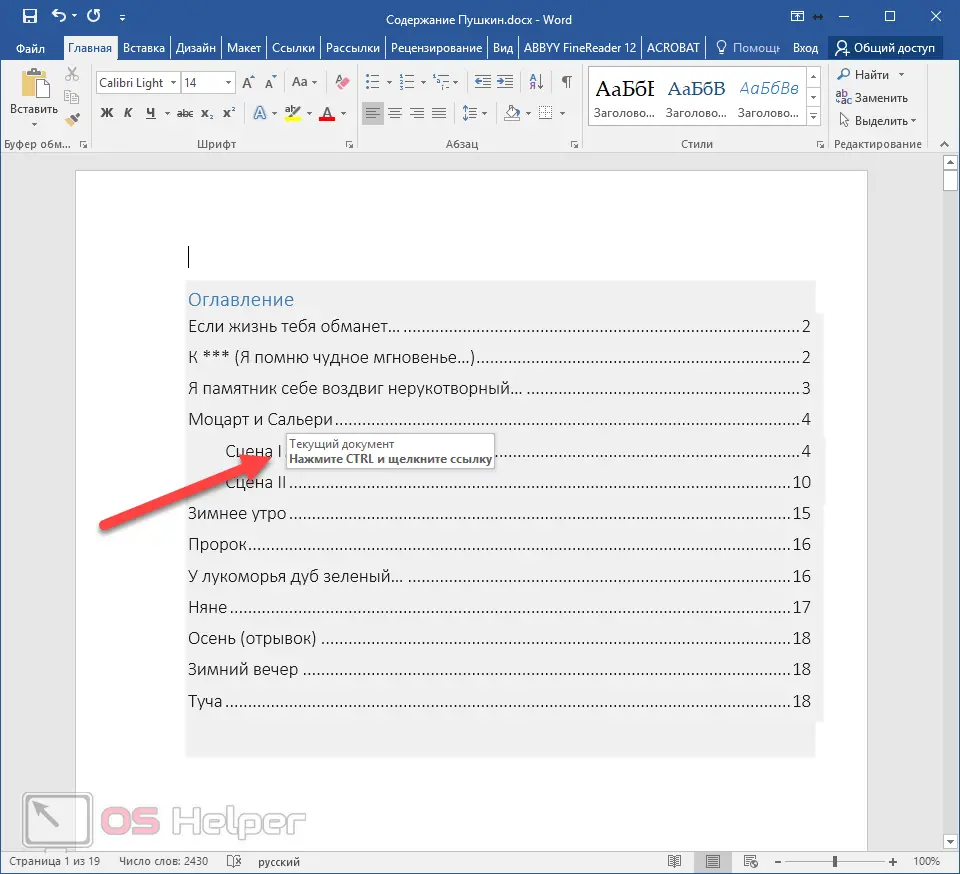
The editor himself tells us about this.
Manual table of contents
If the automatic mode does not suit you, then you can do everything yourself. This is done in the following way.
- Go to the "Links" tab. Open the "Tables" menu item. Select the Manual Table of Contents type.
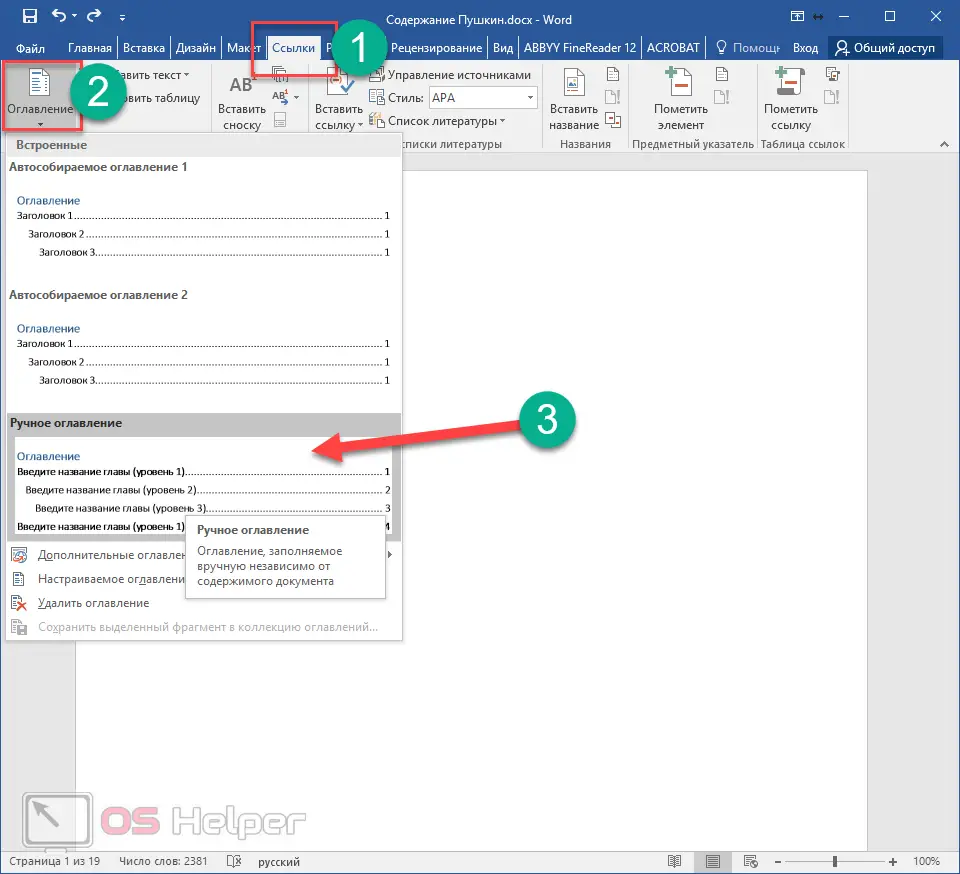
- As a result of this, you will see the following.
Also Read: 6 Ways to Recover Word File
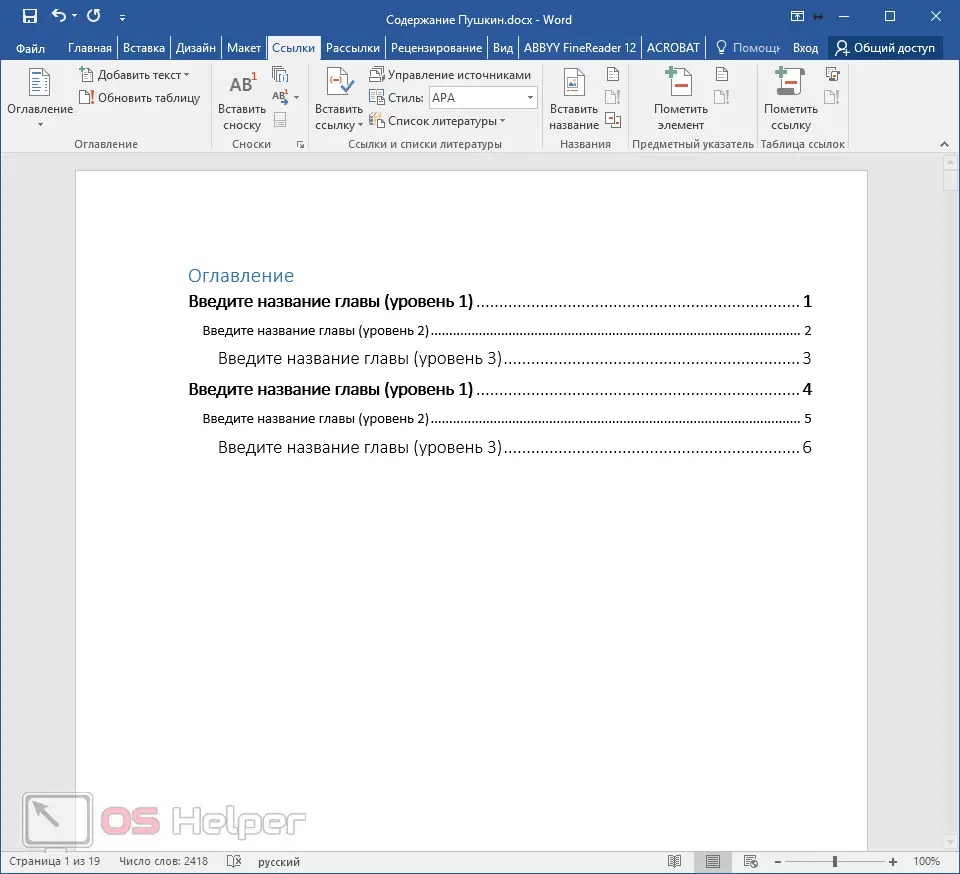
This method is not very convenient. But in this case, at least a dotted line is drawn automatically. It's better than putting dots by hand.
Custom table of contents
But there is a third option - semi-automatic mode. Such content is collected as follows.
- Switch back to the Links tab.
- This time, in the menu "Contents" select the appropriate item.
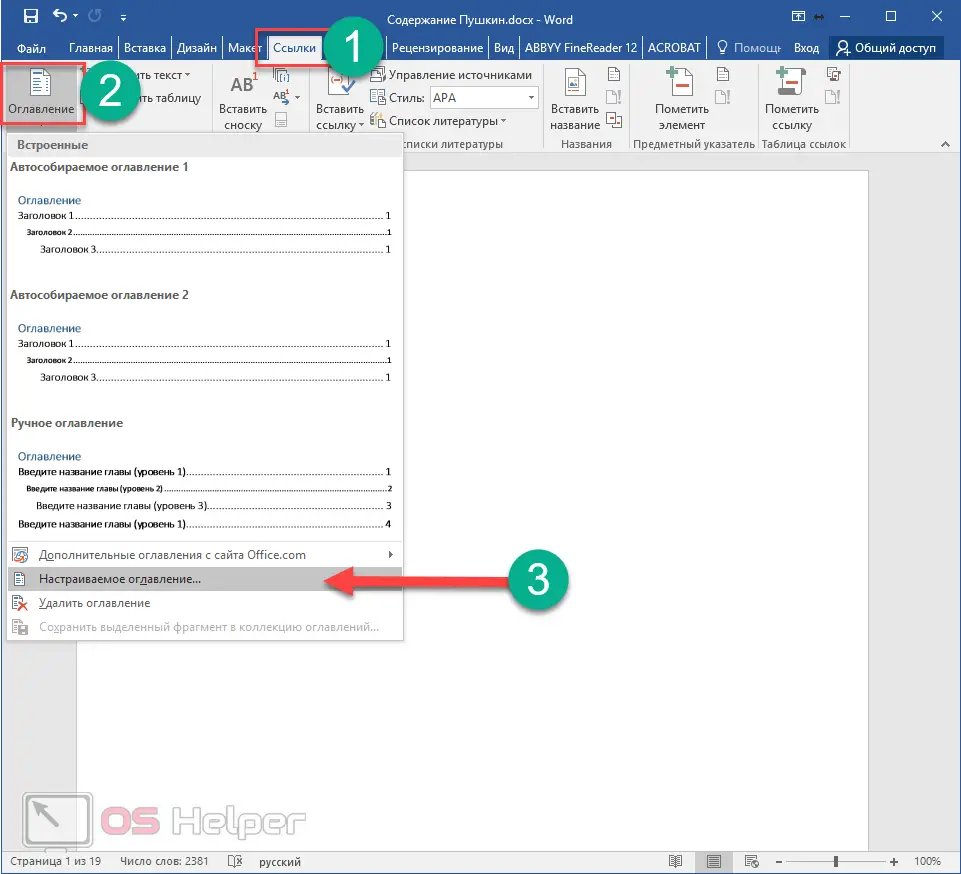
- As a result, the following window will open.
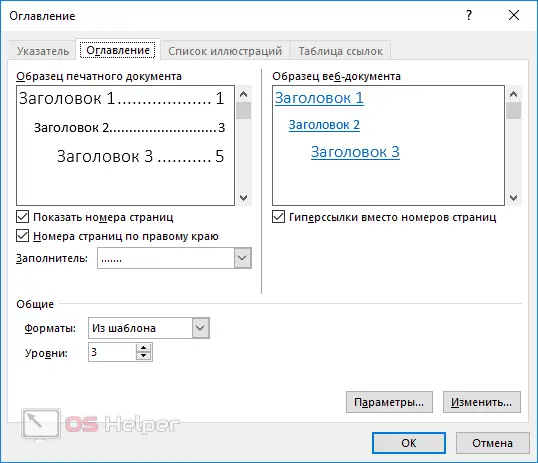
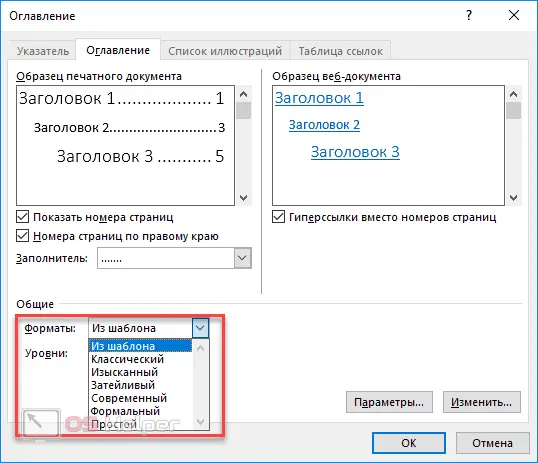
- Here you can:
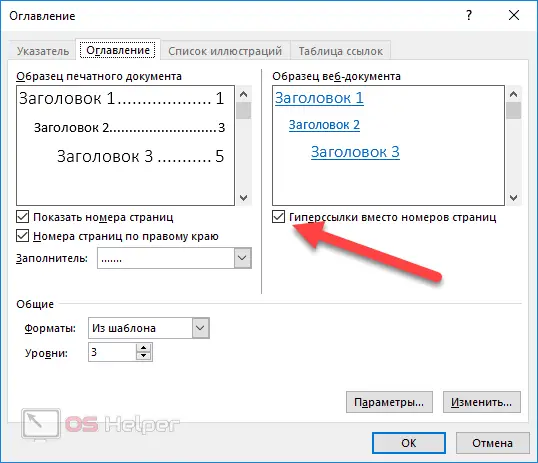
- enable or disable hyperlinks;
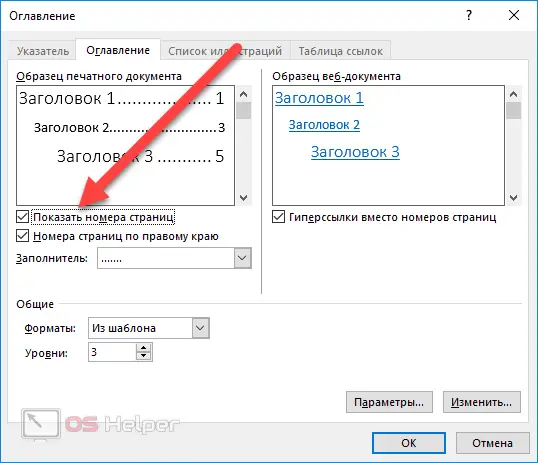
- enable or disable the display of page numbers;
- enable or disable the display of pages on the right edge of the sheet;
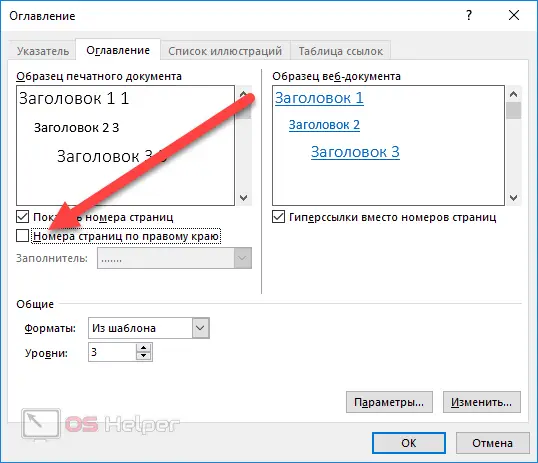
- select the type of placeholder;
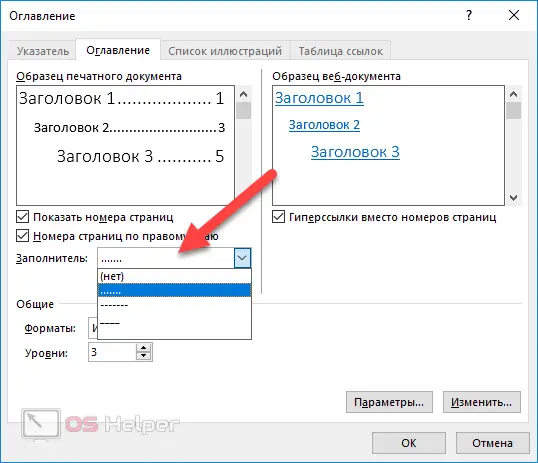
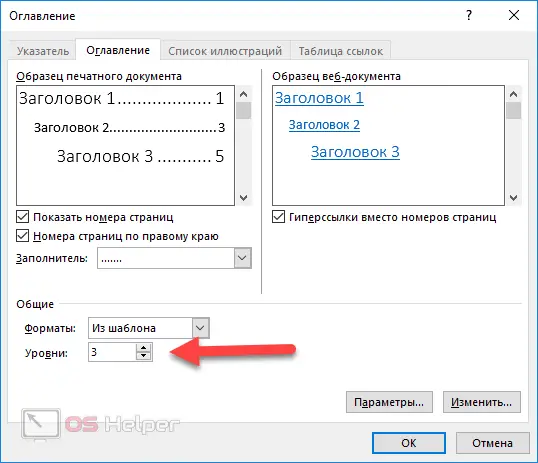
- specify the format of registration;
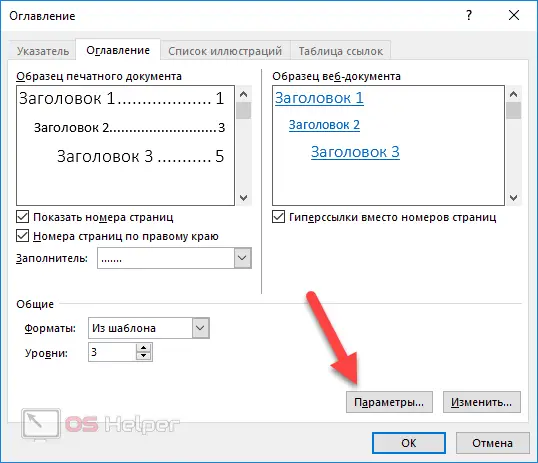
Options
For more detailed settings, click on the "Settings" button.
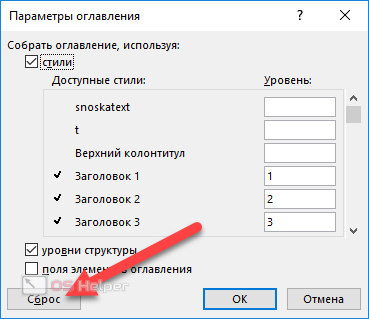
This will open the following window.
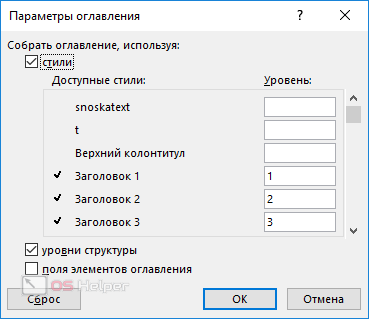
There are quite a few items to edit here. In order to see them all, you need to scroll the slider to the very bottom.

If you don't like the changes you've made, or if you've messed something up, you can always click on the "Reset" button.
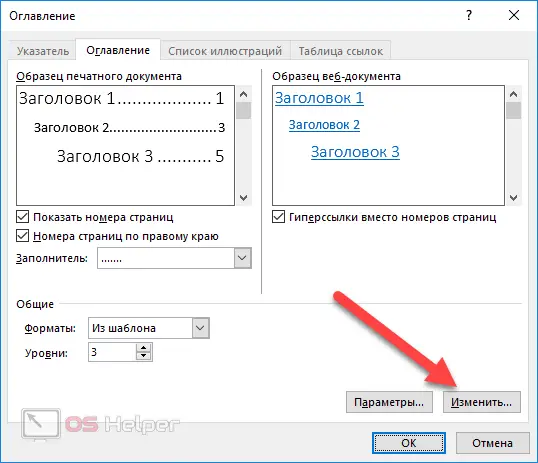
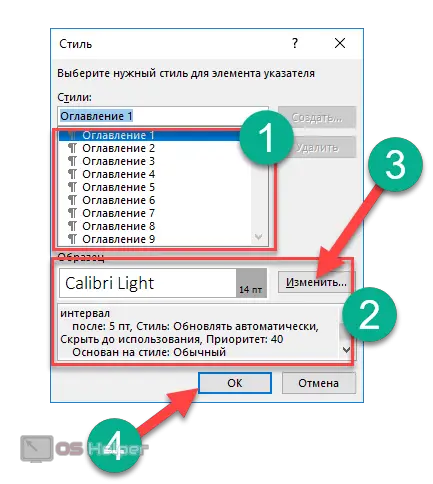
Style
To edit the appearance of menu items, click on the "Change" button.
As a result of this, a window will appear in which you can make changes to any desired table of contents. For this you need:
- Select the desired item.
- View description.
- If you don't like it, click on the Change button.
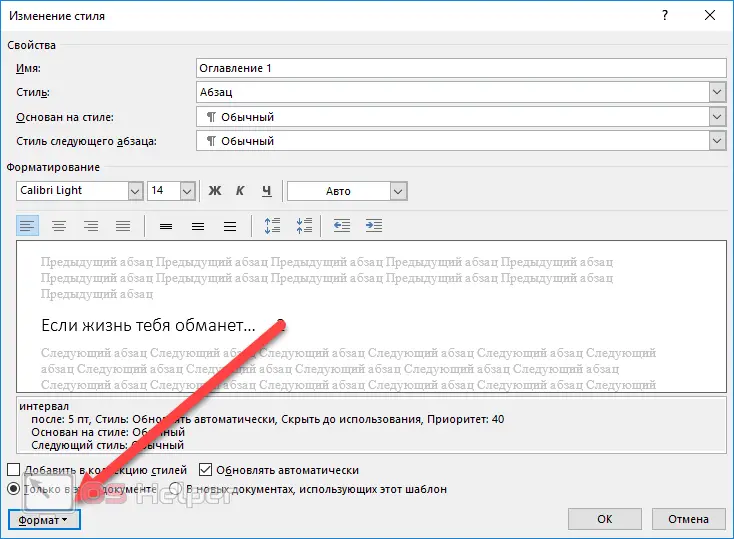
- Immediately after that, the "Change Style" window will appear. Here you can configure basic settings.
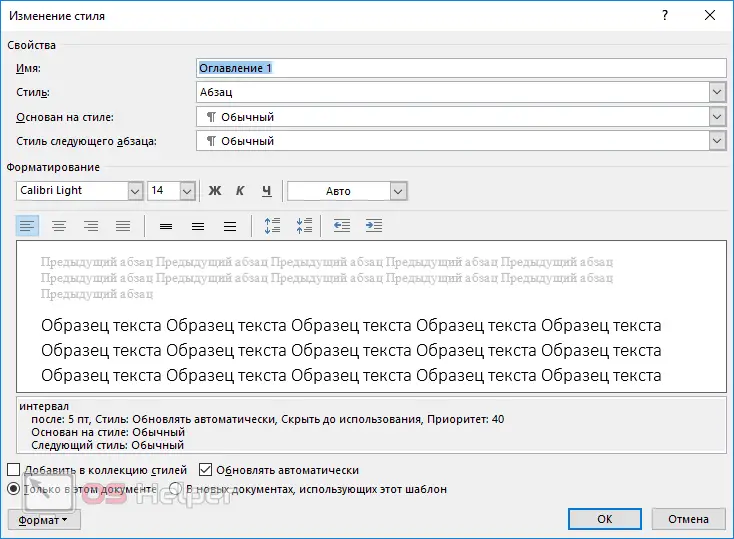
- For finer settings, click on the "Format" menu.
- Right after that, you will see the following items.
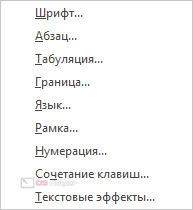
- The most needed are:
- To save the changes at each stage, you must click on the "OK" button.
How to remove content
If you no longer need it or your experiments ended in failure, it is enough to take the following steps.
- Open the Links tab.
- Click on the "Tables" menu.
- Select Remove Table of Contents.
- This will make it disappear immediately.
There is also a second way. To do this, you first need to select everything.

Then click on the button [knopka]Delete[/knopka] or [knopka]Backspace[/knopka]. But if the table of contents is large, then it is much more convenient to use the first method.
Conclusion
In this article, painstaking work with content was considered. Thanks to this, you can create exactly what you want, and not use ready-made templates of the Microsoft Word editor.
If something doesn't work for you, your text may be missing headings. How to fix this problem was described earlier.
Video instruction
For those who still have any questions, a video is attached below with detailed comments on the instructions described above.