How to cut an image in Photoshop and paste it on a different background
 Today, in our detailed step-by-step instructions, we will again talk about the best in the graphic editor from Adobe. Specifically, you will learn how to cut an image in Photoshop and paste it onto another background. Moreover, we will consider three options at once, which are suitable for objects of any degree of complexity. Well, let's get right down to business without delay.
The example discussed in the article is shown based on Adobe Photoshop 2022, however, in earlier versions of this graphic editor, everything looks exactly the same.
Cut out a simple shape
Let's look at the simplest option first. It is suitable when we need to cut a rectangular, square, round or angular object. See how it's done:
- Open our image in Photoshop and proceed to select the object. For example, we need to select a square. To do this, we will use the tool for working with a rectangular area. We marked it on the screenshot.
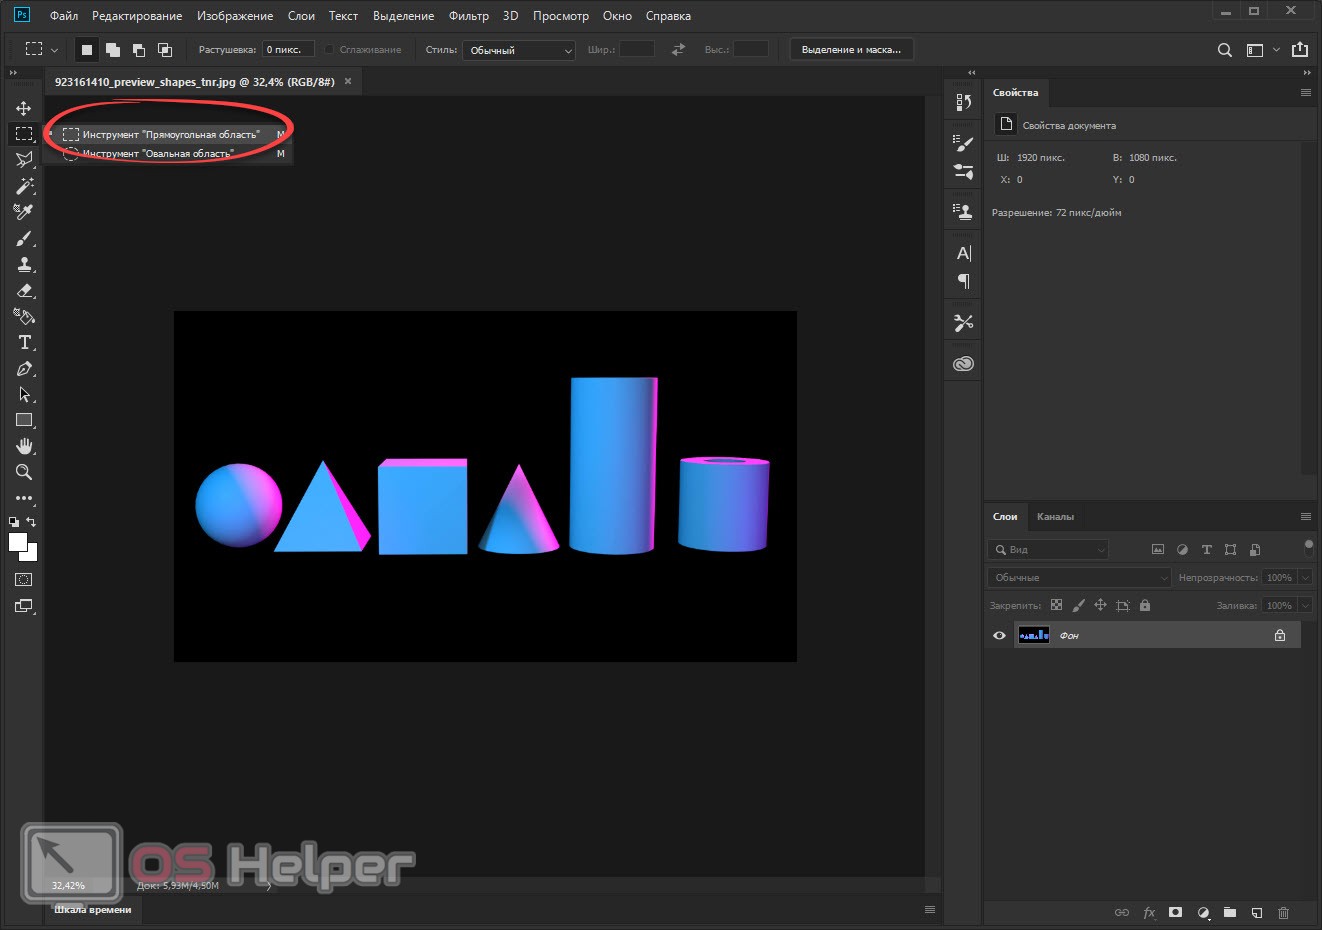
- To select, set the cursor to the starting position, stretch the selection area and release your finger at the end point. As a result, our square will be highlighted with a moving line.
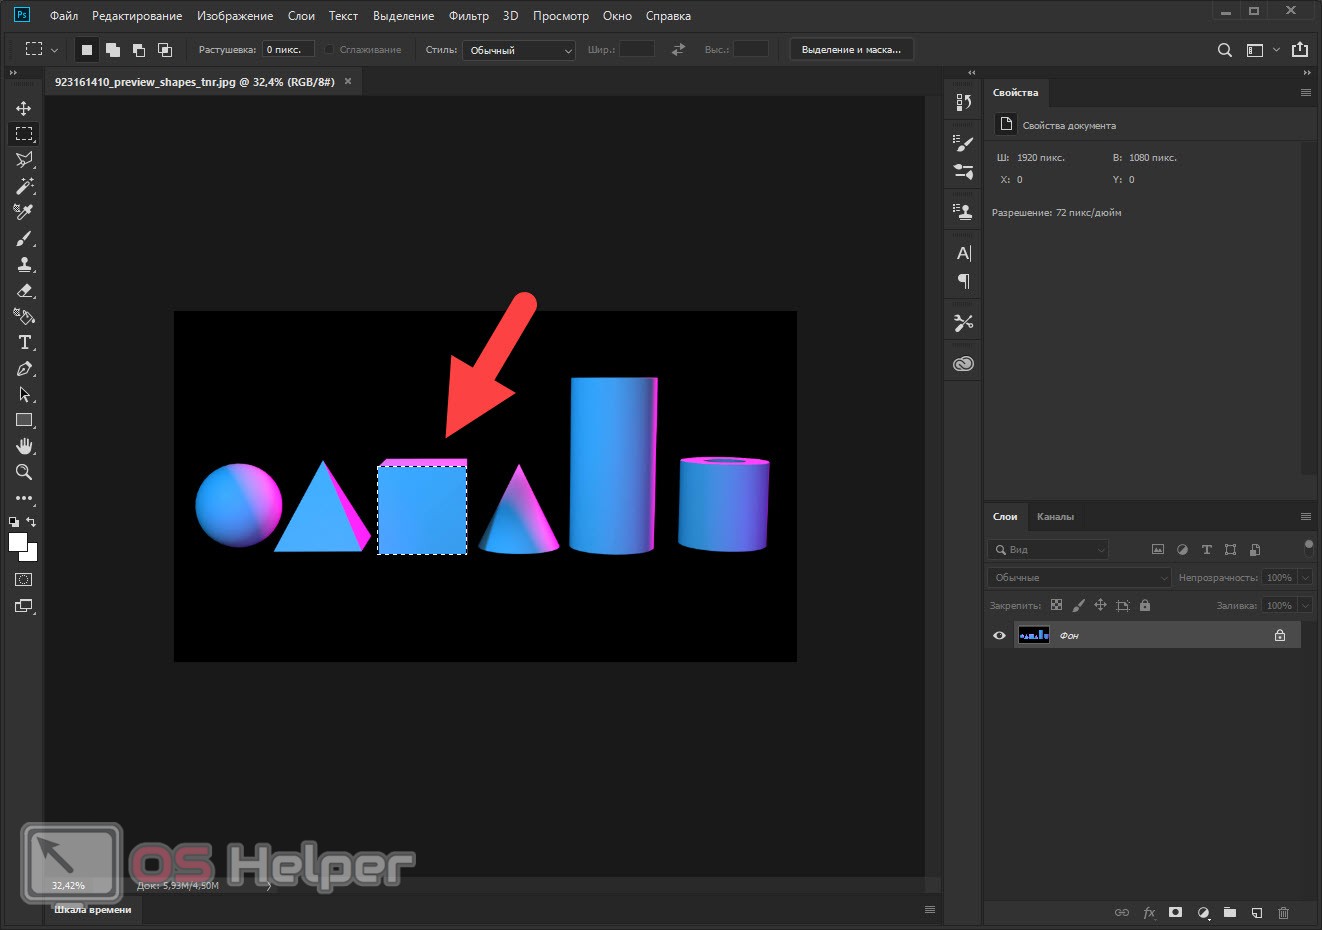
- Now let's select the circle. To do this, in the same place where we selected the rectangular selection, select the circle. Switching between these two tools is done with the right mouse button.
- In the same way as in the case of a rectangular selection, set the cursor to the starting position, stretch the area and release it at the end point.
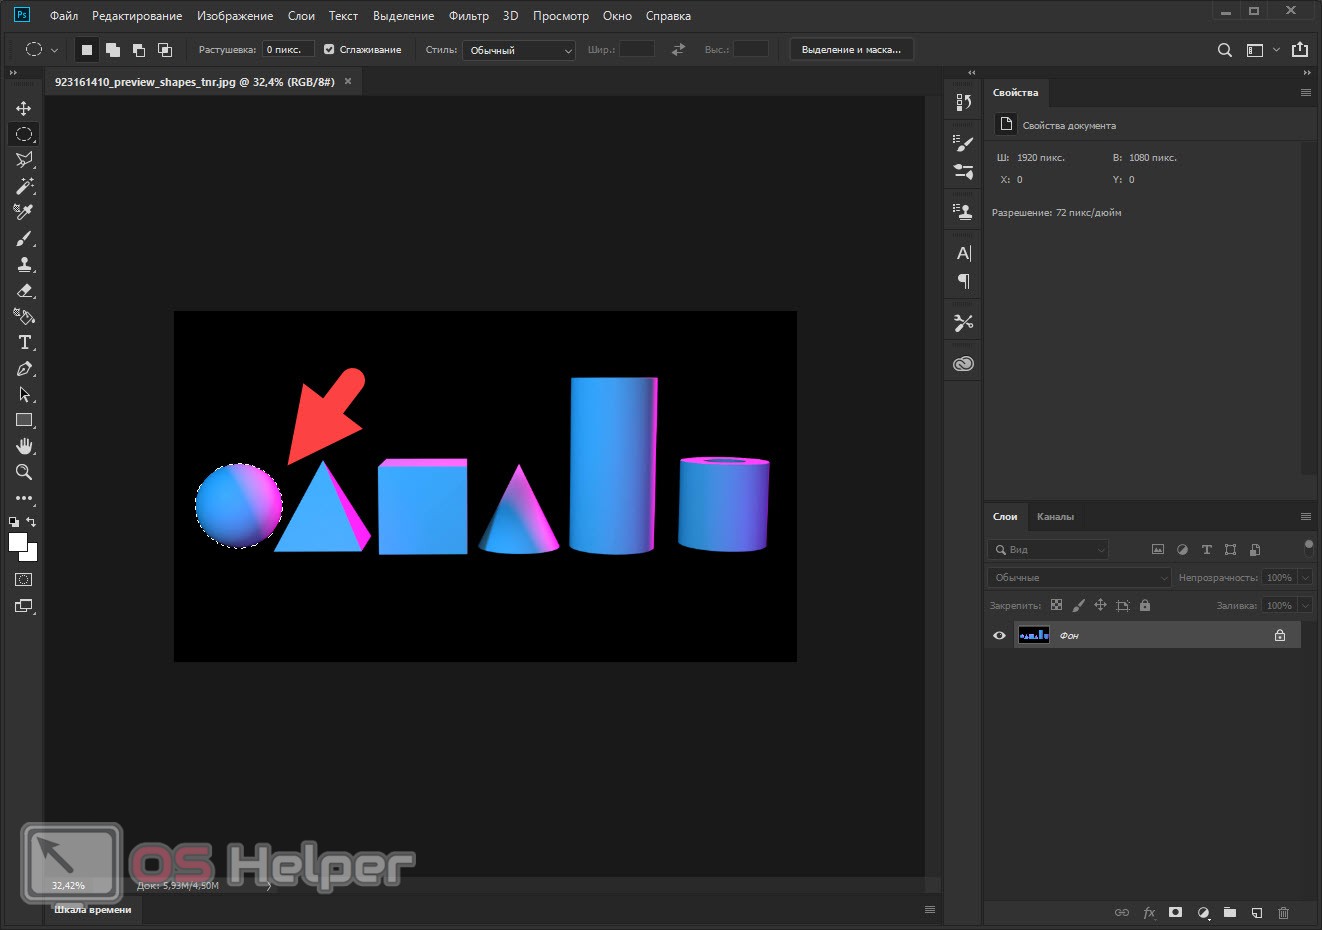
As a result, the figure will stand out.
If we need to designate a more complex figure, there is also a tool for this. Imagine that we want to designate a triangle by capturing its side face:
- On the toolbar, select the straight-line lasso.
Also Read: How to Undo an Action in Photoshop
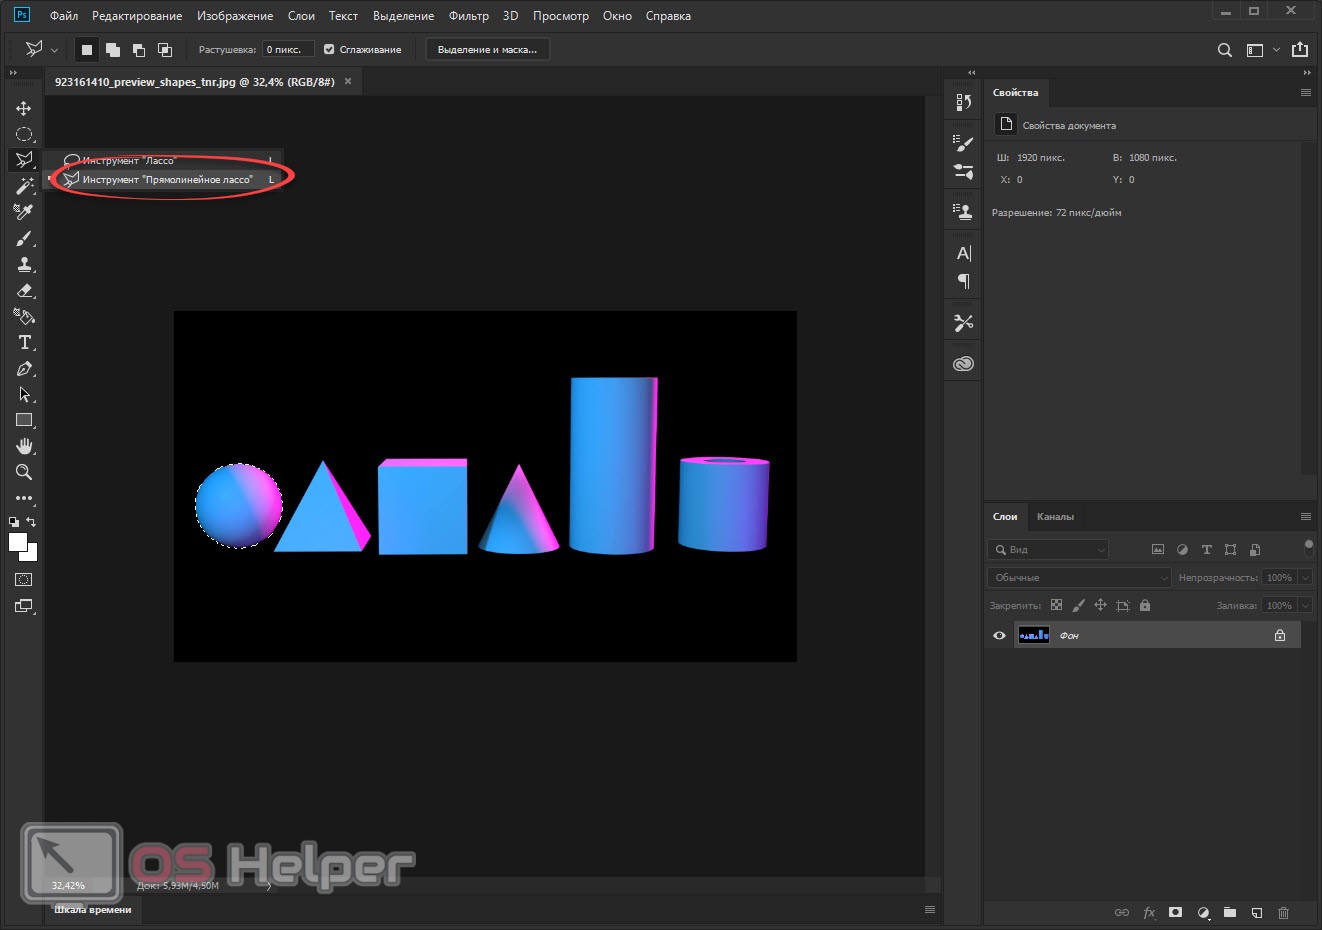
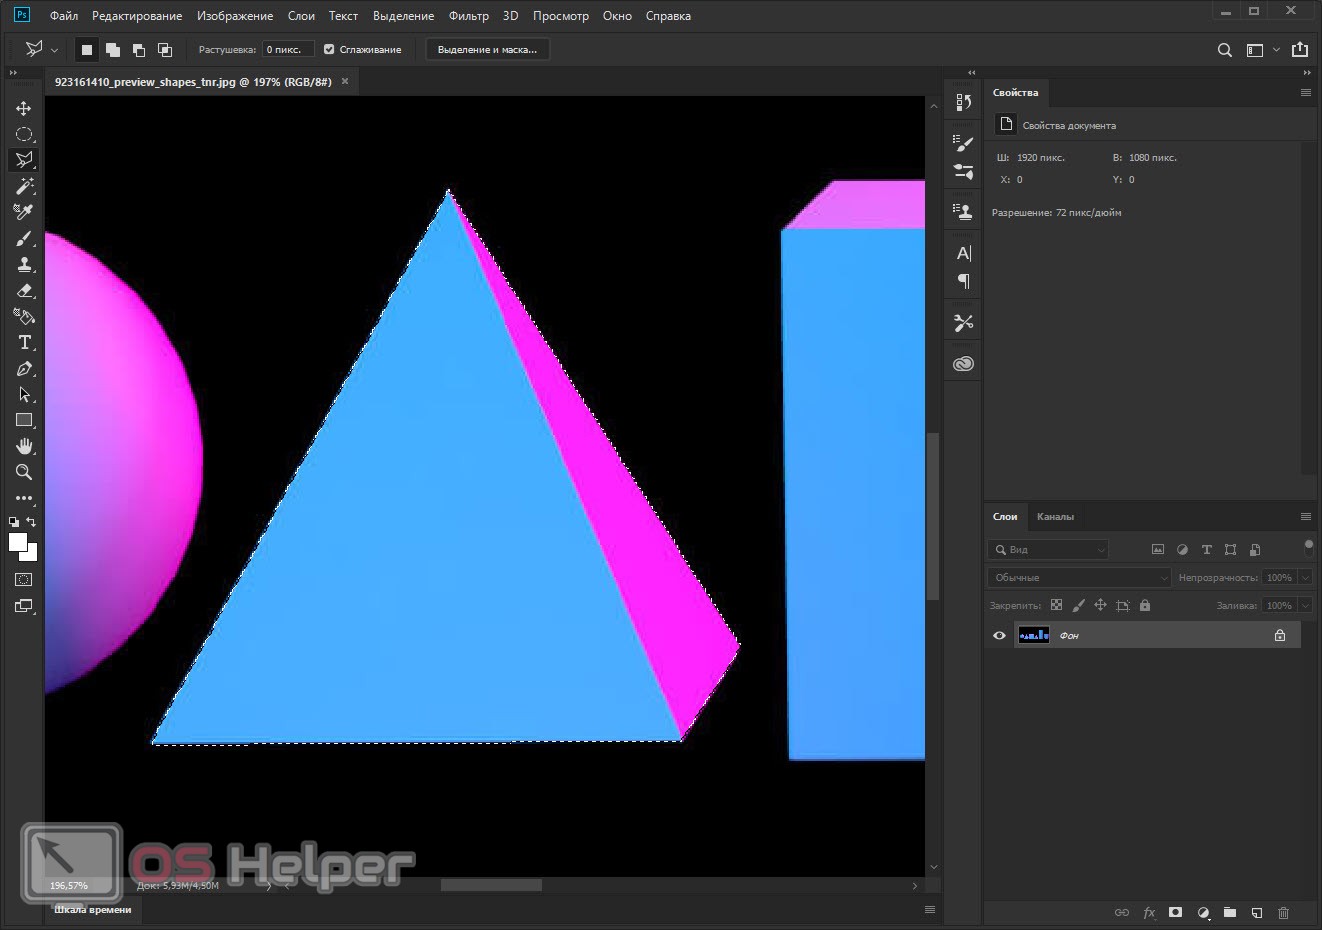
- We increase the figure in such a way that it is most convenient for us to work with it. To do this, on the same toolbar, but a little lower, there is a zoom function (an icon with a magnifying glass). Set the cursor to the first point and make a left mouse click. We point our pointer at the second point, make a second click, then on the third and fourth, respectively. Thus, we select the entire figure, closing the contour.
Expert opinion
Daria Stupnikova
Specialist in WEB-programming and computer systems. PHP/HTML/CSS editor for os-helper.ru site .
Ask Daria The more accurately you place the cursor at key points, the better the selection itself will be.
Ready. Now let's move on to working with more complex objects.
Magic wand
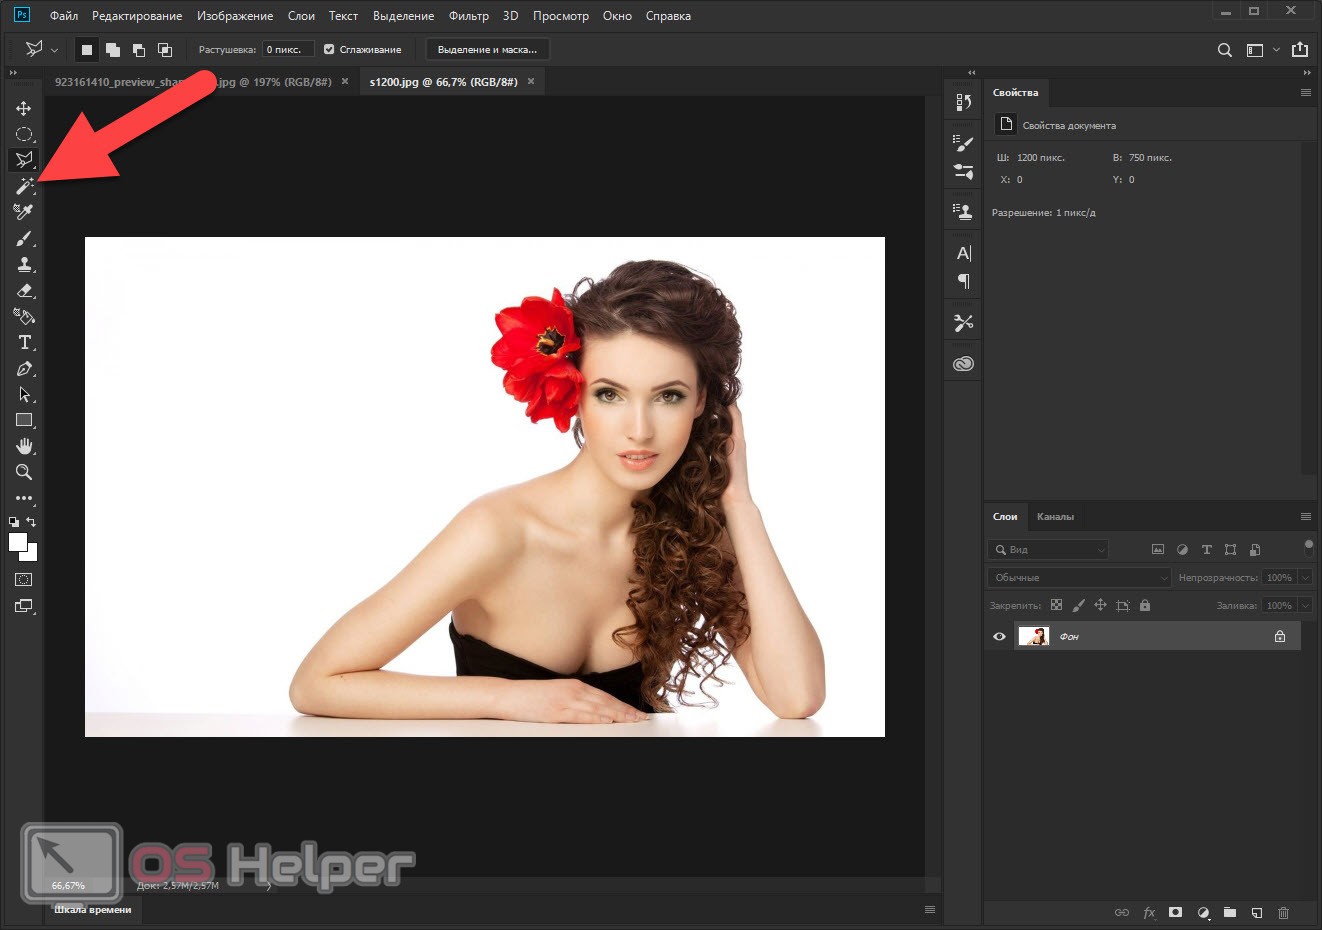
The Adobe program has one very functional tool called the magic wand. It helps to select complex objects, and does it automatically:
- Let's say we have a complex object, like a girl. If we were to select it with a straight lasso, it would take several hours. However, let's activate our magic wand. To do this, click on the button indicated in the screenshot below.
- Now we click with the tool on the background in our picture. This will automatically select the entire background.
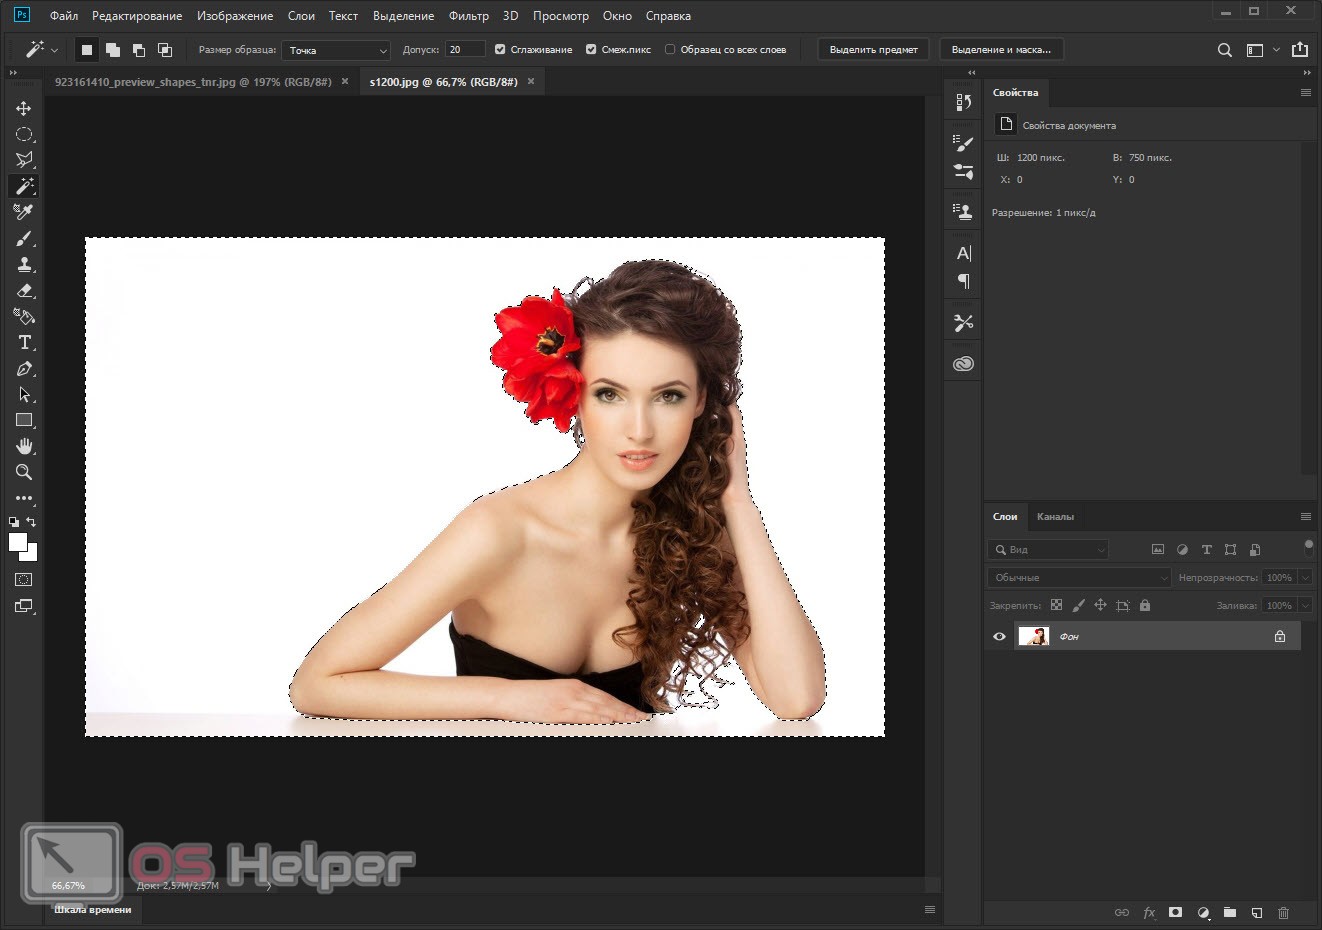
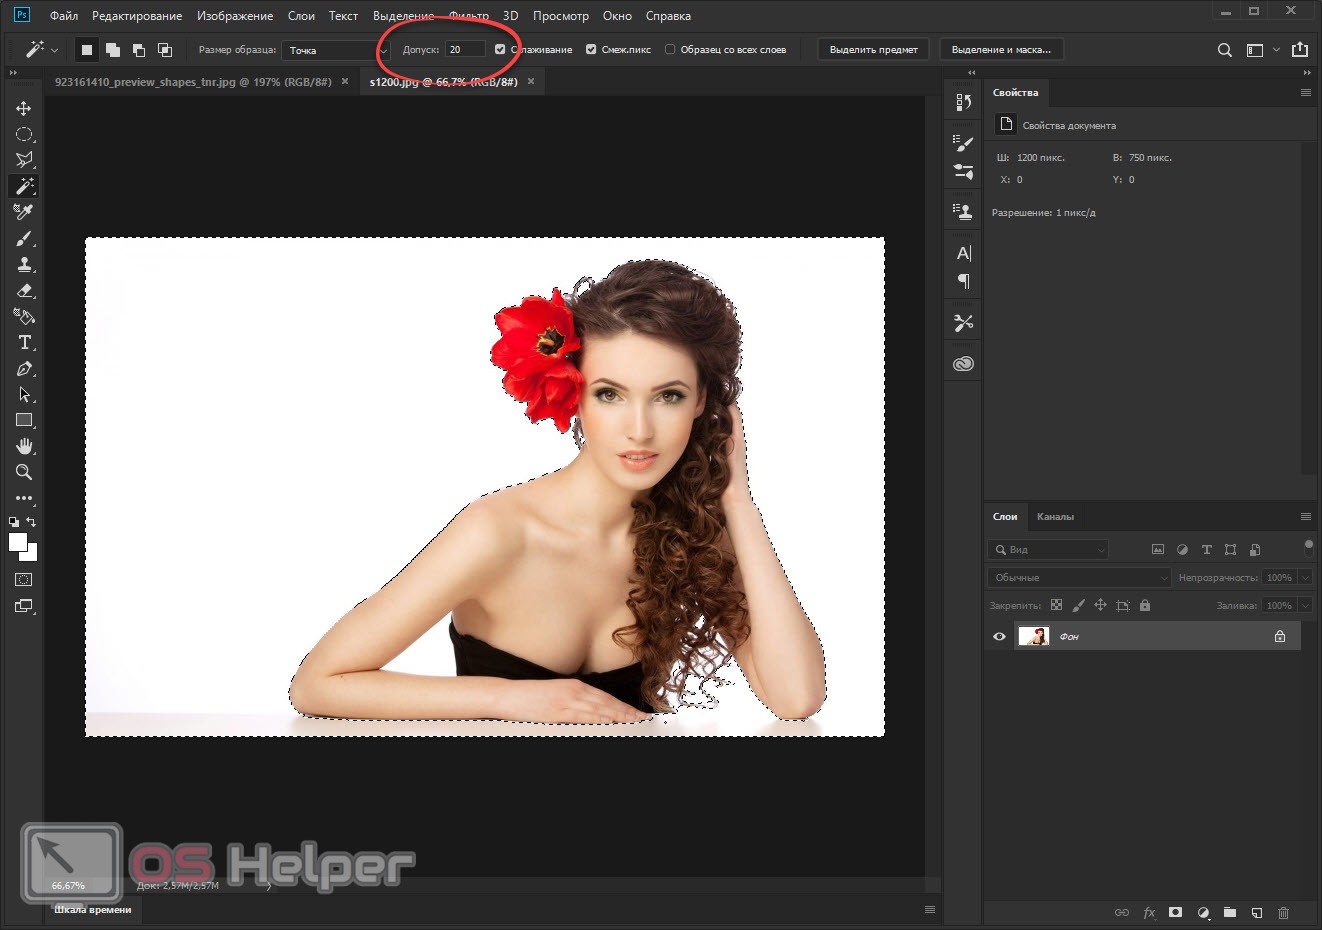
- If the selection is not accurate, try adjusting the tolerance setting. We also marked it in the screenshot below. In order to invert the background selection into an object, simply right-click and select the desired item from the context menu.
In order to add another selection area, hold down the [knopka]Shift[/knopka] button and make the next click.
The magic wand allows you to select only the object that is on a uniform background. However, what to do if the background consists of many fragments? This will be discussed in our third method.
See also: How to draw in Photoshop
Quick mask mode
Let's understand how the quick mask mode works in Adobe Photoshop:
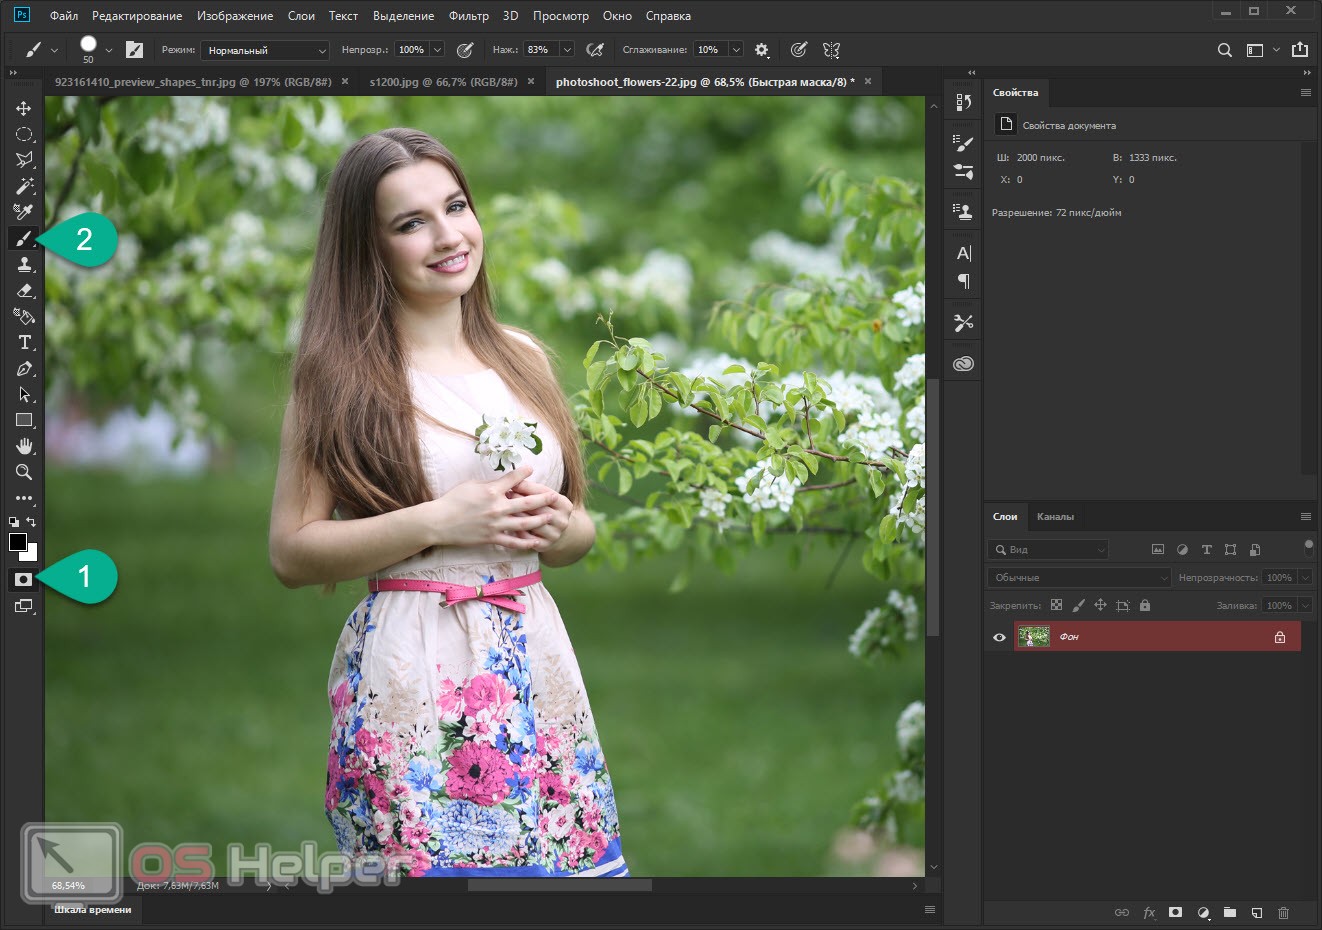
- Using the zoom tool, we zoom in on our object so that we can clearly see all its boundaries.
- We start the quick mask mode using the button marked in the screenshot. Switch to the “Brush” tool (marked with the number “2”) and use it to cover the entire path.
- As a result, you should get something similar to the picture below.
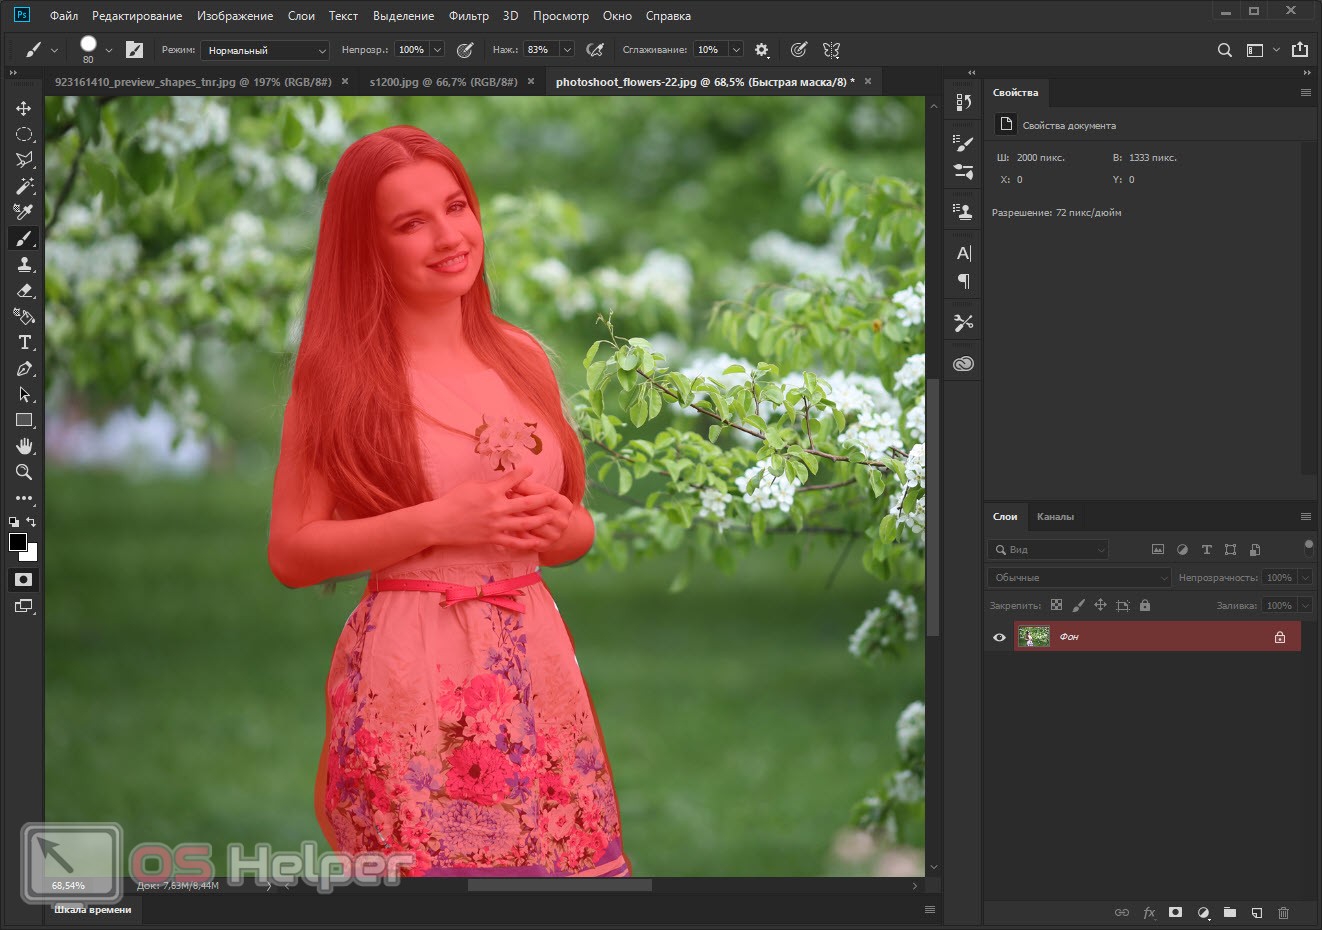
You can use the opening and closing square brackets on your keyboard to change the size of the brush spot.
Now click on the quick mask button again to convert the brush strokes into our selection. The positive effect will not keep you waiting, and in a moment you will see that our object is selected.

Accordingly, the more accurately you apply brush strokes, the more accurate the selection itself will turn out.
Copying and pasting a snippet
Now a few words about how, in fact, to copy and paste the cut fragment. To do this, you can use the context menu, namely the item "Editing" - "Cut" and, accordingly, "Editing" - "Paste".
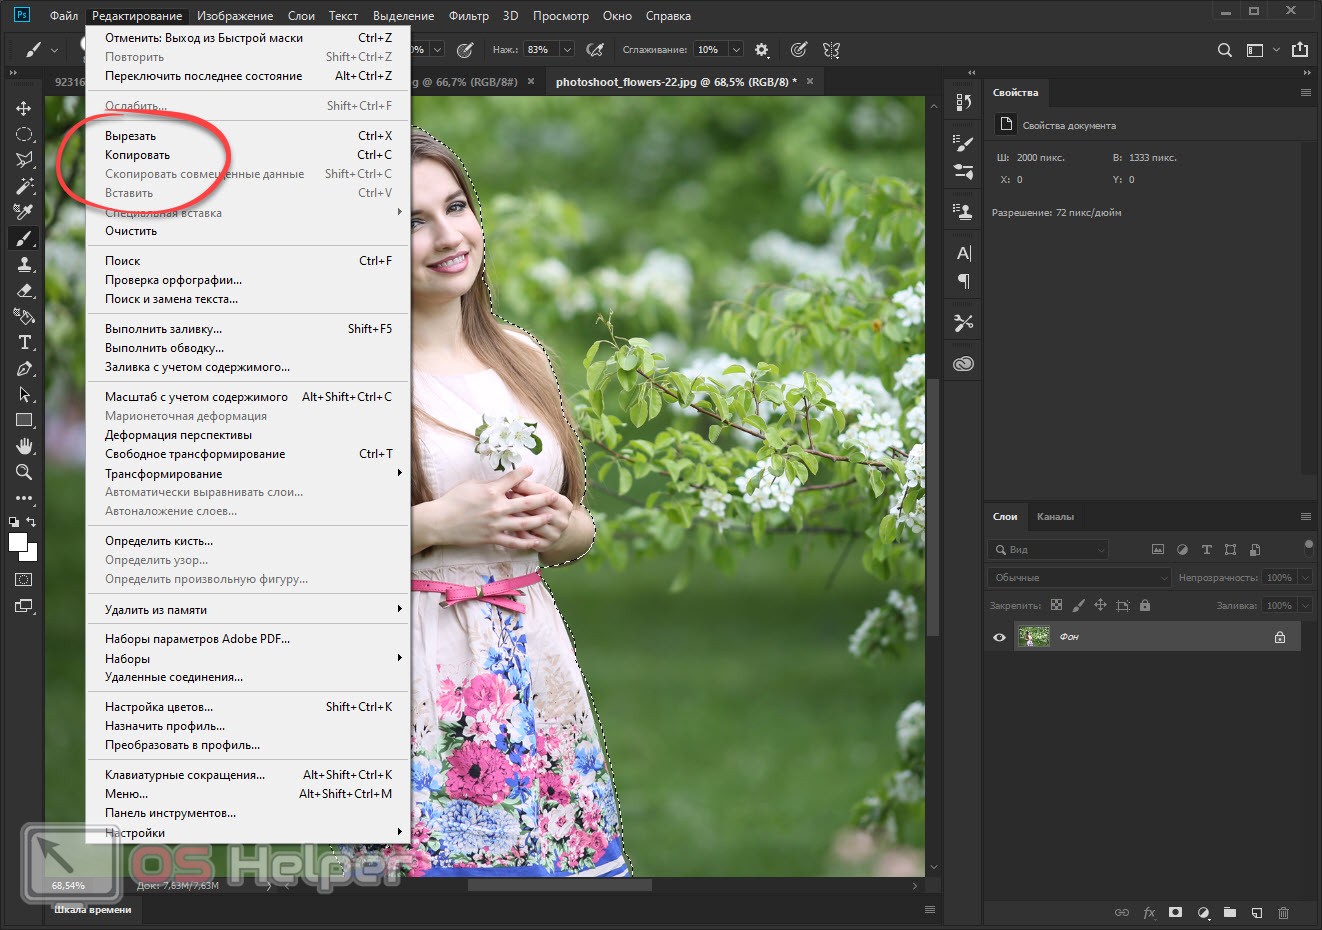
It can also be replaced with hotkeys [knopka]Ctrl[/knopka]+[knopka]C[/knopka] (for copying), as well as [knopka]Ctrl[/knopka]+[knopka]V[/knopka] (for pasting ).
Next, open the image on which you want to paste the object, paste the copied area and scale it in any convenient way ([knopka]Ctrl[/knopka]+[knopka]T[/knopka]).
Video instruction
We also recommend that you check out this tutorial video.
Summing up
Okay, now you know everything about how to cut an image in Photoshop and paste it onto another background. Now you can move on to practice, and do not despair if not everything works out right away. Such programs and all the options for working with them require skill, and, as you know, it appears with practice.