How to get Root rights on Android: step by step instructions
 Root access is the ability of a user of a device running Google Android to gain full access to its system files. This approach may be necessary for some applications with advanced functionality, such as proxy servers, sniffers, or screen recording utilities.
What is Ruth?
On the other hand, getting Ruth is a very dangerous move. By doing this, you literally put the device itself and your personal data at risk, since any software, including a virus, can access system files. In order to minimize this possibility, a special program is installed on the phone along with Root, which distributes powers and protects access with a password.

Advantages of Root:
- you can remove applications that are installed as system ones by default and are not deleted without Root. It's also easy to clean up built-in services and other system junk that manufacturers love to stuff their devices with;
- editing any system software, including the firmware itself;
- additional functionality. For example, the Xposed framework adds many new features to any smartphone;
- modification of the Android operating system;
- Improved phone performance by optimizing software and firmware. Also, the speed of work is affected by cleaning the RAM by unloading excess from it.
In addition to the advantages of rooted phones, there are also a number of disadvantages. Moreover, the negative aspects, in our opinion, are much more significant.
Flaws:
- the phone can no longer receive the latest software versions from manufacturers over the air. Your firmware becomes outdated and becomes more susceptible to virus infection;
- you simply lose the warranty on your phone as soon as you root it;
- the user, by his own negligence, can delete or modify the file, which will lead to the collapse of the entire OS;
- During Recovery flashing or files that modify the boot sector of the operating system, you can disable the phone so that it can no longer be restored even in a service center.

If, despite all the warnings, you still decide to get administrator rights in Android, you can read on.
Examination
Before we get straight to the point, let's check if your Android is already rooted. Moreover, it is very simple to do this:
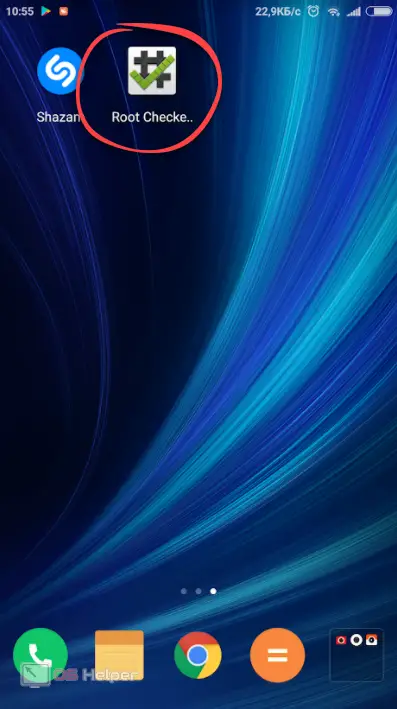
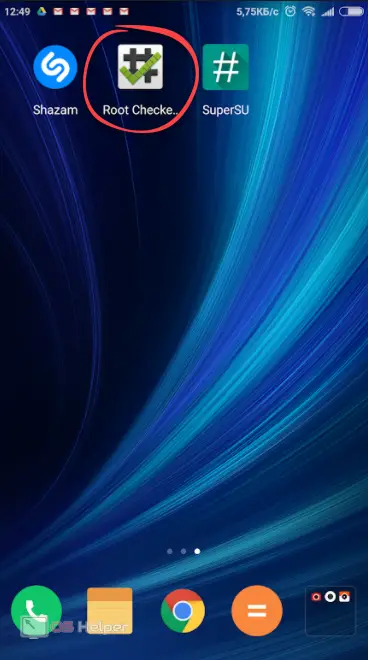
- So, for starters, go to the Google Play Store app store. You can find its icon either on the OS home screen or in the application menu.
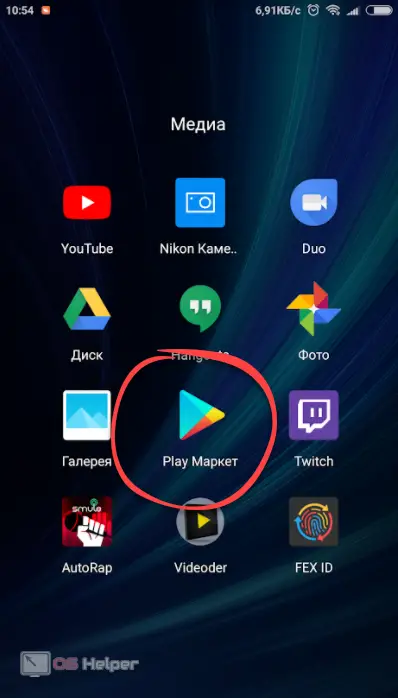
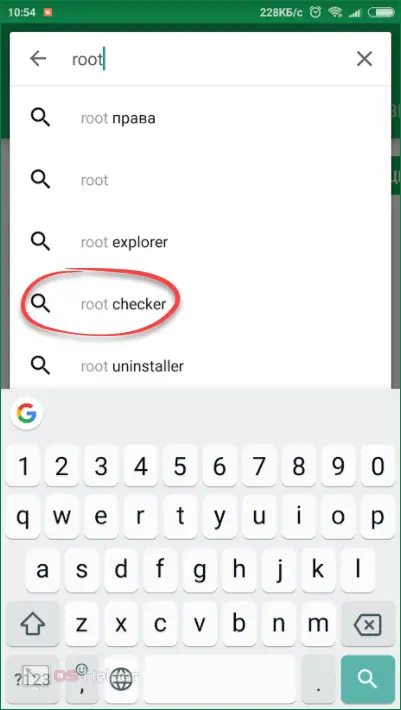
- We write in the search line the name of the program we need - you can see it in the screenshot below - and click on the element indicated in the output.
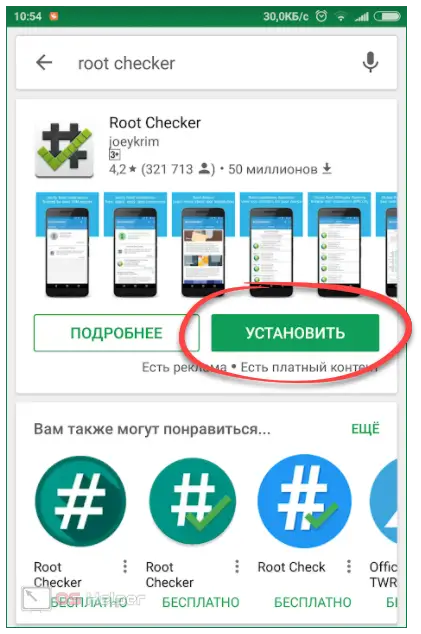
- Next, click on the button labeled "Install".
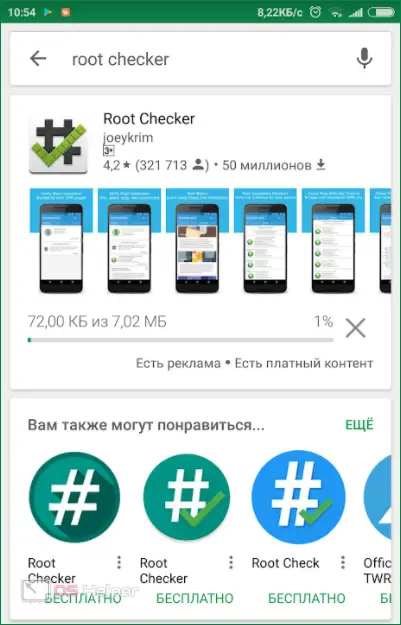
- We are waiting for the file with all the necessary data to be downloaded and installed on your gadget. Both actions take place automatically and depend only on the speed of your network connection.
- Now the application can be launched. You can do this either directly from the Google Play store, or directly from the Android desktop.
See also: Sync contacts with Google on Android

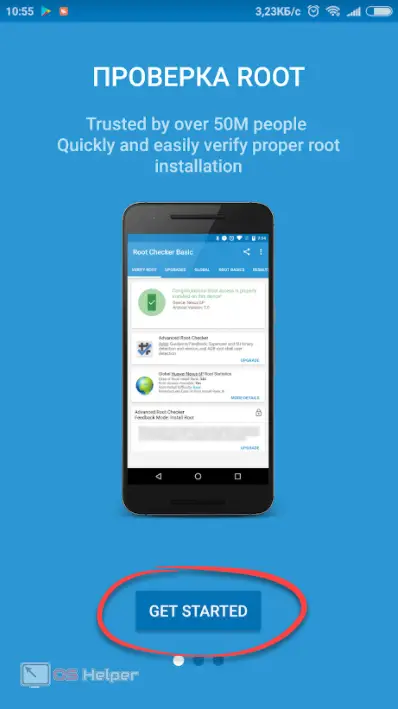
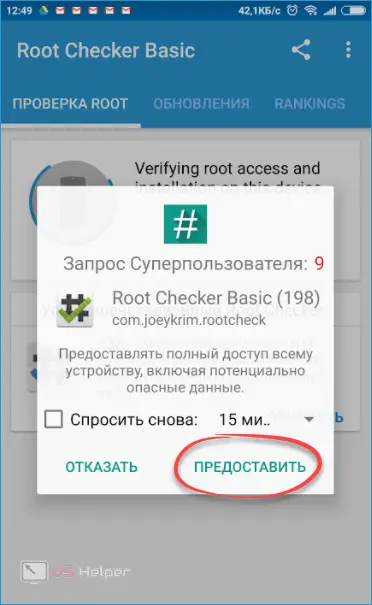
- On first launch, we will be required to provide our consent to the disclaimer. We are told that Root Checker is not designed to get Root rights, but is only needed to check their availability. Finally, click "ACCEPT".

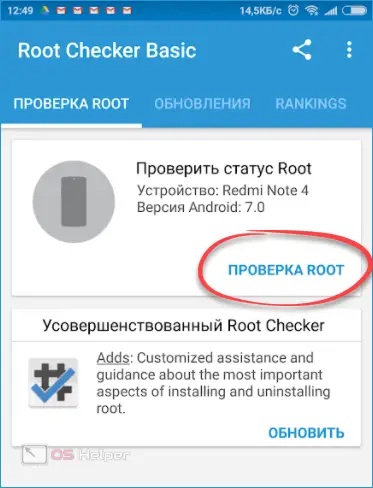
- At the next stage, we will be told about the various advantages of the program. Let's not waste time, but just press the button marked in the picture.
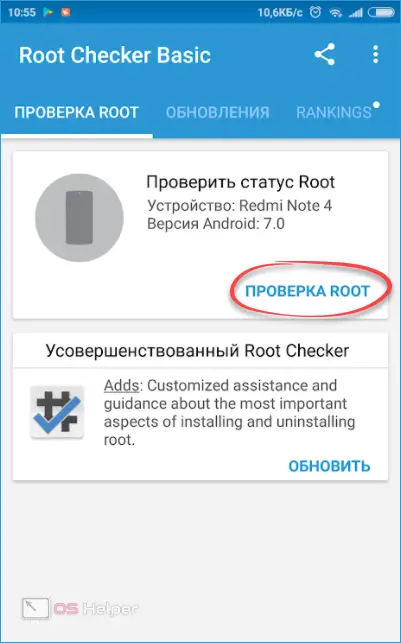
- Here we tap on "CHECK ROOT".
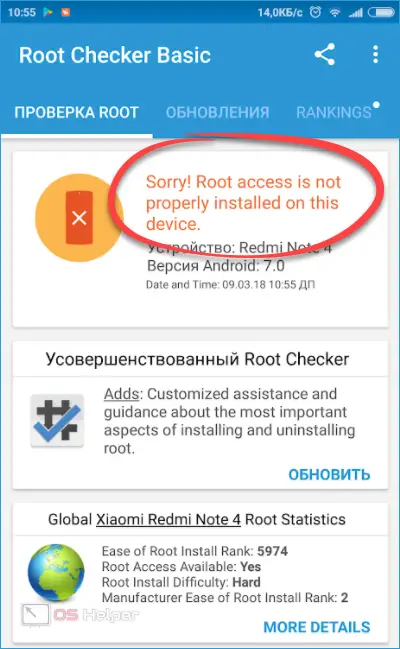
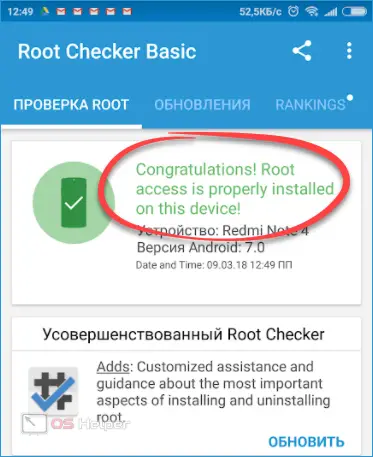
And here is the result. As you can see, we do not have any Root rights. So, you can proceed directly to their receipt.
If, after checking, you see an affirmative entry that Root is present, then simply install the application to redistribute them. It is done like this:
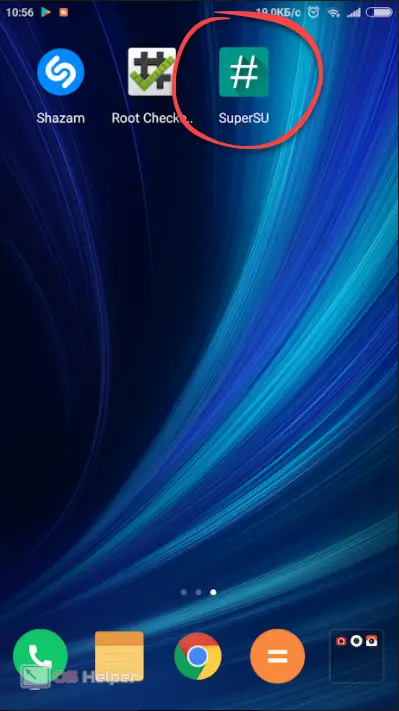
- We visit the Play Market again, finding its shortcut on our Android.

- We prescribe in the search line "super" and in the output that appears, select the desired program.
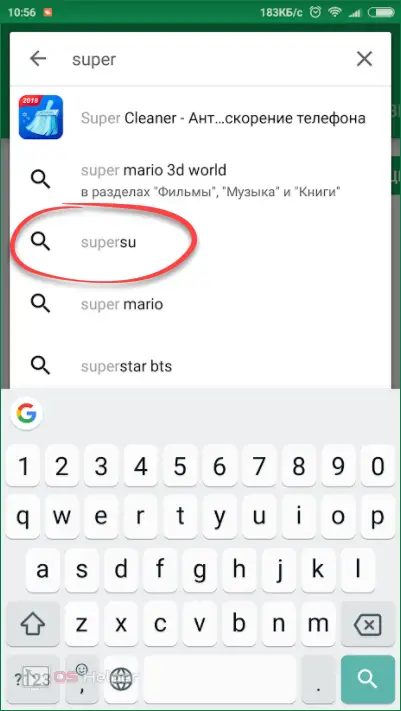
- Then, of course, click "INSTALL".
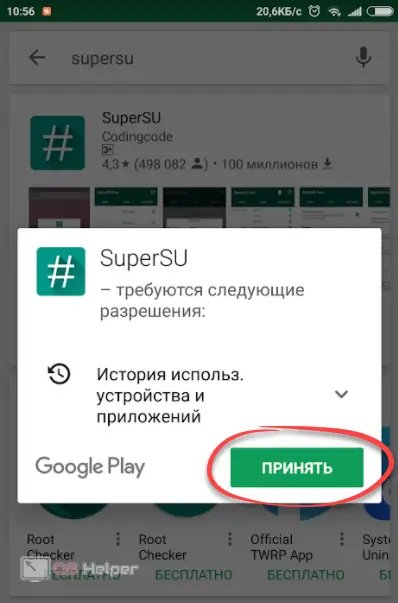
- We accept the required permissions.
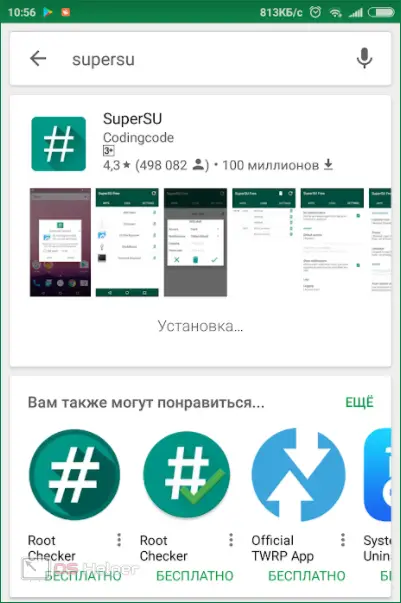
- We are waiting for the installation of SuperSU to complete.
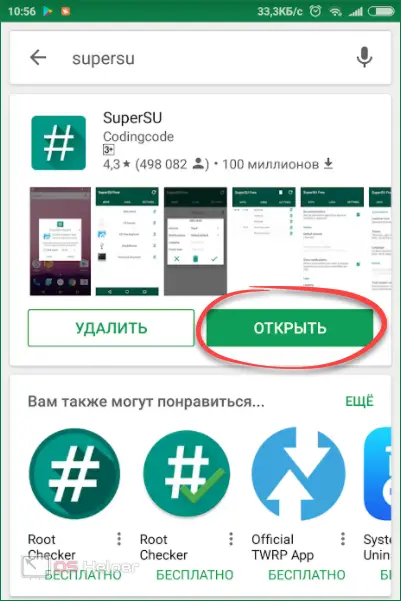
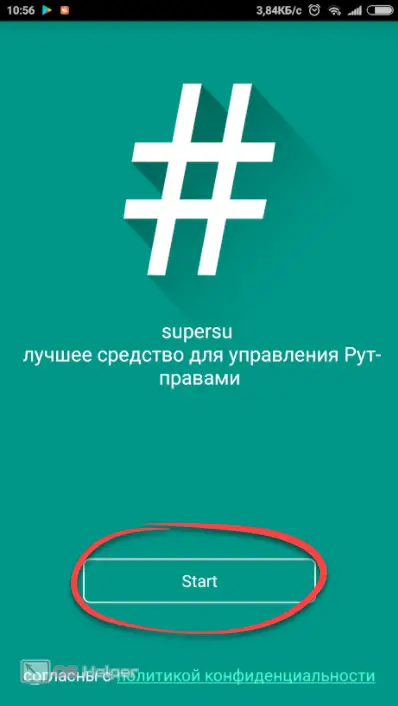
- We open the program directly from the store or by tapping on its shortcut on the Android desktop.
- When our application is launched, click the marked button and start working with it.
Now, with each request for Root access by any application, you can deny it or, conversely, answer in the affirmative.
Getting Root
Attention! Before you get down to business, charge your phone battery. If the firmware process is interrupted halfway, it may not be possible to restore it!
Since there are a lot of phones running the Android operating system, the rooting of each of them can vary significantly. For example, on Samsung, you can use a special program that is installed on your computer, and you can only unlock the Xiaomi bootloader with the permission of the creators. So we will not describe in detail the instructions for all phones, but will only touch on the general principles of obtaining Root and show a specific example.
With the help of programs
The easiest and most versatile way to get Root on Android is to try one of the programs created for it. The principle of working with such software is simple - you install the utility on your phone or Windows PC, run it and follow the prompts on the screen. If your model is supported, the rooting process will begin, which should lead to a positive result.
Consider some of the most popular applications for getting Root.
Framaroot
This software is very easy to use and is installed on your Android as an APK file. Before proceeding with the installation, you must allow the launch of APK from unknown sources. You can do this in the security settings. By default, Framaroot is not on Google Play, so you need to install the software exactly as an APK.
Baidu Root
The following program is distinguished by a rather “crooked” translation (hieroglyphs are visible here and there), but it copes well with its main function. Naturally, only on supported models. The speed of the utility is also pleasing. Brute force is not used here. But there are also negative points. There have been cases of "bricking" of phones after the intervention of Baidu Root.
See also: How to connect a fitness bracelet to an Android phone
KingROOT
Unlike previous applications, this program looks several orders of magnitude more interesting. Here and convenient navigation, and reliability of work. But it works from the computer. Before proceeding with rooting, you will need to go to your smartphone settings and enable USB debugging there.

As soon as a smartphone, such as Lenovo, Huawei, ZTE, Fly, HTC, Asus Zenfone, Meizu or LG, is connected to the PC, the application will scan it and automatically determine if it can be rooted. All you have to do is press the confirmation button. Please note that during the firmware process, the device may randomly reboot. Do not unplug the cord at this point.
Root Genius
The following application also works in tandem with a computer and has a fairly extensive database of supported devices. But then again, there are hieroglyphs everywhere and it’s not so easy to understand what you need to press at a certain point in time. But if you treat the process more or less carefully, it will be difficult to make a mistake.

Kingo Root
There was already a program with a similar name in our list, but this software is not a copy of it. The advantages of Kingo Root include the most extensive list of supported smartphones. The process itself is also very simple. You will have to connect the device to the PC via a cable and, if it is supported, click the button once.
The list of programs for getting Root on Android can be continued for a very long time, but our goal is only a general immersion in the problem. Use the search engine and see which of the utilities is right for your model.
Through Recovery
Recovery is a PreOS mode that is capable of making changes to it without starting the main OS. If we flash the required archive through Recovery, we will get Root rights on our smartphone. Something like this menu looks on Samsung phones:
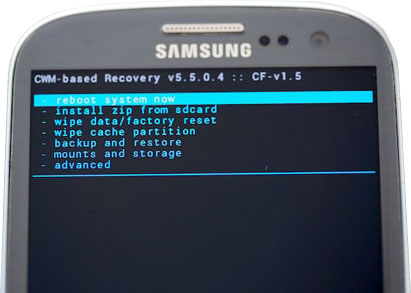
In order to open Recovery on Samsung, you need to turn off the device and simultaneously hold down the buttons [knopka] Volume + [/ knopka] + [knopka] Power [/ knopka].
In this case, you need to place the zip-archive to get Ruth in the internal folder of the file system or on the memory card, then reboot into Recovery and select the "Install zip from sdcard" item. After that, the process of flashing the archive will follow and, accordingly, after turning on the device, Ruth should appear.
Attention! Do not flash anything in this way! Otherwise, instead of Ruth, you will receive an unrecoverable brick!
Recovery mode has a number of additional features, including:
- creating a backup copy of the firmware;
- reset the device with full formatting of all partitions;
- clearing the cache;
- partition mounting and much more.
Instead of the standard Recovery (not present on all phones), you can install custom, more functional software. For example, TWRP Recovery.
Firmware archive from PC
In some cases, it is impossible to access the bootloader in recovery. For example, in Xiaomi phones, working with the Boot Loader is not allowed by default, and to access the section, you must obtain official permission from Xiaomi. Only after that you will be able to put whatever you want. And this is done as follows:
An example of installing Recovery and Root is shown on the basis of a Xiaomi Redmi Note 4X phone. In other models, of course, everything may be different.
- Install the driver for your phone.
- Download the application for the official unlock and run it. At the same time, turn off the phone, hold down the power button and Volume Down on it (Volume -). As a result, the device will go into FASBOOT mode. In this state, we connect it to the PC.
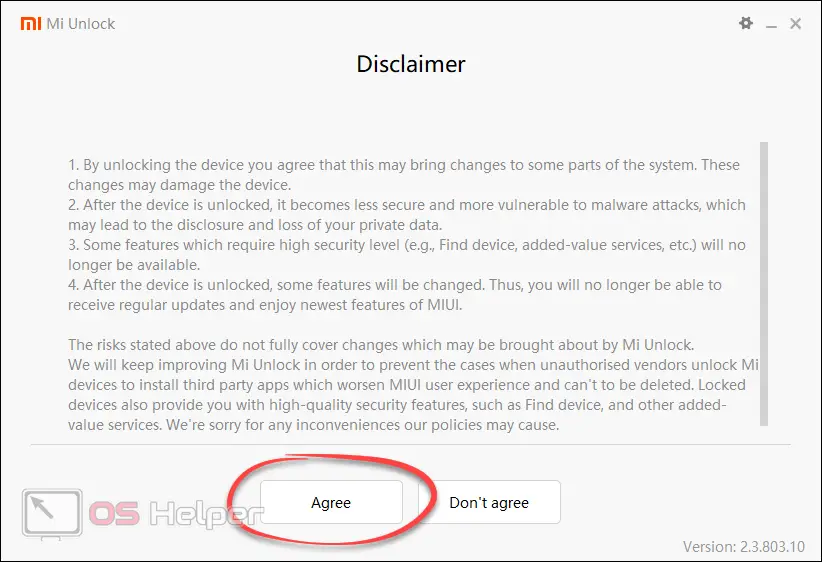
- We accept Mi Unlock license.
Also Read: How to Remove Google Account from Android Phone
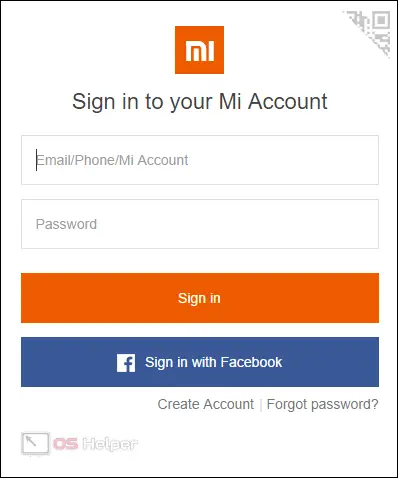
- We log in through an account that has been approved by Xiaomi.
- As a result, the phone will be detected and connected further.
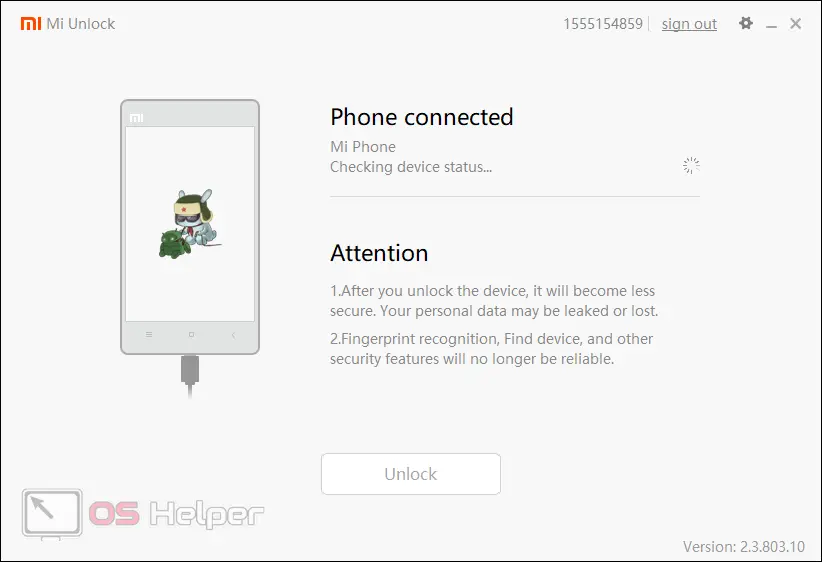
- When everything is ready, press the button marked in the picture below.
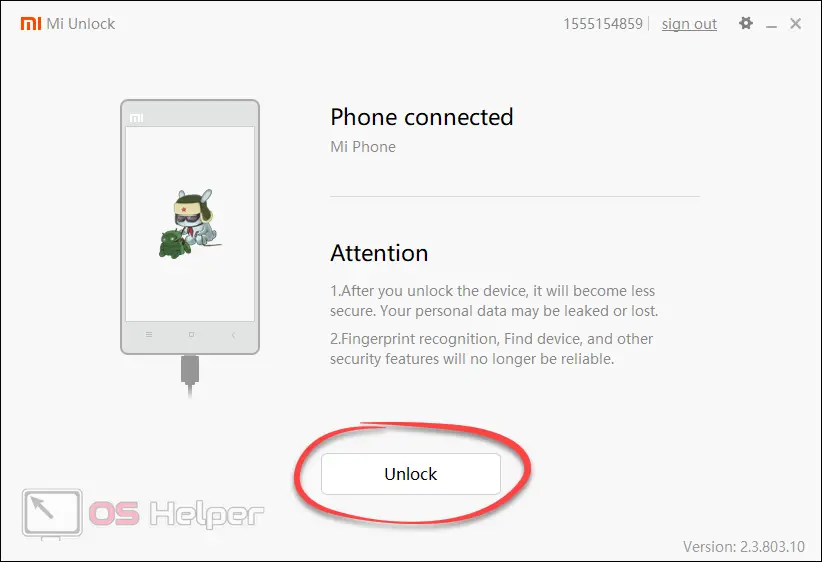
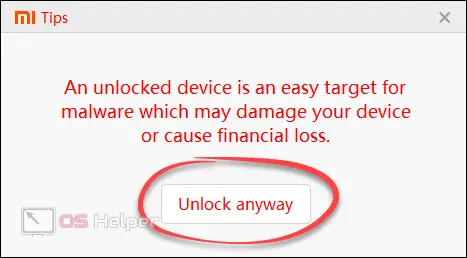
- In a clear red font, we will be warned about the irreparability of the deed and the seriousness of the consequences of unlocking. You will also be notified that the device will become vulnerable to viruses. Haven't changed your mind? So we press.
- The next step is the unlocking process. First, the phone and account will be checked for permission from the creators. Then, if all is well, the bootloader will be unlocked.

- Process completed. Click "Reboot phone".
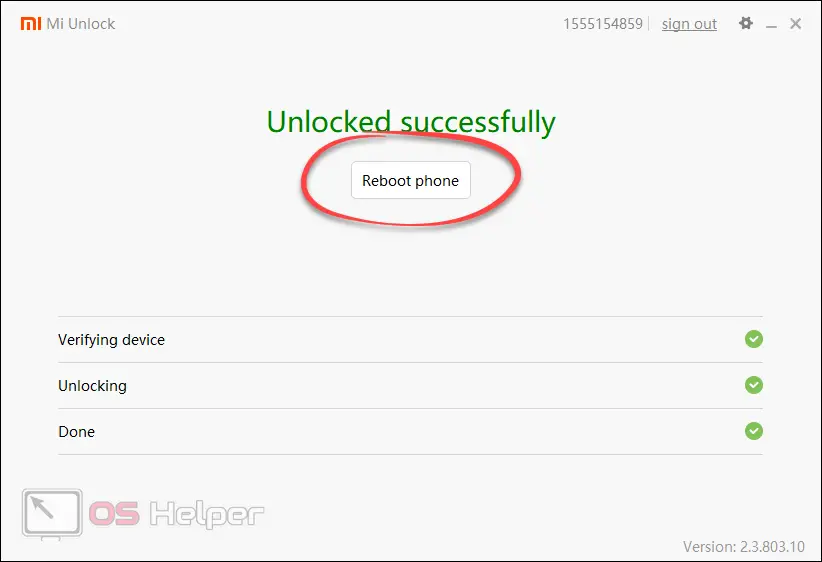
The phone will reboot and turn on with an unlocked bootloader. Now you can go directly to the Root installation.
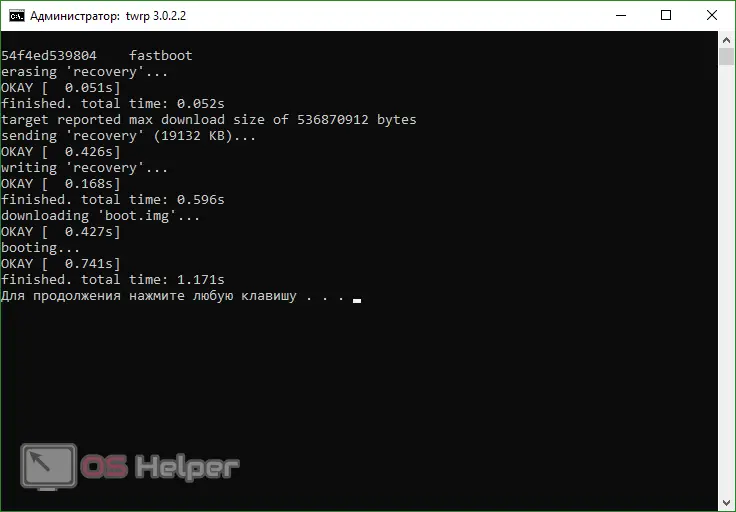
- We are looking for an archive with TWRP Recovery on the Internet and unpack it on our PC. Next, we again transfer the phone to the firmware mode (described above) and connect it to the computer. We turn to the archive with our Recovery and run "flash_and_boot.bat".
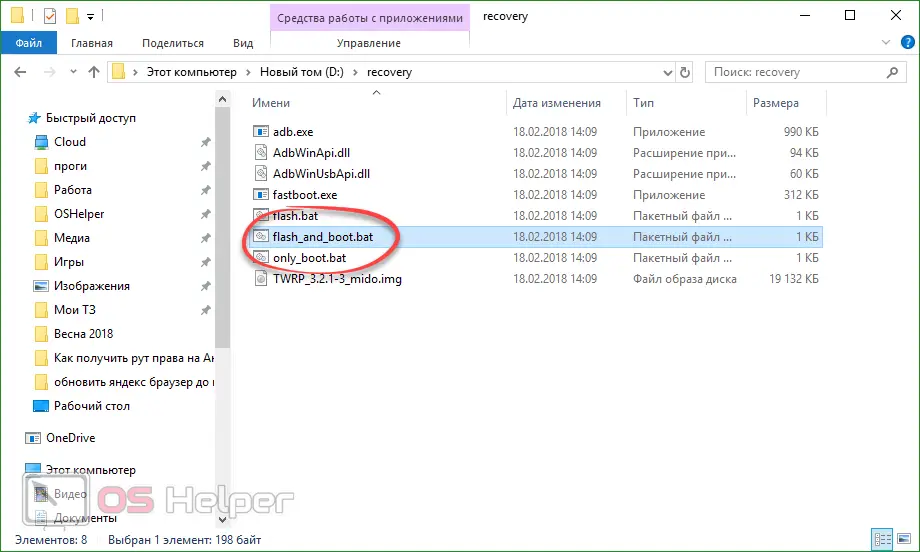
- We are waiting for the files to be flashed and, after the invitation, press any button. The phone will restart automatically.
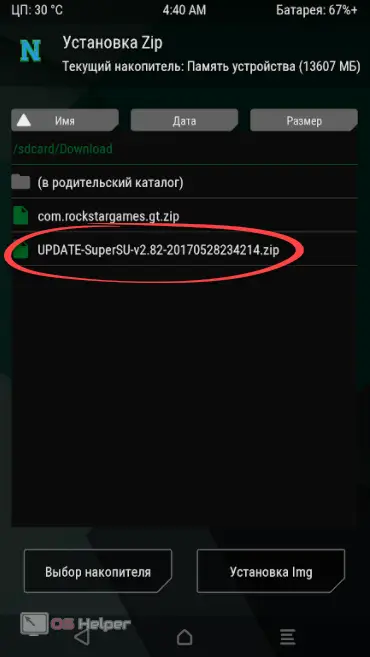
- After we get into Recovery, we need to flash Root itself. Of course, there is no official site here, so look for the archive on the net. First, let's go to the "Installation" section.
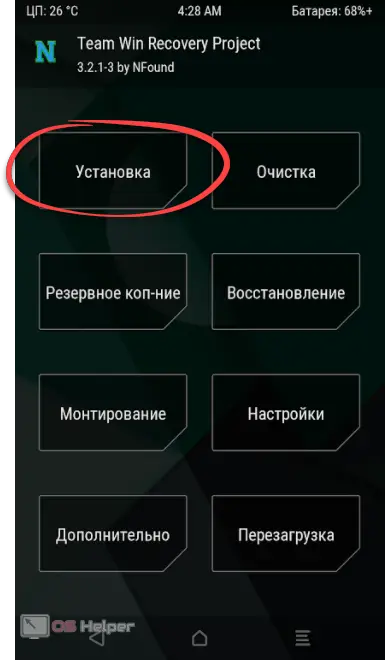
- We find the file of our Root-rights and select it.
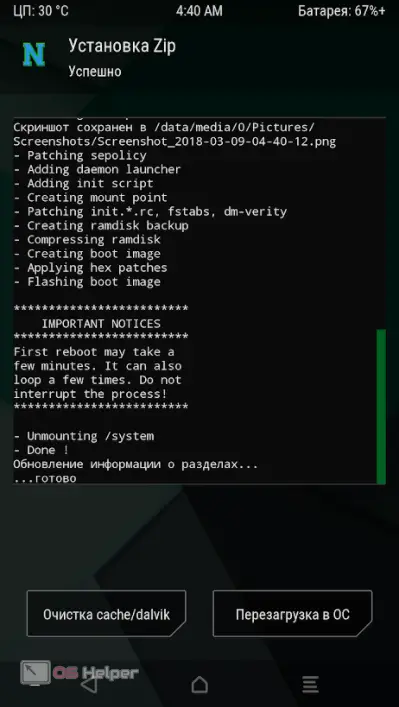
- The firmware process will begin. We are waiting for its completion.
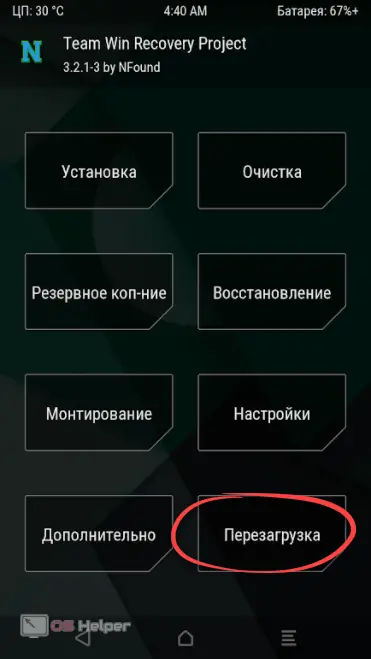
- We rise to the main menu and select the "Restart" button.
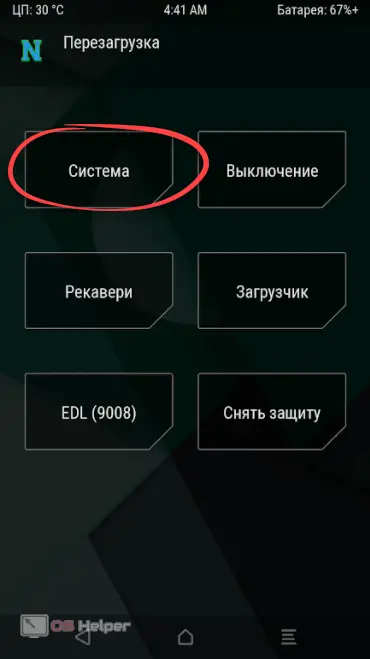
- Tap on the "System" section. Also from here you can go to the EDL, bootloader, Recovery, unprotect menu, or simply turn off the phone.
Also, through TWRP Recovery, you can completely remove Root-rights. To do this, go to the "Advanced" section.
- Now let's check for Root rights again. Run Root Checker.
- We press the familiar button.
- We grant authority to the program to check Root rights. This is what we talked about - all admin actions are now controlled.
Voila! Everything works perfectly.
Using the Chinese Xiaomi Redmi Note 4X as an example, we have installed Root rights. On other phones, things may be completely different.
Conclusion
That's all. Now you know how to flash your Android smartphone and you can safely move on to the practical part of the task. If you're lucky, everything will cost you just installing the APK and a couple of taps on the screen. In other cases (as in the Xiaomi example), you will have to get confused. But even so, and so, you can root any Android, of course, if you have the phone itself, theoretical information (given above) and the most important thing - direct hands.
Video instruction
To complete the picture, we recommend watching a training video on the topic in question.