 Dear friends, once again I welcome everyone! Continuing the theme of professional photography, today I will talk about how to properly develop RAW in Photoshop. As you know, a SLR or mirrorless camera is capable of taking pictures in the familiar JPG format, or advanced mode, which is referred to as RAW. Below I will tell you what kind of format it is, why it is needed and, most importantly, how to manifest it. Go!
What is RAW and what is it for?
If the usual image formats, including JPG, are containers for compressing graphic files, then RAW is the so-called raw, uncompressed format that completely stores all the information from the camera's matrix. The essence of using this type of file is that we get much more opportunities at the post-processing stage.
For example, I can work separately with shadows, highlights, remove chromatic aberrations, and so on. A little lower, all this will be shown with a specific example, so you will understand why this format is better. Okay, let's get right down to business without delay.
Expert opinion
Basil
Project manager, comment moderation expert.
Ask a Question By the way, RAW is not a file extension, but a standard that each manufacturer of SLR and mirrorless cameras has its own name for. For example, Nikon has .NEF.
Secrets of Proper Development in Adobe Camera Raw
This application is a standard module of Adobe Photoshop. Therefore, we do not need to make a separate download and installation. All you need is an already installed editor from Adobe. Run it and follow these steps:
- Using the main menu of the application or a combination of hot keys, we open our image in RAW format. As a result, Camera Raw will start and display a list of photos that we will process.
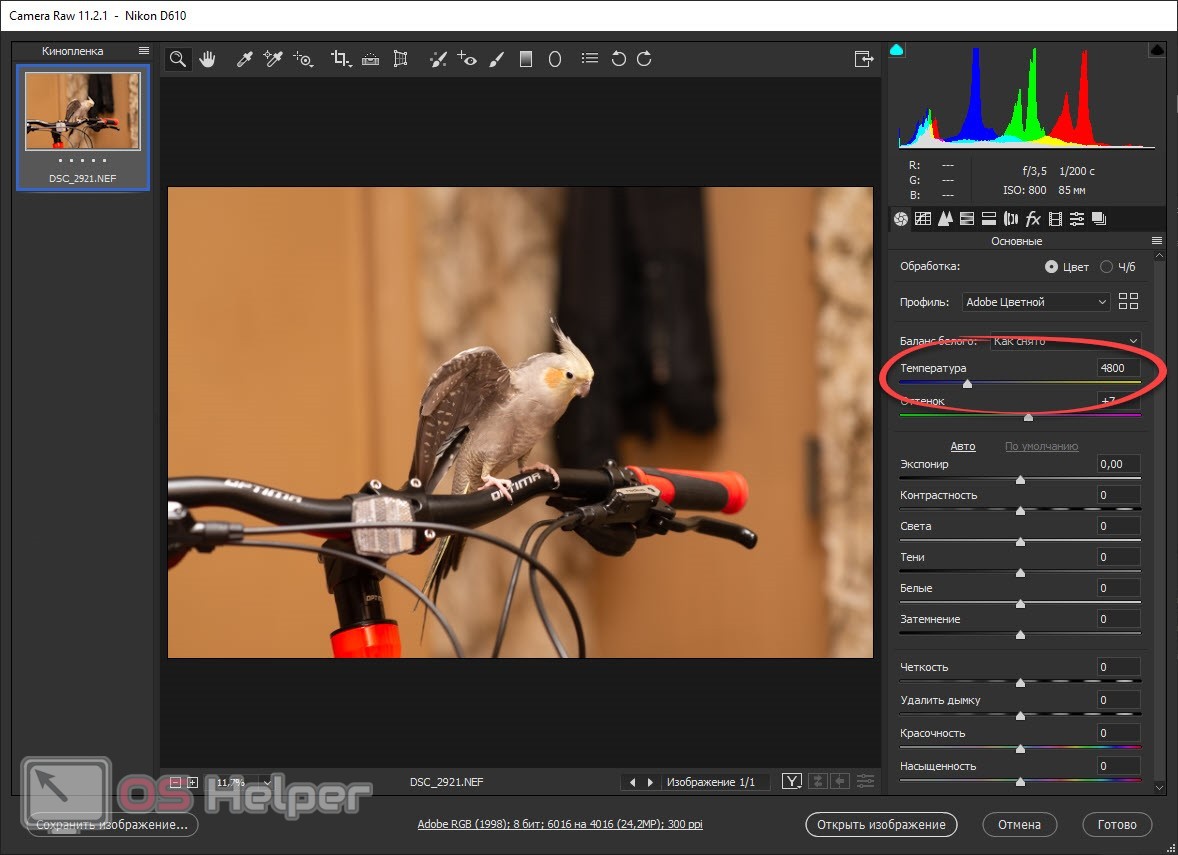
- For example, I will take a picture of my parrot. By the way, you subscribed, Kesha suffered for a long time and remained extremely dissatisfied. When the photo opens in our editor, let's first adjust the white balance. This is the so-called color temperature, which is obviously wrong in our screenshot. Use the slider marked below to adjust.
See also: How to password-protect an archive
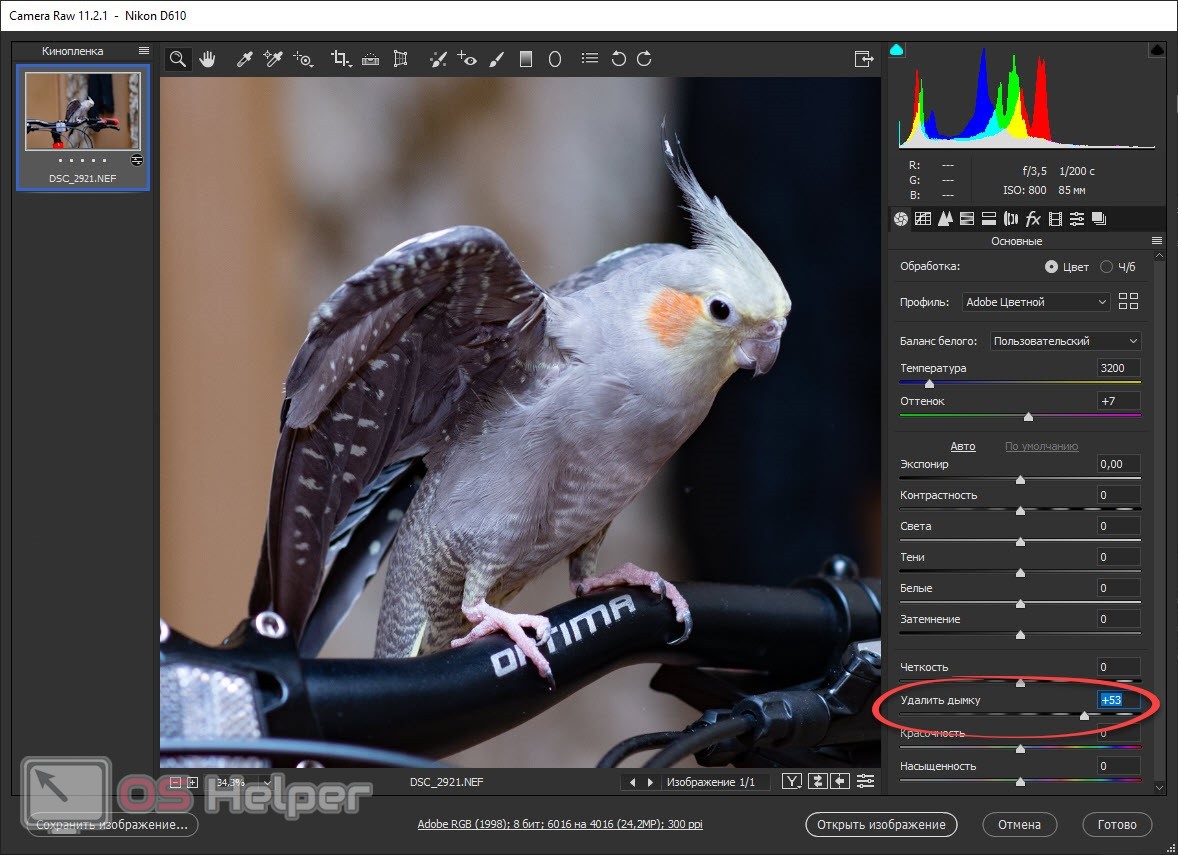
- Using the icon with the image of a magnifying glass on the top panel of the program, we scale the image in such a way that it is convenient to work with it. Now let's remove the haze a bit. This will give the photo more color and saturation. Move the slider marked in the screenshot below to the right.
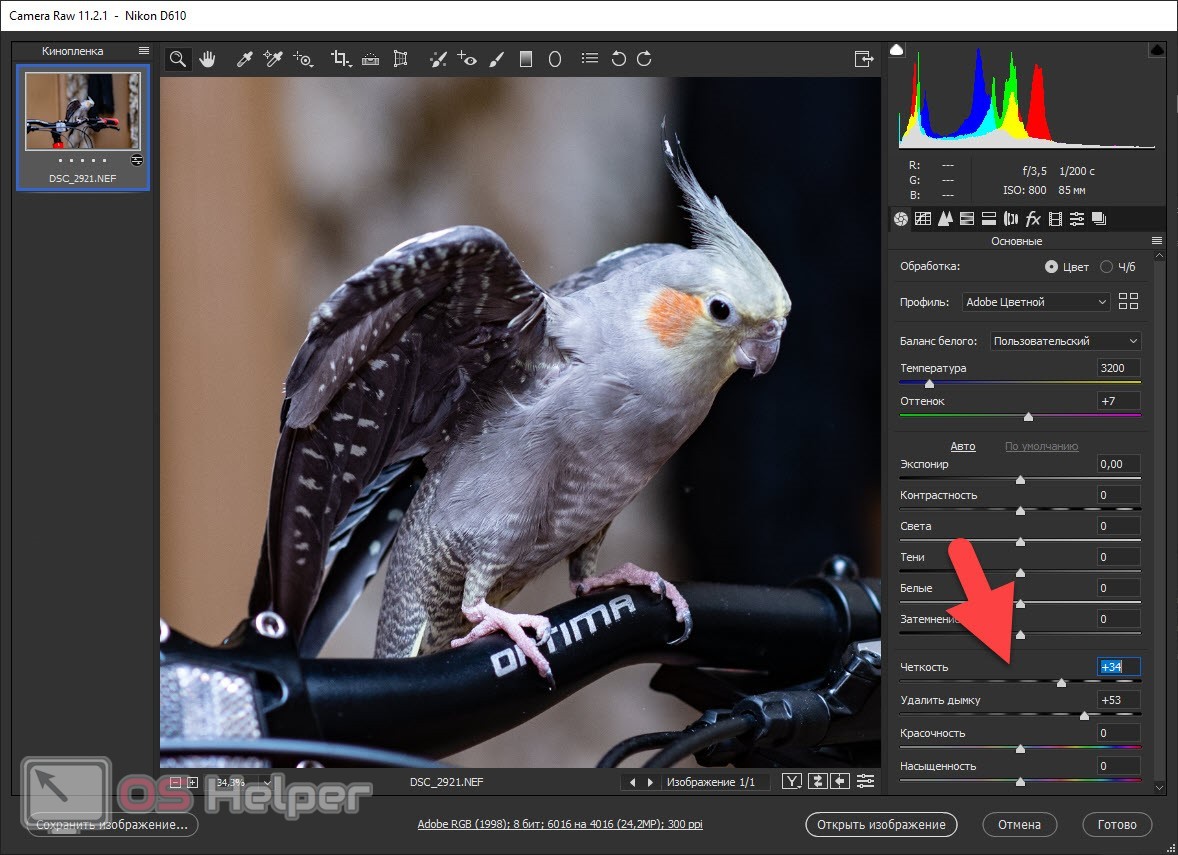
- Also, using the slider above, we can make the picture a little bit clearer.
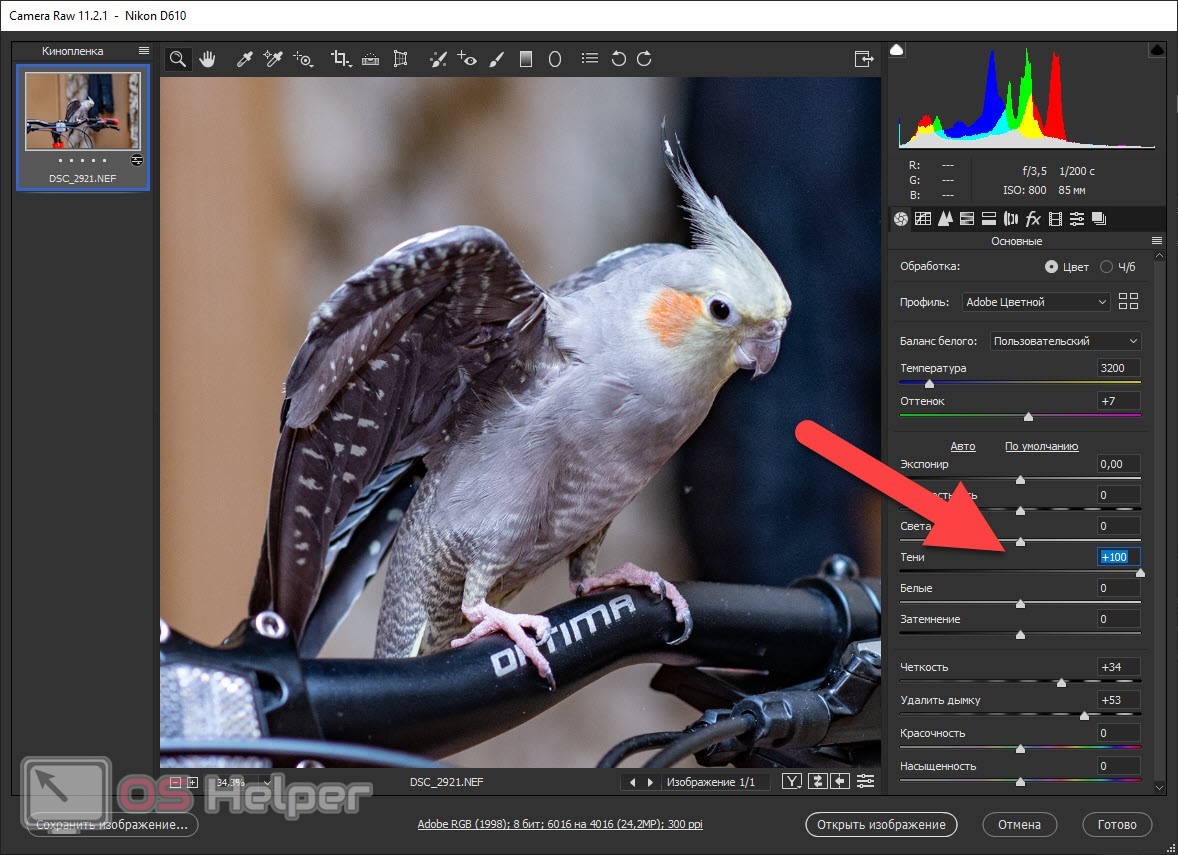
- After all the manipulations done, the shadows sank a little. I can see that details are lost in dimly lit areas. Therefore, using the slider indicated in the screenshot, we add the parameter to the desired value.
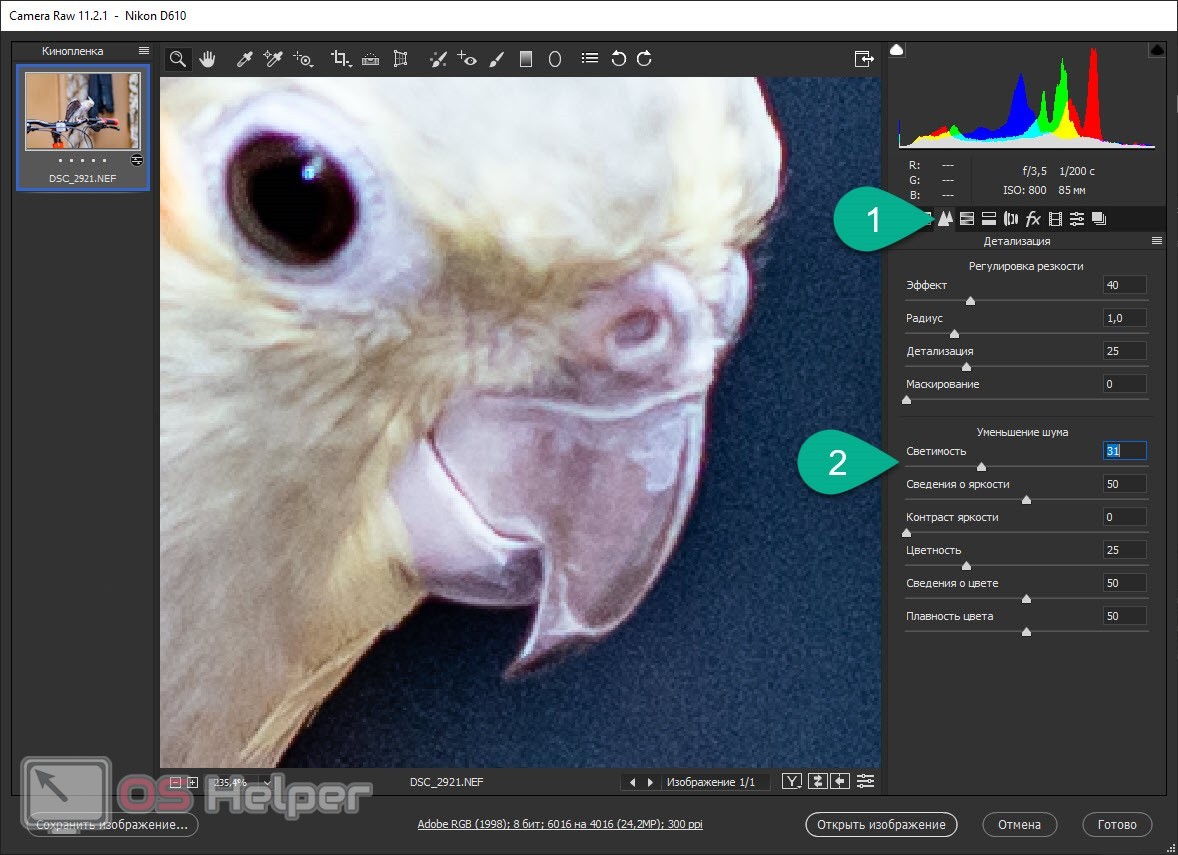
- If we zoom in a little more on our photo, in some cases we can see that there is noise on it. The tab that we marked in the screenshot below will help to defeat him. Just go to it and with the help of the slider indicated by the number "2", we achieve the disappearance of the grain.
- To finish off, we can add some color by moving the sliders to the right, which we have indicated below.
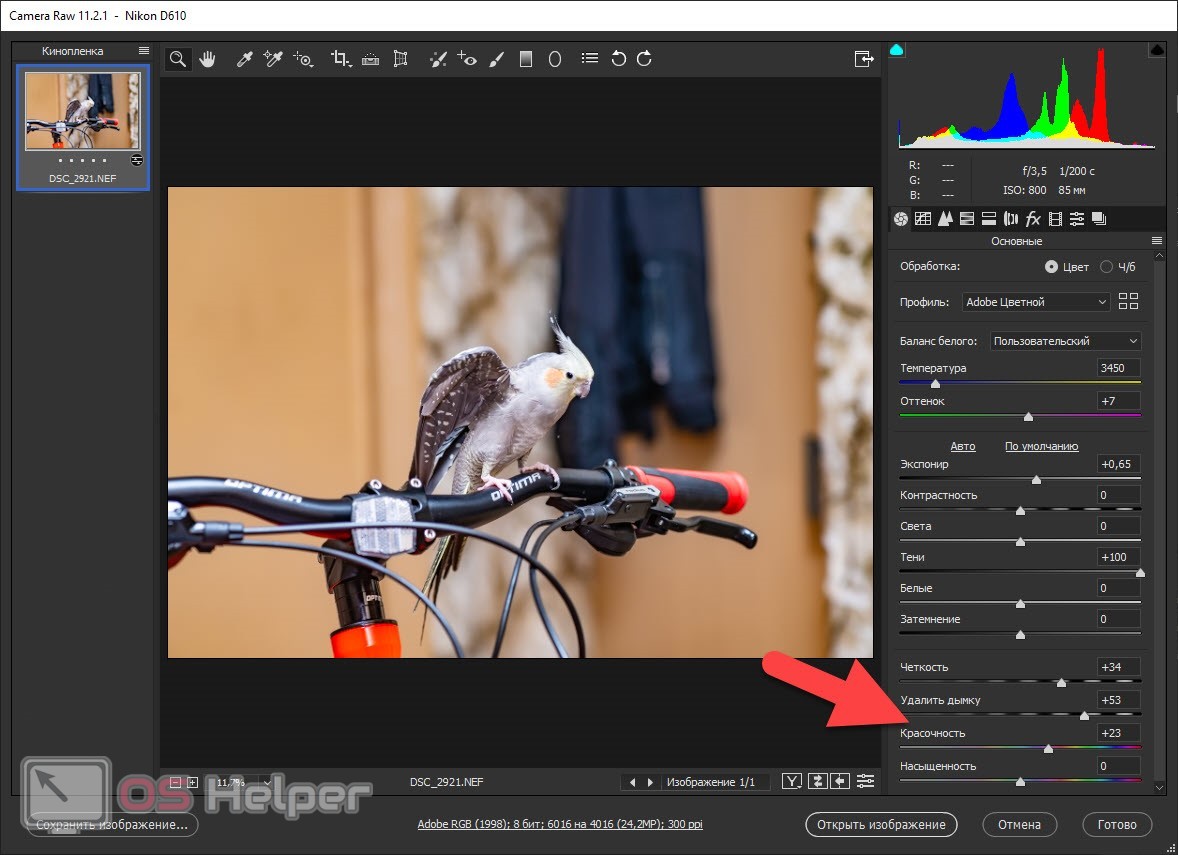
Attention: when working with different sliders, do not overdo it and do not make the photo unrealistic! Your task is simply to give the image artistry.
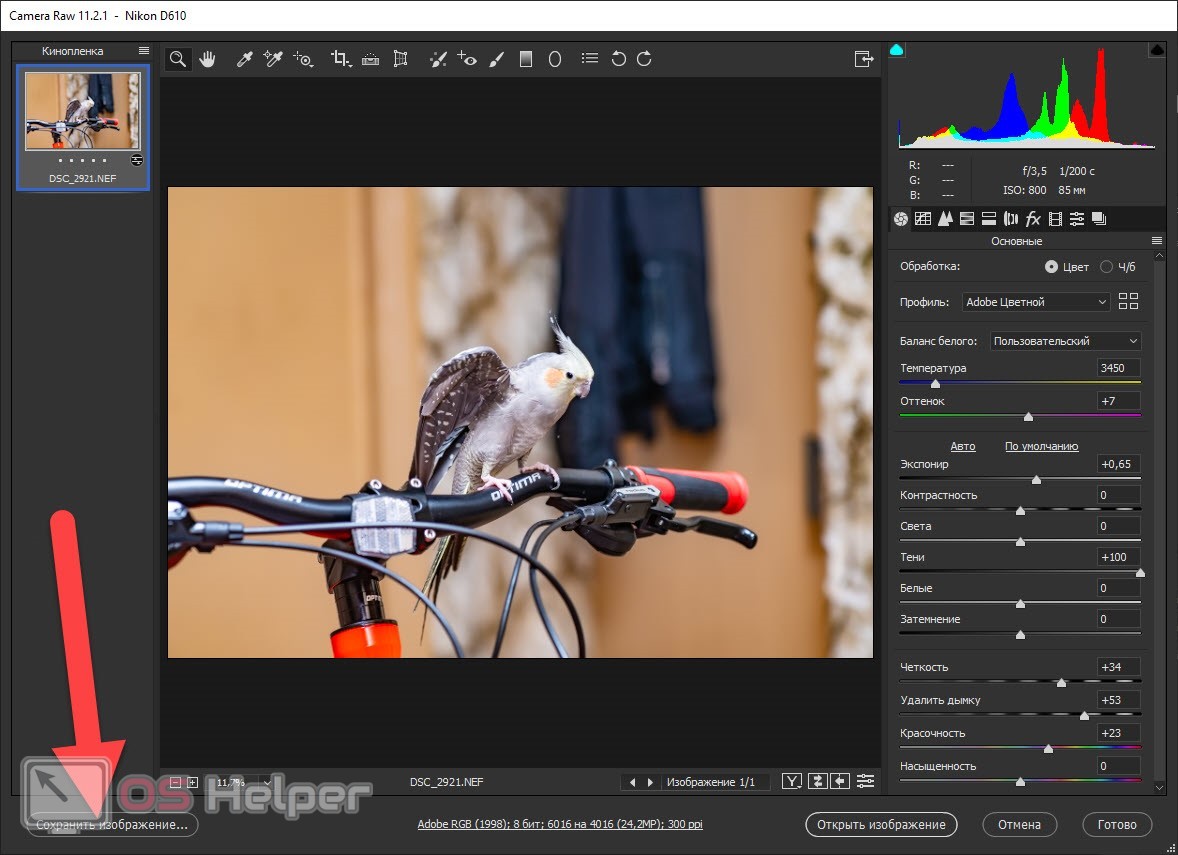
- We can only export the finished result, but in .JPG format. To do this, press the button that we marked in the picture.
Here's what we got:

As you can see, the picture is clean, without noise and with a characteristic background blur.
Summing up
Now that you have a good understanding of how to properly develop a RAW photo, there is nothing left for you but to move on to practice. I hope you know where to get Photoshop? By practicing, you will reach ever greater heights and gradually master this professional tool. This, in turn, will lead to a steady increase in the quality of your work.