How to record a Skype conversation on a computer with video
It would seem, why would someone in the 21st century need a separate program for recording video from a computer screen, if everything can already be found and downloaded in finished form? But this cannot be done with a Skype conversation or a video that is broadcast live and will be deleted later, for example, an online conference or online tutoring, this is where a special program comes in handy. Let's take a look at three of the most popular ones.
Movavi Screen Recorder!
Movavi Screen Recorder is a simple program with a user-friendly interface that allows you to record videos from your computer screen. Most often, users of YouTube and Vkontakte work with it, but it is also perfect for recording a conversation in Skype.
In addition to fast and convenient video recording, the program has a lot of opportunities:
- removal of ads;
- creating screenshots;
- recording automation;
- adding notes;
- a wide range of settings and an easy way to manage them;
- editing the finished video, deleting any part or several of it;
- saving in different formats readable by modern smartphones and computers.
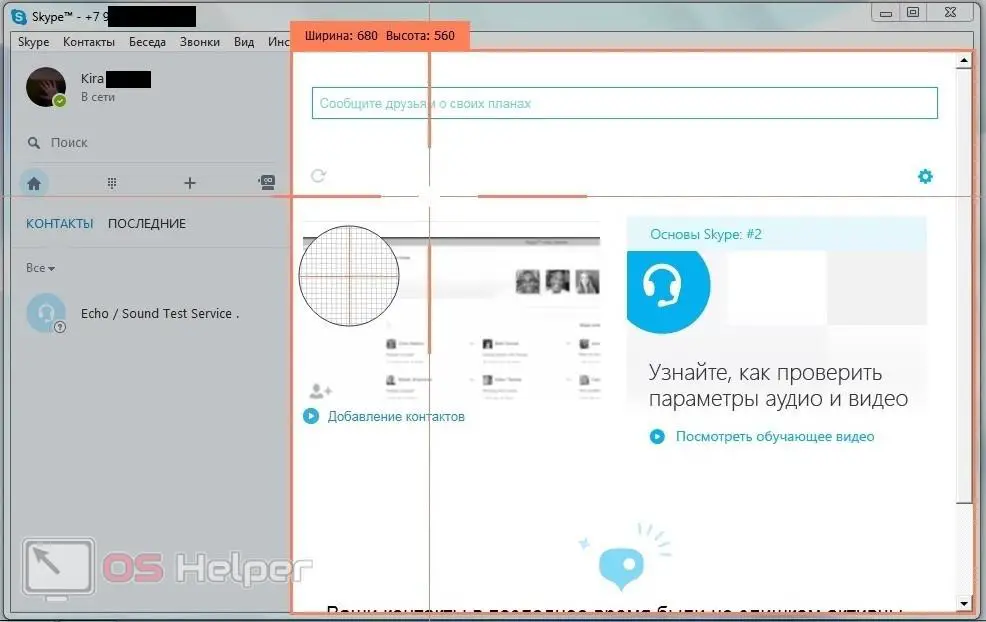
After starting the program, the following window will appear on the computer screen.
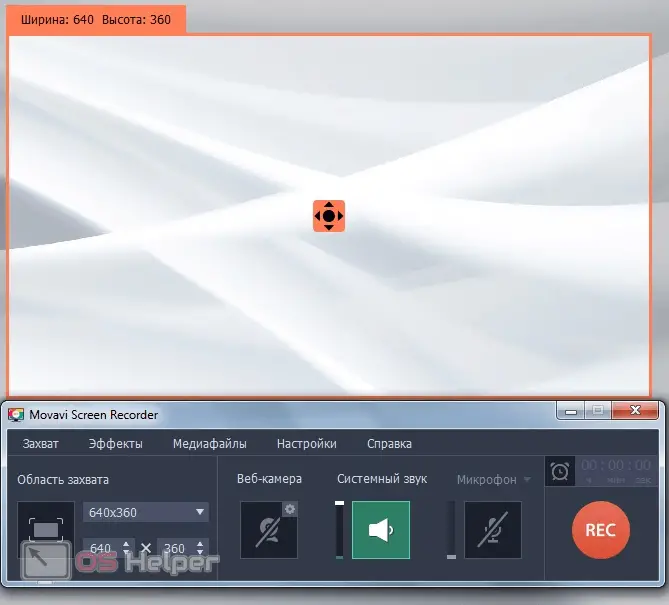
By clicking on the crosshair in the center, you can move the video capture window. The lower part with settings is also easily transferred to any part of the screen, and separately from the video window.
Since the entire program is in Russian, there should not be any difficulties in using it. All functionality is simple and intuitive. While recording, settings can be changed, such as increasing or decreasing the audio level, expanding or shrinking the video capture area, and controlling the recording time. It will be displayed in the right corner just above the red REC button.
To record a Skype video call, follow the short step-by-step instructions.
Step 1:
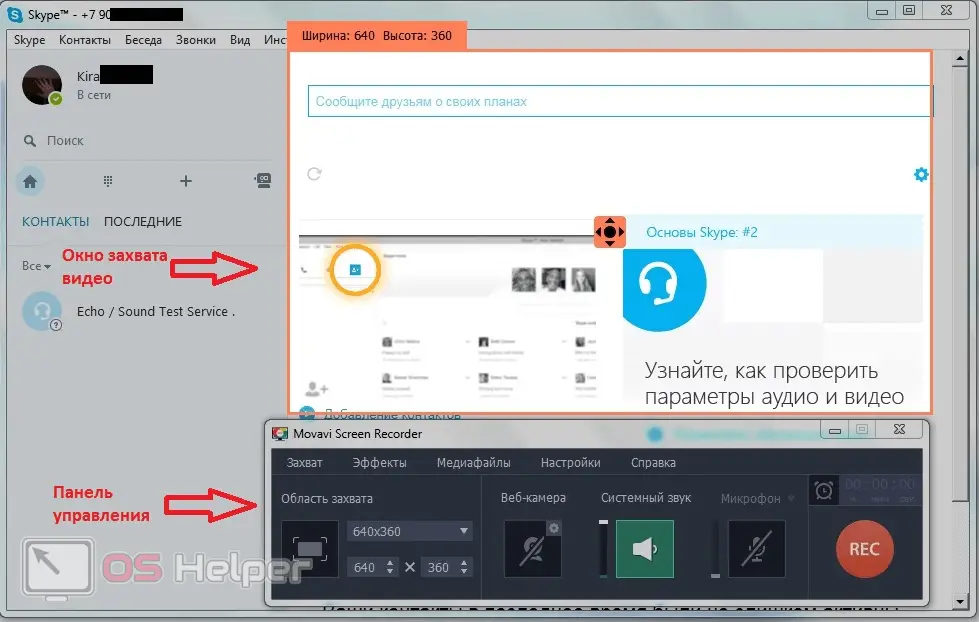
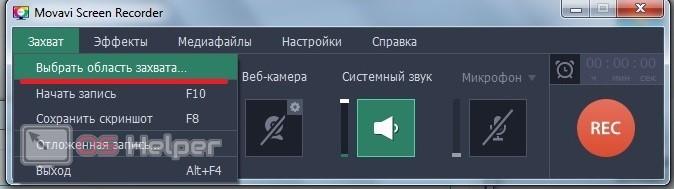
Open Skype and Movavi Screen Recorder. On its control panel, click the button called "Select Capture Area". The cursor will then take the shape of a crosshair. Highlight them on top of the Skype window, where the video call will be broadcast, the capture area.
Step 2:
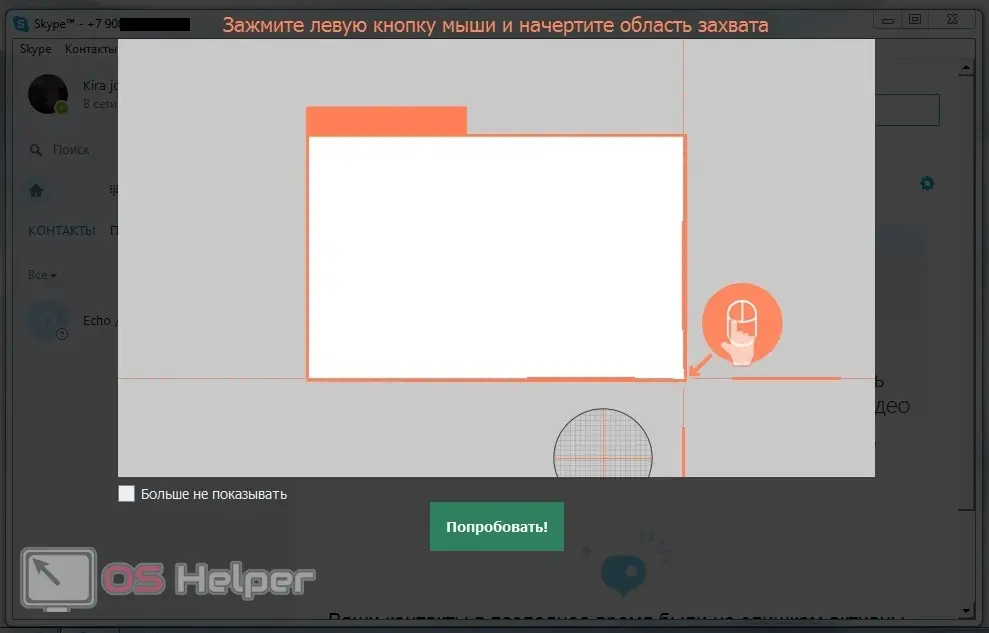
At the first start, a short video instruction will appear on how to use video capture. Click Try.
Step 3:
Select the area to be recorded. This is done by moving the cursor to the right-left-up-down; the window can be expanded and narrowed as desired.
See also: How to transfer photos from computer to computer
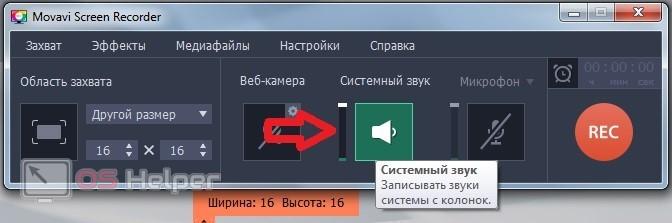
Step 4:
Click on "System Sound" - this will turn on the recording of your interlocutor (green button - on, gray - off). Adjust the volume level using the slider located to the left of the "System Sound" icon.
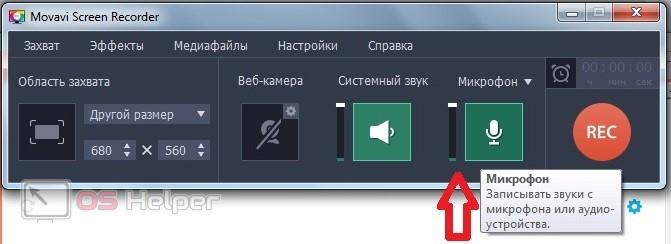
Step 5:
Click "Microphone" to record your voice during the conversation. If you have several microphones, then you need to select one by clicking on the arrow next to the "Microphone" button. Start recording a call at any time by simply clicking the REC button on the capture bar.
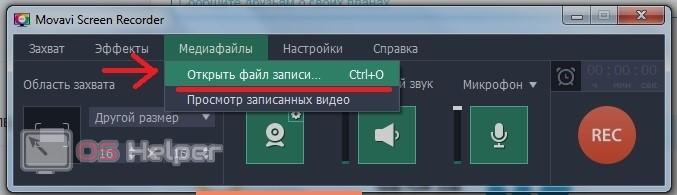
Step 7:
To end the recording, you just need to click "Stop". After that, the recording will automatically open in the editing window, where it can be trimmed or saved in the desired format. You can open a recording by clicking "Media Files" first, and then "Open Recording File".
In addition to recording a conversation in Skype, Movavi Screen Recorder can be used in other cases: record videos in Youtube, video chats and similar services, as well as save videos from Vkontakte, make videos of online seminars and trainings in live format.
The disadvantages of this program include:
- inability to edit and edit video;
- unchanged video quality;
- inability to add titles and watermarks;
- lack of special effects.
However, all this can be done by Movavi Screen Capture Studio, which, having all the capabilities of Screen Recorder, has a built-in video editor. However, for a simple recording of a video call on Skype, Screen Recorder will be enough. Both programs can be downloaded from the official website of the developer: https://www.movavi.ru/support/how-to/how-to-record-skype-calls.html.
skype recorder
Skype Recorder is a free program for recording audio files, which is available for free download on the official website. The installation process is carried out in two steps: check the box for accepting the terms of the agreement on the use of the program and click the Install button, and select Finish in the next window. After installation, the program will start automatically, and in the future it will be possible to open it through the Start menu.
Working with the program is simple, it is enough to understand its functions once:
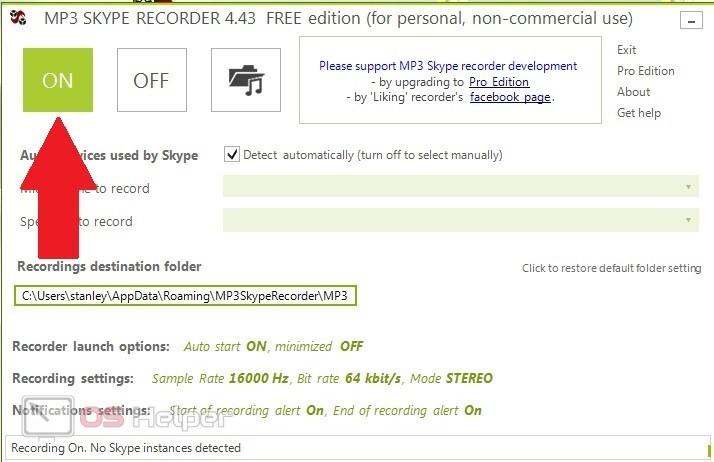
Button On – enable recording.
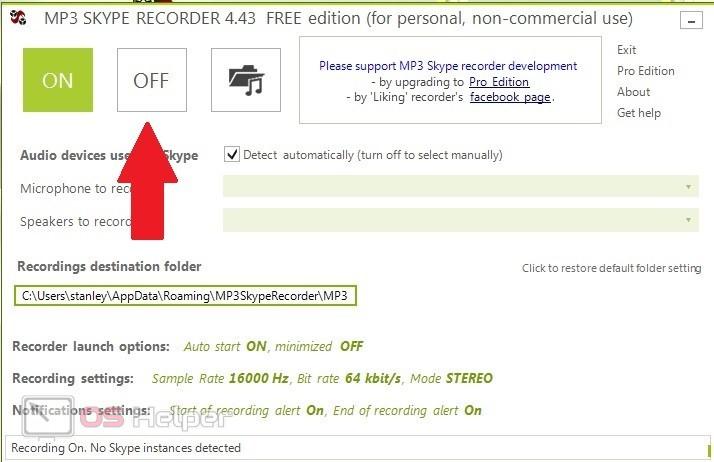
Off button - disable recording.
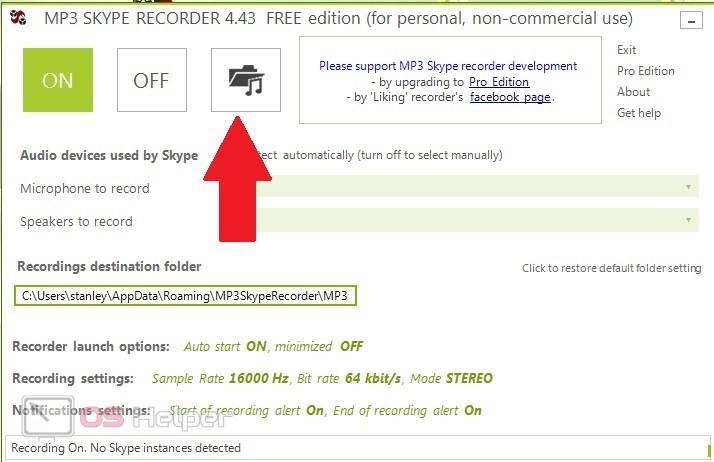
The icon depicting an ajar folder and a melody symbol opens folders where all files recorded with the program are stored.
See also: How to increase the volume on a laptop
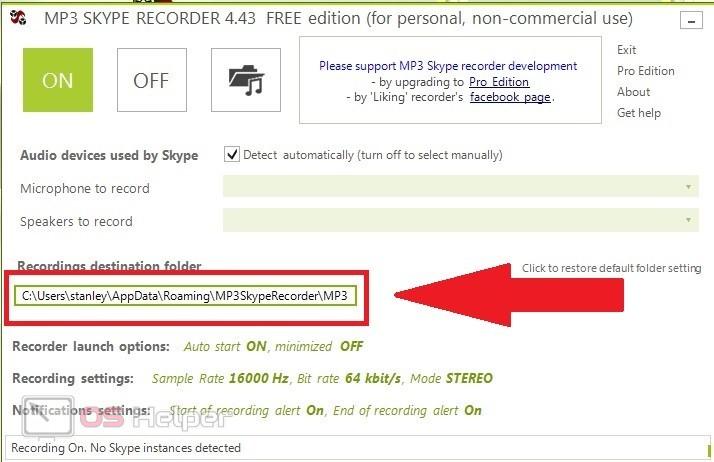
Under the listed buttons is the path where the folder with all the files is located, if you click on it, you can change the storage location for the files, for example, create a separate folder for it on another drive.
Settings for automatic launch of the program.
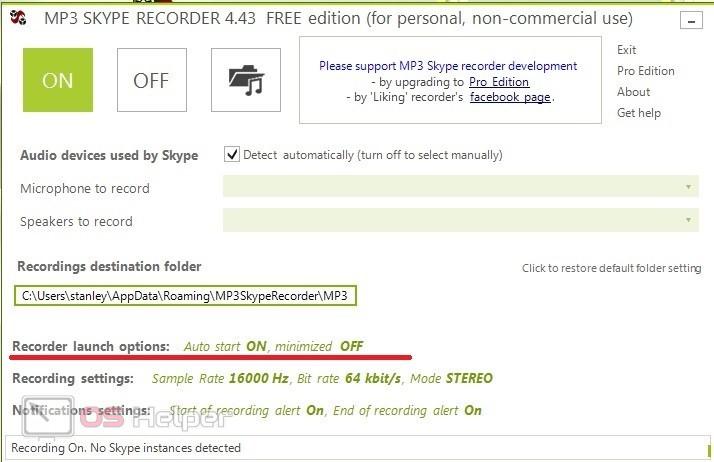
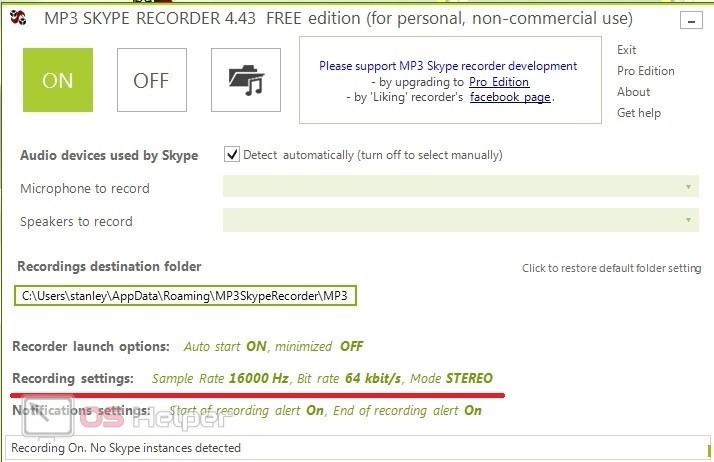
A field for self-adjusting the recording quality.
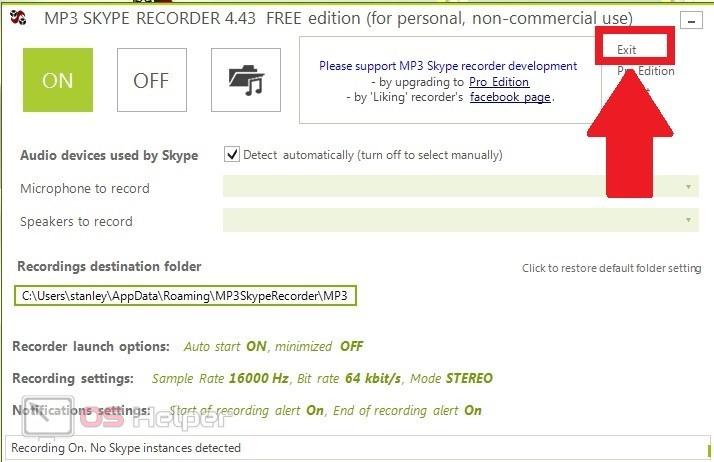
Exit - close the program.
In order to record an important conversation on Skype, you need to run the program and click on On. With automatic settings, nothing will need to be turned on, so immediately after starting the program, by default, it will start recording.
This is especially convenient for those who need to frequently record conversations. After all, you can forget to press the right button in time, and with automatic settings, Skype Recorder will record all your conversations and save them in one folder. Extra entries can be easily deleted at any time.
If you do not want the program to turn on by itself, then you need to uncheck the box "Start automatically when I start windows".
Undoubted advantages of this program: ease of use, fast and free download. In addition, it takes up very little disk space. But it does not provide any other functions besides sound recording, and the interface looks like programs from the 2000s.
iFree Recorder
iFree Recorder is a free program that allows you to record Skype conversations. At the same time, both one-sided and full recording of the conversation is available, and all files are saved in MP3 format.
This program, as well as Skype Recorder, is only in English, but both of them are simple enough not to pay attention to it. You can download it on the official website of the developer.
Installation will take only a couple of minutes, after which a shortcut to the program will appear on the desktop. At the first start, the red inscription "Searching for Skype Waiting to access Skype" will glow - this means that the program does not have access to Skype.

In order to give it, you need to launch Skype, where a window will pop up with a notification about access permission - click on "Give access".
If everything is done correctly, then the red inscription will change to black "Ready for recording".
Read also: Malwarebytes Anti-Malware - what is this program and is it needed?

Now you can record any conversation. There are two ways to do this.
- Automatically - the program itself will start and end the recording along with the beginning and end of the conversation.
- Self-manual recording - this option allows you to start, pause and end recording at any time during the conversation. The control panel looks like this:

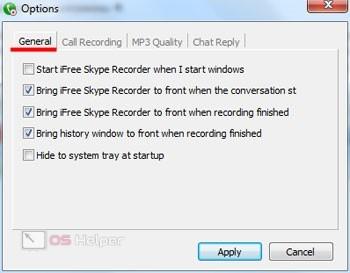
You can select the mode in the program settings - just click on "Option". Here you will see five suggestions: a checkmark in the first one will allow you to configure the automatic launch of the program at the same time as the computer starts; the last one minimizes the program after launch to the system tray. Three in the middle are left by default.
In the next tab "Call recorder" - select the recording method and direction (only yourself, only the interlocutor, or both):
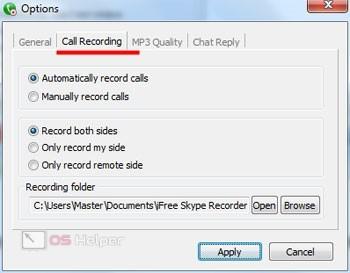
- Automatically record calls - automatic call recording;
- Manually record calls - manual recording of a conversation;
- Record both side - recording a conversation from two sides;
- Only record my side - record the conversation only from your side;
- Only record revote side - record the conversation only from the side of the interlocutor.
Here you can also select the folder where all recorded files will be stored.
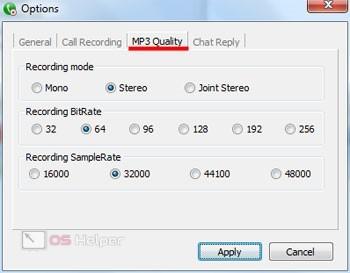
In the third tab, you can adjust the quality. It is important to remember here that the higher the bit depth is set, the higher the quality of the finished file will be, but at the same time it will also be larger.
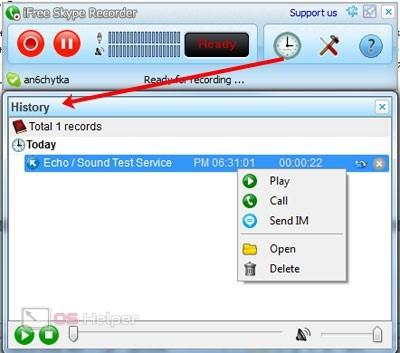
The history of recorded calls opens when you click on the watch logo. The recording can be played again, deleted or sent via Skype to any recipient.
Compared to the first two programs, the settings in iFree Recorder are more confusing and take time to figure out, especially if you don't know English. In addition, all the functionality of the program is limited only to sound recording, although in comparison with Skype Recorder it can do a little more - for example, record only one of the participants in the conversation.
Who is the leader?
Analyzing the advantages and disadvantages of all three listed programs, we can say with confidence that Movavi Screen Recorder is the most practical and convenient of them. Nice interface, many additional useful features and ease of use make it an ideal assistant for all those who need to record videos from Skype and other sources like social networks and Youtube.