Do you want to take a screenshot on your Mac and don't know how to do it? In this article we will show you all the ways to capture screen on Mac and in all its versions of macOS.
If you are a new user of Apple computers , you need to take a screenshot and do not know how to do it, then we will show you all the ways to capture the screen on Mac and in all its versions of macOS .
Capture screen on Mac without using apps
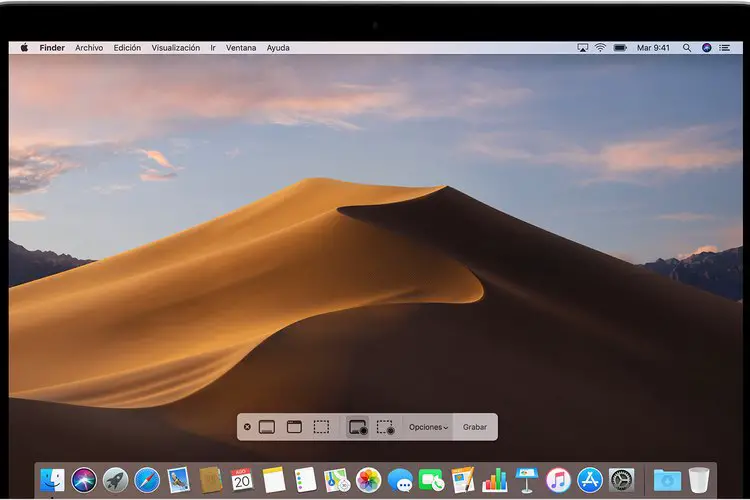
Fortunately, starting with macOS Mojave , as in Windows 10 , we can take different types of screenshots of our computer. This will be possible through the different screen controls that will appear when simultaneously pressing the key combination Shift + Command + 5 . Among the options that the operating system offers us, are: capture the entire screen completely, capture only one window, capture a specific part that we select or record a video of the screen as we teach in this article .
Capture screen in full
To capture the screen of your Mac completely, the first thing you have to do after simultaneously pressing the key combination Shift + Command + 5 , is to go to the first icon that will appear in the control bar. Then, the pointer will take the form of a small camera which will be used to take a screenshot by clicking anywhere in the system. We can also take a screenshot by pressing the Capture option found in the control bar.
Capture only one window
macOS will allow us to capture only one window and avoid the rest of the elements that are on the screen . The procedure is practically the same as the previous one: we must open the control bar by pressing Shift + Command + 5 but in this case we must activate the second option . Again, the pointer will take the shape of a camera and to capture the window we will have to click on any area of it. If we want that the shadow of the window does not appear in our capture, we must hold down the Option key on our keyboard when we click.
Capture a specific part of the screen
If, for example, we are doing a tutorial on a specific tool of a certain program, it will not be necessary for the entire screen to be recorded. On a Mac, we can only capture a specific part of the screen . Again we will have to combine the keys Shift + Command + 5 to open the control bar and in this case, click on the third option that will be represented by a dotted box. When choosing it, we will have to drag the area we want to capture on the screen. Once we have the recording section ready, we just have to click on Capture .
Take a snapshot of a menu
Capturing a macOS menu is extremely easy. The first step is to click on the menu in question so that it opens and shows all the options. Then, while the menu is still open, we will have to type Shift + Command + 5 and follow the steps mentioned above according to our needs.
How to set up screenshots
In addition to the ways to capture the screen detailed a few lines ago, in the control bar that will be activated by simultaneously pressing the Shift, Command and number 5 keys, a tab called Options will appear . When opening it, we can modify certain aspects:
-
Save in: it will allow us to choose the path where our screenshots will be saved automatically.
-
Timer: thanks to this function, we can take a screenshot a few seconds after executing the order.
-
Show floating thumbnail: we can choose whether the thumbnail that is shown in the lower right corner when taking a screenshot is shown or remains hidden.
-
Remember last selection: it will keep the settings saved for all the times we take screenshots.
-
Show the mouse pointer: this option will hide or continue showing our mouse pointer.
Quick shortcuts to capture screen
Although the system version of our Mac is prior to macOS , we can perform the following quick actions to take different types of screenshots:
-
Capture the entire screen: Shift + Command + 3. The capture will be saved to the desktop.
-
Capture a window: simultaneously press Shift + Command + 4, then the space bar and finally the window you want to capture.
-
Capture only part of the screen: simultaneously press Shift + Command + 4 and then drag the pointer over the area you want to capture.
-
Capture a menu: simultaneously press the keys Shift + Command + 4 and then press the space bar to take the capture or drag the pointer over a specific area.