How to replace the screen on iPhone: step by step instructions
 Most smartphone owners sooner or later face the problem of broken screens. According to statistics, this is the most fragile part of the phone. Apple brand users are no exception. It is not difficult to order and buy almost any components. Often people try to replace a broken screen on their own, without really understanding all the subtleties and details of display replacement. At best, this ends with a trip to the master, at worst - with the purchase of a new iPhone.
What you need to replace the screen module
The main skill required is experience with iPhone displays. But if you are reading this article, it is unlikely that you have one, which means that attentiveness and perseverance remain. In disassembling and assembling Apple equipment, attentiveness is the most important thing. Do not be lazy before disassembling, re-read the instructions twice, look several times at the points of parsing. And most importantly - strictly follow what is written.
Why is it important to follow instructions? Our experience is based on long-term practice of masters in iPhone service centers. Attempting to replace the screen without instructions or an experienced technician will end badly. After such repairs, it is far from always possible to restore the device.
Important! All actions take place at your own peril and risk. If you are not confident in your abilities, take the gadget to the master.
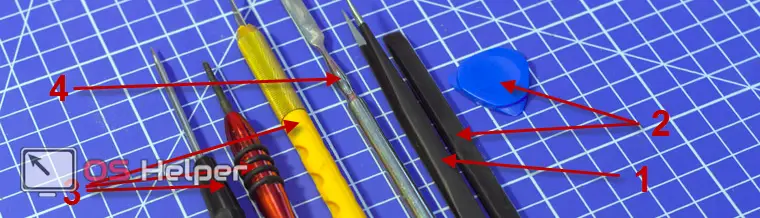
Materials and tools
All tools from the list are easily obtained on the radio market or are included when ordering a replacement screen module. It is not recommended to disassemble the iPhone using improvised tools. These are high-tech devices and digging into them with a kitchen knife is at least not effective. So what do we need.
- thin tweezers. Ideally, plastic, so as not to damage the tracks on the motherboard, but if you act carefully, then the usual one will do;
- scapula. This is a tool for prying and opening self-locking surfaces. May be in the form of a guitar pick or similar to a pencil with a plastic spatula at the end;
- Screwdriver Set. You will need a set of miniature screwdrivers. You can buy them on any radio market;
- scalpel. Can be replaced with a thin construction knife;
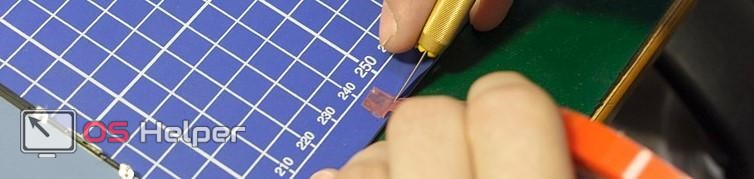
- a small piece of thin double-sided tape to assemble the purchased screen.
See also: How to unlock iPhone
If your smartphone has a protective glass, you will also need:
- a piece of napkin (preferably microfiber);
- needle;
- strong thread (dental thread works well).
Make yourself a special place for the bolts. Unscrewing very small bolts from different parts of the smartphone. do not confuse them: this can have a deplorable effect on your screen replacement.
Important! Screwing the bolt in the wrong place risks turning the groove on the motherboard or the Touch ID button. This, in turn, can cause a break in the contact track.
Removing the protective glass
The protective glass is attached to the phone display thanks to the silicone base, which eliminates shifts and the appearance of air bubbles (if installed correctly). With a thickness of a quarter of a millimeter, the glass is highly resistant to mechanical impact, and the oleophobic coating prevents the appearance of fatty marks (such as fingerprints).
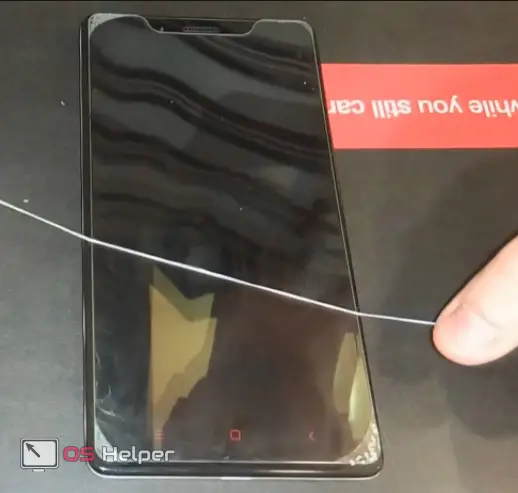
Carefully pry one of the edges of the glass with a needle, then try to quickly insert the corner of the napkin into the place of lifting until the surfaces stick together again. Next, stretch the thread under the glass and lead it to the opposite corner, moving the napkin in a timely manner.
Important! The film is mostly not hard to remove, but it is inconvenient for one to do it. Call a friend. The two of you can easily and quickly remove the protective glass.
Module change
We will conditionally divide the replacement of the screen module into four parts. Disassembling the phone and removing the display, removing components from a faulty module, installing it in a working one and collecting an iPhone with a working screen. Before starting, make sure that all the necessary items are within walking distance. Provide good lighting and get started.
Parsing
- We wait about 10 seconds after turning off the phone and unscrew the two bolts on both sides of the charging connector.

- We pry the lid with a spatula until a characteristic click. The lid is out of the groove. Lift the display module from below only. At the top, the iPhone should open up like a book.

The instruction is relevant for iPhones older than 2011 (5, 6, SE, S, X, all Plus modifications). Older models are disassembled from the lid and are more difficult to dismantle.
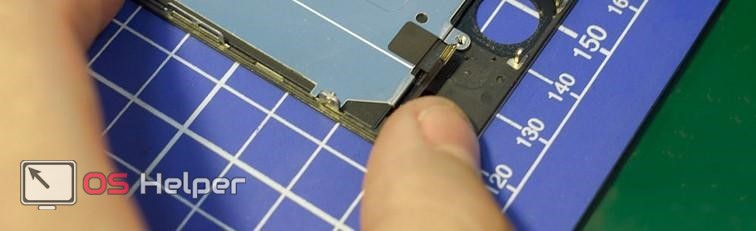
- After passing on three sides with a mediator, gently open the smartphone.
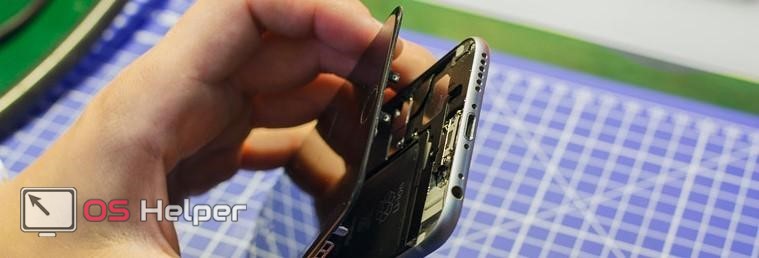
If you have problems with this item, you are afraid to push too hard and break something, you can use a suction cup. Install it closer to the edge and pull it up, helping with a spatula (in case of a damaged screen in this place, seal it with tape).
- We turn out five bolts from the first protective cover and add them separately.
Also Read: How to Take a Screenshot on iPhone
- Remove the released cover with tweezers. Remember, if the tweezers are metal, then we act doubly carefully.

- Remove the second protective cover. It is also screwed on with five bolts. They are recommended to be folded separately, together with the shield.
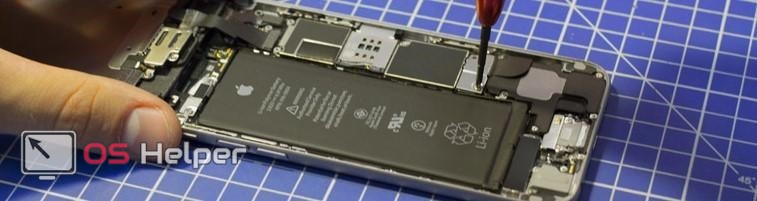
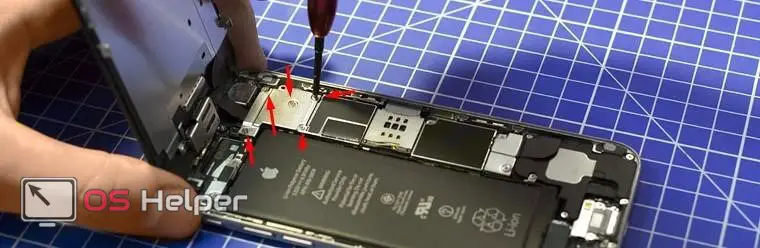
- We find a small shield at the bottom of the phone and unscrew the two bolts from it. This is a smartphone power cover. We carefully bend the cable under the shield towards the battery with a plastic spatula.
- At the top of the iPhone is another connection cable. Gently bend the plastic and turn them off.
The screen module is disconnected from the main part of the smartphone. It remains to transfer the parts to a new one and put everything back together.
Important! Make containers for bolts and shields with signatures and lids. Signatures make reassembly easier, and lids prevent the loss of small parts. After all, in the event of a fall on the floor, they will be very difficult to detect.
Removing the home button, camera and speaker
New iPhone screens rarely come with a built-in camera, speaker, and home key. Therefore, we take everything we need from the broken screen module.
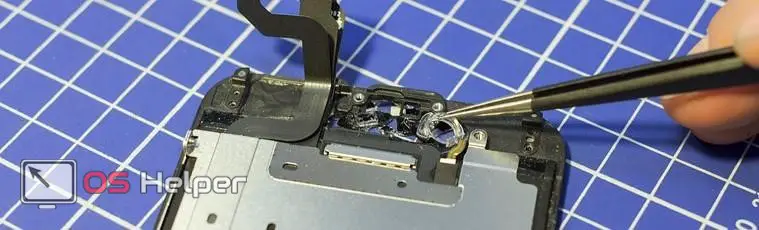
- Release the Touch ID button. The protective cover is held on by three bolts.
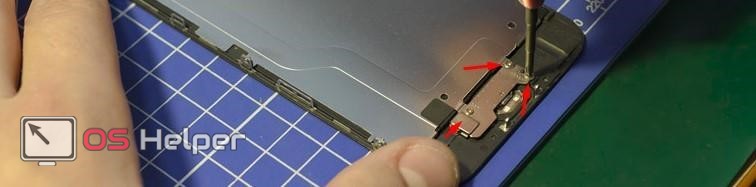
- With tweezers we hook and bend the cable away from the button, carefully disconnect the connector from the Home key.

ATTENTION. The wiring connecting the button and the module is very thin and fragile. Perform this operation with the utmost care. In case of damage, the iPhone will not be subject to recovery.
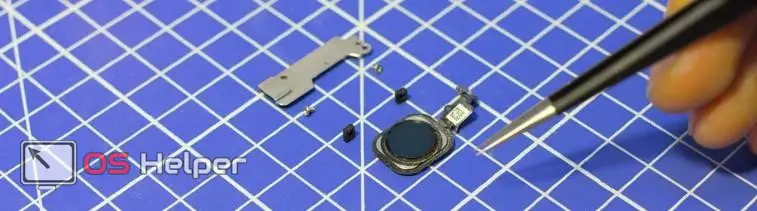
- If everything worked out, pull out the key and fold it separately. Approximately 85% of breakdowns when changing the screen occur at this point in the instruction. So be careful.
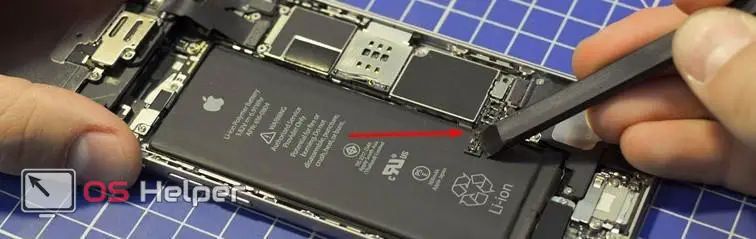
- At the top of the display, remove the camera, speaker and proximity sensor. All this is located under a large composite train. Gently bend down and take out everything you need with tweezers.
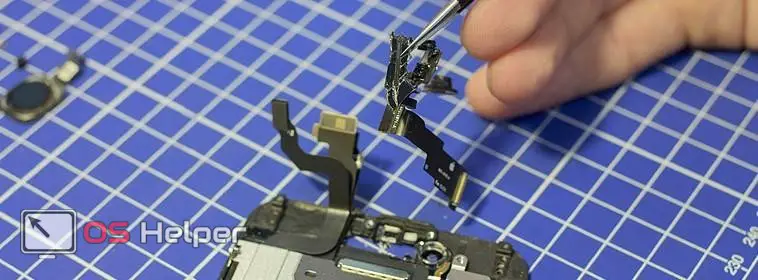
- Next, we take out the ring for attaching the camera and the proximity sensor (two different rings). They are attached to the body with double-sided tape. You may need a scalpel (before working with a sharp object, make sure not to damage the cable).
- The last point is to unscrew the bolts from the large shield covering the sensor housing. We take out a long cable that runs through the entire screen area.
Important! After breaking the screen, check if all front panel functions are working properly. If one of the components does not work correctly, you will need to buy and replace them during the repair process. If the screen is severely cracked, check if there are any small fragments left on the device cables. Even a microscopic fragment that has fallen into the connector can greatly affect the operation of the device.
Assembly
The hardest part is over. Now assemble the new screen in the same sequence in which it was disassembled. This shouldn't cause much difficulty. The location of the connectors on the case will not give you the opportunity to particularly miss.
- We put in place the rings for the camera and the proximity sensor. To do this, cut off small pieces of double-sided tape and put them in place with tweezers.
Also Read: How to Take Screenshot on iPhone 7
- We remove all cables into the connectors and assemble the module as it was before.

- Pay close attention to the "Home" button. Do not forget - damage to the wire leads to irreversible consequences.

- We collect the iPhone already with a new screen. Do not forget to check all cables, wires and connectors. Connect the power last.
- Functionality check. Turn on the device, inspect the screen, check the camera, touch ID button and proximity sensor. If everything works fine, snap the display module into place and screw in the last two bolts.
Congratulations, you have just replaced the screen on your iPhone.
Possible mistakes
When installing a cable with a camera on a new screen, they often put a shield under it. This may cause a black spot to appear on the sensor.
During the dismantling of cables, people pay little attention to cleaning connectors and connectors. Many problems can arise as a result of microparticles getting on the contacts.
Results
Repairing high-tech devices, although exciting, is quite a difficult task with a certain risk for the device.
Among the advantages, we highlight:
- saving money;
- there is no need to take the smartphone to the service center and pick it up from there;
- your phone remains in your hands, and you are sure that you will not be deceived in the service center.
Minuses:
- purchase of the necessary tool;
- the likelihood of damage to the device;
- there is no guarantee that everything will be successful.
Summing up, we can say that changing the screen, although fraught with difficulties, is still possible at home.
Video instruction
For a more accurate assimilation of the material and the prevention of possible errors, we offer a detailed video instruction.