How to Update Drupal [Step by Step Guide]

When you create a website with this content manager, it is very important that you know how to update Drupal or, at least, have a guide on hand to help you carry out the process step by step :-).
If you don't have it and it is the first time you are going to update the Drupal application, here I bring you a very complete one.
In it I will show you not only how to update Drupal, but also some recommendations and checks that are important to carry out before changing the version.
Go for it?
Why update Drupal?
As with WordPress, Moodle or, for example, PrestaShop, it is important to always keep Drupal up to date. It is the only way to enjoy the advantages and improvements that are released in the new versions, but more importantly, to keep your website secure.
Specifically, by updating Drupal and leaving behind obsolete versions, you will have:
- More security : new versions of the Drupal core, themes or plugins that are released usually correct vulnerabilities and, in turn, include security improvements.
- New features and greater performance : in addition to security improvements, when a version is released it usually includes features that improve its operation and even the performance of the application itself.
- Fewer incompatibilities problems : on some occasions, the Drupal themes or plugins that are released are not compatible with the most obsolete versions of this CMS.
Before updating Drupal
Before you start updating Drupal, it is important to perform some tasks manually. It is best to follow this order:
- Make a backup copy of your website.
- Check the version of Drupal you have installed.
- Check which version of Drupal you need to upgrade to.
- Check that your hosting meets the requirements of the new version of Drupal.
- Check that the installed plugins and themes are compatible.
- Activate maintenance mode in Drupal.
Let's look at each of these points in more detail.
1. Make a backup in Drupal
Before making any changes to your website, it is always advisable to make a backup. This way, if something goes wrong, you can go back in just a few clicks.
If you have your Drupal Hosting at LucusHost, remember that in your client area you have the Premium Backup tool available , which automatically makes two backup copies a day and allows you to do any restoration in a few seconds.
In any case, you also have the option to make a backup with Softaculous. To do this, go to cPanel and locate the “Softaculous App Installer” tool
Now go to the list of active installations, locate your Drupal and click on the green “Backup” icon.

2. Check the version of Drupal you have installed
You can check what Drupal you have installed from the backend of your application. To do this, go to the “Reports” section and then click on “Status Reports”.
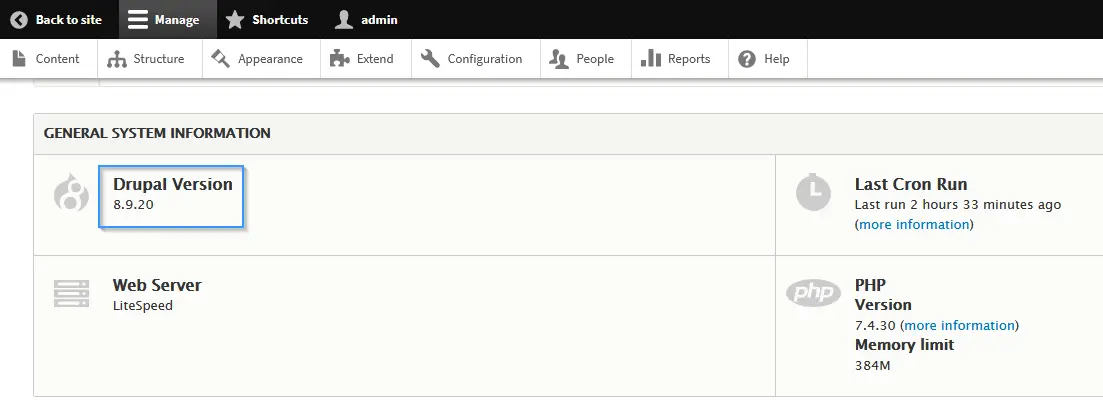
You can also check out the Drupal version from Softaculous.

If you have questions, I recommend that you take a look at this article in our help section:
3. Check which version of Drupal you need to upgrade to
Drupal's versioning system works with the YXZ framework:
- The Y indicates the major version, as a general rule it is released every few years and breaks compatibility with previous versions.
- X is a minor version, it is published every 6 months and includes improvements and new features for our Drupal.
- The Z is a patch version in which bugs or security flaws are corrected.
The stable versions of Drupal are: 7.0 / 8.0 / 9.0 / 10.0
This means that, if you have version 7.95 and want to update to the most current version of Drupal, which is 10.0.5, you need to update first to version 8.0 then to 9.0 and finally to version 10.0.
It is not possible to skip stable versions and go directly to the latest version.
Note : For versions lower than Drupal 8.0, support by Drupal developers has stopped.
4. Check that the server meets the requirements of the new version of Drupal
It is not possible to check the requirements of new versions of Drupal through the application administrator itself, so you have to access the official website and consult the Drupal documentation.
5. Check that plugins and themes are compatible with the new version
To avoid any errors on your website, before updating the Drupal core, it is necessary to make sure that the installed themes and plugins are compatible with the new version.
If so, you have to replace the theme or plugin with one that is compatible and that meets the functionalities you need on your site.
6. Activate Drupal maintenance mode
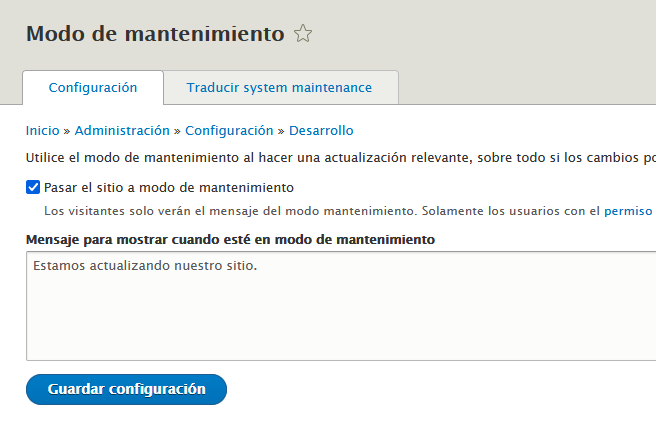
Although it will not affect the update, it is highly recommended to put Drupal in maintenance mode. This way, people who access your website know that you are carrying out improvement tasks and they will not get a bad impression of your site.
And how I do it? First, access the Drupal backend and go to the “Settings” section.

Next go to “Development” and click on “Maintenance mode”.
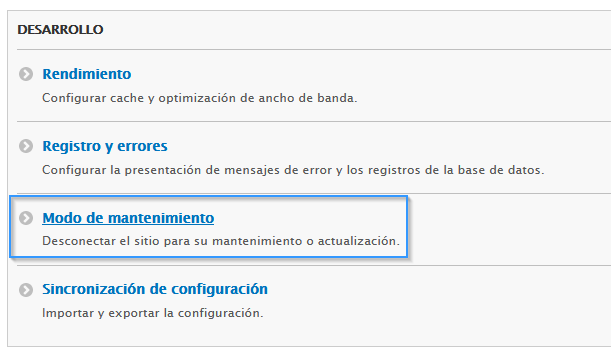
You can personalize the message for your visitors, for example by adding contact information or indicating what time maintenance will end.
How to update Drupal
Once the relevant checks have been carried out, it is time to update Drupal. You can do this in three different ways:
- Updating Drupal with Softaculous: For me, the easiest way to update Drupal, especially if you still don't get along very well with this application.
- Update Drupal manually : somewhat more laborious, so technical knowledge is recommended.
- Update Drupal with Drush: you can update Drupal very quickly, executing just a few commands, but you need to have experience working via the command line.
Now let's see how to do it in each case.
Update Drupal with Softaculous
For me it is the fastest and easiest way to update the application, especially if you are still starting with this content manager.
Of course, you can only choose this option if you have this tool available in the control panel of your accommodation. If you have your Drupal Hosting with us, you will not have a problem  .
.
Start the update process
The first thing you have to do to update Drupal is access the "Softaculous App Installer" tool in cPanel. All your applications will be listed there:

If next to the Drupal version you see a wheel with two arrows, there is a pending update. By clicking on it, you can start the installation process.

You will then see a warning like this. It simply tells you that, if you have made manual modifications to files such as .htaccess , composer.json or robots.txt , you have to save them to apply them after the update.
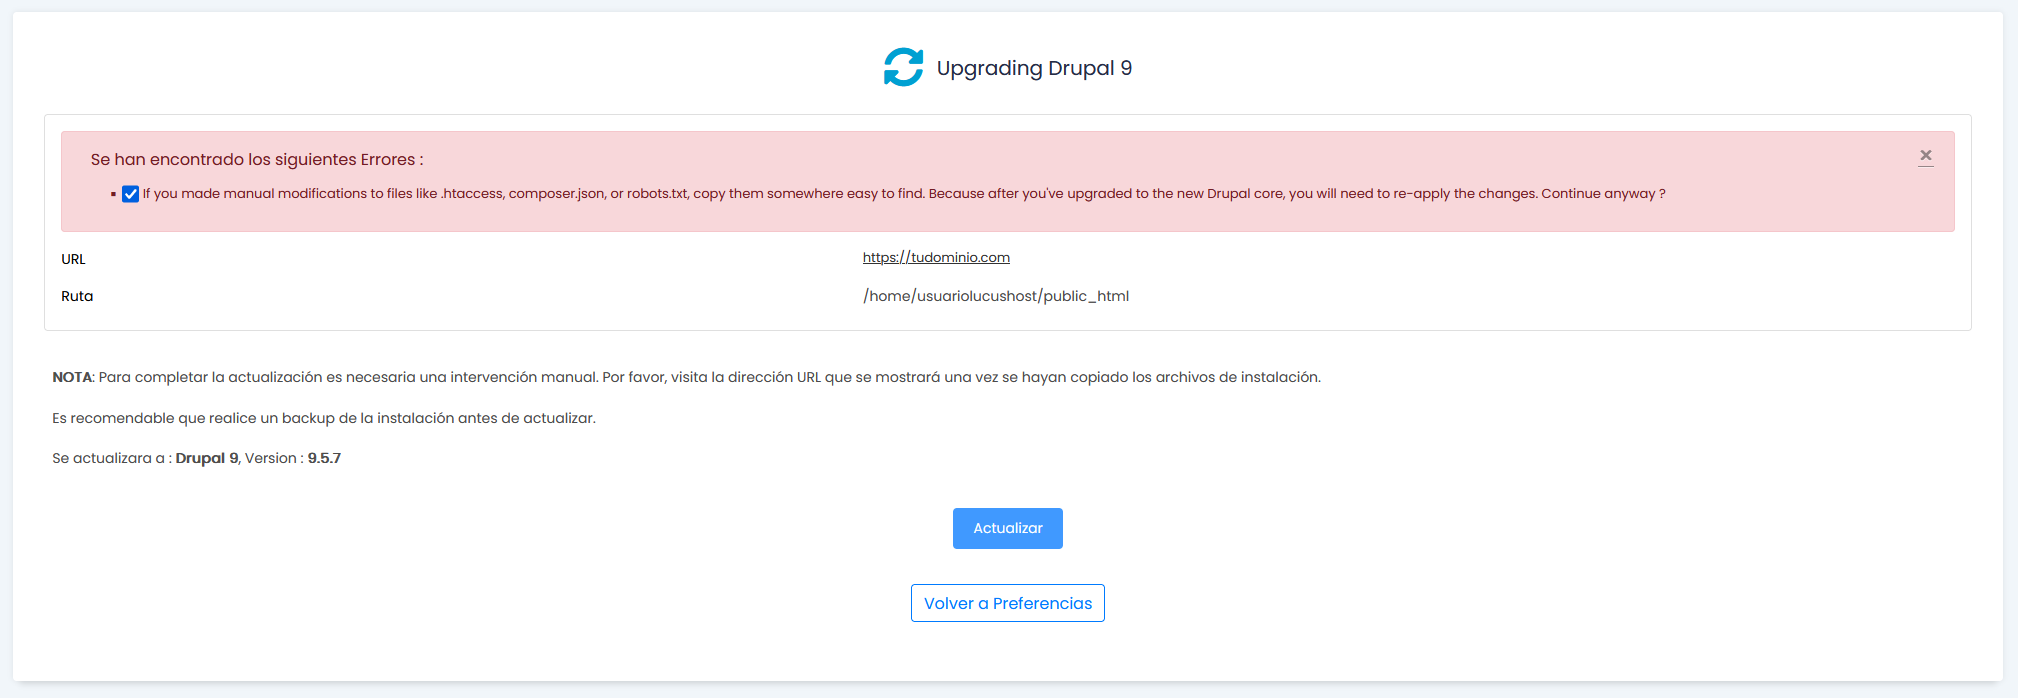
Check the checkbox with this Drupal warning and run the update again.
Access the assistant
On your screen, you will see a message like this with a link to start the update wizard:

If you do not have sufficient permissions to complete the installation, Drupal displays this message:

Therefore, you must access the settings.php file, which is in the sites/default/ directory and modify the update_free_access variable to True.

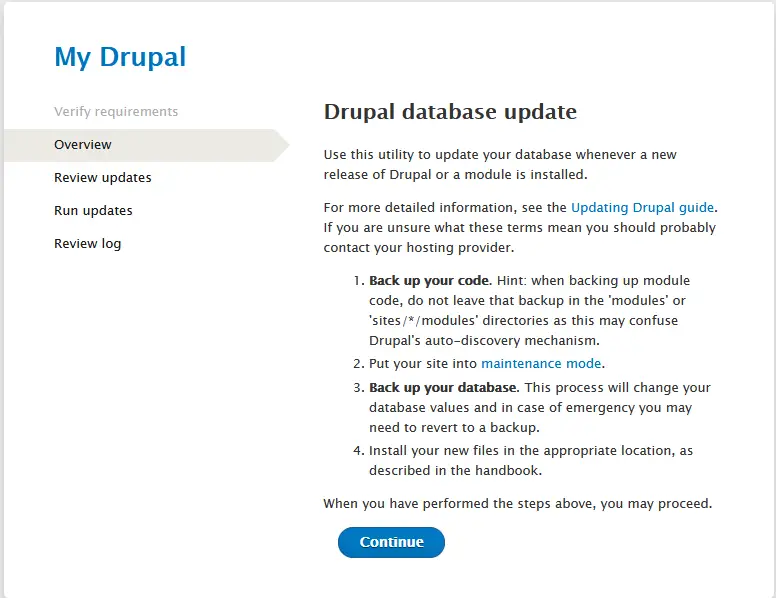
Once this is done, reload your web page. Automatically, it will be checked that the server versions are compatible with the new version of Drupal. If everything is correct, you can finish the update with the Drupal wizard by following these steps:
- Overview : This overview recommends that you make a backup of Drupal.
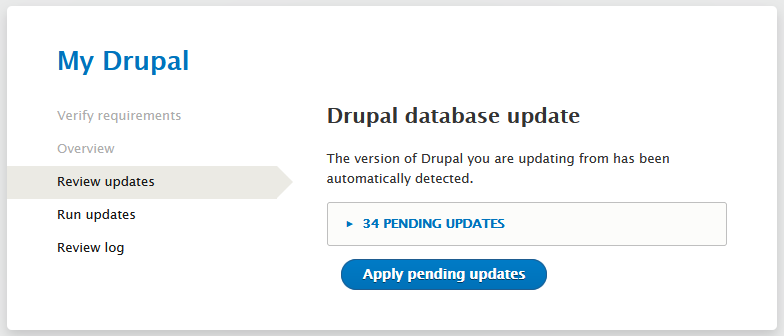
- Review updates : Here you will see a summary of pending updates.
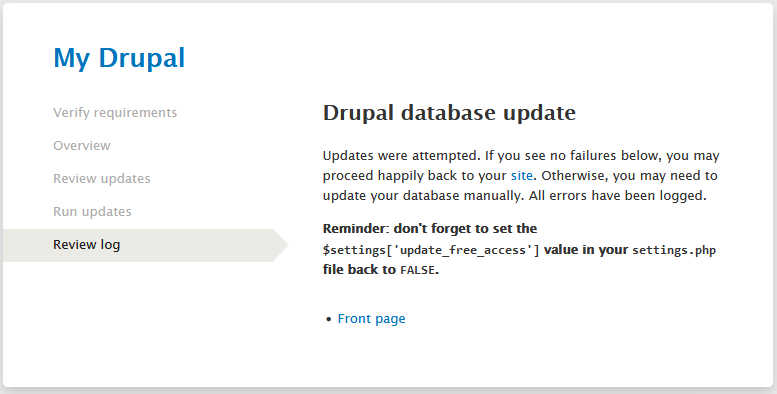
- Review log: applies pending updates. At the end, a log is shown confirming that it has been updated correctly and telling us to set the update_free_access variable to False .
Check your Drupal website
Finally, deactivate maintenance mode and check that everything works correctly. Likewise, the new version should already be shown in Softaculous.

Update Drupal manually
Another way to update Drupal is to do it manually. This option is somewhat more laborious, so we recommend that you only choose it if you have advanced knowledge with this CMS.
Download the new version
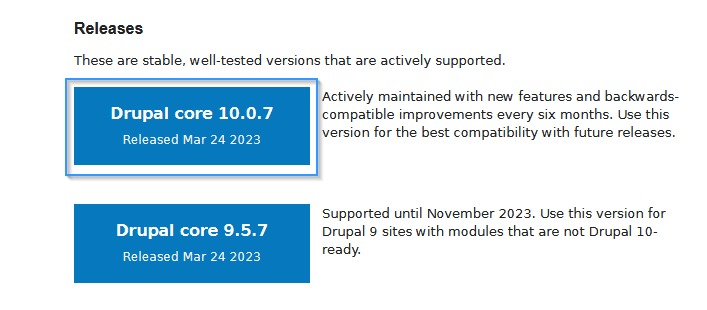
The first thing you have to do is download the version of Drupal to which you want to update through the official repository of the application.
Upload Drupal files to your hosting
Once you have downloaded the Drupal file, you must upload it to the server. You can do this through the cPanel File Manager.
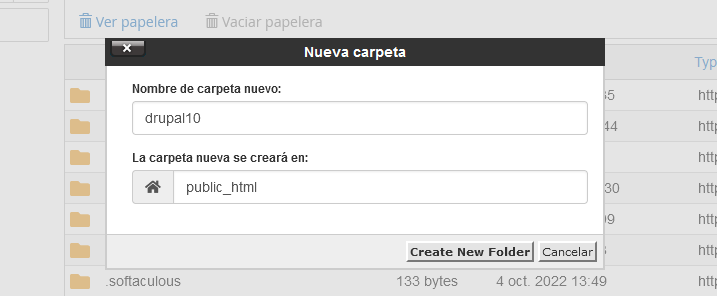
To do this, access the directory where you have the application installed, in this example it is /public_html , and create a new directory to load the new version.

Next, set the name of the new directory:
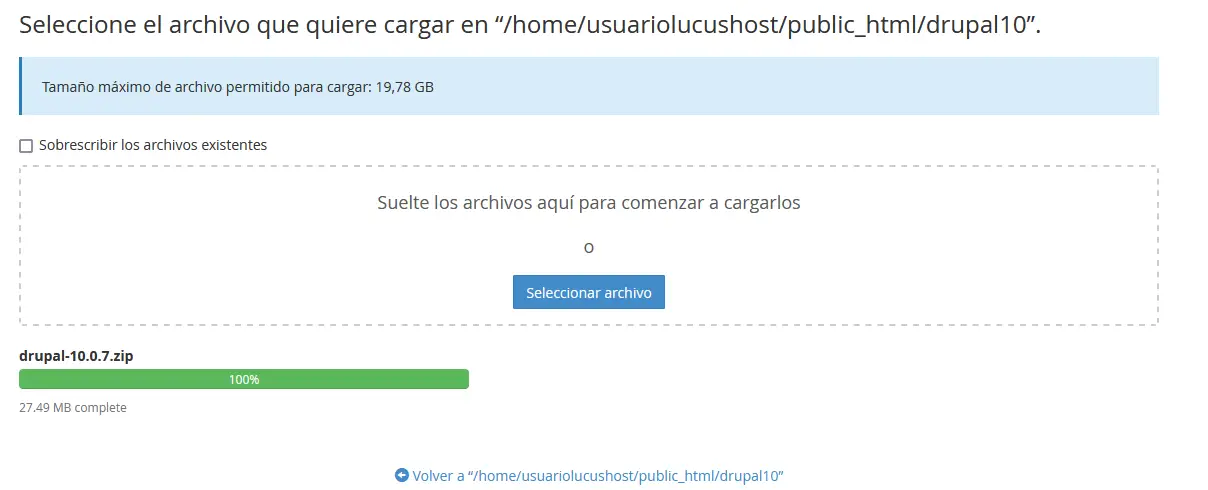
Access the directory you just created and upload the file you downloaded to your PC.
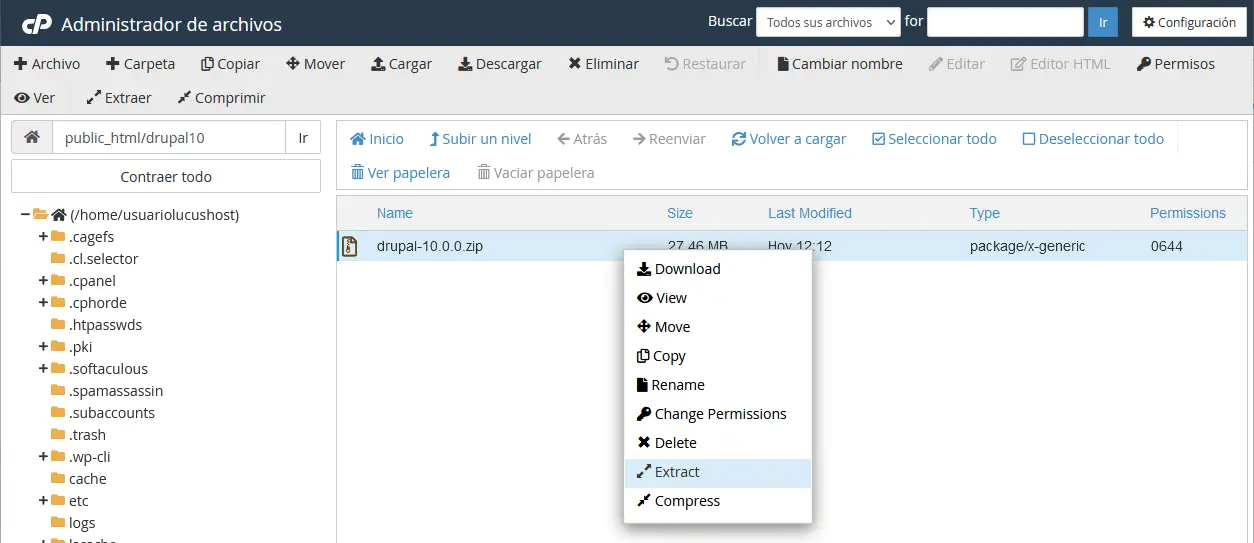
Now unzip the file you just uploaded.
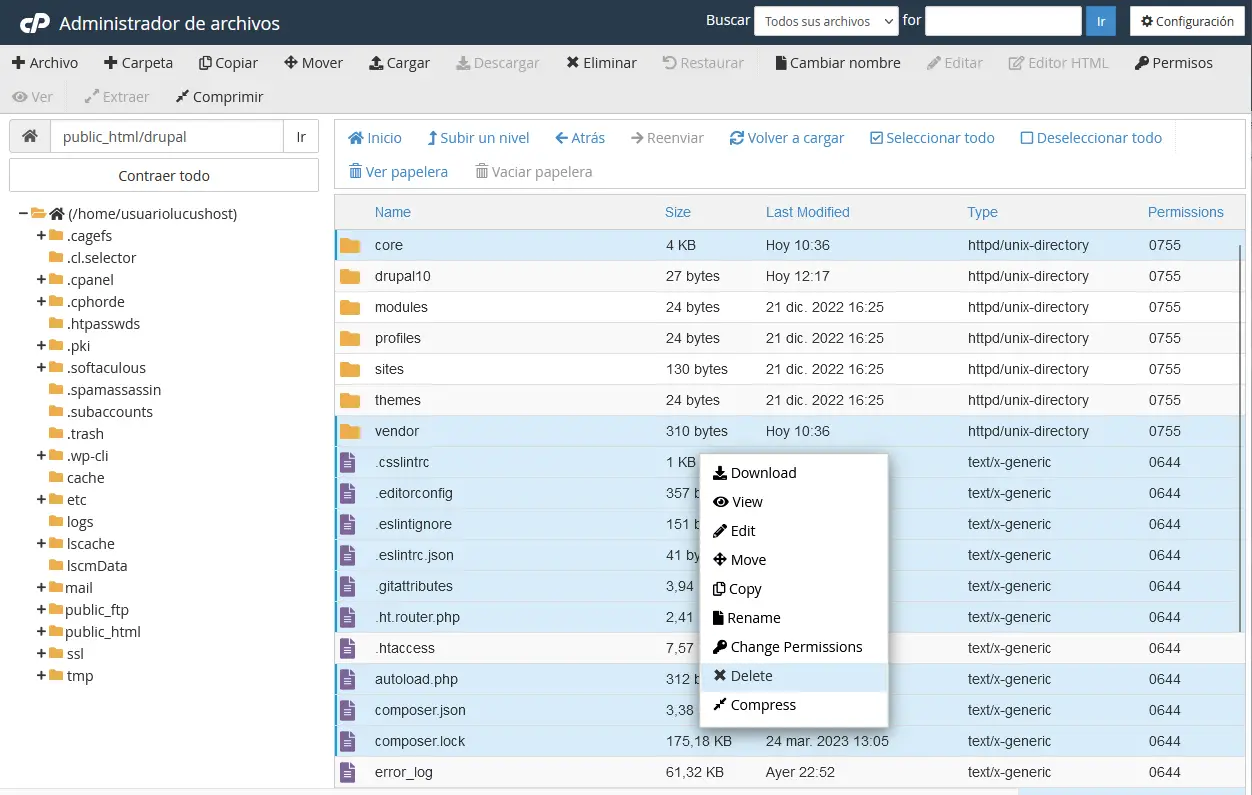
The next step is to delete the core , vendor directories and all files (even hidden ones) in the directory, except for .htaccess , error_log , robots.txt .
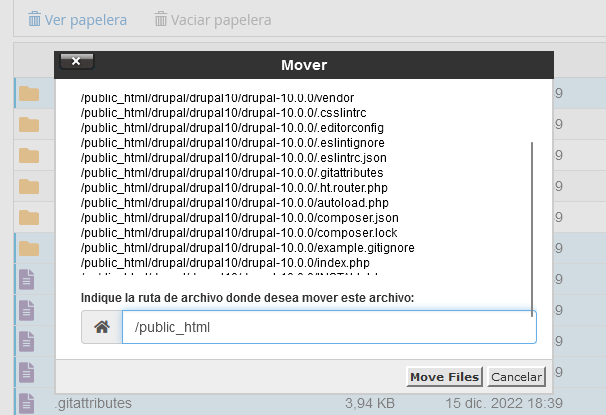
Next, access the directory where you have the files for the version of Drupal to which you are going to update. In this example I go to public_html/drupal10/drupal-10.0.7 and move the files to /public_html , except the .htaccess and robots.txt files .
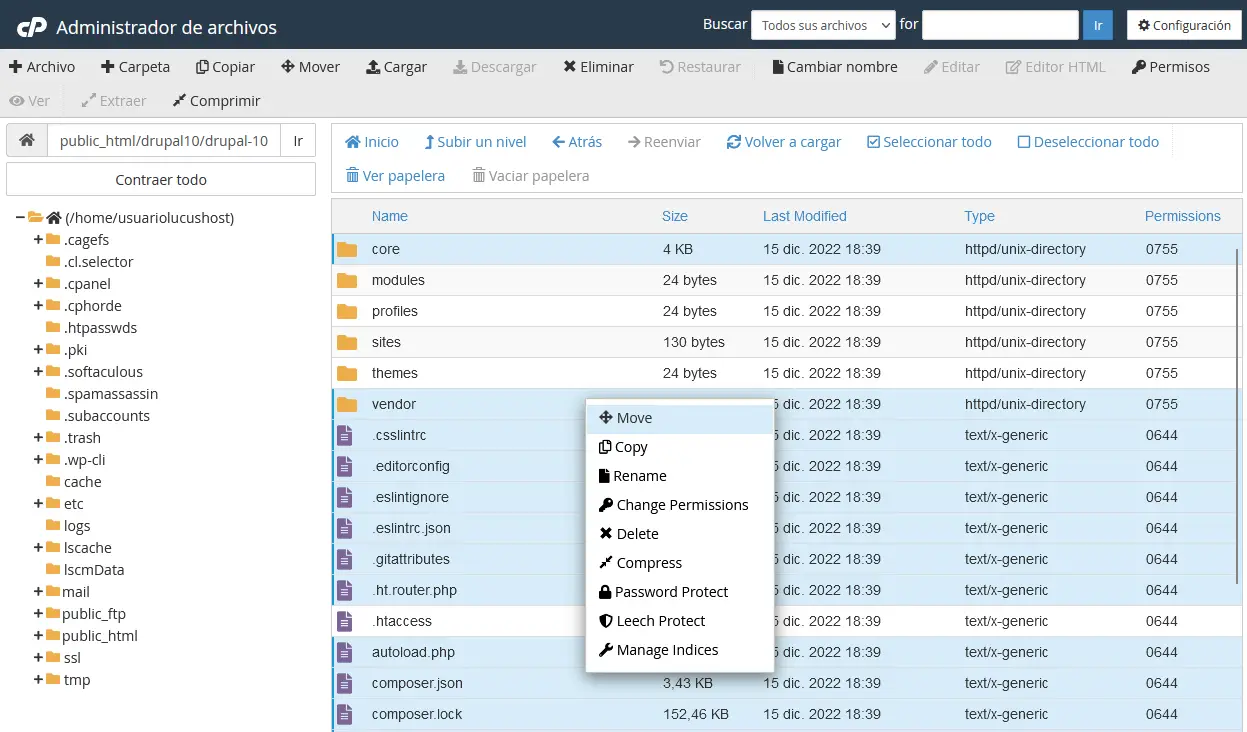
Indicate the route where you are going to move them:
To finish updating Drupal, go to the settings.php file (within the path public_html/sites/default/settings.php ) and modify the update_free_access variable by setting the value True .

Run the Drupal wizard
To finish the update, open the browser and access the path like:
- https://yourdomain.com/update.php
This is how the Drupal update script is launched:

Continue the process to finish the update:

Finish and check the update
You can check if the update completed successfully. To do this, just see the version of Drupal that you have installed, for example, from the “Reports” – “Status Reports” section.
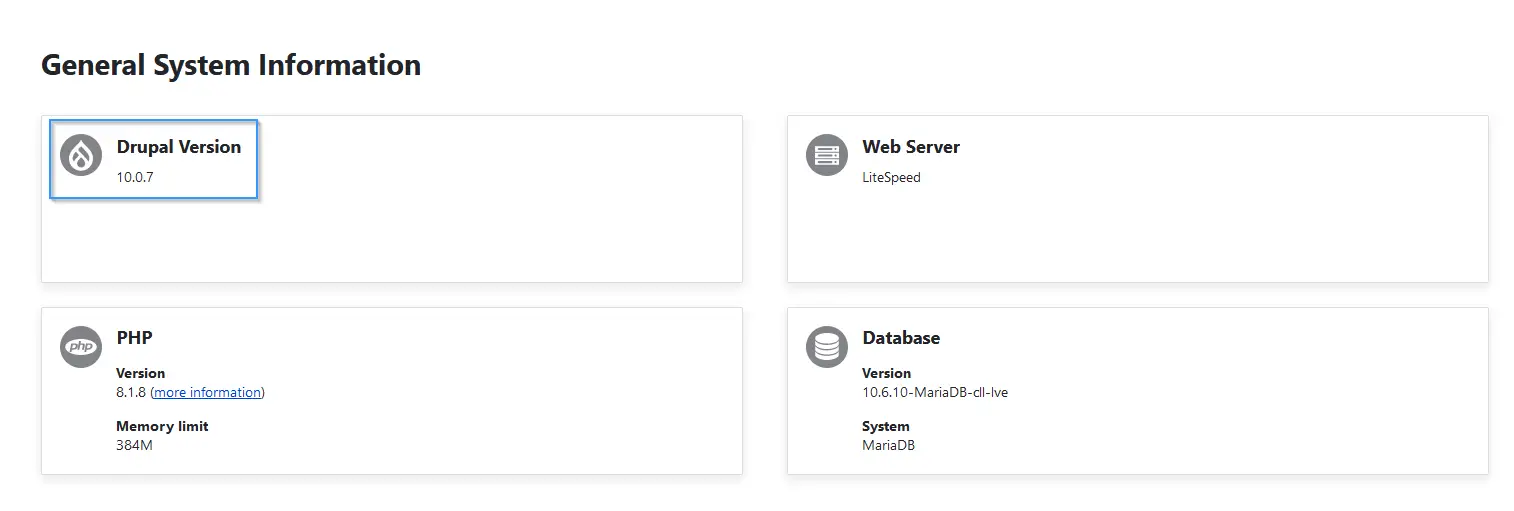
Finally, modify the value of the update_free_access variable within the settings.php file and set the value to False .
Eye! Don't forget to remove maintenance mode and check that your site's behavior is correct.
Update Drupal with Drush
Lastly, I am going to explain how to update Drupal with Drush, that is, via the command line.
To use the Drush shell you need to have SSH access to your hosting plan. Remember that we include this functionality in all our Drupal Hosting plans .
Important : The process of updating Drupal with Drush is different between minor versions (for example, from 8.0 to 8.9) than between major versions (for example, from 8.9.20 to 9.5).
Between minor versions
First create an SSH connection to your cPanel account and access the directory where you have the application installed. In this example I go to /pubic_html using the following command:
cd public_html/
Once you log in, check the version of Drupal you are working with by running the following:
drush core-status drupal-version

Once this is done, follow these steps:
- Activate maintenance mode by executing:
drush sset system. maintenance_mode 1

- Rebuild the cache .
drush cr

-
Update composer dependencies .
composer update

- Update Drupal.
drush pm-update drupal --no-backup


- Deactivate maintenance mode.
drush sset system. maintenance_mode 0

- Do another rebuild of the cache.
drush cr

- Finally, check if the new version of Drupal is already installed.
drush core-status drupal-version

Between older versions
If you want to update Drupal between major versions (for example, from 8.9.20 to 9.5) it is necessary to use Composer. In this case the process is as follows:
- Check the version of Drupal you have installed:
drush core-status drupal-version

- Modify the permissions of the sites/default directory. By default the directory is set to 555.
chmod 755 sites/default/

- Get the Drupal 9 version of the core-recommended and dev-dependencies packages.
composer require 'drupal/core-recommended:^9' 'drupal/core-composer-scaffold:^9' 'drupal/core-project-message:^9' --update-with-dependencies --no-update

- Run the Drupal update:
composer update --no-cache

- Now run the following command to check if you have any pending updates in the database:
drush updatedb

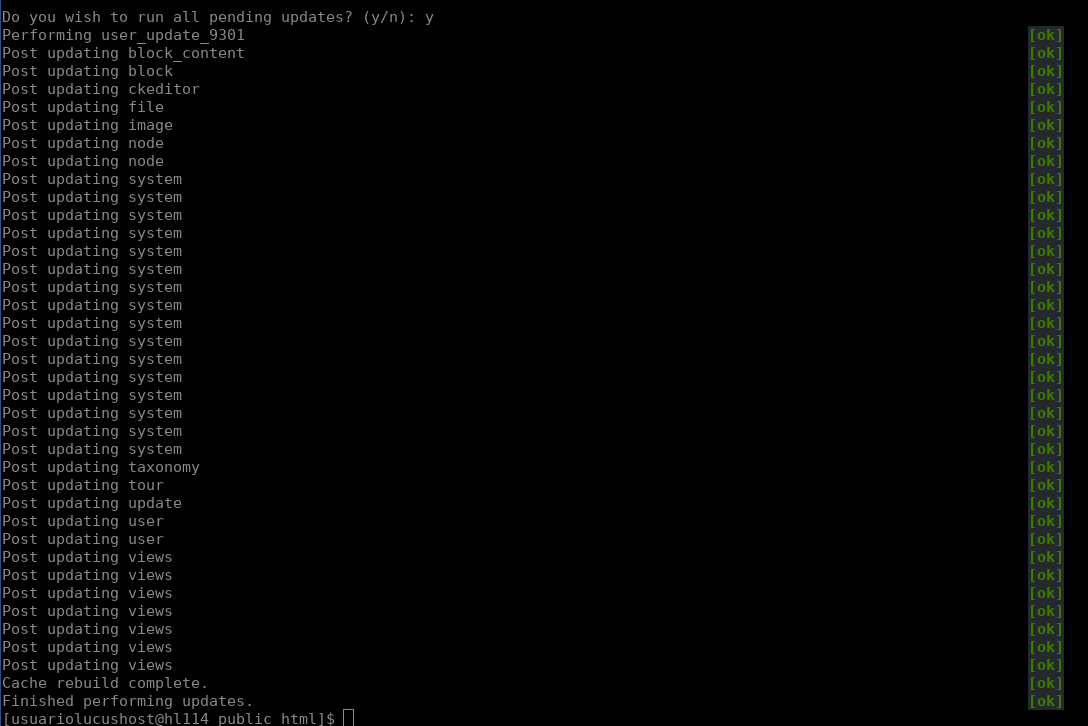
- Finally, check that Drupal has been updated correctly.
drush core-status drupal-version

Any questions?
In this guide we have just seen what to do before updating Drupal and how to change the version through three different methods:
Now it's your turn! If you are going to update Drupal, but you don't know which option to choose or have any questions, leave me a comment below and I'll give you a hand  .
.